
Pedaling an exercise bike seems effortless—until you finish a workout with nagging knee pain or zero progress toward your fitness goals. The truth? Most riders waste 40% of their effort through incorrect setup and form. Whether you’re burning fat, building endurance, or rehabbing an injury, proper bike positioning transforms this simple machine into your most powerful fitness tool. In the next few minutes, you’ll discover exactly how to adjust your bike to your body, avoid common injuries, and structure workouts that deliver real results—no gym membership required.
Match Your Bike to Your Body First
Selecting the wrong exercise bike guarantees frustration. Start by verifying the weight capacity exceeds your body weight by at least 10%—this prevents dangerous wobbling during intense efforts. Next, prioritize fully adjustable components: seats that move vertically and horizontally, plus handlebars that shift up/down. Magnetic resistance systems operate quieter than friction pads, while heavier flywheels (20+ lbs) deliver smoother momentum crucial for high-cadence training. Don’t get distracted by flashy screens; essential features include heart-rate monitoring, a water bottle holder, and a Q-factor (pedal spacing) matching your hip width to prevent knee strain.
Measure Your Inseam Before Shopping
Stand barefoot and measure from your crotch to the floor—this number dictates your minimum seat height range. Write it down before buying; if a bike’s specs don’t accommodate this measurement, you’ll sacrifice knee safety and power transfer no matter how you adjust it.
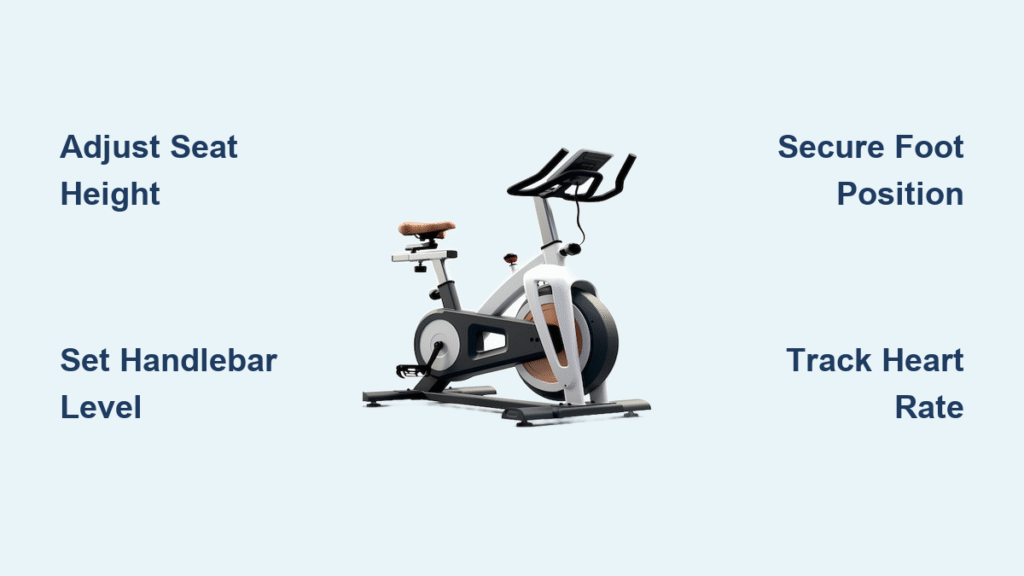
Set Seat Height in 60 Seconds
Stand beside your bike and raise the saddle until it aligns with your hip bone (iliac crest). This instant baseline prevents dangerous knee hyperextension. Now sit on the bike without clipping in: place your heel on the pedal at the 6 o’clock position. Your knee should show just a 5–10° bend—no more, no less. When you switch to the ball of your foot (as you normally pedal), you’ll achieve the ideal 25–35° knee bend. If your toes dangle above the floor? Seat’s too high. If your whole foot plants flat? Raise it immediately.
Perfect Seat Fore-Aft Positioning
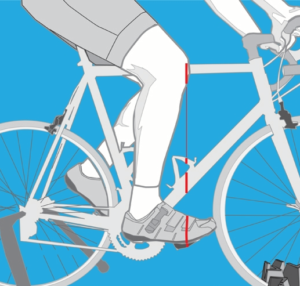
Position both pedals horizontally (3 and 9 o’clock). From the side, visualize a straight line dropping from the front of your forward knee cap. This line must pass through the pedal axle and the ball of your foot. Knee drifting ahead of the pedal? Slide your seat backward to engage glutes and reduce knee shear. Knee behind the axle? Move the seat forward to prevent hamstring strain. This single adjustment makes the difference between sore knees and powerful, joint-friendly pedaling.
Optimize Handlebar Height for Spinal Safety
On indoor cycle bikes, set handlebars at or above seat level initially—this maintains a neutral spine and prevents shoulder hunching. Test it: Sit tall, hinge forward from your hips (keeping your back flat), and reach for the bars. If you can grip them without rounding your upper back, you’ve nailed it. Only lower handlebars after 4–6 weeks of consistent riding when your core strength improves. Recumbent bikes skip this step entirely since they position you in a reclined posture ideal for back pain sufferers.
Secure Feet Without Cutting Circulation
Center the ball of your foot precisely over the pedal spindle. Tighten toe straps until snug but not restrictive—you should feel secure without losing toe sensation. Using clipless pedals? Set cleat tension loose enough for comfortable foot float yet firm enough to prevent accidental unclipping during sprints. Never pedal with loose straps; your foot could eject mid-effort during high-resistance intervals.
Maintain Form That Prevents Injury
Lock your core to stabilize your pelvis—imagine zipping a tight pair of jeans. Keep your back flat, chest lifted, and shoulders pulled down away from your ears. Viewed from the side, your ear, shoulder, and hip must align vertically. Grip handlebars firmly but without white-knuckling; elbows stay slightly bent to absorb road vibration. Most critically: knees track over your second toe—never collapsing inward (valgus) or bowing outward. Heel drop during the downstroke is natural, but avoid pointing toes like a ballerina which strains your Achilles.
Execute Beginner Workouts That Stick
Start with just three 25–35 minute sessions weekly for the first two weeks. Begin each ride with 5–10 minutes of easy spinning (RPE 3–4—conversational pace). Then ride steadily at moderate intensity (RPE 5–6—you can speak short phrases) for 15–20 minutes. Finish with 5 minutes of cooldown. Add only 1 minute per session weekly until you comfortably hit 45 minutes. Skipping this gradual buildup risks burnout and joint inflammation.
Burn Fat With Smart Interval Timing
For fat loss, perform 3–5 sessions weekly (30–45 minutes each). After warming up, alternate between 1–3 minutes of hard effort (RPE 7–8—you can say 1–2 words) and 3–5 minutes of active recovery (RPE 5–6). This “afterburn effect” keeps your metabolism elevated for hours post-ride. Never exceed 30 minutes of intervals—more triggers muscle breakdown instead of fat burning.
Master HIIT Without Overtraining
Limit high-intensity intervals to 2–3 non-consecutive days weekly. Perform 30-second all-out sprints (max sustainable resistance/cadence) followed by 90 seconds of easy spinning. Repeat 8–10 times. To progress, add just 5 seconds to sprints or increase resistance by one notch every 1–2 weeks. Attempting more than 10 sprints floods your system with cortisol, sabotaging recovery.
Tone Legs With Pedal Technique
For sculpted glutes and quads, ride steady at 80–100 RPM with moderate-heavy resistance (RPE 6–7). Focus on two key cues: push through your heel during the downstroke to fire glutes, then actively pull up with hamstrings during the upstroke. Pair this with 2–3 weekly off-bike strength sessions (squats, lunges) for visible definition—cardio alone won’t build significant muscle.
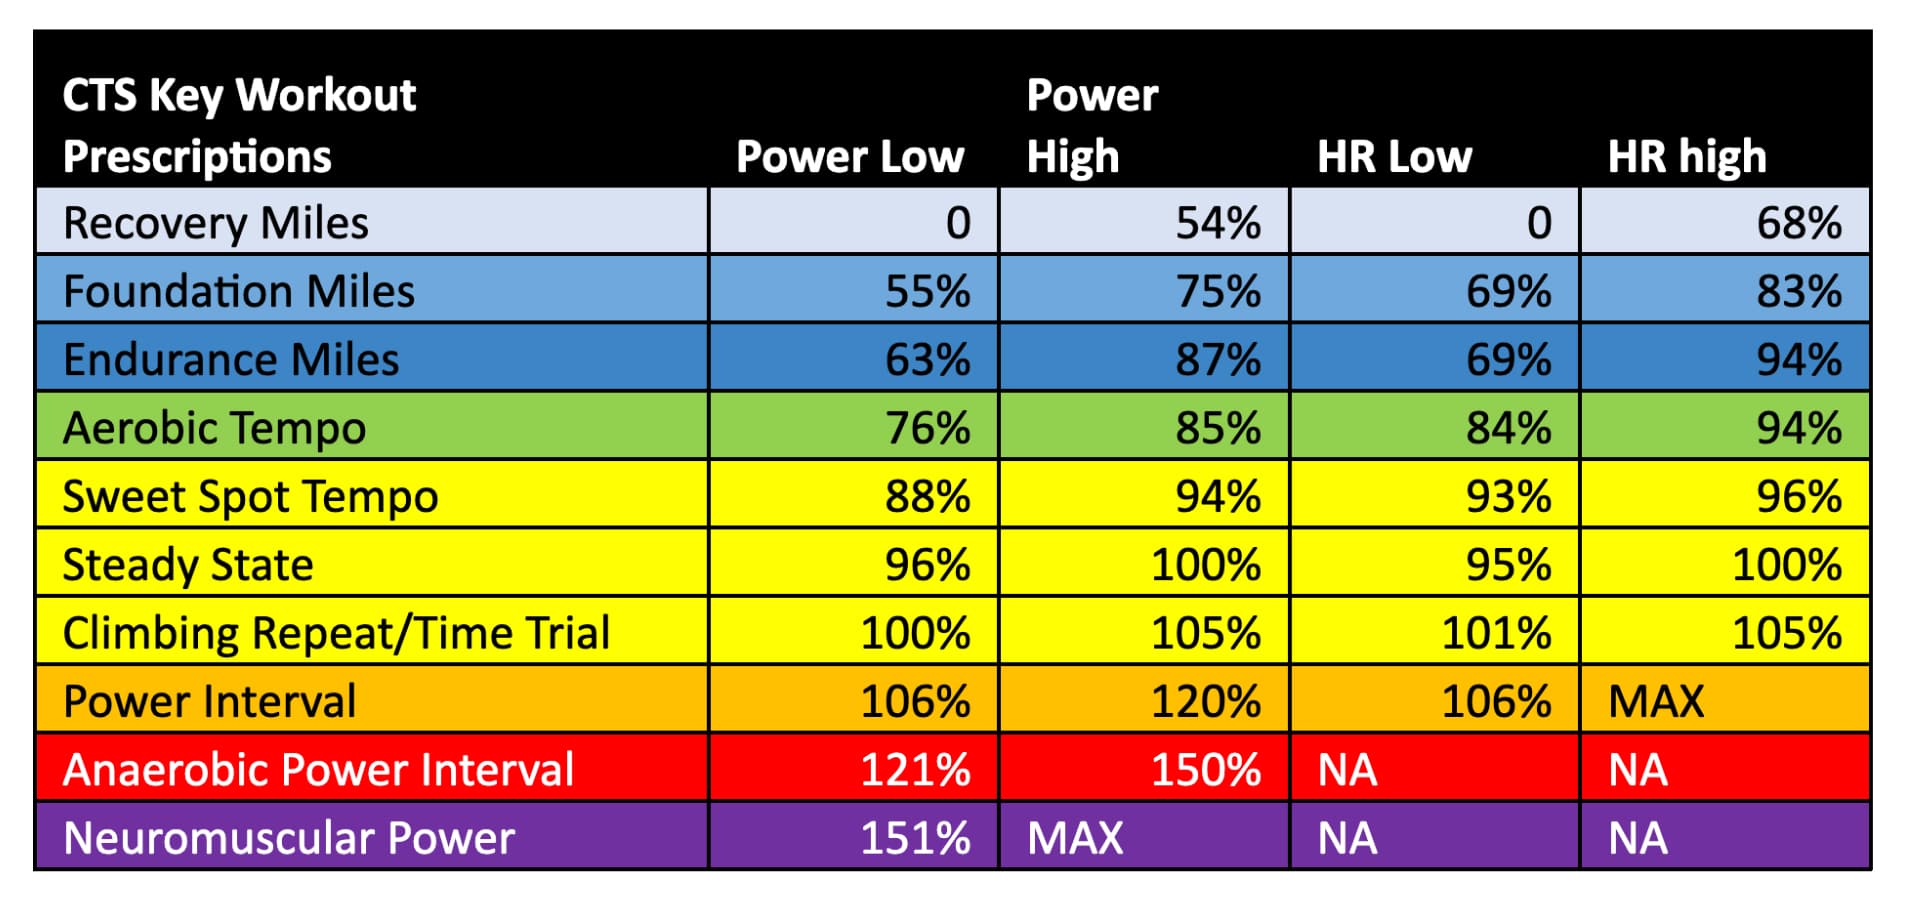
Decode Console Metrics That Matter
Ignore calorie counts—they’re wildly inaccurate. Track these instead:
– Cadence (RPM): Keep between 80–110 for joint safety
– Heart rate: Fat-burning zone = 60–80% of max (220 minus your age)
– Watts: Measure real power output for progress tracking
Quick Heart-Rate Target Formula
Calculate your max heart rate: 220 minus your age. Multiply by 0.7 for steady-state fat burning (e.g., 140 bpm for a 40-year-old). Multiply by 0.9 for HIIT intervals (180 bpm).
Stop Knee Pain Before It Starts
Knee ache almost always stems from seat height errors—recheck using the heel-on-pedal method. Lower-back strain? Raise your handlebars immediately and engage your core. Numb feet? Loosen straps by one notch or reposition cleats to relieve nerve pressure. Never power through pain; it takes 3x longer to rehab an overuse injury than to prevent one.
Pre-Ride Safety Checklist
Tighten these before every session:
– Seat post and handlebar bolts (no wobble allowed)
– Toe straps or cleat engagement
– Resistance set to minimum for warm-up
– Water bottle within arm’s reach
– Screen positioned at eye level
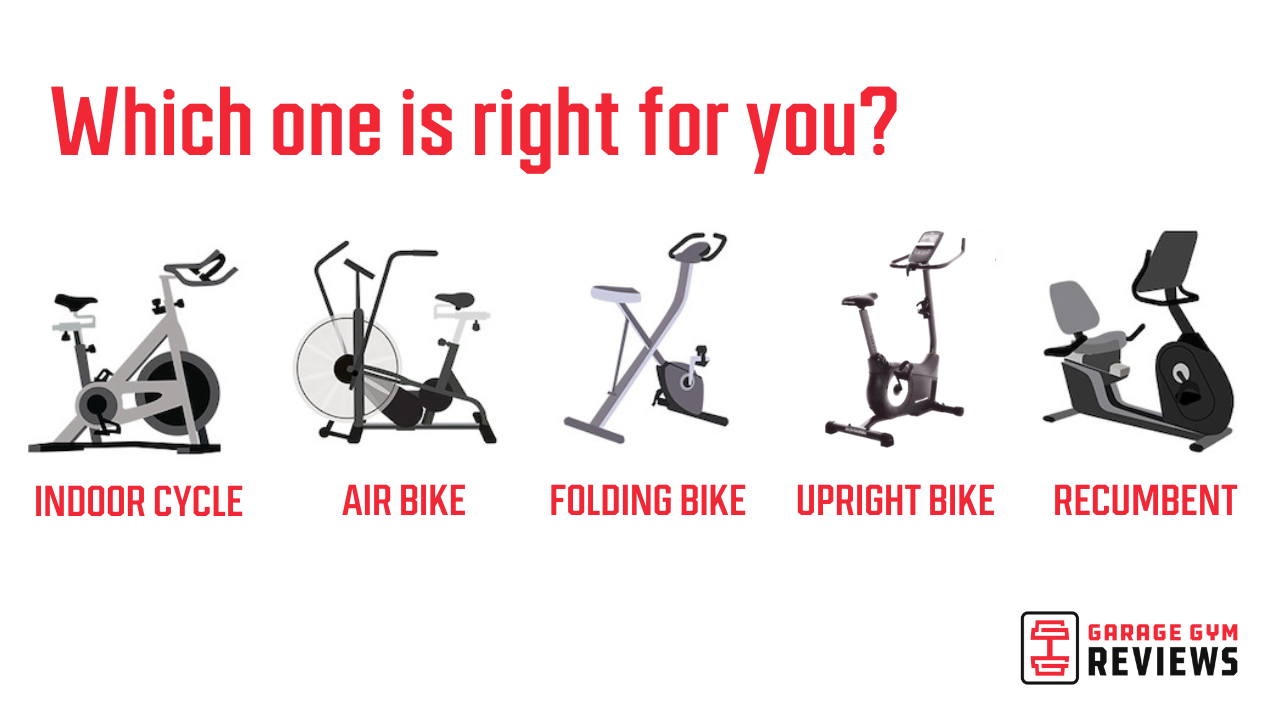
Choose Your Bike Type Strategically
| Bike Type | Best For | Critical Setup Focus |
|---|---|---|
| Upright | Small spaces, traditional cycling | Seat height precision |
| Recumbent | Back pain, joint issues | Seat slide (not height) |
| Indoor Cycle | HIIT, studio workouts | Full adjustability (seat + bars) |
| Air Bike | Total conditioning | Pace effort—resistance self-adjusts |
Recover Faster With Targeted Nutrition
Drink 16–24 oz (500–750 ml) of water per 30 minutes on the bike—add electrolytes for sessions over 45 minutes. Within 45 minutes post-ride, consume 0.5g of protein per pound of body weight (e.g., 40g for a 160-lb person) to repair muscles. Always cool down with 5 minutes of easy spinning followed by stretching quads, hamstrings, and hip flexors while warm.
Track Progress Without Plateaus
Log these weekly: average watts, heart-rate recovery (how fast it drops post-ride), and perceived exertion. Never increase workout duration or intensity by more than 10% weekly. Every fourth week, reduce volume by 20–30%—this “deload” phase lets your body consolidate gains and prevents burnout.
Your 60-Second Pre-Ride Ritual
- Tighten seat and handlebar bolts (shake the bike to test)
- Secure feet in straps or clipless pedals
- Set resistance dial to minimum
- Place water bottle and towel within reach
- Start spinning at 70 RPM for warm-up
Follow these steps religiously, and you’ll transform every ride from wasted effort to a precision-engineered fitness session. Whether you’re chasing fat loss, endurance, or joint-friendly cardio, proper bike setup and technique deliver results 3x faster—without the injuries that sideline most riders. Your strongest, healthiest self starts with the next pedal stroke.


