
Your heart pounds as the treadmill belt locks mid-stride—suddenly you’re sprinting in place on a $1,000 clothes rack. When your treadmill motor stops working, it’s not just a workout interruption; it’s a fitness emergency. This happens to 1 in 3 treadmills annually, often due to simple fixes you can complete before dinner. You’ll learn to pinpoint whether it’s a $12 brush kit or full motor replacement needed, using only basic tools and a multimeter. No electrical expertise required—just follow this step-by-step battle plan.
Decode Your Treadmill’s Death Rattle
Stop guessing what’s wrong. Match your symptoms to these failure fingerprints:
| Problem | What You See & Hear | Hidden Clues |
|---|---|---|
| Motor Overheating | Shuts down mid-run, burning smell, hood too hot to touch | Restarts after 30 min; lint packed in vents |
| Motor Won’t Start | Belt dead, no hum, console lights normal | Zero DC voltage at motor; tripped house breaker |
| Hums, Belt Still | Low continuous hum, pulley frozen | Belt slides freely by hand |
| Speed Drops Under Load | Belt slows when you step on, motor strains | Speed recovers when you step off |
| Grinding/Sparking | Metallic squeal, blue flashes, acrid odor | Shavings near pulley, carbon dust on end caps |
If you smell burning but see no smoke, unplug immediately—this is often overheating from dust-clogged vents. But if the console lights work while the belt stays frozen, you’ve got a classic motor or control board failure. Your next move? Safety first.
Essential Safety Steps Before Touching Wires
Skip this and you risk electrocution or fried circuits. Treadmill motors use 90-120 VDC—enough to stop your heart. Do this:
- Kill power: Remove safety key, unplug cord, wait 2 minutes for capacitors to discharge.
- Access motor: Remove hood screws (Phillips or hex) with your No. 2 Phillips driver—slide cover off.
- Stage tools: Grab multimeter, 6 mm Allen wrench, flashlight, and compressed air. Never work on live circuits.
Pro Tip: Place your phone on video mode before unplugging anything. Recording wire positions saves reassembly nightmares later.
5-Minute Visual Inspection That Catches 90% of Failures
Vacuum first—this solves overheating 90% of the time. Here’s what to hunt:
- Lint invasion: Shine flashlight into cooling fins. If you see carpet fibers or dust bunnies, blast them out with compressed air. Blocked vents cause 70% of overheating deaths.
- Scorch signals: Check for brown PCB traces, melted wires, or swollen capacitors near the control board. These mean “board replacement needed.”
- Pulley test: Rotate drive pulley by hand—it should turn smoothly with only mild belt drag. Stiffness points to mechanical binding.
If the pulley spins freely but the belt won’t move when powered, skip to diagnosing motor resistance. If it’s frozen solid, inspect the belt tension and coupler first.
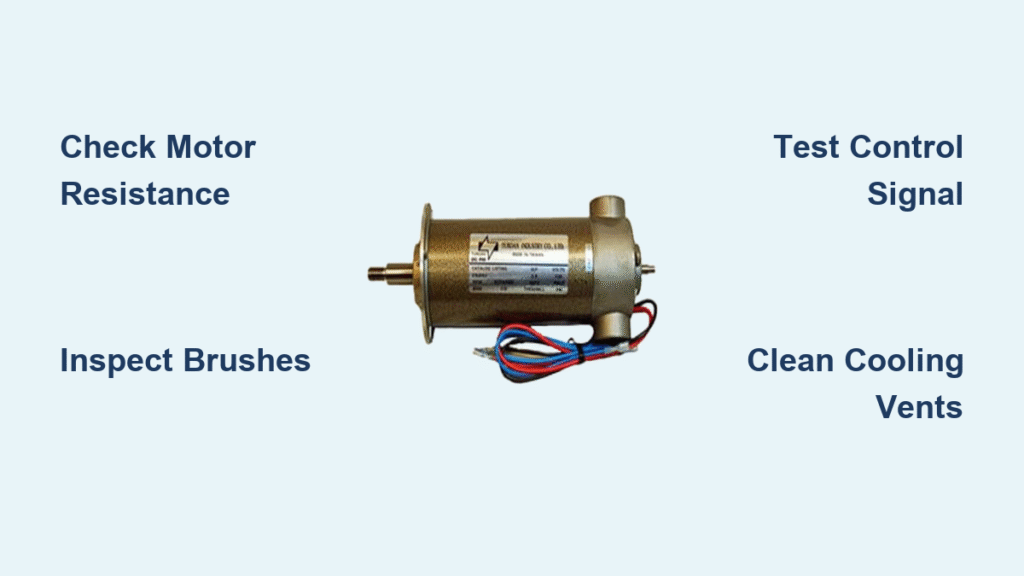
Diagnose Motor Not Working: The 6-Step Voltage Test

Grab your multimeter—this reveals the exact failure point in 10 minutes. Disconnect motor leads first to avoid false readings.
| Step | Test Point | Good Reading | Bad Reading & Fix |
|---|---|---|---|
| 1 | Wall outlet | 110–120 VAC | Low/zero → reset breaker/GFCI |
| 2 | Power cord | < 1 Ω continuity | Open → replace cord |
| 3 | Board input (after rectifier) | 90–100 VDC | Low → blown bridge or board |
| 4 | Motor leads (disconnected) | 0.5–10 Ω | Infinite → replace motor |
| 5 | Control signal (red/black) | 5–12 VDC on START | Zero → console fault |
| 6 | Brushes (if visible) | ≥ ¼ inch length | < ¼ inch → swap brush kit |
Critical move: If Step 4 shows infinite resistance, your motor windings are dead. But if resistance is good (0.5–10 Ω) yet the motor won’t start, focus on Steps 3 and 5—this usually means a failed control board.
Stop Motor Overheating in 15 Minutes Flat
Don’t replace the motor yet—most overheating stems from preventable issues:
- Vacuum monthly: Use crevice tool on motor shroud and fan blades. Dust acts like an oven mitt—trapping heat.
- Clear 8-inch buffer: Pull treadmill away from walls. Restricted airflow cooks motors in 30 minutes.
- Cool-down ritual: Walk at 2 mph for 5 minutes post-workout. Skipping this shaves 2 years off motor life.
- Add a fan: Bolt on a 120 mm cooling fan ($38) if temps still spike. For NordicTrack C990, use part #405662 fan kit.
Still overheating after these steps? Your motor’s thermal fuse is likely blown—time for replacement.
Fix Motor Won’t Start: Branch Logic Repair Path

Follow this sequence—stop when you find the fault:
A. No AC power?
→ Reset tripped breaker/GFCI. Test outlet with lamp.
B. AC good but no DC?
→ Inspect control board for scorched MOSFETs (black burn marks). Replace board—NordicTrack C990 needs #405662.
C. DC at board, none at motor?
→ Tighten loose spade connectors on red/black leads—they vibrate loose over time.
D. Brushes worn?
→ Install carbon brush kit (8 mm × 5 mm × 15 mm for 2.5 HP motors). Align springs correctly—wrong orientation causes instant failure.
E. Open windings?
→ Order motor by part label (e.g., Icon #307540). Match continuous HP—not peak ratings.
Time-saver: If your multimeter shows 5–12 VDC at the motor leads but zero movement, it’s 95% a dead motor—skip to replacement.
Cure Humming but Stationary Belt
That low hum means power reaches the motor but torque fails. Here’s the triage:
- Belt tension check: Press down mid-belt—it should deflect ¼–½ inch. Too tight? Loosen rear roller bolts ¼ turn each. Too loose? Replace if glazed or cracked.
- Coupler autopsy: Remove drive belt and inspect rubber insert between motor shaft and pulley. Sheared? Swap universal coupler (8 mm keyed bore).
- Board failure: If belt tension and coupler check out, your control board’s SCRs are failing—replace board immediately.
Warning: Forcing the pulley by hand while powered can fry the board. Always unplug first.
Replace Treadmill Motor Without Breaking the Bank
Match these specs exactly or face premature failure:
– Continuous HP (not peak)
– Frame diameter (typically 3.25″)
– Mount bolt pattern (2.95″ on center)
– Shaft diameter (0.625″ keyed)
OEM vs aftermarket:
– OEM (Icon #307540): $250–$400, 2–5 year warranty
– Compatible: $120–$220, 1 year warranty (same UL certifications)
15-minute swap steps:
1. Photograph wiring connections
2. Disconnect leads, remove drive belt
3. Unbolt 4 cradle nuts; slide motor out
4. Transfer pulley with gear puller; torque set-screw to 60 in-lb + Loctite 242
5. Reverse steps; set belt deflection to ¼–½ inch
6. Run calibration (NordicTrack: hold SPEED ↑ + START 3 sec, enter weight)
Prevent Treadmill Motor Failures Forever
Follow this maintenance calendar:
| Task | Frequency | Supplies |
|---|---|---|
| Vacuum motor housing | Monthly | Compressed air |
| Check belt tension | Monthly | Allen wrench |
| Lubricate deck | 150 miles or 6 months | 100% silicone spray |
| Measure brush length | 2 years | Caliper |
| Torque motor bolts | Yearly | 10 mm socket, 25 ft-lb |
Pro Tip: Keep room humidity below 60%. Moisture attracts static dust that clogs motors 3x faster. And never skip the 5-minute cool-down—your motor’s lifespan depends on it.
Final Checklist Before Hitting Start
– [ ] Power cord secure, outlet 110–120 VAC
– [ ] Safety key inserted
– [ ] Hood off—dust and scorch check complete
– [ ] Brushes > ¼ inch (if visible)
– [ ] Belt tension ¼–½ inch deflection
– [ ] Motor resistance 0.5–10 Ω
– [ ] Control signal 5–12 VDC
– [ ] Deck lubricated, smooth surface
If every box is ticked but your treadmill motor still won’t work, replacement is inevitable. But 80% of “dead” treadmills roar back to life with these fixes. Grab your tools—your next run starts now.


