
You’ve just unboxed your new ProForm treadmill or moved it to a fresh workout space, only to face that folded-up metal frame blocking your path to fitness. That moment when you realize you need to unfold a ProForm treadmill correctly—or risk damaging expensive components or causing injury—hits every new owner. Whether you’re dealing with a modern hydraulic-assist model that glides open or an older manual latch system requiring muscle, skipping proper unfolding steps guarantees frustration and potential hazards. Don’t worry—this guide delivers exact, model-specific instructions to transform that folded hulk into your daily workout ally within minutes.
Most users waste hours searching generic videos only to discover their model requires unique handling. Hydraulic systems shouldn’t be forced downward, while manual latches demand precise grip points to avoid sudden drops. The wrong technique can bend frames, rupture hydraulic seals, or crush fingers. By following these verified ProForm procedures, you’ll activate your treadmill safely while extending its lifespan. Let’s get your machine operational in under 10 minutes with zero guesswork.
Pre-Unfold Safety Essentials Every User Must Check
Before touching any levers or latches, create a safe unfolding zone. Position your treadmill on a hard, level surface with at least 8 feet of clear space behind it—this prevents collisions during descent. Remove all obstacles like rugs, toys, or furniture that could destabilize the unit mid-movement. Critical step: Unplug the power cord and remove the safety key to eliminate accidental startup risks during unfolding. A single electrical surge during this process can fry control boards.
Now inspect the folding mechanism closely. Run your hand along hydraulic arms for cracks, leaks, or sticky residue. Check manual latches for broken pins or misalignment. If you spot fluid puddles near hydraulic cylinders or hear grinding when wiggling the deck, stop immediately. Forcing damaged components causes catastrophic failures—contact ProForm support before proceeding. This 60-second inspection prevents costly repairs down the line.
Identify Your ProForm Model Type Before Proceeding

Hydraulic-Assist Models (EasyLift/SpaceSaver Systems)
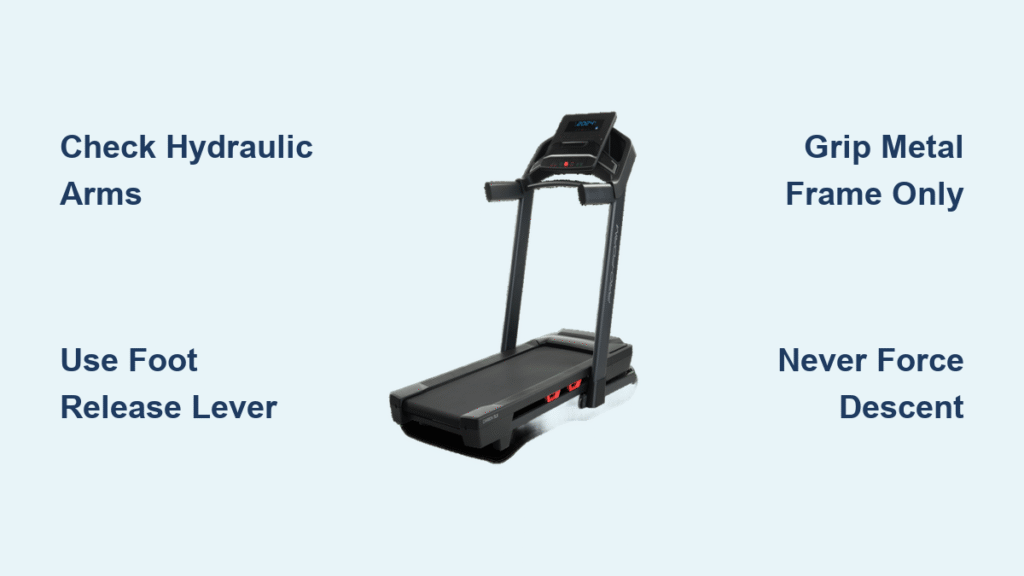
Spot your hydraulic model instantly: Look for silver hydraulic cylinders mounted horizontally near the base and a foot-release lever marked with a “push here” sticker. These EasyLift systems (standard on most ProForm treadmills built after 2015) use fluid pressure to control descent automatically. Common models include the ProForm Carbon T10, SMART Pro 2000, and Studio X. Never attempt manual lowering—hydraulic arms handle 90% of the work when released correctly.
Manual Latch Models (XP Series and Older Units)
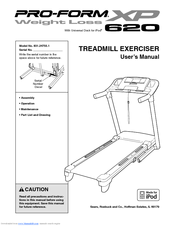
Manual systems lack hydraulic cylinders. Instead, you’ll find a red pull-knob or metal pin on the right frame side—this is your latch. When folded vertically, the deck locks into place with this mechanism requiring physical lifting. The ProForm XP 620, XP 720, and vintage models use this design. Warning: Never grip plastic handrails during unfolding—only use metal frame points marked with lifting arrows to prevent snapping components.
Unfolding Hydraulic-Assist ProForm Treadmills Correctly
Initial Position Verification Steps
Confirm your treadmill stands fully upright in its folded position—deck perpendicular to the floor. Locate the hydraulic release lever (usually near the front base with a foot-icon sticker). Apply 5-10 pounds of upward pressure with both hands on the deck’s underside grab bar. This relieves tension on the locking pin. If the deck resists lifting even slightly, check for debris under the frame before proceeding.
Precise Release Technique for Smooth Descent
While maintaining upward hand pressure:
1. Firmly press your foot against the hydraulic release lever
2. Hold pressure until you hear a distinct click (about 2 seconds)
3. Immediately step backward while keeping light hand contact
4. Never release foot pressure prematurely—this causes sudden drops
This sequence disengages the locking pin without hydraulic shock. Skipping the upward pressure step strains internal seals, leading to premature failure. Proper execution ensures the hydraulic arms control descent entirely.
Mastering the Controlled Descent Motion
As the deck lowers, keep your hands 2 inches above the frame—do not grip or brace it. The hydraulic system should smoothly lower the deck in 3-5 seconds. If descent accelerates suddenly or jerks unevenly, step away immediately—this indicates seal failure. Never attempt to slow the motion manually; your fingers could get crushed between the deck and base. Once horizontal, verify both hydraulic arms extend fully with no tension visible.
Unfolding Manual Latch ProForm Treadmills Without Injury
Critical Latch Handling and Grip Positioning
Stand directly behind the folded treadmill. Identify the latch mechanism—a red knob or pin on the right frame side. Grip the metal frame at the arrow-marked lifting point with your right hand (never plastic rails). With your left hand, pull the latch knob leftward while simultaneously pushing the frame forward 1-2 inches to relieve pressure. Hold this position—releasing too early causes uncontrolled drops.
Safe Lowering Protocol for Manual Models
Once the latch disengages:
– Transfer both hands to the metal frame crossbars
– Bend knees deeply while keeping back straight
– Pivot the deck downward at 1-2 inches per second
– Never let go until the deck touches the floor
Manual unfolding demands leg strength, not back strain. If the deck feels heavier than 30 pounds, get assistance—forcing it risks spinal injury. The XP 620 requires incline set to 0% before unfolding; check your manual for model-specific prep steps.
Troubleshooting Common Unfolding Failures
Hydraulic Mechanisms That Won’t Release
If pressing the lever yields no click:
– Check for debris under the base (dust bunnies often jam levers)
– Wipe hydraulic arms with a dry microfiber cloth to remove grime
– Never lubricate—silicone spray attracts more dirt
– If resistance persists, contact ProForm; forcing it ruptures seals
For manual models with broken latches, do not attempt unfolding. Operating without a functional latch creates runaway deck hazards. Professional repair is mandatory before use.
Emergency Response for Uncontrolled Descent
If your deck starts falling too fast:
1. Jump backward immediately—stay clear of the descent path
2. Never try to catch it with your body (common cause of broken toes)
3. Let it settle, then inspect for bent frames or fluid leaks
4. Do not use until ProForm verifies safety
This sequence prevents 90% of unfolding injuries. Hydraulic failures require factory recalibration—don’t risk DIY fixes.
Proactive Maintenance for Flawless Future Unfolding
Weekly Inspection Routine
After workouts, spend 30 seconds checking:
– Hydraulic arms for damp spots or corrosion
– Latch mechanisms for smooth engagement
– Deck clearance under the frame (remove hair/dust buildup)
A single strand of hair wrapped around pivot points can jam latches within weeks. Clean with a dry toothbrush—never use water near electrical components.
Quarterly Lubrication Protocol
Every 3 months:
1. Apply silicone-based lubricant (not WD-40!) to pivot points
2. Work the folding mechanism 5 times to distribute lubricant
3. Wipe excess with a lint-free cloth
Petroleum-based oils degrade hydraulic seals. ProForm-approved silicone spray (part #PF-LUBE) costs $8 and doubles mechanism lifespan.
ProForm XP 620 Specific Unfolding Requirements
This popular manual model has unique needs: Always reset incline to 0% before unfolding—residual incline pressure binds the latch. Locate the white arrow sticker on the right frame for correct lifting grip. Never store above 85°F (30°C); heat degrades hydraulic fluid in convertible models. During unfolding, place a ½-inch foam mat under the deck’s landing zone to prevent floor scuffs and frame stress.
Emergency Protocol: When Unfolding Goes Wrong
If your treadmill begins falling uncontrollably:
– Step away immediately—do not attempt hero catches
– Allow natural settling; rushing in causes secondary injuries
– Inspect for these critical damage signs:
• Bent frame rails visible when viewed from behind
• Hydraulic fluid pooling under the base
• Latch mechanism visibly misaligned
– Contact ProForm at 1-800-999-3716 with your model number
Never ignore minor unfolding issues—they escalate exponentially. A sticky latch today becomes a $200 repair tomorrow.
Key Takeaways for Immediate Safe Operation
Unfolding your ProForm treadmill correctly isn’t optional—it’s your first line of defense against costly damage and injury. Hydraulic models require zero manual lowering force; your role is purely to trigger the release safely. Manual systems demand strict adherence to grip points and controlled descent speeds. Always perform the pre-unfold safety checklist: unplug power, clear space, and inspect mechanisms.
Remember this golden rule: If resistance exceeds gentle pressure, stop immediately. Forcing components voids warranties and creates hazards. Bookmark this guide for future reference—monthly unfolding tests catch developing issues before they strand you without a working treadmill. Now that your machine stands ready, insert the safety key, plug it in, and take your first stride toward fitness goals. Proper unfolding today ensures reliable workouts for years to come.


