

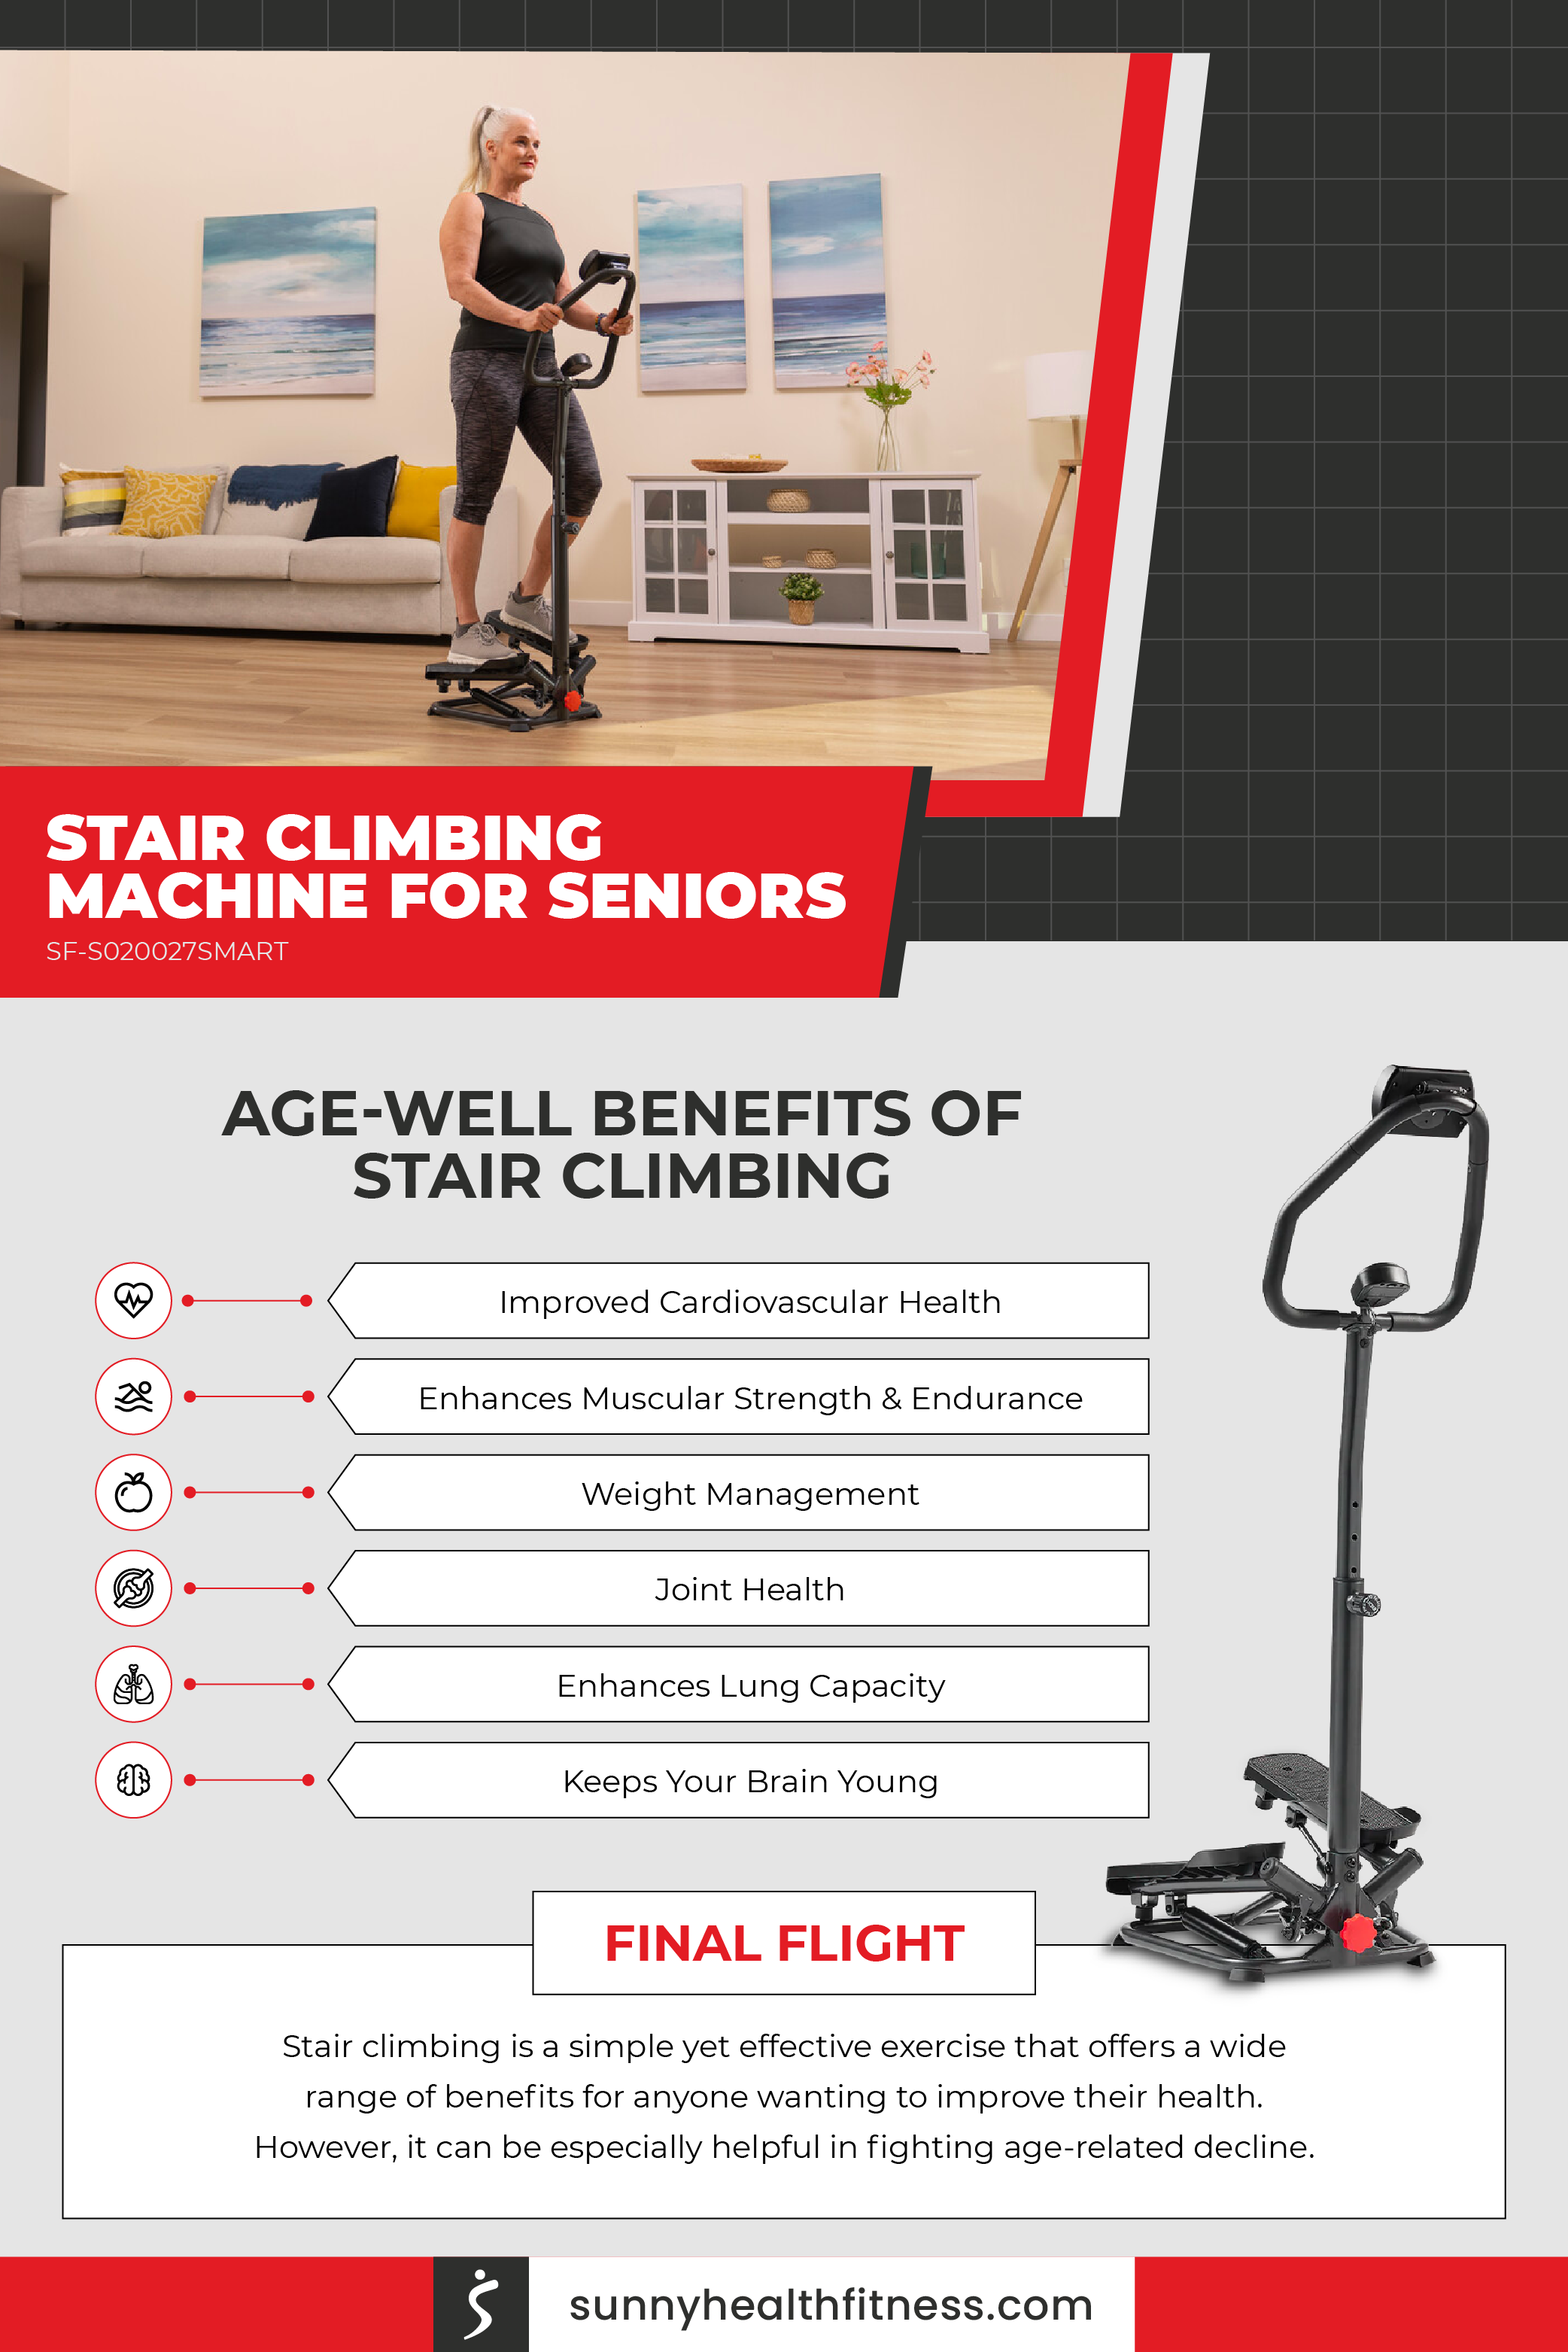
You’re sweating, your heart’s racing, and you’ve only been climbing for 15 minutes—but you’re already burning more calories than your friend logging an hour on the treadmill. That’s the magic of a properly structured 30 minute stair climber workout. Unlike traditional cardio, this vertical movement forces your body to work against gravity with every step, engaging nearly double the muscles of walking while delivering superior bone density benefits. In this guide, you’ll discover exactly how to transform your half-hour Stairmaster session into a fat-burning, muscle-building powerhouse that delivers results in half the time of conventional cardio.
Why Your Glutes Burn More on a Stair Climber Than a Treadmill
The vertical nature of stair climbing creates ground strike force that walking simply can’t match, triggering significant muscle activation throughout your lower body. When you step up, your glutes fire at maximum capacity during hip extension, while your hamstrings control the downward movement between steps. Your quadriceps power each upward motion, calves provide propulsion, and thighs maintain continuous tension—creating a full-leg workout in minimal time.
Critical muscle activation differences:
– Glutes engage 40% more intensely than during walking
– Quadriceps experience constant tension versus intermittent activation
– Calves work harder to stabilize your body with each vertical lift
– Hamstrings control deceleration between steps, increasing time under tension
This weight-bearing movement isn’t just better for your muscles—it actively increases bone mineral density by stimulating resistance and thickness growth with every step, unlike walking which merely maintains current bone mass.
The Exact 30-Minute Stair Climber Routine That Burns 400+ Calories
Follow this science-backed protocol from certified trainer Ryan Ernsbarger to maximize your half-hour session:
Minute 0-5: Strategic Warm-up
Start at an easy resistance level while focusing on smooth, controlled movements. Establish your breathing rhythm by inhaling for two steps and exhaling for two steps—this pattern will carry you through the entire workout.
Minute 5-10: Endurance Foundation
Increase to moderate resistance where you could maintain the pace for hours. Beginners should stay at this level for the entire workout to build consistency without risking injury.
When to Slow Down: Critical Warning Signs
- You can’t speak in short sentences
- Dizziness or nausea sets in
- Sharp knee or ankle pain develops
- Your breathing becomes erratic
Minute 10-20: Calorie-Torching Push
Ramp up to vigorous resistance where your heart rate reaches 70-85% of maximum. Focus on driving through your heels to maximize glute activation—this subtle technique shift prevents knee strain while increasing effectiveness.
Minute 20-25: Active Recovery
Reduce resistance slightly to allow your heart rate to decrease while maintaining movement. This strategic recovery prepares your body for the final cooldown phase.
Minute 25-30: Proper Cooldown
Return to easy resistance while gradually reducing speed. Continue your breathing pattern as your heart rate returns to normal—skipping this phase increases soreness and reduces overall workout benefits.
How to Structure 1:1 Intervals for Maximum Fat Burn in 30 Minutes
Brett Durney’s interval training method keeps your mind engaged while dramatically increasing calorie expenditure through strategic intensity shifts:
The Classic Interval Pattern:
– Warm up for 5 minutes at easy pace
– Alternate 1 minute of fast climbing (pushing your pace) with 1 minute of slow recovery
– Continue this pattern for 25 minutes
– Total session time: exactly 30 minutes
Pro Tip: The Advanced 4:2 Protocol
After your 5-minute warmup, perform 4 minutes at challenging resistance followed by 2 minutes of easier recovery. Repeat this cycle four times, ending with a 1-minute cooldown. This variation builds exceptional cardiovascular endurance while preventing workout boredom.
Key benefit: Interval training creates an “afterburn effect” where your body continues burning calories at an elevated rate for up to 48 hours post-workout—something steady-state cardio rarely achieves.
Mountain Climber Protocol: Turn Your Stairmaster into a Trail Hike
Kerri Howell’s resistance-focused routine mimics real hiking conditions, making it perfect for trail runners and weekend adventurers:
Minute 0-2: Low resistance warm-up
Minute 2-5: Mid-range base pace
Minute 5-6: Skip every other step (maximizes glute activation)
Minute 6-8: Normal recovery steps
Minute 8-9: Side step left (builds lateral stability)
Minute 9-11: Normal steps
Minute 11-12: Side step right (balances opposite side)
This variation prevents workout monotony while building functional strength for real-world activities. The constant movement changes keep your nervous system engaged, preventing adaptation plateaus that stall progress.
Backward Stair Climbing: The Knee-Friendly Quad Builder (With Proof)
Research confirms backward movement offers unique advantages you won’t get from traditional climbing:
- Enhanced quad development through reversed movement patterns
- Knee osteoarthritis relief by reducing anterior knee stress
- Pain-free alternative for those with traditional stair climbing discomfort
Safe Execution Technique
- Start at extremely slow speed
- Grip side rails lightly for balance only
- Focus on controlled leg extension
- Limit to 1-2 minutes initially as your body adapts
Warning: Never attempt backward movement at high speeds—this technique should only be performed at beginner to moderate resistance levels to prevent injury.
Resistance Band Hacks That Boost Calorie Burn by 20% on Stairmaster
Wrap a medium-strength resistance band around your thighs just above your knees to dramatically increase workout effectiveness:
- Creates constant outward pull that increases glute activation
- Forces your muscles to work harder with each step
- Increases calorie burn by 15-20% without extending workout time
Proper band placement: Position the band mid-thigh, maintain slight knee separation throughout your climb, and stop immediately if the band rolls or pinches your skin. This simple modification transforms your standard workout into a lower-body sculpting session.
5 Critical Form Mistakes That Wreck Your Stair Climber Results
Even with perfect programming, poor form sabotages your 30 minute stair climber workout effectiveness:
1. Leaning heavily on handrails – This reduces intensity by up to 30% and defeats the purpose of weight-bearing exercise
2. Tiptoeing instead of full-foot placement – Creates unnecessary calf strain while reducing glute and quad activation
3. Holding your breath – Limits oxygen delivery to working muscles, causing premature fatigue
4. Rushing steps instead of controlled movement – Sacrifices muscle engagement for speed, reducing overall effectiveness
5. Looking down constantly – Compromises spinal alignment and reduces core engagement
Fix this immediately: Stand tall with chest up, shoulders back, and core engaged. Use handrails only for light balance support, not weight bearing.
Stair Climber vs Walking: Why 30 Minutes Beats 45 of Treadmill Time

The stair climber delivers superior results through physics you can’t replicate on flat ground:
- Calorie burn difference: 30 minutes stair climbing equals 45-50 minutes brisk walking
- Muscle engagement: Walking uses approximately 200 muscles; stair climbing engages 400+ through vertical lifting
- Bone density impact: Walking maintains current density; stair climbing actively increases bone mass
- Time efficiency: Adjustable resistance allows continuous progression without increasing workout duration
This isn’t just theory—studies published in Medicine and Science in Sports and Exercise show women who performed weekly stair climbing for just a few minutes increased their fitness levels by 10% within approximately 40 days.
Beginner’s 6-Week Stair Climber Plan: From Zero to 30 Minutes
Weeks 1-2: Complete 15-20 minutes at moderate pace, focusing solely on consistency
Weeks 3-4: Build to full 30 minutes using the standard protocol
Weeks 5-6: Introduce 1:1 intervals once weekly
Week 7+: Add resistance variations and backward movements
Starting smart: Begin at 50% of your perceived maximum effort, track only total time initially, and gradually add complexity every two weeks. Trying to do too much too soon creates unnecessary lactic acid buildup and increases injury risk.
Advanced Stair Climber Progression: Level Up Every 4 Weeks
Level 1 (Weeks 1-4): Standard 30-minute protocol with consistent moderate resistance
Level 2 (Weeks 5-8): Interval training introduction with 1:1 work-to-recovery ratio
Level 3 (Weeks 9-12): Resistance-focused mountain training with step variations
Level 4 (Weeks 13-16): Backward and lateral movement integration
Weekly progression markers: Increase resistance by 1-2 levels, add 5 BPM to average heart rate, reduce handrail dependency, and improve step count by 10%. Small increases compound dramatically over time—don’t underestimate incremental progress.
How to Track Your Stair Climber Progress (Without Getting Bored)
Sync your movement to 145-160 BPM tracks for optimal performance:
Perfect playlist matches:
– “Marry You” – Bruno Mars (145 BPM)
– “Toxic” – Britney Spears (145 BPM)
– “Don’t You Want to Stay” – Jason Aldean (145 BPM)
Essential tracking metrics:
– Heart rate variations between morning/evening sessions
– Total distance climbed week-over-week
– Resistance level progression
– Pre-workout nutrition impact
– Post-session recovery ratings
Your 30 minute stair climber workout delivers maximum results when you start conservatively, track metrics consistently, progress gradually, stay hydrated, and listen to your body’s signals. Master these protocols, and watch your fitness transform faster than traditional cardio methods.


