Your stair climber suddenly stops halfway up the stairs with a sickening grinding noise. Whether it’s your elderly parent’s mobility lifeline or your own daily necessity, this breakdown creates an immediate crisis that demands quick stair climber repair knowledge. This guide transforms you from helpless to capable, walking through every repair scenario from simple fixes to complex diagnostics—so you can restore safe operation without waiting days for professional service.
Identify Your Stair Climber’s Error Codes and Symptoms
Decode Flashing Error Codes on Your Control Panel
Modern stair climbers communicate problems through specific error codes that pinpoint exact failure points. E1 signals motor overload—typically caused by track obstructions or worn bearings that you can verify by checking for resistance when manually moving the carriage. E2 indicates track blockage from debris or damaged guide strips that you’ll notice as jerky movement before complete failure. E3 warns of low battery voltage, often the first sign of failing battery cells that struggle to maintain 24V under load. E4 points to safety edge sensor malfunction, requiring immediate attention since these sensors stop the climber at 22 pounds of pressure. E5 reveals remote control communication failure, usually a simple battery or signal issue you can test by using the wall-mounted controls.
Quick diagnostic steps you can perform immediately:
– Note exact error code and whether it appears consistently or intermittently
– Test system with minimal weight to see if the problem persists
– Check for unusual sounds like grinding, clicking, or humming
– Inspect track for visible obstructions or damage
Verify Power Supply Issues Before Disassembling Components
Power problems cause over 40% of stair climber failures, so always start here before tearing into mechanical components. Grab your multimeter and measure voltage at the primary connection point—you need steady 110-120V AC delivery. Fluctuating readings indicate supply problems, not climber issues. Test the outlet with another device like a lamp to rule out electrical supply failures before proceeding.
Essential voltage checks to perform:
– Wall outlet: 110-120V AC (if below 105V, check home electrical system)
– Charger output: 24V DC (for battery models—should read 26-28V when charging)
– Battery voltage under load: Must stay above 22V DC during operation
– Control board input: Verify 5V and 12V regulated outputs are stable
Repair Grinding Noises: Stair Climber Motor Replacement Guide
Replace Faulty Drive Motors Causing Operation Failure
When your stair climber motor fails, you’ll hear grinding, whining, or complete silence when activating the controls. Drive motors operate at 24V DC with 200-500 watt ratings depending on lift capacity. Replacement begins with complete power disconnection—flip the main breaker AND disconnect battery terminals to prevent accidental activation.
Motor replacement process (allow 45-60 minutes):
1. Remove seat or platform for access (typically 4-6 bolts)
2. Disconnect motor cables at control board—note positions carefully
3. Unbolt motor mounts (typically 4 bolts with 10mm heads)
4. Extract motor slowly to avoid damaging wiring harness
5. Install new motor by reversing removal steps
6. Test operation at minimal speed before full reassembly
Critical mistake to avoid: Forgetting to reset error codes after motor replacement—most units require holding the reset button for 10 seconds after power restoration.
Maintain Gearbox to Eliminate Metal-on-Metal Sounds

Worm drive gearboxes require semi-annual lubrication with manufacturer-specified synthetic grease. Warning signs include metallic grinding, increased noise, or jerky movement during operation. Access the gearbox by removing the motor assembly, then clean old grease thoroughly with degreaser before applying fresh lubricant.
Gearbox maintenance checklist:
– Inspect gear teeth for uneven wear patterns indicating misalignment
– Check bearing smoothness by rotating input shaft—should move freely
– Apply grease to fill 75% of housing capacity (overfilling causes overheating)
– Test backlash by rotating input shaft—you should feel 0.5-1.0 degrees of play
Fix Track Misalignment Causing Jerky Movement
Correct Rail Alignment with Precision Measurement Tools
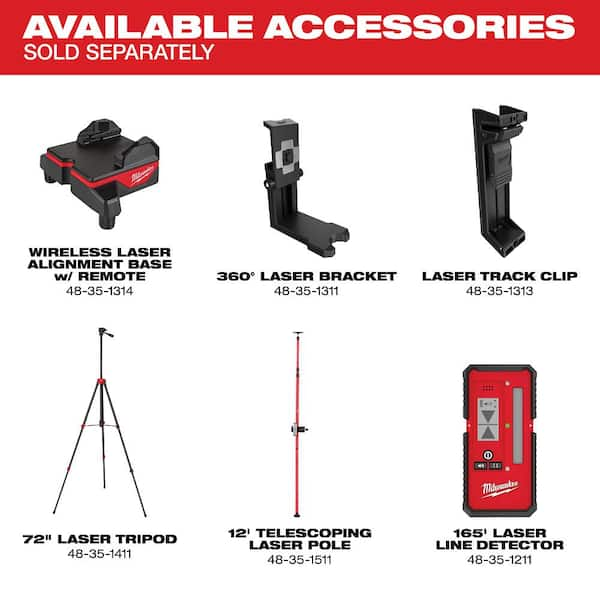
Rail misalignment causes premature wear and dangerous operational failures. Use a laser level to verify deviation stays within 1/8 inch tolerance across the entire track. Curved rail systems require specialized jigs for accurate repositioning—don’t attempt adjustments without proper tools as this creates safety hazards.
Alignment procedure (allow 60-90 minutes):
1. Mount laser level at track midpoint, projecting parallel to stairs
2. Check deviation at 5-foot intervals using ruler against laser line
3. Mark high/low spots with colored tape for reference
4. Loosen mounting brackets at adjustment points (typically 2-3 per section)
5. Reposition using slotted holes while checking laser alignment
6. Apply thread-locking compound to bolts before final tightening
Replace Worn Guide Strips Before Motor Damage Occurs
Nylon guide strips show wear indicators at 3/32 inch depth. Beyond this point, motor strain increases dramatically, leading to premature failure. Check strips monthly by running your fingers along the contact surface—you should feel smooth material without deep grooves.
Guide strip replacement steps:
– Remove old strips with heat gun on low setting and plastic scraper
– Clean mounting surfaces with isopropyl alcohol to remove residue
– Test fit new strips before applying adhesive—they must sit flush
– Use manufacturer-approved adhesive sparingly to avoid excess squeeze-out
– Allow 24-hour cure time before operation—don’t rush this step
Troubleshoot Electrical Failures Preventing Operation
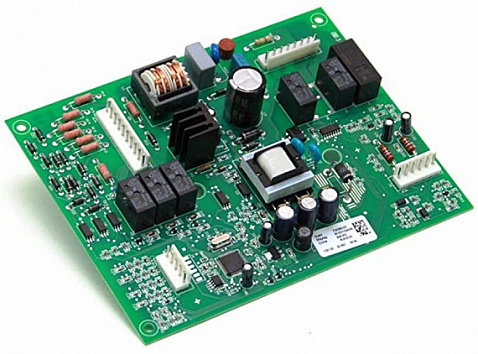
Diagnose Control Board Problems Causing Intermittent Function
Control board failures manifest as random shutdowns, unresponsive controls, or persistent error codes. Inspect for swollen capacitors (bulging tops), burned traces, or corroded connectors. Most failures stem from power surges or moisture intrusion—common in basement installations.
Control board testing sequence:
1. Perform visual inspection under bright light for obvious damage
2. Check 5V and 12V regulator outputs with multimeter
3. Test capacitor ESR values if you have an ESR meter
4. Verify all connector tightness—many issues are loose connections
5. Compare readings to service manual specifications
Replace Batteries Restoring Power to Your Stair Climber
Battery replacement becomes necessary every 3-5 years depending on usage. Lead-acid batteries require monthly voltage testing—anything below 12.4V when fully charged indicates replacement time. Lithium-ion systems show reduced capacity through shorter operating times between charges.
Battery replacement guide:
– Match voltage exactly: 12V or 24V system (never mix types)
– Verify capacity: 7-35 Ah typical range (higher Ah = longer runtime)
– Check physical dimensions—some models have space constraints
– Test new batteries with load tester before installation
– Recalibrate charge controller by cycling new batteries 3 times
Restore Safety Features After Critical Failures
Repair Safety Edge Sensors That Stop Operation
Safety edge sensors activate at 22 pounds of pressure, stopping the climber immediately. Test by applying graduated pressure along the entire edge length using a bathroom scale. Failed sensors create dangerous conditions requiring immediate repair—you shouldn’t operate with compromised safety edges.
Sensor testing method:
1. Place bathroom scale against safety edge at multiple points
2. Apply pressure gradually until system stops (should be 20-24 lbs)
3. Verify immediate system response with no delay
4. Check sensor continuity with multimeter if non-responsive
5. Replace if activation force exceeds 25 pounds or shows inconsistency
Prevent Future Breakdowns With Strategic Maintenance
Implement Monthly Maintenance Preventing Costly Repairs
Preventive maintenance extends stair climber life dramatically. Create a simple monthly routine that catches problems before they cause failures. This 10-minute check takes less time than waiting for emergency service.
Essential monthly tasks:
– Visual inspection of all moving parts for unusual wear
– Battery voltage check under load (simulate operation)
– Safety system functional testing at beginning of each ride
– Track cleaning with damp cloth to remove dust and debris
– Control button responsiveness check—clean contacts if sticky
Recognize When to Call Professionals for Complex Repairs
Understanding repair complexity prevents dangerous DIY attempts. Motor replacements and track alignment require specialized tools and knowledge. Safety system repairs should always be handled by certified technicians due to liability concerns.
Repair complexity assessment guide:
– Basic maintenance (lubrication, cleaning): Safe for DIY
– Battery replacement: DIY with proper precautions
– Control board replacement: Professional recommended
– Motor replacement: Professional required for most models
– Safety system repairs: Professional mandatory for liability
Emergency Fixes for Immediate Mobility Restoration
Apply Temporary Solutions for Critical Mobility Needs
When professional service isn’t immediately available, certain temporary repairs restore basic functionality. These measures maintain essential operation while ensuring permanent repairs occur quickly—never consider them permanent solutions.
Emergency restoration steps:
– Clean battery terminals with wire brush and baking soda solution
– Apply silicone-based lubricant to noisy rail sections (avoid oil-based)
– Tighten all visible mechanical connections (check torque specs later)
– Reset error codes after clearing obvious obstructions
– Document all temporary measures for the professional technician
Your stair climber’s reliability directly impacts daily independence, making timely stair climber repair knowledge essential. By following these systematic repair procedures and maintenance protocols, you’ll minimize downtime and maximize safety. Remember that safety system components should never be bypassed—even temporarily—as the risks far outweigh any convenience. Document every repair in a maintenance log, as this record proves invaluable for troubleshooting recurring issues and maintaining warranty coverage. When in doubt about any repair procedure, contact a certified technician—your mobility and safety are worth the investment.


