
If you’ve ever wondered how to use a deep tissue foam roller effectively, you’re not alone. Millions of athletes, fitness enthusiasts, and desk workers rely on this simple yet powerful tool to relieve muscle tension, improve flexibility, and accelerate recovery. Unlike passive massage therapy, foam rolling puts you in control of your own muscle recovery, allowing you to target specific problem areas whenever you need. When performed correctly, deep tissue foam rolling breaks up fascial adhesions, increases blood flow, and helps restore optimal muscle function. In this guide, you’ll discover precise techniques that transform your foam rolling from a casual ritual into a targeted recovery powerhouse.
Understanding how to use a deep tissue foam roller properly separates those who experience real results from those who simply go through the motions. Many people make the mistake of rolling too quickly or applying improper pressure, which minimizes benefits and can even cause discomfort. The truth is, effective foam rolling requires specific positioning, controlled movement, and strategic pressure application. By the end of this guide, you’ll know exactly how to target every major muscle group with professional-level precision—no guesswork required.
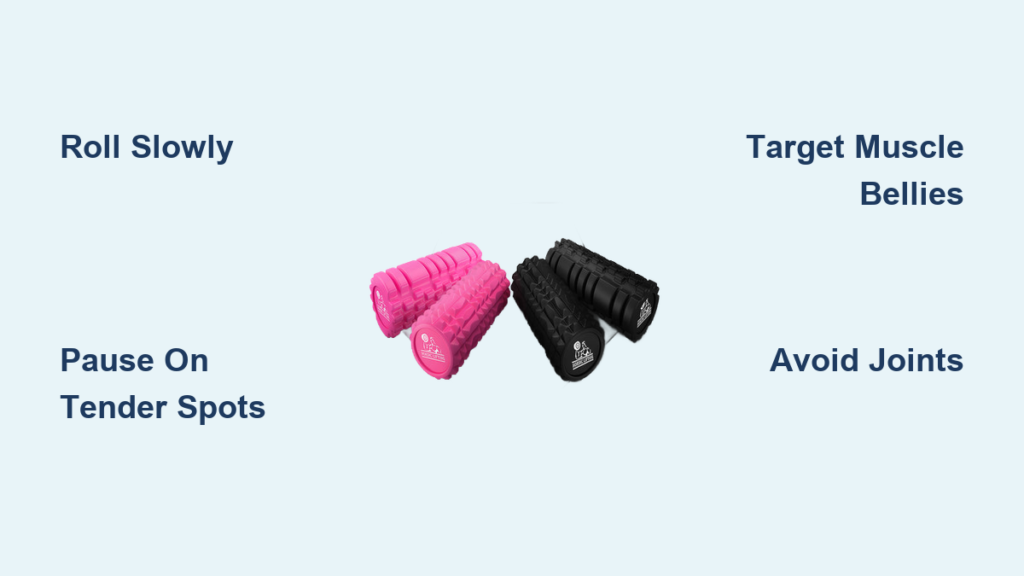
Choose the Right Foam Roller for Your Needs

Selecting appropriate equipment makes a dramatic difference in your foam rolling effectiveness. Smooth foam rollers provide consistent pressure ideal for beginners learning proper technique, while textured rollers with bumps or grids deliver more targeted pressure for stubborn knots in experienced users. Vibrating foam rollers add oscillation technology that enhances muscle relaxation beyond standard rollers, though they come at a higher price point.
Density matters significantly—soft rollers suit those new to deep tissue work or with high sensitivity, firm rollers deliver intense pressure for advanced users, and medium-density offers the best balance for most people. Consider starting with medium density and progressing to firmer options as your body adapts. The standard 36-inch length works well for most applications, though shorter 12-18 inch rollers provide better portability for travel or targeted work.
Perfect Your Fundamental Foam Rolling Technique
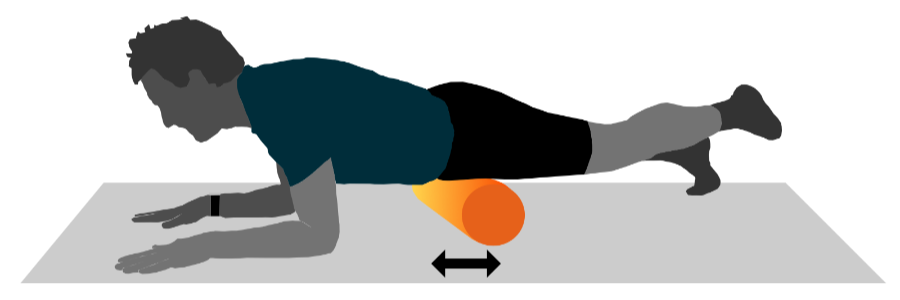
Mastering basic foam rolling mechanics ensures you maximize benefits while avoiding common pitfalls. Position yourself so the roller targets muscle bellies rather than bones or joints—your hands and supporting limbs should control pressure, not your full body weight. Maintain a stable core throughout to prevent unnecessary strain on your spine while rolling.
Roll at a deliberate pace of about one inch per second, giving your muscles time to respond to pressure. When you encounter a tender spot, pause and hold for 30-90 seconds while taking slow, deep breaths—this sustained pressure triggers the release response. Remember the pain scale rule: discomfort should register 7-8 on a 10-point scale, never sharp or unbearable. Spend 1-2 minutes per major muscle group, prioritizing consistency over marathon sessions that could cause bruising.
Target Your Quadriceps and Hip Flexors Effectively

Your quads and hip flexors often tighten from prolonged sitting or running, contributing to knee pain and lower back issues. To roll quads properly, lie face down with the roller beneath your thighs, supporting your weight on forearms and toes. Roll slowly from just above the knee to the hip crease, adjusting leg angle to target outer, middle, and inner quad sections.
For hip flexors, position the roller at the top of your thigh below the hip bone while lying face down. Cross one leg over to rotate your pelvis, then gently roll through the small area where hip meets thigh. Avoid common mistakes like rolling directly on knee joints or bouncing quickly—you’ll achieve better results by pausing on tender spots for at least 30 seconds while maintaining steady breathing.
Release Hamstrings and Glutes Without Strain
Tight hamstrings and glutes restrict mobility and contribute to lower back pain. For hamstrings, sit with the roller beneath your thighs, hands behind you for support, and lift hips slightly. Roll from glute fold toward the knee, rotating legs inward to target outer hamstrings or outward for inner portions. Cross one leg over the other for increased pressure on stubborn knots.
Glute rolling requires sitting on the roller with one ankle crossed over the opposite knee (figure-four position). Lean toward the crossed leg side to target gluteus medius and minimus, rolling slowly in small circles. For the larger gluteus maximus, simply sit and rotate hips while applying downward pressure. Be patient with these dense muscles—consistent, moderate pressure yields better long-term results than aggressive sessions that leave you sore.
Address Calves and Achilles Tension Safely
Neglected calf tension leads to plantar fasciitis and compromised ankle mobility. For gastrocnemius (upper calf), sit with legs extended straight and roller beneath calves, rolling from Achilles toward the knee. Cross one leg over the other for deeper pressure. To target soleus (lower calf), slightly bend knees while rolling—this shifts tension to the deeper muscle layer.
Achilles treatment requires caution—position the roller just above the heel bone and apply gentle pressure with small rocking motions. Avoid excessive pressure directly on the tendon itself. For plantar fascia relief, stand barefoot on the roller and slowly shift weight from heel to toe, or roll in small circles under the foot’s ball. This complementary technique maintains foot mobility that affects your entire kinetic chain.
Roll Your Upper Back Without Risk
Upper back stiffness from desk work limits shoulder mobility and causes neck pain. Lie on your back with roller positioned horizontally beneath shoulder blades, hands behind head for support. Lift hips slightly and roll slowly between shoulder blades and mid-back—never roll into the neck or lower back.
Maintain a slight upper back arch rather than flattening completely against the roller. This positioning allows the roller to sink into muscles between spine and shoulder blades. When you find tight spots, pause and take deep breaths to encourage release. For upper traps, sit against the roller behind your shoulder and lean back, rotating slightly to target muscles along the inner shoulder blade edge.
Treat IT Band and Outer Thigh Correctly
The IT band causes knee pain but responds better to surrounding muscle work than direct pressure. Lie on your side with roller beneath outer thigh, supporting weight on forearm. Roll from hip to knee while pausing on tight spots, but recognize the IT band itself is connective tissue—not muscle—so focus on surrounding muscles.
For better results, target the tensor fasciae latae (TFL) just in front of the hip bone. Position the roller here while lying on your side and apply pressure with slight rocking motions. Many users find TFL release provides more immediate relief for IT band syndrome than direct band rolling. Keep sessions moderate—this area tolerates less pressure than larger muscle groups.
Optimize Pre and Post-Workout Rolling
Timing your foam rolling maximizes benefits for performance and recovery. Pre-workout sessions should be brief (2-5 minutes total) with light, quick rolling to increase blood flow—avoid pausing on tender spots as this can temporarily weaken muscles. Focus on major muscle groups with 30-second passes per area.
Post-workout rolling can be more intensive (10-15 minutes), targeting tight spots with slower movement and longer holds. This helps clear metabolic waste and reduces next-day soreness. On rest days, dedicate 10 minutes to problem areas—morning rolling counters overnight stiffness and prepares your body for daily activities. Consistency beats intensity for long-term results.
Avoid Common Foam Rolling Mistakes
Certain areas require special caution to prevent injury. Never roll directly over joints, bones, or the lower back—these structures need professional care. The lumbar spine should never receive direct foam roller pressure. For the neck, use a tennis ball against a wall rather than a full foam roller.
Pain should feel like intense pressure you can breathe through, not sharp or shooting sensations. If you experience the latter, immediately adjust your position. Those with osteoporosis, blood disorders, or recent surgery should consult healthcare providers before starting foam rolling. When in doubt, stick to large, well-padded muscle groups and avoid areas where you feel bone beneath the skin.
Maximize Your Foam Rolling Results
Achieving lasting benefits requires consistency—expect gradual improvement over weeks of regular practice rather than instant miracles. Track progress by noting which areas consistently feel tight and how your comfort level changes. Combine foam rolling with post-session stretching to maintain mobility gains.
Stay properly hydrated to support tissue health and make rolling more comfortable. Remember that foam rolling complements but doesn’t replace professional care—seek physical therapy for persistent pain that doesn’t improve with consistent self-treatment. By integrating proper technique with realistic expectations, you’ll transform how to use a deep tissue foam roller from a simple ritual into a powerful recovery tool that enhances every aspect of your physical performance.


