
Tight muscles and soreness after yoga practice can derail your progress and make it difficult to maintain a consistent routine. If you’ve ever struggled to sink deeper into poses or felt restricted in your movement, learning how to use a yoga foam roller properly could be the game-changer you need. This simple yet powerful tool helps release muscle tension, improve flexibility, and accelerate recovery when used with correct technique. By incorporating targeted foam rolling into your routine, you’ll experience noticeable improvements in your range of motion and overall practice. In this guide, you’ll discover specific, actionable techniques that transform your foam roller from a dusty prop into an essential component of your yoga journey.
Selecting the Perfect Foam Roller for Your Practice

Choosing the right foam roller makes all the difference between effective recovery and wasted effort. For yoga practitioners, density matters most—beginners should start with softer rollers (low-density EVA foam) that provide gentle pressure while your body adapts to the sensation. As you become more experienced, progress to medium-density rollers that offer balanced pressure for most regular practitioners. High-density rollers deliver intense pressure best suited for advanced users with well-conditioned muscles.
Surface texture significantly impacts your rolling experience. Smooth rollers provide consistent pressure ideal for general warm-ups and beginners, while textured rollers with bumps or ridges target specific muscle fibers for stubborn knots. If you’re just learning how to use a yoga foam roller, start with smooth and progress to textured as your tolerance increases. Length is another consideration—12-18 inch rollers work well for spot treatments of specific areas like calves, while 24-36 inch rollers allow for full back rolling and greater stability.
Mastering Basic Foam Rolling Techniques
Proper technique separates effective foam rolling from mere cylinder rolling. Position the roller under your target muscle group and slowly lower your body weight onto it, allowing the muscle to sink into the roller rather than tensing against it. Control pressure by adjusting how much weight you distribute through your supporting limbs—more arm support reduces pressure, while lowering your hips increases intensity.
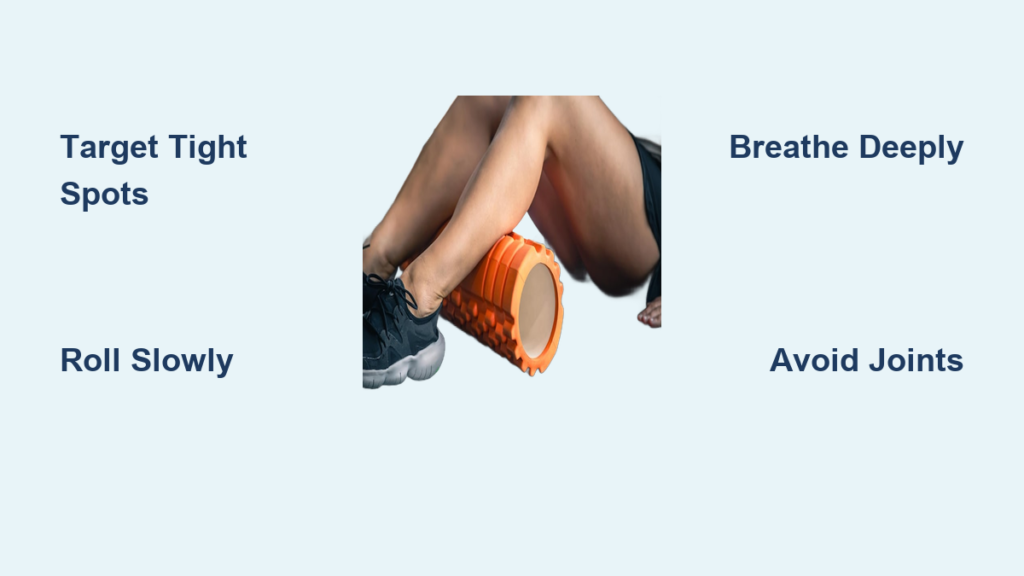
Move slowly along the muscle at about one inch per second to give tissues time to respond. When you encounter tight spots, pause and hold sustained pressure for 30-90 seconds, allowing the muscle to gradually relax. Rushing through movements or bouncing rapidly actually irritates muscles rather than releasing them. For each muscle group, aim for 30 seconds to two minutes of rolling time depending on the area’s size and your sensitivity level.
Breathing transforms your foam rolling effectiveness. Deep, steady breaths help muscles relax under pressure, allowing for deeper release. When you hit a tender spot, consciously breathe through the discomfort rather than tensing up. This relaxation response signals your nervous system to release tension, making the rolling more effective.
Lower Body Release Techniques Every Yogi Needs
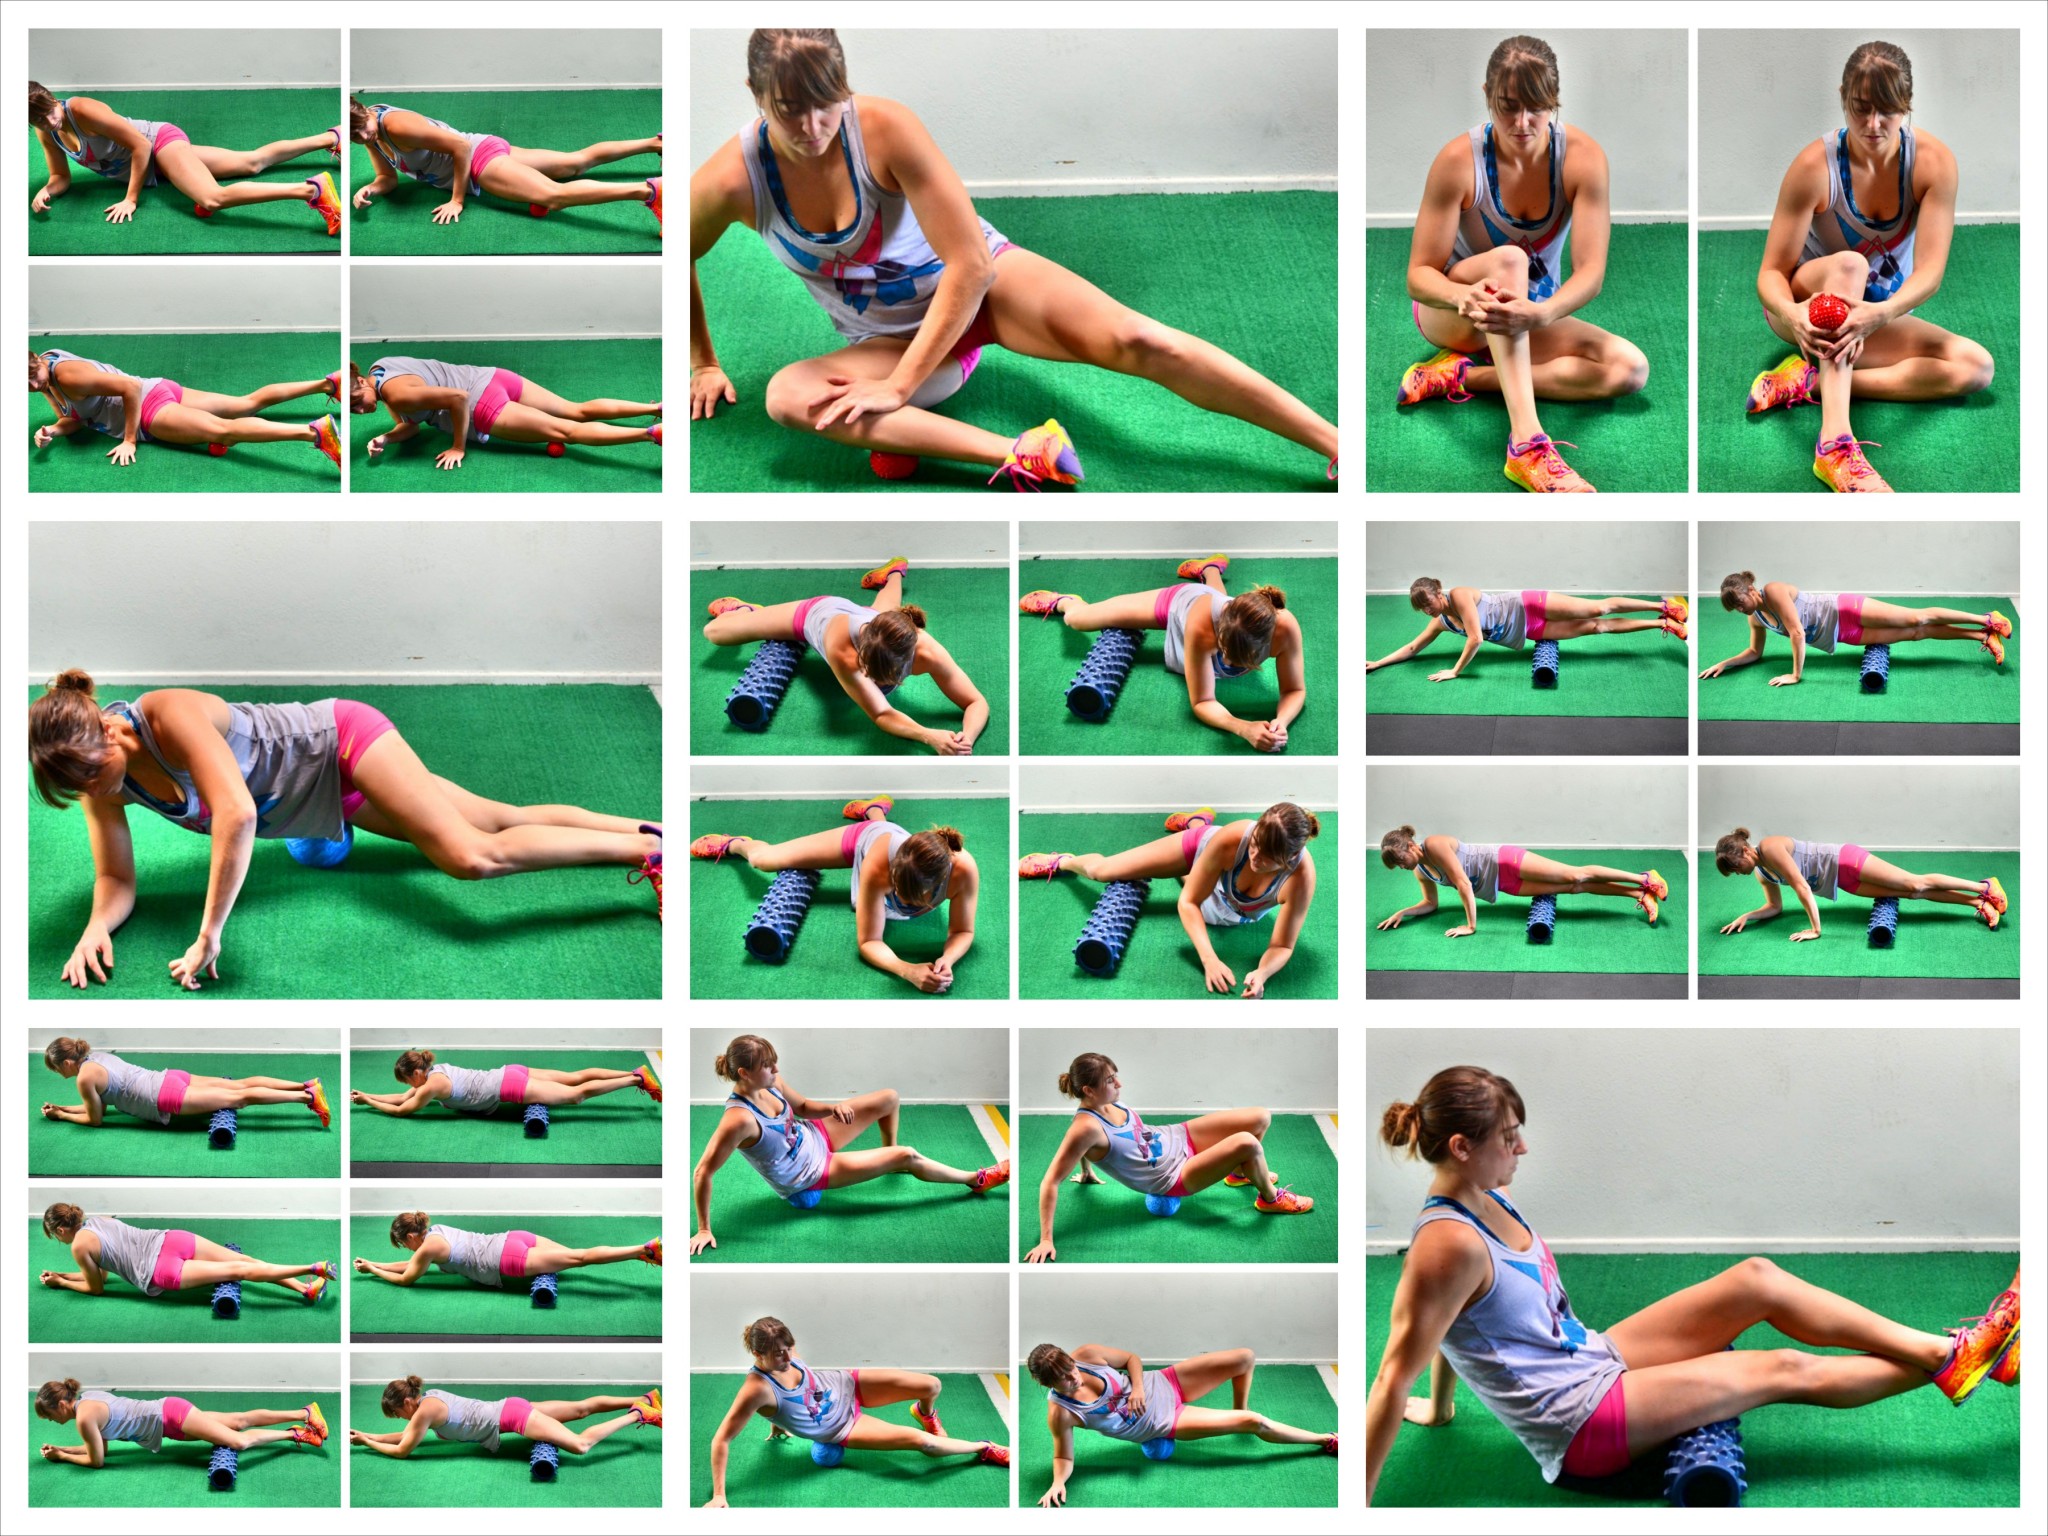
Your calves take significant stress during yoga, particularly in downward dog and balancing poses. To release them properly: sit with the roller under your calves, hands behind you for support. Roll from below the knee to above the ankle, pausing on tight spots. For deeper work, turn your foot outward to target outer calf muscles or inward for inner calves. The Achilles tendon responds well to gentle side-to-side rocking motions over the roller.
Thigh rolling addresses quadriceps that work hard during lunges and chair pose. Lie face down with the roller under your thighs, supporting yourself on your forearms. Roll from hip flexor area to just above the knee. To target different quadriceps sections, turn toes inward for outer thigh work or keep them forward for balanced coverage. The inner thigh (adductors) requires lying face down with one leg rotated outward, positioning the roller under the inner thigh.
Hamstring rolling helps release the back of thighs tight from sitting and forward folds. Sit with the roller under hamstrings, hands behind for support. Roll from glute fold to above the knee. Work one leg at a time for focused attention, or place both legs on the roller for reduced intensity. Stop immediately if you feel numbness or tingling, which indicates nerve compression.
Upper Body and Core Release Methods
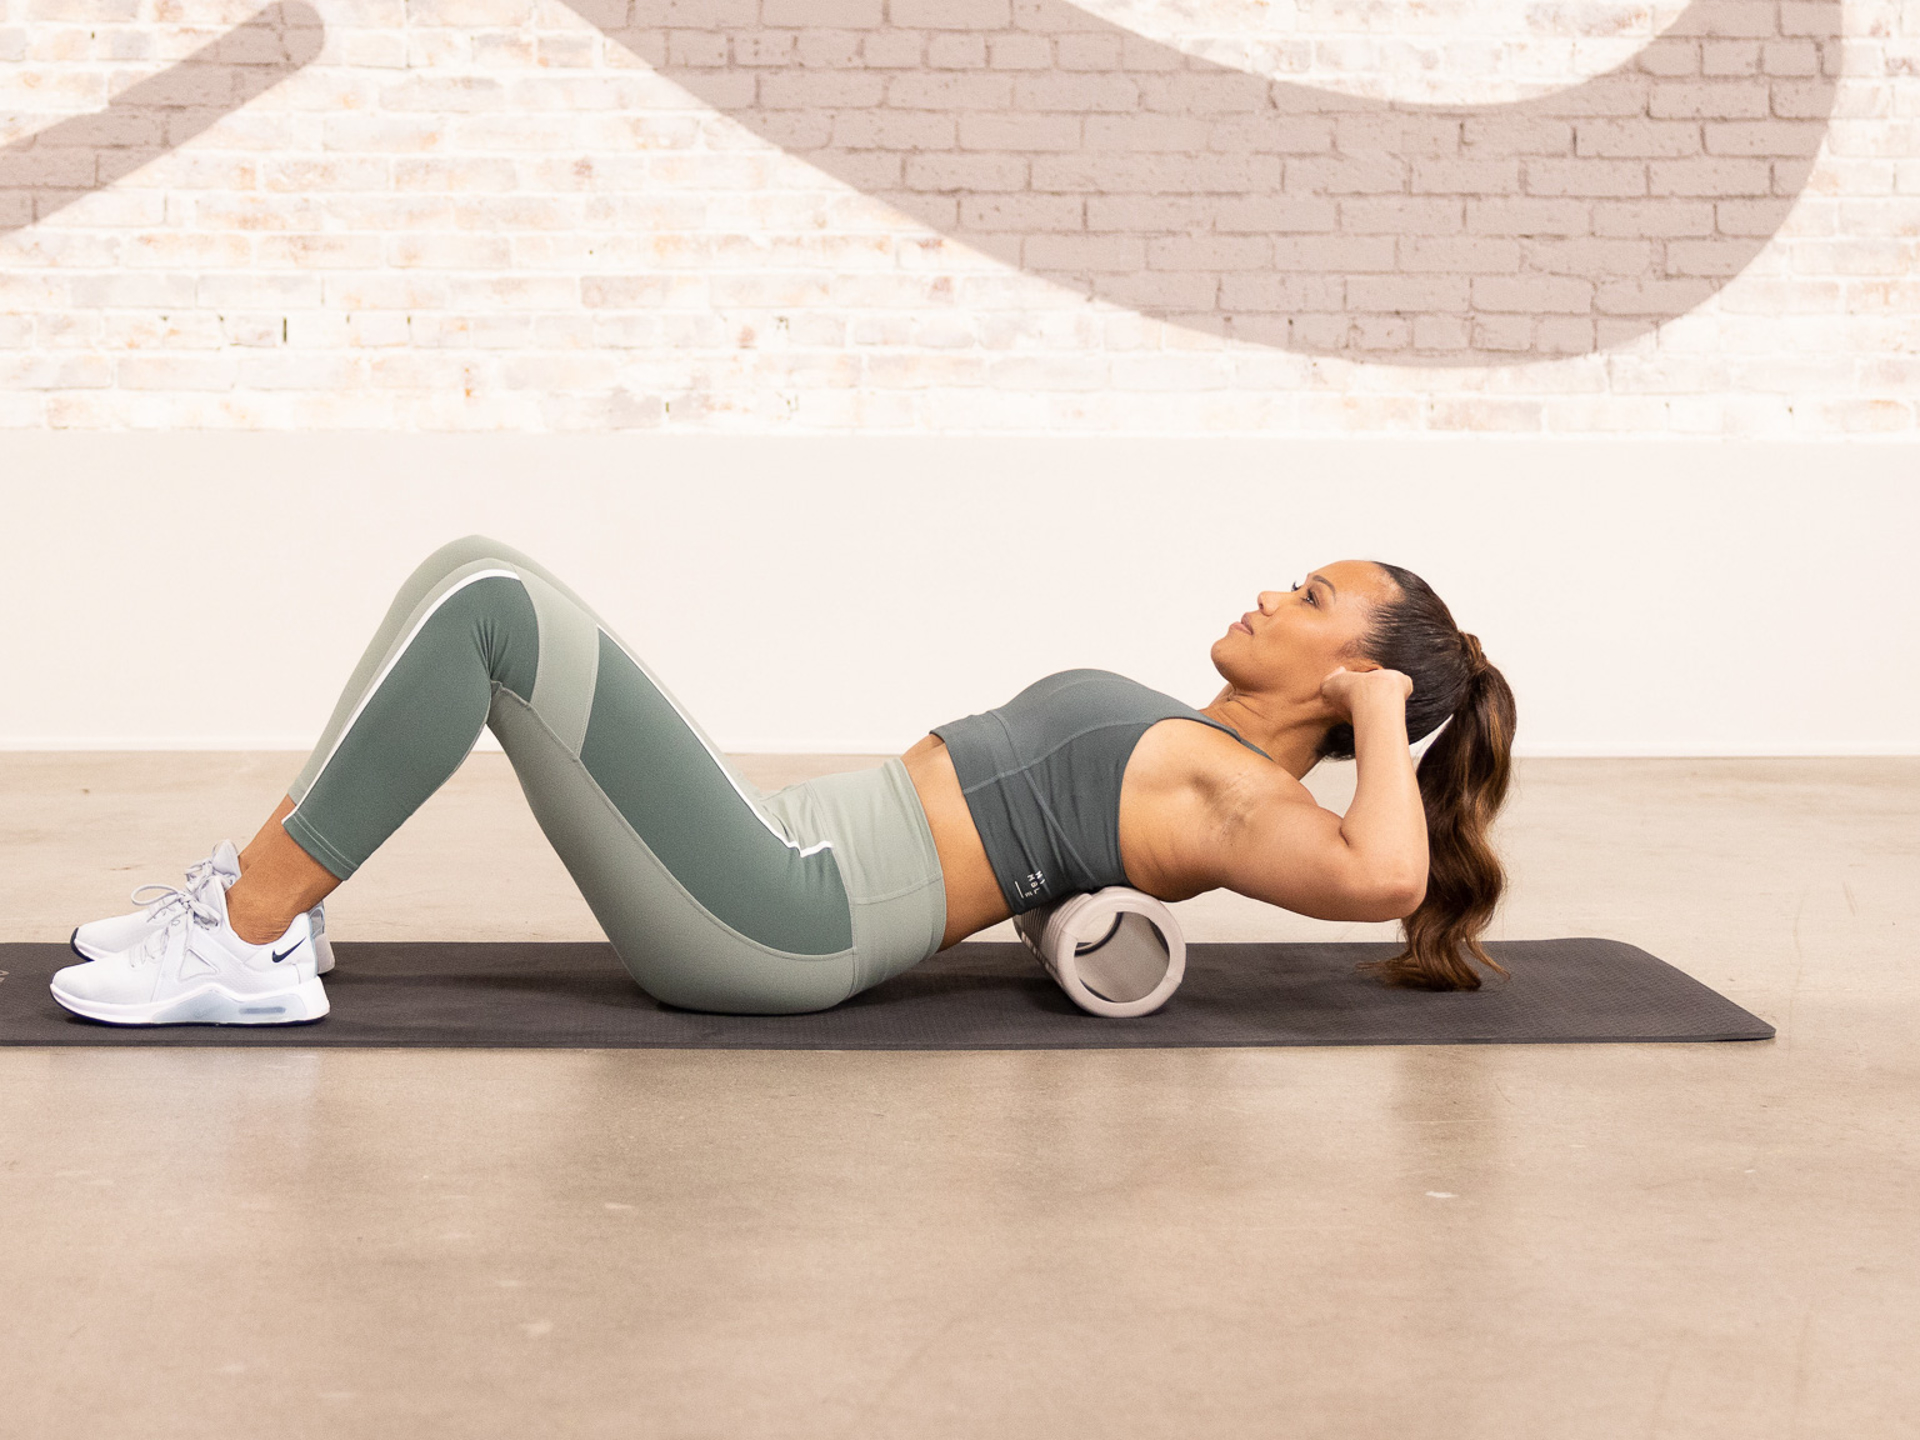
Upper back rolling improves posture and enhances backbends. Place the roller horizontally under your upper back between shoulder blades, with head supported by a small pillow. Interlace fingers behind your head, lift hips, and roll slowly up and down your thoracic spine—from top of shoulder blades to middle back. Avoid rolling directly on the lower back or neck. When finding tight spots, pause, bend knees to increase pressure, or extend arms overhead to open the chest.
Shoulder release maintains mobility essential for downward dog and arm balances. Lie on your side with the roller under the outer edge of your shoulder blade. Support your head with your other arm and use your bottom arm for stability. Roll slowly along the shoulder blade and surrounding muscles. This sensitive area requires starting with lighter pressure before gradually increasing.
Chest release counteracts rounded shoulder posture from desk work. Lie face down with one arm extended, positioning the roller under the chest near the front of the shoulder. Start closer to the shoulder and gradually move toward the center of the chest. Breathe deeply to allow muscles to relax into the roller. A smaller ball works well for targeted pec work around the front shoulder.
Timing Your Foam Rolling for Maximum Benefit

Strategic timing maximizes how to use a yoga foam roller effectively within your routine. Pre-practice rolling (5-10 minutes) prepares muscles by increasing blood flow and tissue elasticity. Focus on major muscle groups you’ll use—calves, thighs, glutes, and upper back for vinyasa flow. This gentle to moderate rolling helps you move more deeply and safely into poses without over-fatiguing muscles.
Post-practice rolling (10-15 minutes) is ideal when muscles are warm and pliable. Spend this time rolling out areas that feel tight or fatigued, applying deeper, sustained pressure since muscles are already responsive. Pay particular attention to muscles heavily worked during practice—hip flexors from standing poses, shoulders from arm balances, and back muscles from twists.
Active recovery days allow for longer (15-20 minute) sessions to address overlooked areas. Use this time to explore new positions, hold trigger points longer, and experiment with different pressure levels. These thorough sessions often unlock new ranges of motion that translate to improved performance in your next practice.
Avoiding Common Foam Rolling Mistakes
Many beginners make critical errors that reduce effectiveness or cause injury. Rolling directly on bones and joints causes pain without muscle benefit—stay on the meat of muscles rather than pressing into shin bones, knee joints, or spine vertebrae. If you feel sharp, localized pain that doesn’t soften with breathing, adjust your position immediately.
Rolling too aggressively on sensitive areas leads to bruising and increased tension. The “no pain, no gain” mentality doesn’t apply here—start with lighter pressure and gradually increase. If an area is very sensitive, use a softer roller or reduce pressure by supporting more weight with your arms.
Rushing through routines provides minimal benefit compared to slow, deliberate rolling. Set aside dedicated time rather than rushing—quality matters more than quantity. Five minutes of focused, mindful rolling beats fifteen minutes of careless movement.
Neglecting symmetry creates imbalances—check both sides equally, adjusting based on findings but maintaining overall balance. Chronic imbalances often develop because one side compensates for the other, and rolling only the “problem” side perpetuates these patterns.
Creating Your Personalized Foam Rolling Routine
Start with a basic 10-15 minute full-body sequence: calves (30-60 seconds per leg), thighs (quads and hamstrings), glutes, upper back, and shoulders. This systematic approach ensures comprehensive coverage. Add targeted work for problem areas—more shoulder time if you practice arm balances, extra hip work for deep hip openers.
Time sessions strategically: shorter morning rolls mobilize stiff muscles, pre-practice rolls optimize performance, post-practice sessions support recovery, and active recovery days allow longer sessions. Find times that fit your schedule and stick with them consistently.
As you master fundamentals, incorporate advanced techniques: cross-fiber rolling (moving perpendicular to muscle fibers), breathing into tension spots, and combining rolling with joint movement. Gradually progress to firmer rollers as your tissues adapt to regular rolling, preventing plateauing and ensuring continued benefits.
Maintaining Your Foam Roller for Longevity
Regular cleaning prevents bacteria buildup—wipe after each use with a damp cloth and mild soap. For deeper cleaning, spray with diluted water and white vinegar solution, then dry completely before storing. Store in a cool, dry place away from direct sunlight to prevent foam degradation. Replace your roller when you notice visible wear like cracks, flattened areas, persistent odors, or sticky surfaces—typically after 1-3 years of regular use.
By consistently applying these techniques on how to use a yoga foam roller, you’ll experience faster recovery, improved flexibility, and deeper access to your yoga practice. The key is mindful application—listening to your body’s signals and adjusting pressure and duration accordingly. Start with these fundamentals, be patient with your progress, and soon foam rolling will become an indispensable part of your wellness routine that supports not just your yoga practice but your overall physical comfort and mobility.


