
Your foam roller collects sweat, bacteria, and dead skin cells with every use, creating a breeding ground for odors and potential skin irritations. Without proper cleaning, that essential recovery tool becomes less effective and potentially harmful to your health. Learning how to clean foam roller properly ensures each session delivers maximum benefits without compromising your hygiene. Whether you use a smooth roller for gentle recovery or a textured model for deep tissue work, establishing the right cleaning routine extends your roller’s lifespan while protecting your skin.
Most users don’t realize how quickly bacteria accumulates on foam surfaces. After just a few sessions, your roller absorbs sweat and skin cells that create an ideal environment for microbial growth. The good news? Cleaning your foam roller doesn’t require special products or hours of effort—just the right technique tailored to your specific roller type. By the end of this guide, you’ll know exactly how to clean foam roller effectively based on its material, structure, and usage patterns.
Gather Your Cleaning Supplies Before Starting
Having the right tools ready makes foam roller cleaning efficient rather than a chore. For basic maintenance, you’ll need mild dish soap (free of harsh chemicals), warm water, a soft-bristled brush (an old toothbrush works perfectly), microfiber cloths, and a spray bottle. If your roller has a removable cover, check the care label for washing instructions before proceeding.
Critical mistake to avoid: Never use bleach, ammonia, or abrasive cleaners that degrade foam integrity. These chemicals break down the polymer structure over time, causing premature cracking and deterioration. Similarly, oil-based cleaners leave residues that attract more dirt while softening the foam’s density—exactly what you don’t want in a recovery tool designed to apply consistent pressure.
For deep cleaning sessions, add white vinegar (for odor elimination) and baking soda (for stubborn stains) to your toolkit. These natural alternatives provide powerful cleaning without toxic residues. Keep all supplies in a dedicated basket near your workout space so cleaning becomes part of your post-exercise routine rather than an afterthought.
Quick Surface Clean After Every Single Use
Skipping this two-minute ritual guarantees you’ll face tougher cleaning sessions later. Immediately after rolling, wipe the entire surface with a microfiber cloth dampened in warm, soapy water—paying special attention to textured areas where debris hides in crevices. For ridged rollers, gently work the soft brush along the contours to dislodge trapped particles.
“I’ve seen clients develop persistent rashes from rollers cleaned only weekly,” shares physical therapist Maria Chen. “Sweat and bacteria penetrate foam within 20 minutes of contact—making immediate surface cleaning non-negotiable for skin health.”
Rinse your cloth with clean water and wipe again to remove soap residue, then pat dry with a clean towel. Store the roller upright in a ventilated area to prevent moisture trapping. If you’re short on time, keep pre-moistened disinfecting wipes (formulated for gym equipment) nearby—but ensure they’re alcohol-free to avoid drying out the foam.
Deep Clean Your Foam Roller Weekly Without Damage
Weekly deep cleaning removes what surface wipes miss, especially important if you roll daily or sweat heavily. Fill your sink with warm water and 2-3 drops of dish soap, submerging your roller for 5-10 minutes to loosen embedded grime. Never soak EVA foam rollers longer than 15 minutes—excessive water absorption causes permanent density loss.
Use your soft brush to gently scrub textured surfaces in circular motions, focusing on high-contact zones like the center section that bears your body weight. For smooth rollers, concentrate on areas that contact sweaty skin (typically your back and thighs during use). Rinse thoroughly under running water until suds disappear—leftover soap attracts more dirt and causes skin irritation.
Pro tip: Squeeze water from the foam vertically (never twist!) to maintain structural integrity. Stand the roller on end in a well-ventilated area, rotating it every few hours for even drying. Humid climates require 48 hours drying time—test by pressing the foam firmly; if coolness or moisture releases, it needs more air exposure.
Remove and Wash Fabric Covers Properly

Rollers with zip-off covers make deep cleaning dramatically easier—but only if you follow fabric care instructions. Remove the cover per manufacturer guidelines (some require unzipping from both ends), checking the care label for material specifics. Most performance fabrics withstand gentle machine washing but shrink in hot water.
Wash covers separately on cold with mild detergent, skipping fabric softeners that clog moisture-wicking fibers. For stubborn sweat stains, rub diluted vinegar directly on affected areas before washing. Never use the dryer—high heat melts elastic fibers and shrinks technical fabrics. Instead, lay flat on a towel to air dry, reshaping seams while damp.
While the cover dries, clean the exposed foam core with your weekly deep cleaning method. Having two covers lets you maintain your rolling schedule uninterrupted—a worthwhile $15 investment for frequent users. Reassemble only when both components are bone dry to prevent trapped moisture.
Eliminate Persistent Odors That Resist Standard Cleaning
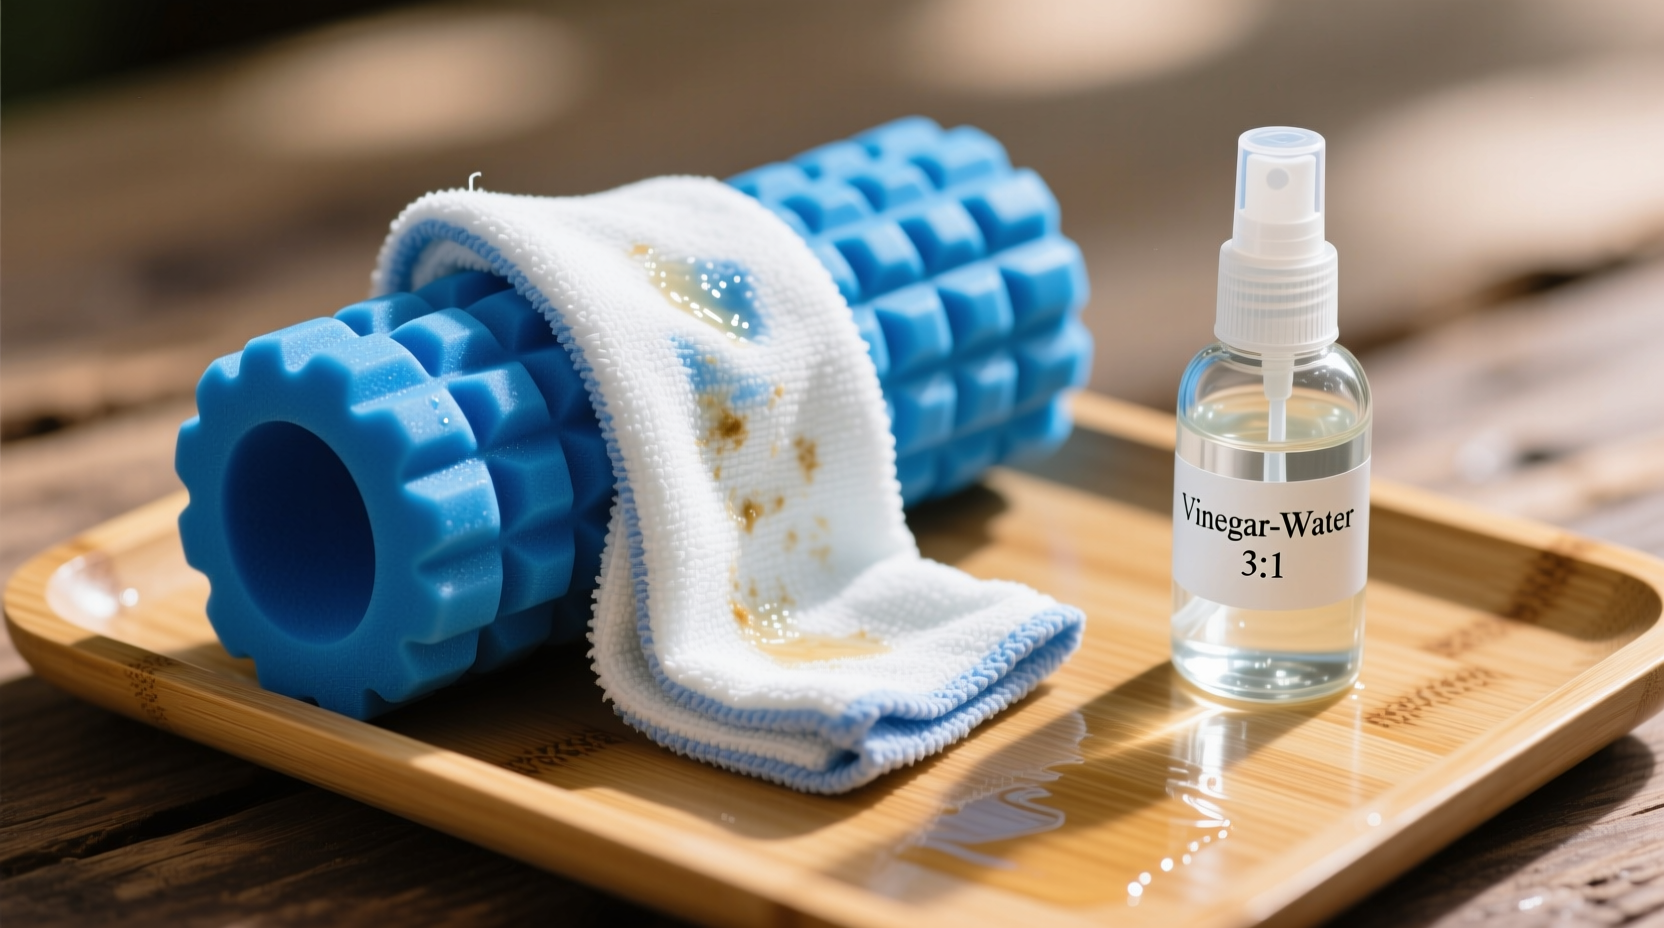
Vinegar’s acetic acid neutralizes odor-causing bacteria at the molecular level—making it superior to masking sprays. Mix equal parts white vinegar and water in a spray bottle, misting the roller surface until damp (not soaked). Let sit 10 minutes before wiping with a clean cloth. For severe odors, sprinkle baking soda generously over the surface, let sit overnight, then vacuum thoroughly with a brush attachment.
Warning: Avoid essential oil “fresheners” that leave oily residues attracting more dirt. If vinegar smell lingers after cleaning, air the roller outdoors for 2 hours—the scent dissipates completely once dry.
Address Specific Stains Before They Set Permanently
Act immediately on fresh stains—wait too long and they become impossible to remove. For blood or protein-based stains, use cold water only (heat sets proteins permanently). Blot with soapy cloth working from the stain’s edge inward to prevent spreading. Grass stains respond well to vinegar-water solution dabbed gently with a cotton swab.
Discoloration from sun exposure or oxidation won’t disappear, but proper cleaning removes surface grime that makes it more noticeable. If stains penetrate deeply or cover more than 30% of the roller, replacement may be safer—especially if used on broken skin.
Dry Your Foam Roller Completely to Prevent Mold

This step makes or breaks your cleaning efforts. Trapped moisture causes mold within 48 hours, creating health hazards no surface cleaning can fix. After squeezing out water, stand the roller vertically on a drying rack away from direct sunlight (UV rays degrade foam). In humid environments, place a fan nearby to accelerate drying.
Critical check: Press your palm firmly across the roller—if any coolness or moisture transfers to your skin, it needs more drying time. Never store in plastic bags or enclosed spaces; breathable mesh bags only when completely dry.
Maintain Your Roller Between Deep Cleanings
Integrate these habits into your routine:
– Wipe with dry cloth immediately post-rolling
– Store upright or hanging (never flat on floor)
– Keep in climate-controlled space (avoid car trunks)
– Rotate usage if multiple people share one roller
Inspect monthly for permanent indentations—if foam doesn’t rebound within 30 seconds of pressure release, it’s time for replacement. Damaged foam harbors bacteria in micro-cracks invisible to the eye.
When to Replace Your Foam Roller Despite Cleaning
Even perfect maintenance can’t overcome material fatigue. Replace your roller when:
– Permanent dents remain after 24 hours of rest
– Surface cracks appear (harbors bacteria you can’t clean)
– Odors return within hours of thorough cleaning
– Density feels inconsistent during rolling
Gym-quality rollers typically last 6-12 months with daily use; home rollers last 18-24 months with proper care. When in doubt, replacement costs less than potential skin infections from compromised equipment.
Consistent foam roller cleaning takes minimal time but delivers maximum return on your recovery investment. By implementing quick surface wipes after each session and thorough weekly cleanings, you protect your skin health while extending equipment life. Remember that complete drying is non-negotiable—moisture retention causes more roller failures than dirt buildup. Make these habits automatic parts of your fitness routine, and your foam roller will continue delivering effective, hygienic recovery for years. Start today: grab your roller and those cleaning supplies—you’ll feel the difference in both hygiene and performance at your next session.


