
Neck tension is a modern epidemic affecting 30% of adults daily, with stiff muscles radiating pain into shoulders and headaches. When your neck feels like a tangled knot after hours at a desk, a massage ball can offer drug-free relief—but improper use risks nerve damage or worsened pain. I’ve seen clients arrive with intensified symptoms after pressing too hard near their spine, turning minor stiffness into weeks of discomfort. This guide reveals exactly how to use a massage ball on neck muscles safely, focusing on evidence-backed pressure points while avoiding dangerous zones. You’ll learn wall-assisted techniques taking under 5 minutes, warning signs to stop immediately, and why your tennis ball might be doing more harm than good. Most importantly, you’ll discover how to transform that “ouch” moment into genuine relief without risking injury.
Critical Safety Zones to Avoid on Your Neck
![]()
Why the Front of Your Neck Is Off-Limits
Never apply pressure to the front of your neck where arteries and the windpipe sit. The carotid artery running vertically on both sides supplies blood to your brain—excessive pressure here can cause dizziness or fainting. Similarly, the thyroid cartilage (Adam’s apple) and trachea are fragile structures. If you feel a soft, hollow area when gently pressing your neck, move immediately to the muscular areas at the back and sides. Using a massage ball here risks bruising vital structures or triggering dangerous blood pressure changes.
Identifying Your Spinal Column Danger Zone
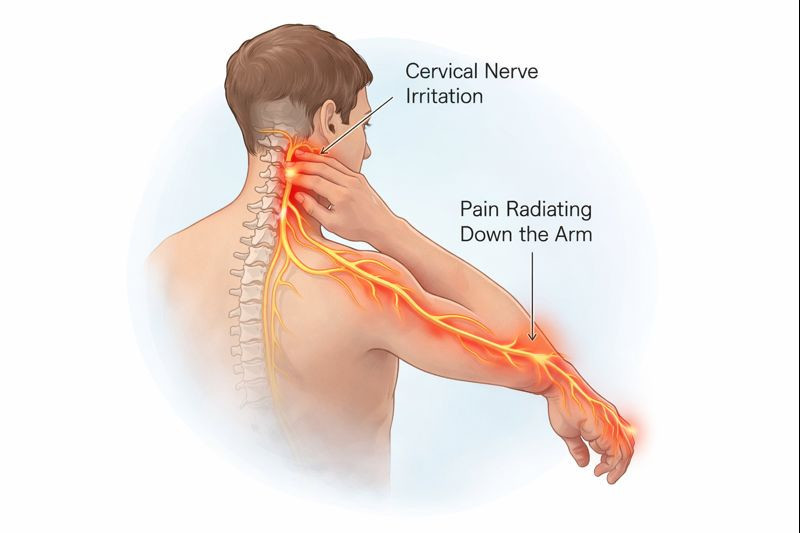
Your cervical spine runs vertically through the center of your neck. Stop immediately if you feel small, bony protrusions when exploring with your fingers—this is your vertebrae. Applying direct pressure here with a massage ball can compress nerves exiting the spine, causing shooting pain down your arms or numbness in fingers. Instead, target the thick trapezius muscles extending from your shoulders to the base of your skull, staying at least 1.5 inches lateral to your spine. When positioning the ball, always feel for soft tissue first; if you hit bone, shift outward toward your shoulders.
Proper Positioning Techniques for Neck Relief
Wall-Assisted Method for Controlled Pressure
Stand with your back against a wall, feet shoulder-width apart. Place a soft massage ball (not lacrosse or tennis ball) between your neck and the wall at the base of your skull where tension gathers. Crucially, tilt your chin slightly down to create space between vertebrae. Gently lean back, using body weight to apply pressure—never force it. Hold for 20-30 seconds max while taking slow breaths. If pain exceeds 3/10 intensity, reduce pressure immediately. This position prevents accidental over-pressing and keeps your spine aligned. Most beginners make the mistake of pressing too high near the skull base; stay focused on the meaty area just above your shoulder blades.
Seated Floor Technique for Targeted Trigger Points
Sit on the floor with knees bent, placing a small towel roll under your neck for support. Position a soft foam massage ball under the right side of your neck where it meets your shoulder. Slowly lower your right ear toward your shoulder, allowing body weight to sink onto the ball. Do not roll the ball—maintain steady pressure on one tender spot for 20 seconds. Breathe deeply to relax muscles. Repeat on the left side. This method works best after a warm shower when muscles are pliable. Warning: If you feel tingling in arms or fingers, stop instantly—this indicates nerve irritation.
Selecting the Right Massage Ball for Neck Use
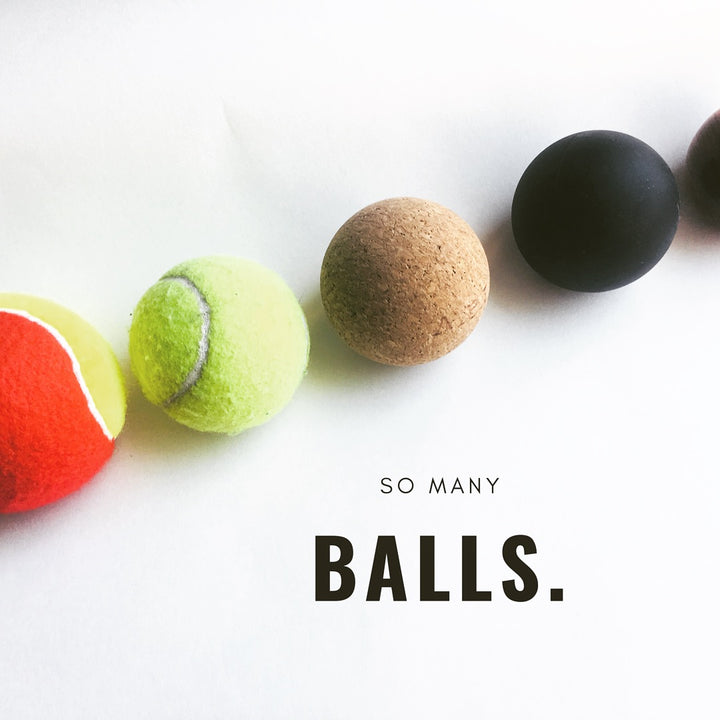
Why Firm Balls Cause More Harm Than Good
Lacrosse balls and tennis balls are dangerously inappropriate for neck work. Their extreme firmness concentrates pressure on small areas, risking nerve compression in the delicate cervical region. Opt instead for soft foam balls (2-3 inches diameter) or specialized neck massage tools with contoured edges. These distribute pressure evenly across muscle fibers without digging into nerves. When pressed gently, your chosen ball should indent 30-50% under finger pressure—not remain rock-hard. Remember: neck muscles respond better to sustained, gentle pressure than aggressive digging.
Size Matters: Choosing Diameter for Neck Anatomy
Standard 4-inch balls are too large for neck contours. Select 2.5-inch diameter balls that fit precisely between your shoulder and jawline. Larger balls press multiple areas simultaneously, reducing effectiveness while increasing injury risk. Test by placing the ball where your neck meets your shoulder—if it spills over onto your spine or shoulder muscle, it’s too big. Smaller balls (1.5 inches) work well for pinpointing trapezius knots but require extra caution to avoid rolling onto bones.
Step-by-Step Neck Massage Protocol
Pre-Massage Preparation Checklist
- Warm muscles first: Take a 5-minute warm shower or apply a heating pad for 2 minutes
- Check for contraindications: Do NOT use if you have recent whiplash, osteoporosis, or neck surgery scars
- Position safely: Always use wall or floor support—never float the ball freely
- Start low pressure: Begin with fingertip pressure to locate tender spots before introducing the ball
Skipping these steps risks muscle spasms. I’ve treated clients who jumped straight to ball use on cold muscles, worsening their tension for days.
The 3-Minute Relief Sequence
Phase 1: Base of Skull (60 seconds)
Place ball at hairline where neck meets skull. Tilt chin down slightly. Apply light pressure (20% body weight) for 20 seconds. Move ball 1 inch toward right shoulder, repeat. Repeat on left.
Phase 2: Upper Trapezius (90 seconds)
Position ball where neck slopes into shoulder. Gently drop right ear toward shoulder. Hold 30 seconds. Move ball diagonally up toward ear in 1-inch increments—max 3 spots per side. Pressure should never exceed 30% body weight.
Phase 3: Mid-Neck Release (30 seconds)
Place ball midway between base of skull and shoulder on right side. Keep head neutral (not tilted). Apply minimal pressure for 15 seconds. Repeat left side. Stop if you feel any vibration or tingling.
Never exceed 5 minutes total per session. Over-massaging triggers inflammation.
Warning Signs You’re Using the Ball Incorrectly
Immediate Red Flags Requiring Stoppage
- Radiating pain into arms or fingers (nerve compression)
- Dizziness or nausea (vascular pressure)
- Numbness or tingling (nerve irritation)
- Increased headache intensity (muscle aggravation)
These aren’t “good pain”—they’re danger signals. One client ignored tingling in her thumb during neck ball use and developed carpal tunnel symptoms requiring physical therapy. If any occur, discontinue immediately and apply ice for 10 minutes.
Common Beginner Mistakes Causing Harm
Mistake: Rolling the ball rapidly up/down the neck
Why it’s dangerous: Creates micro-tears in muscle fibers near vertebrae
Fix: Hold steady pressure on one spot for 20-30 seconds max
Mistake: Using excessive body weight
Why it’s dangerous: Compresses facet joints between vertebrae
Fix: Start with 10% body weight (just leaning, not pressing)
Mistake: Targeting the sides of the neck near the jaw
Why it’s dangerous: Presses on the vagus nerve affecting heart rate
Fix: Stay 2+ inches below the jawline on muscular areas only
Maintenance Protocol for Lasting Results
Optimal Frequency and Timing
Use the massage ball only 2-3 times weekly for neck tension. Daily use causes tissue inflammation. Best timing:
– After warm showers when muscles are pliable
– Between work sessions before stiffness sets in
– Never before driving (dizziness risk)
Pair with these post-massage moves:
1. Slow chin-to-chest stretches (hold 15 seconds)
2. Shoulder blade squeezes (10 reps)
3. Diaphragmatic breathing (5 cycles)
This prevents rebound stiffness. Clients who skip these often return with “the relief didn’t last.”
When to Consult a Professional Instead
Stop all self-massage and see a physical therapist if:
– Pain persists beyond 72 hours after stopping ball use
– You have a history of cervical disc issues
– Symptoms include blurred vision or ringing ears
– You experience weakness in arms/hands
A therapist can identify if your tension stems from posture issues requiring corrective exercises—not just muscle knots. One client wasted months on massage balls before discovering her neck pain came from a forward-head posture needing targeted strengthening.
Final Note: Properly executed, a massage ball can melt neck tension in minutes—but the cervical spine demands respect. Stick to soft balls, stay clear of bones and arteries, and never push through sharp pain. For lasting relief, combine these techniques with daily posture checks and shoulder mobility exercises. If tension persists beyond two weeks of careful self-care, consult a physical therapist to address root causes. Remember: relief should feel like a gentle unraveling, not a battle against your own body.


