
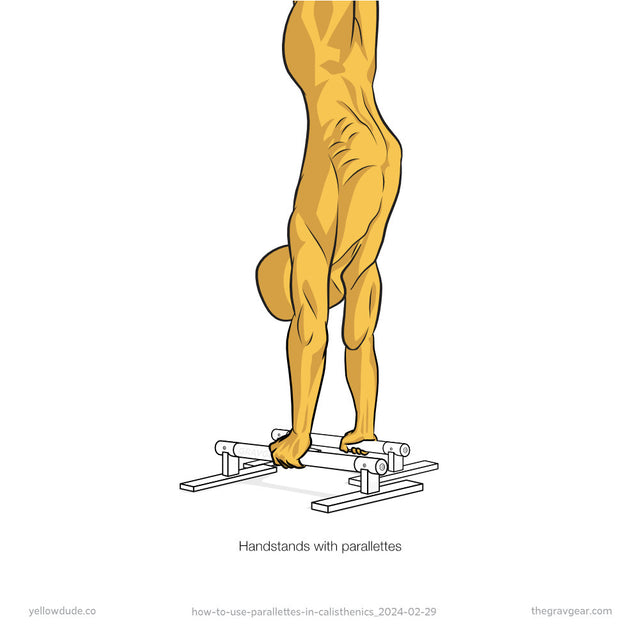
Nothing ruins your handstand progress like unstable, slippery parallettes that wobble with every push. Commercial models often cost $150+ while delivering flimsy plastic construction that cracks under serious training. Learning how to make wooden parallettes transforms basic lumber into rock-solid training equipment that outperforms store-bought options at 25% of the price. Whether you’re a beginner working on your first handstand or an advanced athlete mastering planche progressions, custom-built wooden parallettes give you perfectly sized equipment that won’t slip, crack, or break when you need it most.
This step-by-step guide shows you exactly how to make wooden parallettes in a single afternoon with basic tools. You’ll discover the best wood types that resist sweat and wear, precise dimensions for your skill level, and professional finishing techniques that prevent splinters during intense workouts. By the end, you’ll have durable, comfortable parallettes that feel like premium gym equipment but cost less than your weekly coffee budget.
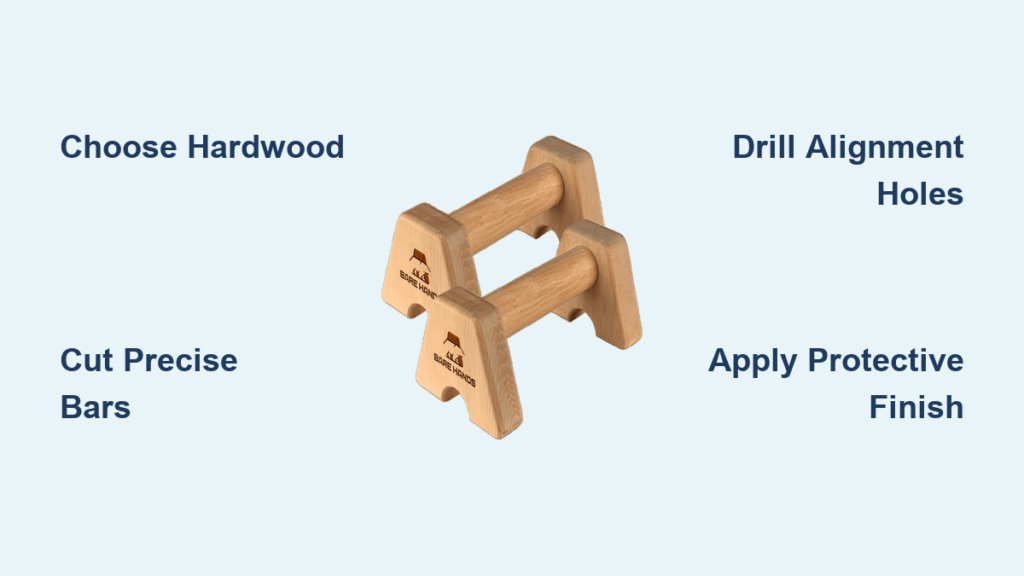
Choosing the Right Wood for Long-Lasting Parallettes
Your wood selection determines whether your parallettes survive six months or six years of daily training. Avoid cheap pine boards that develop hand-shaped dents after just a few weeks of L-sits.
Hardwood vs. Softwood: What Actually Works
Maple provides the ideal balance of density, smoothness, and affordability for parallette bars—they won’t splinter during sweaty handstands and develop a naturally grippy surface over time. Birch offers 90% of maple’s performance at 20% lower cost, while oak delivers legendary durability with pronounced grain that feels great under your palms. If budget constraints force you toward softwoods, choose yellow pine over white pine—it’s 30% harder and withstands compression better.
For the frame structure, 3/4-inch plywood works perfectly when properly reinforced. Avoid particle board or MDF—they swell instantly when exposed to workout sweat. Reclaimed hardwood flooring scraps make excellent budget-friendly bar material if you can find straight, knot-free pieces.
Critical Dimension Guidelines for Proper Form
Your parallette dimensions directly impact exercise effectiveness and safety. Build them too narrow, and you’ll strain your shoulders; too tall, and handstands become impossible to stabilize.
Height Matters Most for Skill Progression
– 6-8 inch height: Best for beginners learning L-sits and tuck handstands
– 9-10 inch height: Ideal for intermediate athletes working on straddle presses
– 12-14 inch height: Required for advanced moves like elbow levers and full planche practice
Measure your current handstand height first—your parallettes should sit 2-3 inches above your knuckle height when in full handstand position. This ensures proper wrist alignment without compromising stability.
Essential Tools You Already Own (No Specialized Equipment Needed)

You don’t need a professional workshop to make wooden parallettes. Most DIYers complete this project with just five basic tools they already own.
Must-Have Tools Checklist
- Circular saw or hand saw: For precise 20-inch bar cuts (measure twice, cut once!)
- Drill/driver with 3/8″ drill bit: Critical for creating secure mounting holes
- Random orbital sander: Prevents splinters with smooth 220-grit finish
- Tape measure and speed square: Ensures perfectly aligned frame construction
- Clamps (minimum 4): Holds pieces steady during glue-ups and drying
Skip expensive specialty tools like pocket hole jigs—they add unnecessary complexity. A simple countersink bit creates flush bolt holes that won’t snag your skin during rolls and transitions.
Step-by-Step Construction: Building Rock-Solid Parallettes in 90 Minutes
Follow this exact sequence to avoid common assembly mistakes that cause wobbling or uneven bars.
Cutting Perfectly Straight Bars and Frame Pieces
Start with two 2×4 hardwood boards cut to 20 inches for your main bars—this length accommodates 95% of users from beginners to advanced athletes. For the frame, cut four pieces from 1×4 lumber:
– Two side pieces at 16 inches (for standard 15-inch width between bars)
– Two end pieces at 7 inches (adjust for your chosen height)
Pro Tip: Mark all cutting lines with a sharp pencil and verify measurements with your speed square before cutting. Even 1/8-inch discrepancies cause alignment issues during assembly that create dangerous wobble.
Drilling Precision Mounting Holes for Maximum Stability
This step makes or breaks your parallettes’ stability. Drill 3/8-inch holes through both frame sides simultaneously to ensure perfect alignment:
1. Position frame sides parallel with 15-inch spacing
2. Clamp securely to prevent movement
3. Drill two holes per bar end (1.5 inches apart vertically)
4. Countersink the top 1/4 inch to hide bolt heads
Critical Warning: Never skip pilot holes—they prevent wood splitting that weakens structural integrity. Drill pilot holes 1/8-inch smaller than your bolt diameter for optimal grip.
Finishing Techniques That Prevent Sweat Damage and Splinters

Raw wood parallettes become hazardous after just a few sweaty workouts. Proper finishing creates a smooth, grippy surface that actually improves with use.
Best Finish Options Compared
| Finish Type | Drying Time | Durability | Cost | Best For |
|---|---|---|---|---|
| Tung Oil | 24 hours/coat | ★★★☆☆ | $ | Beginners wanting natural feel |
| Water-Based Poly | 4 hours/coat | ★★★★★ | $$ | Heavy sweaters needing max protection |
| Hemp Oil | 12 hours/coat | ★★☆☆☆ | $ | Eco-conscious builders |
Apply three thin coats of your chosen finish, sanding lightly with 320-grit paper between coats. The final result should feel smooth as glass but provide enough grip that your hands don’t slide during handstands.
Assembly Checklist: Avoiding Dangerous Construction Mistakes
Most parallette failures happen at connection points. Follow this safety-tested assembly sequence:
- Insert carriage bolts through pre-drilled holes
- Position bars with 1/2 inch overhang on each side
- Add two washers and a lock nut per bolt
- Tighten nuts in crisscross pattern to prevent warping
- Verify perfect levelness with a spirit level
Critical Test: Apply full body weight slowly before training. Any creaking, movement, or uneven pressure means you must disassemble and check bolt tightness. Never train on untested parallettes.
Pro Maintenance Tips to Double Your Parallettes’ Lifespan
Wooden parallettes last years longer with simple weekly care that takes less than 5 minutes.
Three-Step Sweat Protection Routine
- Wipe down bars immediately after each workout with dry microfiber cloth
- Monthly deep clean with 50/50 water-vinegar solution to neutralize sweat acids
- Reapply finish every 3 months (or when wood looks dry)
Inspect bolt connections weekly—loose hardware causes 80% of parallette failures. Keep a small wrench stored with your equipment for quick tightenings before workouts.
Custom Modifications for Advanced Training Needs
Once you’ve mastered basic construction, these upgrades transform standard parallettes into professional training tools:
Contoured Grip Bars for All-Day Comfort
Use a 1/4-inch roundover bit to soften bar edges where your knuckles rest. The slight curve reduces pressure points during extended L-sits and handstands, allowing you to train longer with less hand fatigue. Sand to 320 grit afterward for buttery smoothness.
Stackable Height System for Progressive Training
Drill multiple mounting hole sets at different heights (8″, 10″, 12″). This lets you gradually increase difficulty as your skills improve—no need to build new parallettes for each progression stage. Insert rubber grommets in unused holes to maintain clean appearance.
Troubleshooting Common Wooden Parallette Problems
Even well-built parallettes develop issues with heavy use. Fix these problems before they become safety hazards:
Fixing Slight Wobble in Newly Built Parallettes
Tighten all bolts in diagonal sequence (like lug nuts on a car). If wobble persists, add 1/8-inch felt pads under the lowest corner—never sand the feet, as this creates uneven height.
Repairing Sweat-Damaged Finish
Strip remaining finish with 120-grit paper, clean with mineral spirits, then reapply three fresh coats. For deep sweat penetration, apply wood conditioner before finishing to seal the grain.
Final Safety Check Before First Use
Never skip these critical pre-training inspections:
– Verify all bolts are tight (use torque wrench if available)
– Check for cracks around mounting holes
– Confirm bars sit perfectly parallel
– Test weight capacity gradually (start with 50% body weight)
Your finished parallettes should feel like a solid extension of the floor—not a separate, wobbly platform. If anything feels unstable, disassemble and rebuild rather than risking injury during training.
Building your own wooden parallettes puts professional-grade training equipment within reach of any home gym. The $35 investment in materials creates equipment that outperforms $150 commercial models while perfectly matching your body dimensions and training goals. Within just two hours of work, you’ll have rock-solid parallettes that withstand daily use for years with minimal maintenance. Start with the standard dimensions outlined here, then modify future builds as your skills progress—soon you’ll have a complete set of height-adjustable parallettes customized for every stage of your calisthenics journey. The confidence of training on equipment you built yourself adds mental strength that no store-bought gear can match.


