
Your living room floor just became a gym with the simple addition of mini resistance bands—those unassuming loops that deliver surprising strength-building power. Learning how to use mini resistance bands transforms basic bodyweight exercises into targeted muscle-building sessions that rival gym equipment, all without taking up space or breaking your budget. These compact rubber loops create constant tension throughout movement patterns, forcing muscles to work harder than traditional weights where resistance fluctuates at different points in the range of motion. Whether you’re recovering from injury, traveling for work, or simply want to maximize home workouts, mastering mini resistance band techniques delivers visible results in just weeks when performed correctly. This guide reveals exactly how to implement these portable powerhouses into your routine for stronger glutes, stable hips, and toned legs—no gym membership required.
Why Mini Bands Outperform Traditional Weights for Home Workouts
Mini resistance bands deliver unique strength-building benefits that dumbbells and machines can’t replicate, especially for home fitness enthusiasts. Unlike free weights that rely on gravity for resistance, these continuous loops provide constant tension throughout every phase of movement—meaning your muscles work harder during both the lifting and lowering portions of each exercise. This constant tension principle creates superior muscle activation in the glutes, hips, and thighs compared to traditional weights where resistance diminishes at certain points in the movement arc. The compact loop design stays securely in place during dynamic movements, allowing you to focus entirely on form rather than adjusting equipment positions.
The elastic construction—typically high-grade rubber or latex—determines both resistance level and durability, with quality bands maintaining consistent tension thousands of repetitions. Color-coded resistance levels (from extra light to extra heavy) let you precisely match band strength to your current fitness level and specific exercises. Most users benefit from owning 3-4 different resistance levels to accommodate various muscle groups—lighter bands for hip stabilizers and heavier bands for major lower body movements. The portability factor makes these bands indispensable for consistent training; you can pack them in a hotel drawer or even your work bag, eliminating the most common excuse for skipped workouts. When you learn how to use mini resistance bands properly, you gain access to a complete lower body workout system that fits in the palm of your hand.
Selecting Your First Mini Band Set for Targeted Muscle Development
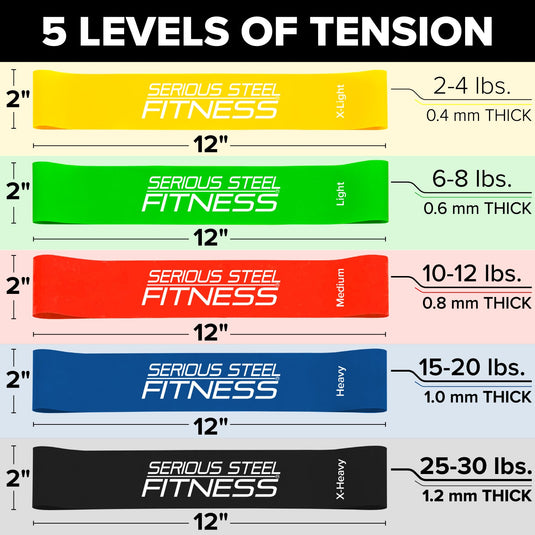
Choosing the right resistance levels prevents frustration and ensures continuous progress as your strength improves. Most manufacturers offer 5 distinct resistance levels, but beginners should start with 3 essential bands: light (yellow/green), medium (blue/red), and heavy (black/purple). The light band works best for rehabilitation exercises, warm-ups, and targeting smaller stabilizer muscles like the gluteus medius. Medium resistance challenges primary glute and thigh muscles during foundational movements like banded squats and bridges. Heavy bands deliver maximum muscle activation for advanced users performing compound movements or high-repetition sets.
Test resistance levels by performing 10 controlled glute bridges with each band. You should feel significant muscle burn by repetitions 8-10—if you reach failure before rep 5, the band is too heavy; if you complete all reps without fatigue, it’s too light. Many fitness professionals recommend starting with medium resistance for lower body exercises and light resistance for hip mobility work. As you consistently learn how to use mini resistance bands over 4-6 weeks, you’ll notice your medium band becoming easier—this signals it’s time to incorporate the heavy band for primary exercises while using medium for warm-ups. Always inspect bands for nicks or thinning before each use; damaged bands can snap during exercise, causing injury.
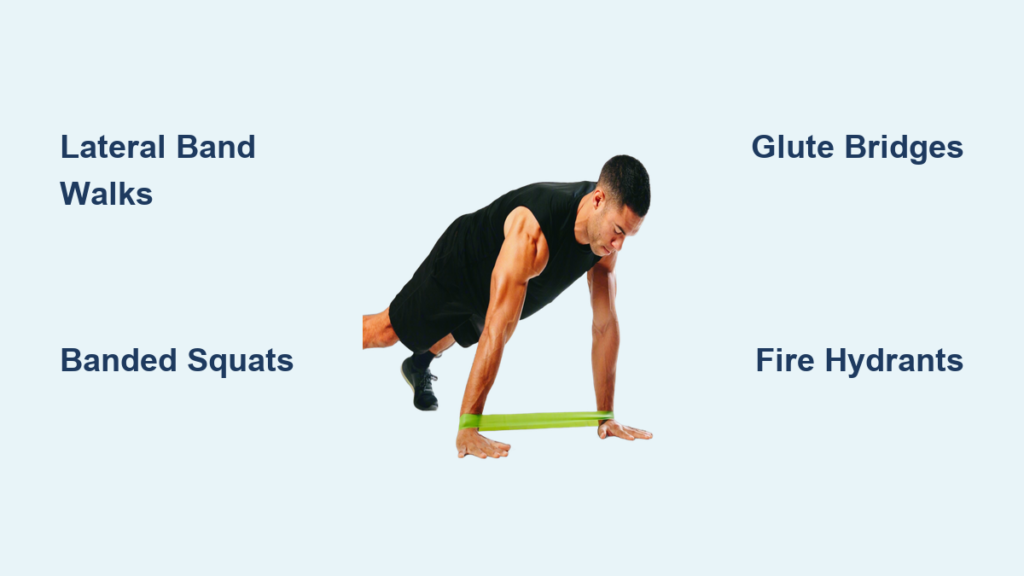
Perform Lateral Band Walks for Hip Stability in 3 Steps
Lateral band walks (squat side steps) build the often-neglected hip abductors that stabilize your pelvis during walking, running, and squatting movements. Position the band around your ankles and assume a quarter-squat position with feet shoulder-width apart. Take a controlled 12-inch step sideways with your right foot, maintaining tension in the band throughout the movement. Bring your left foot toward your right foot without releasing tension, then repeat in the opposite direction.
Avoid These Common Lateral Walk Mistakes
- Collapsing at the knees: Keep knees tracking over toes, not caving inward
- Rushing the movement: Move slowly (2 seconds per step) to maximize muscle engagement
- Standing too upright: Maintain consistent squat depth throughout all repetitions
Complete 2 sets of 10 steps in each direction as part of your warm-up routine. You’ll know you’re using proper form when you feel intense activation along the outer hips and glutes—not in your lower back. Advanced users can increase difficulty by lowering into a deeper squat position or using a heavier resistance band. This exercise directly translates to improved stability when carrying groceries, climbing stairs, or changing direction during sports.
Transform Your Squats with Band Resistance Technique
The banded squat creates unprecedented glute and thigh activation by forcing your knees outward against continuous tension. Place the band just above your knees and assume standard squat position with feet slightly wider than hip-width. As you descend, actively push your knees against the band’s resistance—this engages the hip abductors throughout the entire movement. Lower until your thighs reach parallel to the floor (or as low as mobility allows), then drive through your heels to stand while maintaining outward knee pressure.
Optimize Your Banded Squat Form
- Foot placement: Slightly turn toes outward (15-30 degrees) for natural hip alignment
- Tempo control: Take 3 seconds to descend, 1 second at bottom position, 2 seconds to rise
- Breathing pattern: Inhale during descent, exhale forcefully while standing
Complete 3 sets of 12-15 repetitions, resting 45 seconds between sets. You should feel significant fatigue in your glutes and outer thighs by the final repetitions—if your quads dominate the movement, widen your stance slightly. For increased challenge, hold a pulse at the bottom position for 2 seconds before rising. This variation particularly benefits office workers by counteracting the hip weakness caused by prolonged sitting.
Master Glute Bridges with Progressive Resistance Strategies
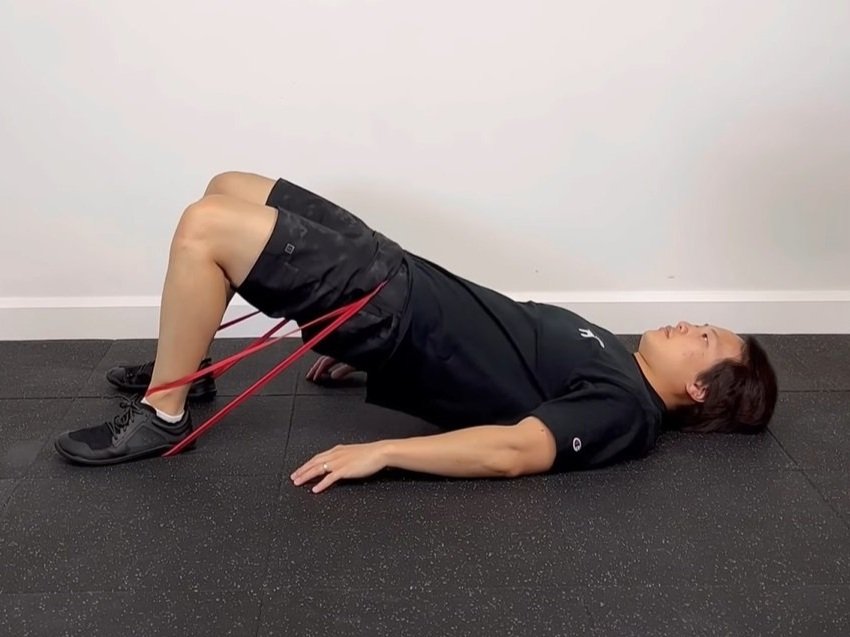
Glute bridges with mini bands transform a basic exercise into a glute-building powerhouse by adding targeted resistance where it matters most. Lie on your back with knees bent, feet flat, and band positioned just above your knees. Lift your hips toward the ceiling while simultaneously pressing your knees outward against the band. Squeeze your glutes forcefully at the top position—hold for 2 seconds—then lower with control.
Progress From Beginner to Advanced Bridge Variations
- Standard bridge: 3 sets of 15 reps for foundational strength
- Single-leg bridge: Lift one foot off floor while bridging (10 reps per side)
- Weighted bridge: Place dumbbell across hips for advanced users
The key to maximizing results while learning how to use mini resistance bands for glute bridges lies in the mind-muscle connection—focus entirely on glute contraction rather than how high your hips rise. Perform bridges at the beginning of your workout when your glutes are fresh for maximum activation. You’ll notice significant improvements in daily activities like standing up from chairs or climbing stairs within 3-4 weeks of consistent practice.
Intensify Glute Activation with Wide Bridge Pulses
Wide bridge pulses add metabolic stress to your glute workout by maintaining constant tension through small, controlled movements. After lifting into the bridge position, widen your knees against the band’s resistance and begin pulsing your hips upward in 2-inch increments. Each pulse should be slow and deliberate—1 second up, 1 second down—while maintaining maximum glute contraction.
Complete 3 sets of 20 pulses without lowering your hips between repetitions. The burn you feel in your glutes and outer thighs indicates effective muscle engagement. If your hamstrings fatigue before your glutes, consciously focus on squeezing the glute muscles throughout each pulse. This exercise works exceptionally well as a finisher after standard glute bridges, taking your glutes to complete exhaustion for maximum growth stimulus.
Correct Fire Hydrant Form for Hip Mobility and Strength
Fire hydrants target the often-neglected gluteus medius—the muscle responsible for pelvic stability during walking and running. Position yourself on hands and knees with band around upper thighs. Keeping your core tight and back flat, lift one knee outward to the side (like a dog at a fire hydrant) while maintaining 90-degree bend at the knee. Lower with control and repeat.
Key Fire Hydrant Technique Markers
- Spinal alignment: Maintain neutral spine throughout—no arching or rounding
- Range of motion: Lift knee only as high as you can without shifting hips
- Controlled tempo: 2 seconds up, 2 seconds down for maximum muscle time under tension
Perform 3 sets of 15 repetitions per side as part of your warm-up routine. You’ll know you’re performing fire hydrants correctly when you feel intense activation along the side of your hip—not in your lower back. Consistent practice improves not only hip strength but also reduces the risk of knee injuries during athletic activities by stabilizing the pelvis.
Build Consistent Results with Mini Band Training Principles
Maximize your mini band results by following these evidence-based training principles. Complete workouts 3-4 times weekly with at least one rest day between sessions to allow muscle recovery. Always begin with lighter resistance to activate target muscles before progressing to heavier bands. Focus on perfect form rather than resistance level—muscle growth comes from proper activation, not just heavy resistance.
Mini Band Progression Roadmap
- Weeks 1-2: Master form with light resistance (15-20 reps per set)
- Weeks 3-4: Increase to medium resistance (12-15 reps per set)
- Weeks 5+: Incorporate heavy resistance (8-12 reps per set) with advanced variations
Track your progress by noting when exercises become easier—this signals it’s time to increase resistance or add sets. The true power of learning how to use mini resistance bands lies in their versatility; combine them with bodyweight exercises for complete lower body development anywhere, anytime. Consistent application of these techniques delivers visible improvements in strength, muscle tone, and functional movement within just 6 weeks.


