
Circle resistance bands have revolutionized home fitness by offering a portable, joint-friendly alternative to traditional weights. These looped elastic bands provide variable resistance that increases as you stretch them, challenging your muscles throughout the entire range of motion in ways that dumbbells simply cannot match. Whether you’re a beginner setting up your first home gym or a seasoned athlete looking to add versatile equipment to your training arsenal, learning how to use circle resistance bands properly opens up hundreds of exercise possibilities for every major muscle group. This comprehensive guide walks you through essential techniques, specific exercises, and programming strategies so you can maximize your results with this affordable, travel-friendly fitness tool.
Configure Your Circle Resistance Band for Maximum Effectiveness

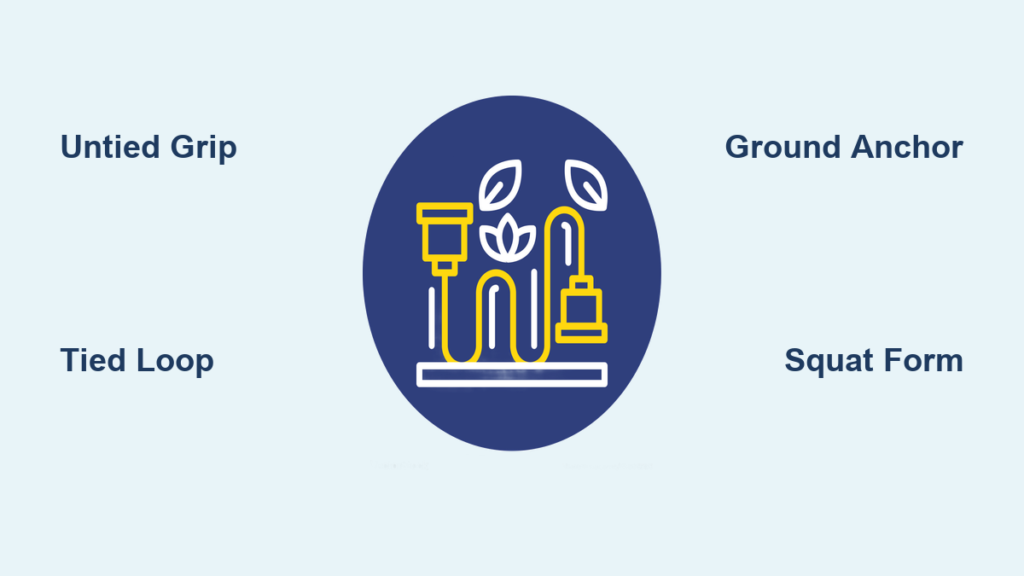
Proper band configuration determines whether an exercise feels effective or frustrating, so mastering the two main setups—untied and tied—gives you access to the band’s full potential.
Untied Configuration for Upper Body Work
Leave the ends of your resistance band free when performing pulling and curling movements for your arms, shoulders, and back. Grip the band in its center with your hands positioned roughly one foot apart—this distance creates your baseline resistance level. The closer together you place your hands, the more challenging the exercise becomes because you’re working a shorter section of band that must stretch further to complete the movement. This adjustability means you can customize difficulty on the fly without switching to a different band or adding weight.
When performing upper body exercises with the untied configuration, your grip creates the anchor point while your arms direct the force. The smooth, continuous resistance increases as you extend your arms further from your body, creating a different training stimulus than free weights where resistance follows gravity’s constant pull.
Tied Configuration for Lower Body Focus
Securely knot the two ends of your resistance band together when targeting your legs, hips, and glutes. The knot must hold firm throughout your entire workout session—give it a firm tug before beginning to ensure it won’t come undone mid-exercise. Once tied, the band forms a stable circular loop that wraps around your legs or ankles and maintains consistent tension throughout squatting, lunging, and walking movements.
With the band properly tied and positioned around your ankles or thighs, you should be able to stand with your feet hip-width apart without the band falling down or losing shape. This stable loop enables exercises like lateral walks, squats, and hip thrusters where the band needs to maintain continuous pressure against your legs throughout the entire movement.
Ground Anchoring Technique
Some exercises require you to place the resistance band on the floor and stand on it, using your body weight to create the anchor point. Position your feet shoulder-width apart with equal amounts of band material extending on each side of your body. This centering prevents the band from sliding toward one foot during exercises and ensures balanced resistance distribution across both legs. When standing on the band, your feet create the anchor while your hands grip the ends and direct the force for movements like hip thrusters and deadlifts.
Upper Body Exercises That Build Real Strength
The upper body section of your resistance band training includes exercises that target your back, shoulders, arms, and chest, each requiring proper form to maximize effectiveness while preventing injury.
Band Pull for Posture Correction
Stand holding the band’s center with your hands about one foot apart, arms extended straight in front of you at shoulder height. Pull your hands apart while focusing on squeezing your shoulder blades together as if trying to hold a pencil between them. Keep your shoulders dropped away from your ears throughout the movement—tension in your neck indicates compensation that reduces back muscle engagement. Slowly return your hands to the starting position to complete one repetition.
This exercise targets your rhomboids, middle trapezius, and rear deltoids—muscles critical for maintaining upright posture and preventing the forward shoulder position that develops from desk work. Pro tip: The closer you position your hands on the band, the more challenging the exercise becomes, allowing you to progressively increase difficulty.
Bent-Over Row for Back Development
Stand on the band with your feet hip-width apart, holding one end in each hand with palms facing inward. Hinge forward at your hips about 30 degrees while keeping your back flat and arms hanging straight beneath your shoulders. Bend your elbows to pull the band toward your chest, keeping your elbows close to your body so they skim your sides during the pulling motion. This strict form ensures your back muscles do the work rather than momentum from swinging your arms.
Common mistake to avoid: Don’t round your back during this movement. If you feel your spine curving, reduce the resistance by widening your hand position on the band.
Lower Body Exercises That Transform Your Physique

Lower body training with circle resistance bands allows you to target your glutes, thighs, and hips with exercises that improve both strength and functional movement patterns.
Squat with Banded Resistance
Loop the band around both ankles and stand with feet shoulder-width apart, toes slightly turned out. Lower into a squat by bending your knees and pushing your hips back, keeping your weight in your heels so you can always see your toes throughout the descent. Maintain an engaged core, lifted chest, and flat back as you descend, then push through your heels to stand back up.
Why it works: The band creates lateral resistance that forces your hip abductors and adductors to work harder maintaining proper knee alignment throughout the squat. Your glutes and quadriceps receive enhanced activation because they must overcome both the band resistance and maintain form against the outward pull on your legs.
Lateral Walk for Hip Stability
Loop the band around both ankles and bend your knees into a quarter-squat position. Take a giant step to the right with your right foot, then follow with your left foot. Continue taking six steps in one direction while maintaining your quarter-squat position, then reverse direction and take six steps back to your starting point.
Time-saving tip: Complete this exercise while watching TV or listening to a podcast—just maintain proper form throughout. This exercise is particularly effective for strengthening your gluteus medius and minimus, which play critical roles in stabilizing your pelvis during single-leg activities.
Core Exercises That Create Functional Strength
Core training with resistance bands goes beyond traditional crunches to develop the stabilizers, obliques, and hip muscles that create a strong, functional midsection.
Glute Bridge with Banded Resistance
Lie on your back with knees bent, feet flat on the floor hip-width apart, and hands at your sides. Loop the band around your thighs just above your knees. Squeeze your glutes and abdominals while pushing through your heels to lift your hips until your body forms a straight line from shoulders to knees. Hold this position for one second while keeping your knees from collapsing inward or falling outward.
Visual cue: Imagine trying to spread the band apart with your knees throughout the movement. This mental image helps maintain proper form and maximizes glute activation.
Lateral Leg Raise for Obliques and Hips
Lie on your side and loop the band around your ankles. Extend both legs straight, stacking one leg on top of the other. Slowly lift your top leg while keeping it straight and engaging your core. Raise until just before your lower back begins to arch—typically about one to two feet off the ground—then slowly lower back to the starting position.
Difficulty adjustment: For an easier version, bend your bottom leg for stability. For a harder version, add ankle weights or increase the height of your lift.
Build Effective Workouts in Minimal Time
Structuring your resistance band training appropriately ensures you get the most benefit from your workouts while allowing adequate recovery between sessions.
Set and Repetition Guidelines for Busy Schedules
For a comprehensive 40-minute full-body workout, complete 12 repetitions of each exercise for two sets, resting 30 to 60 seconds between sets as needed. If time is limited, a 20-minute workout using one set per exercise still provides effective stimulus for building strength and endurance.
Pro tip: When traveling, perform circuit training—complete one set of each exercise back-to-back with minimal rest, then repeat the circuit one more time for a complete workout in just 15 minutes.
Breathing and Core Engagement for Maximum Results
Exhale during the exertion phase of each exercise—when pulling the band during rows, standing up during squats, or lifting during leg raises—and inhale during the return phase. This breathing pattern helps maintain intra-abdominal pressure that stabilizes your spine and protects against injury.
Expert note: Engaging your core means actively contracting your abdominal muscles to create a stable midsection before and during each movement. The constant tension from resistance bands makes core engagement especially important, as your abs work throughout each set rather than just during specific “core exercises.”
Essential Warm-Up and Cool-Down Protocol
Prepare your body by spending five minutes on light cardiovascular activity like marching in place or gentle jumping jacks. This warm-up elevates your heart rate and increases blood flow to your muscles. After your workout, spend five minutes stretching the muscles you worked while they’re warm to promote recovery and prevent tightness.
Time estimate: The complete workout with warm-up and cool-down takes just 30 minutes—perfect for busy schedules while delivering maximum results from properly using your circle resistance bands.
Maximize Your Training Results with Progressive Overload
Circle resistance bands offer remarkable versatility that allows you to train effectively anywhere, yet their simplicity belies their effectiveness for building real strength and muscle. Start with lighter resistance bands and focus on perfect form—once you’ve mastered the movements and built a foundation of strength, progressively challenge yourself with heavier bands and more sets to continue making gains over months and years of consistent training. The key to mastering how to use circle resistance bands effectively is understanding that proper technique trumps resistance level every time. With these exercises and programming strategies, you’re equipped to build a stronger, more functional body using just one piece of affordable, portable equipment.


