
Loop resistance bands have revolutionized home fitness routines by offering portable strength training that rivals traditional gym equipment. These versatile rubber or fabric loops provide consistent tension throughout every movement, challenging your muscles in unique ways that free weights cannot match. Whether you’re recovering from an injury, building foundational strength, or enhancing athletic performance, mastering loop resistance bands unlocks powerful training opportunities anywhere—your living room, office, or even while traveling.
This comprehensive guide delivers practical strategies for maximizing your resistance band workouts. You’ll learn how to select appropriate resistance levels, execute foundational exercises with proper form, target specific muscle groups effectively, and create complete training routines that deliver real results. By the end, you’ll transform a simple rubber loop into a sophisticated strength-training tool that fits seamlessly into your fitness journey.
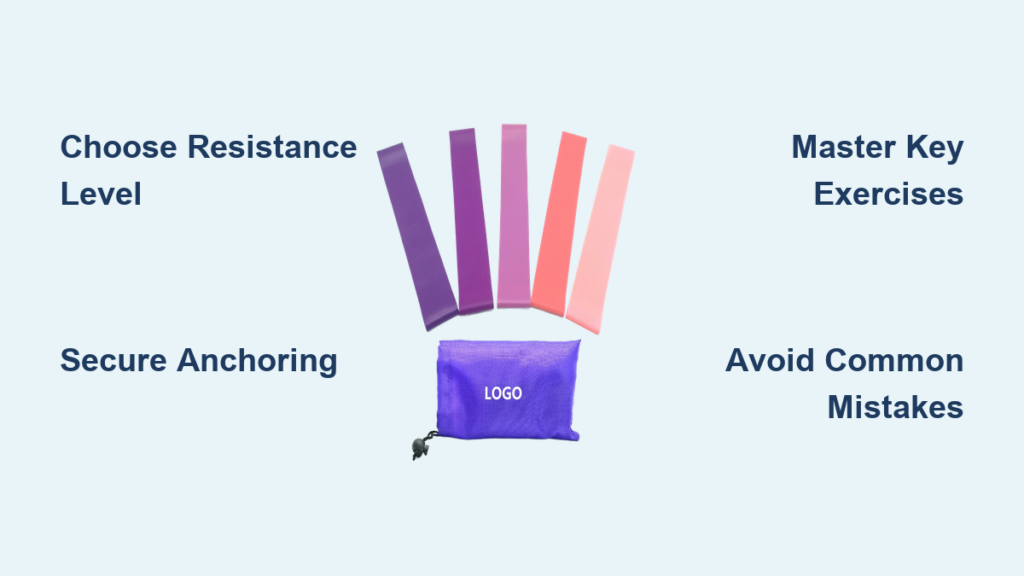
Select Your Optimal Resistance Level
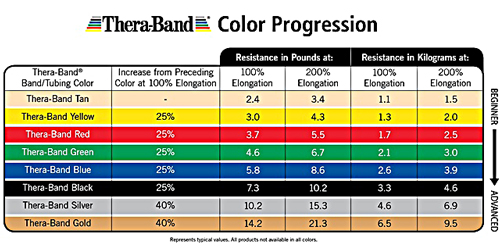
Choosing the right resistance band prevents frustration and maximizes training effectiveness. Bands typically follow a color-coding system where lighter colors (yellow, green) indicate lower resistance suitable for beginners and rehabilitation, while darker colors (black, purple) provide heavier resistance for advanced strength work. The critical principle to understand is that resistance increases proportionally as you stretch the band—double the length means approximately double the tension.
Test potential bands before committing to ensure proper challenge. Perform a basic squat or row movement with each candidate band, assessing whether the tension adequately challenges your muscles without compromising form. If you can complete 15-20 repetitions with perfect technique while barely feeling muscle fatigue, the band is too light. Conversely, if you struggle to complete 5 reps or experience joint strain, opt for lighter resistance.
Maintain multiple resistance levels for comprehensive training. Smaller muscle groups like shoulders and arms typically require lighter resistance than larger groups like glutes and legs. Having light, medium, and heavy bands allows you to match resistance precisely to each exercise and muscle group, ensuring optimal stimulus without overexertion.
Prepare for Safe and Effective Training
Thorough band inspection prevents dangerous accidents during workouts. Before each session, run your fingers along the entire band length, feeling for thin spots, nicks, or visible damage. A snapped band during an intense movement can cause serious injury or property damage. Replace any band showing signs of wear immediately—safety should always outweigh cost considerations.
Secure anchoring transforms exercise possibilities while ensuring safety. For upper-body exercises like rows or face pulls, use door anchors that slip securely over doorframes or wrap anchor straps around sturdy poles. Always test anchor stability before applying full resistance; a shifting anchor during a challenging set creates hazardous conditions. For lower-body exercises like squats and hip thrusts, simply step on the band or position it around your thighs or ankles without additional anchoring.
Position bands correctly on your body to maximize muscle engagement and prevent slippage. For lower-body work, place the band just above your knees for optimal glute activation during squats and bridges. Higher placement loses tension during deep ranges of motion, while lower placement may slip during movement. For upper-body exercises, grip the band with hands positioned shoulder-width apart unless the exercise specifically requires wider or narrower grip.
Execute Foundational Upper-Body Exercises
Master the band pull-apart to develop critical upper-back strength and combat poor posture. Stand with feet shoulder-width apart, arms extended in front of your chest at shoulder height, gripping the band with hands slightly narrower than shoulder width. Pull the band apart until your arms extend fully to your sides, squeezing your shoulder blades together forcefully. Maintain straight arms throughout—bending elbows shifts focus to your biceps. Complete 3 sets of 12-15 repetitions with controlled movement, emphasizing the contraction rather than speed.
Build back thickness with banded rows that counteract desk-related hunching. Sit with legs extended, loop the band around your feet, and grip each end with hands positioned just outside your hips. Lean back slightly while maintaining tall posture, then pull the band toward your waist, bending elbows and squeezing shoulder blades together. Focus on initiating the pull from your back muscles rather than simply bending your arms. Complete 3 sets of 15 repetitions, emphasizing the mind-muscle connection with your lats.
Strengthen your rotator cuff with shoulder external rotations to improve shoulder stability. Bend your elbows to 90 degrees, holding them at your sides with forearms extended forward. Grip the band with both hands, keeping elbows pinned to your ribs. Rotate your forearms outward against the band’s resistance until your hands align with your shoulders. Perform 3 sets of 20 repetitions with light resistance that allows perfect form—jerky motions indicate excessive resistance.
Develop Lower-Body Power with Band Training
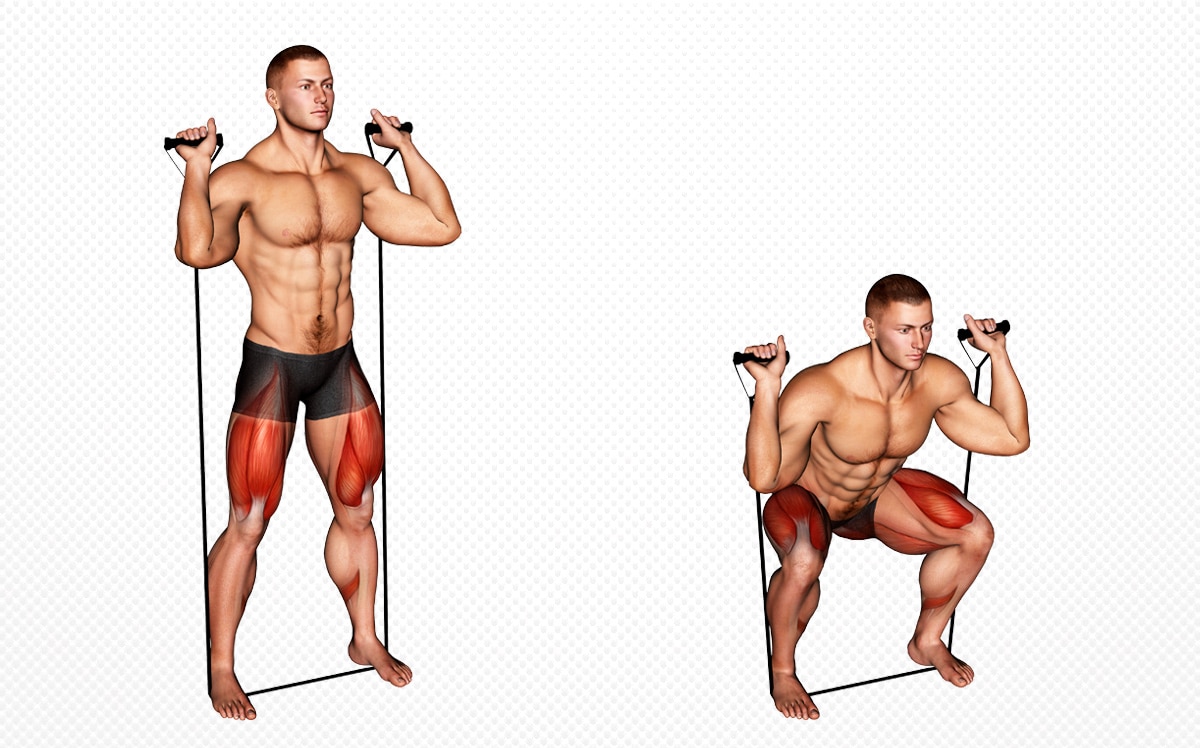
Transform basic squats with banded resistance for comprehensive leg development. Stand on the band with feet shoulder-width apart, gripping the band at your shoulders with elbows pointed down. Descend by pushing your hips back and bending your knees, keeping your chest up and core engaged. The band adds constant resistance throughout the entire movement, particularly challenging in the bottom range where momentum usually assists. Complete 4 sets of 12-15 repetitions with controlled tempo.
Amplify glute activation with banded hip thrusts that specifically target your gluteus maximus. Sit with your upper back against a sturdy surface, loop the band around your hips just above your knee level, and extend your legs forward with feet planted. Drive your hips upward while squeezing your glutes, creating a straight line from shoulders to knees at the top. The band adds horizontal resistance that forces your glutes to work harder than bodyweight alone. Complete 3 sets of 12-15 repetitions with a two-second squeeze at the top.
Build hip stability with monster walks that develop gluteus medius strength critical for athletic performance. Place the band just above your knees and assume an athletic stance with feet shoulder-width apart and slight knee bend. Step your right foot laterally, followed by your left foot, maintaining constant tension and stance width. Take 10 steps in one direction, then reverse direction. Perform 3 circuits of 10 steps each direction, focusing on consistent outward pressure against the band.
Target Your Core Effectively
Develop anti-rotation strength with banded pallof presses that protect your spine during everyday movements. Anchor the band at chest height, grip the handle with both hands, and step back to create tension. Press the handle straight out from your chest while maintaining hip and shoulder alignment—no rotation or tilting allowed. Perform 3 sets of 10-12 repetitions per side, emphasizing stability over speed.
Challenge rotational power with banded standing rotations that build functional core strength. Stand with feet shoulder-width apart, anchor the band at waist height to one side, and grip the handle with both hands. Rotate your upper body away from the anchor point, allowing your hips to follow while maintaining athletic stance. Control the return to the starting position rather than letting the band snap you back. Complete 3 sets of 12-15 rotations per side.
Avoid Common Training Mistakes
Prevent grip failure from sabotaging your back exercises by using techniques that maintain focus on target muscles. When your grip weakens, you naturally recruit shoulder muscles to assist, transforming effective back work into shoulder-dominant movements. Counter this by wrapping the band around your hands multiple times, using mixed grips when possible, or selecting bands with built-in handles.
Maintain proper joint alignment throughout every repetition to maximize effectiveness and prevent injury. Keep knees tracking over toes during lower-body exercises rather than caving inward. Maintain neutral spine position during pulls and presses, avoiding excessive arching or rounding. When form deteriorates, end the set—quality always trumps quantity in resistance training.
Master breathing patterns that support both performance and safety. Exhale during the concentric (working) phase of each repetition and inhale during the eccentric (lowering) phase. This rhythm maintains core stability while preventing dangerous blood pressure spikes. Practice breathing separately from movement until the pattern becomes automatic.
Create Complete Band Workouts

Structure effective full-body sessions by balancing muscle groups and movement patterns. A beginner routine might include band pull-aparts (3×15), banded squats (3×12), banded hip thrusts (3×15), monster walks (3×10 steps each direction), and pallof presses (3×10 per side). This 30-35 minute workout hits every major muscle group while maintaining manageable session length.
Progress systematically by increasing resistance, repetitions, or time under tension. When exercises become too easy, switch to thicker bands, add additional bands, or slow your tempo—taking three seconds to lower through each repetition increases challenge without changing resistance. Document your workouts to track progress and identify when it’s time to advance.
Optimize rest intervals based on your training goals. For strength development, rest 2-3 minutes between sets to allow near-complete recovery. For muscular endurance, rest 30-60 seconds to maintain elevated heart rate and challenge fatigue resistance. Shorter rest intervals also increase cardiovascular demands, creating efficient cardio-strength hybrid sessions.
Maintain Your Equipment for Longevity
Store bands properly to maximize lifespan. Keep them away from direct sunlight, extreme temperatures, and sharp objects in a drawer, closet, or dedicated storage bag. Never store bands stretched or under tension—relaxed storage preserves elasticity. Wipe bands with a damp cloth after sweaty workouts to remove skin oils that accelerate degradation.
Inspect bands before each workout for discoloration, sticky texture, small cracks, or loss of elasticity. Most quality bands last 3-6 months with regular home use, though frequent training may require earlier replacement. When bands no longer maintain consistent resistance or show visible damage, replace them immediately—the cost of new bands pales compared to injury costs.
Loop resistance bands offer remarkable versatility in a compact, affordable package. By selecting appropriate resistance, mastering fundamental exercises, maintaining proper form, and training consistently, you build strength and conditioning that transfers to every aspect of active life. Start with basic movements, progress systematically, and let these simple tools meet you wherever your fitness journey leads.


