
Nothing feels more frustrating than completing a leg workout only to realize you haven’t properly activated your glutes or felt your quads burning. Resistance bands solve this problem by providing constant tension throughout every movement, forcing your leg muscles to work harder from start to finish. Whether you’re recovering from an injury, training at home, or looking to enhance your gym routine, learning how to use resistance bands for legs delivers impressive strength gains without expensive equipment. This guide reveals the exact exercises, techniques, and programming strategies that transform your lower body using nothing but affordable, portable resistance bands.
The magic of resistance bands lies in their ability to challenge your muscles at every point in the movement—something free weights can’t do. As you stretch the band, the resistance increases, perfectly matching your body’s natural strength curve. This means your muscles work hardest where they’re strongest, creating maximum growth stimulus. Plus, with resistance bands for legs, you can target specific muscle groups like the often-neglected hip abductors that give you that sculpted look. In just minutes a day, you’ll build functional strength that improves everything from your squat form to your running performance.
Selecting the Right Resistance Band for Leg Exercises
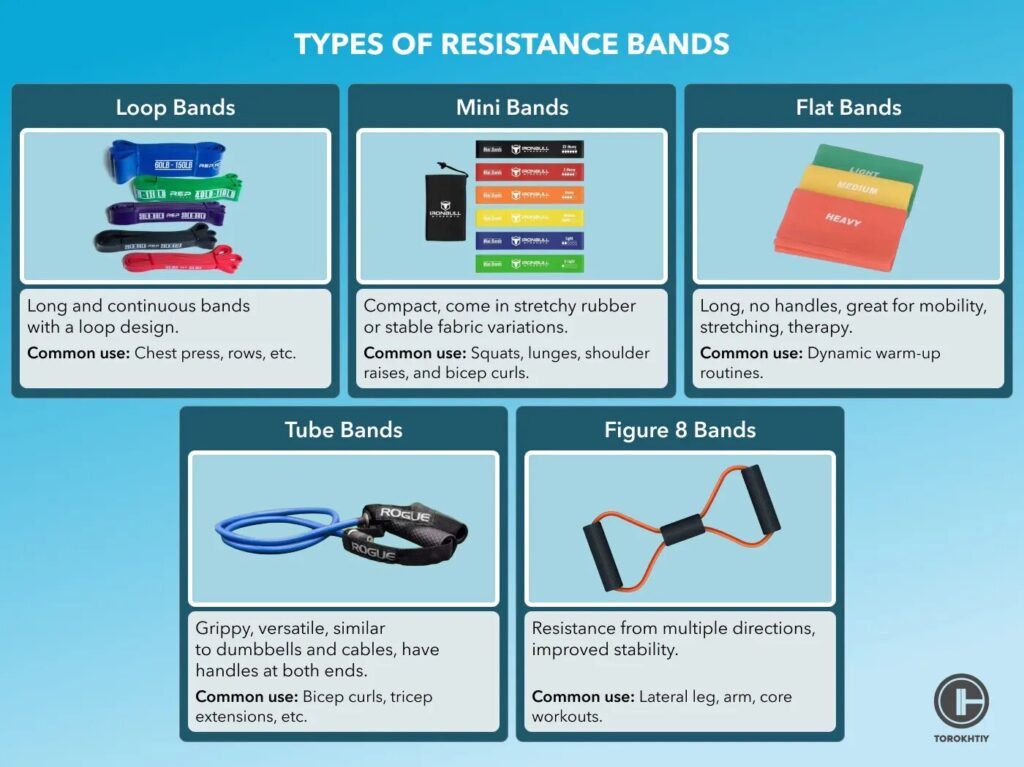
Choosing the appropriate band type determines whether your leg workout delivers results or leaves you frustrated. Not all resistance bands serve the same purpose, and using the wrong one for specific leg exercises compromises effectiveness and safety.
Loop bands create constant tension around your thighs during hip-focused movements like glute bridges and monster walks. Their circular design stays securely positioned without slipping, which is critical when performing lateral movements that target your outer hips. Available in light, medium, heavy, and extra-heavy resistances, loop bands allow progressive overload as your strength improves—start with medium resistance for most leg exercises unless you’re a beginner.
Flat bands with handles provide versatility for standing leg exercises requiring greater range of motion. Anchor these bands to a door or sturdy object to perform standing leg curls and kickbacks that isolate your hamstrings effectively. The handles reduce hand fatigue during extended sets and give you multiple grip options to target different muscle fibers. For leg-specific work, choose bands with 30-50 pounds of resistance to adequately challenge your posterior chain.
Mini bands specialize in hip activation and warm-ups with their compact, thick design. Despite their small size, they generate substantial resistance for lateral movements that wake up your glutes before heavier training. Keep a mini band in your work bag for quick activation sets before any leg workout—just 2 sets of 20 monster walks significantly improves muscle engagement during subsequent exercises.
Master These Essential Quad-Building Band Exercises
Your quadriceps respond exceptionally well to resistance band training when you prioritize full range of motion and proper muscle engagement over simply completing repetitions.
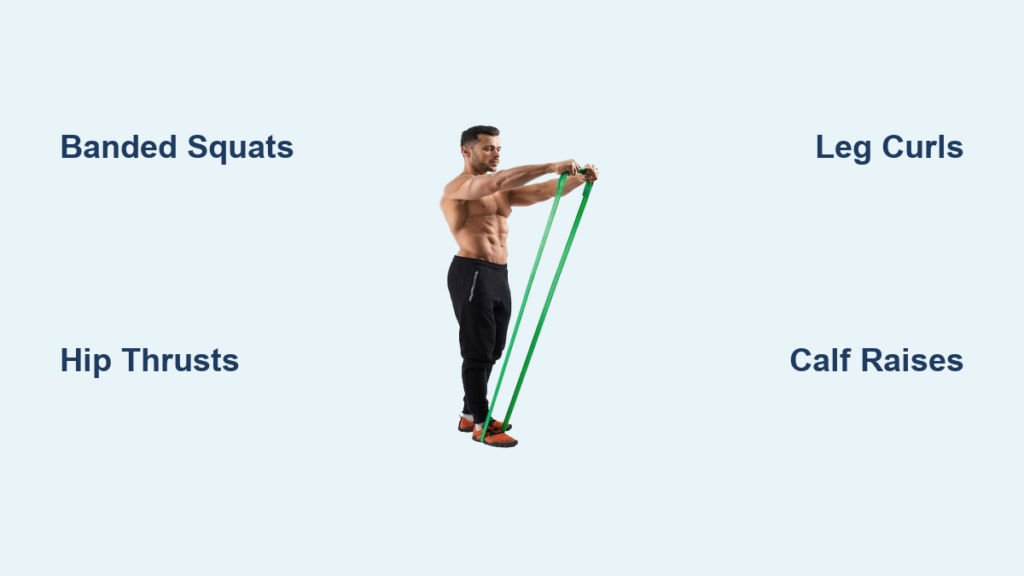
Banded squats force your quads to work harder throughout the entire movement compared to bodyweight squats alone. Stand on the band with feet shoulder-width apart, holding both handles at shoulder height. As you lower into a full squat, push your knees outward against the band’s resistance to activate your glutes while targeting your quads. Drive powerfully through your heels to return to standing, maintaining constant tension in the band. Perform 3 sets of 12-15 reps with controlled descents and explosive ascents for maximum quad development.
Banded leg extensions isolate your quads through their complete range of motion—an exercise typically requiring expensive gym machines. Anchor the band behind a sturdy object at knee height, sit on the floor facing away, and loop the band around the top of your foot. Extend your leg against resistance while keeping your upper body stable, holding the contracted position for one second before slowly returning. This movement particularly benefits those seeking defined thigh muscles; complete 3 sets of 12-15 reps per leg with a 2-second contraction hold.
Banded lateral squats challenge your quads while simultaneously engaging your hip adductors. Stand on one end of the band with your left foot, hold the other end with your left hand, and perform a deep squat toward your left side while keeping your right leg straight. The unilateral loading ensures both legs develop proportionally while improving hip mobility. Complete 3 sets of 10 reps per side with perfect form before increasing resistance.
Transform Your Glutes and Hamstrings with These Band Moves
Strong posterior chain muscles improve athletic performance, enhance posture, and reduce injury risk more effectively than almost any other training focus. Resistance bands create the perfect tension curve for developing powerful glutes and hamstrings.
Banded hip thrusts deliver maximum glute activation that surpasses traditional bodyweight versions. Sit with your upper back against a bench or sturdy surface, loop a resistance band just above your knees, and drive your hips upward while squeezing your glutes hard at the top. The band adds constant tension throughout the movement, especially challenging your glutes at full contraction. Perform 3-4 sets of 10-12 reps with a two-second hold at the peak position for optimal muscle growth.
Banded deadlifts build functional posterior chain strength that transfers directly to real-world activities. Stand on the band with feet hip-width apart, hold the handles with arms extended, and hinge at your hips while keeping your back flat and knees slightly bent. The band creates resistance that peaks at full extension, perfectly matching where your hamstrings and glutes generate maximum force. Complete 3 sets of 10-12 reps with controlled movement through the entire range of motion.
Standing leg curls isolate your hamstrings without gym equipment. Attach the band to a low anchor point behind you, face away, and curl one heel toward your glutes while maintaining upright posture. This single-leg movement corrects strength imbalances between limbs and allows concentrated effort on each hamstring. Perform 3 sets of 12-15 reps per leg with slow, controlled movement for maximum muscle engagement.
Target Your Calves for Complete Lower Leg Development

Most people neglect their calves, but resistance bands provide the perfect solution for developing strong, defined lower legs without specialized equipment.
Seated banded calf raises maintain constant tension throughout the entire movement, which is crucial for calf development. Sit on the floor with legs extended, loop the band around the ball of your foot, and hold the handles while pointing your toes away from you. Rise onto your toes as high as possible, hold briefly, and lower with control. Perform 4 sets of 20-25 reps per leg to achieve the high volume calves require for growth.
Standing banded calf raises allow for greater resistance while maintaining proper form. Stand on the band with both feet, hold the handles at your hips, and rise onto your toes. Alternate between parallel and turned-out foot positions to target different calf heads for complete development. Complete 4 sets of 20 reps with a 2-second pause at the top of each rep.
Avoid These Common Resistance Band Leg Mistakes
Even dedicated trainees sabotage their progress through technique errors that reduce effectiveness or invite injury.
Using incorrect resistance level wastes your training time. Bands that are too light fail to challenge your muscles sufficiently, while excessively heavy bands compromise your form. Select resistance that allows perfect technique with the final 2-3 repetitions feeling challenging but achievable. As you grow stronger, immediately progress to heavier bands rather than continuing with inadequate resistance.
Partial range of motion dramatically reduces exercise effectiveness. Many users perform half-reps that never fully stretch or contract the target muscles. Control the band through complete movements, allowing adequate stretch at the start and maximum contraction at the finish. This approach builds flexibility alongside strength and delivers superior results.
Ignoring muscle imbalances perpetuates asymmetries that affect performance and increase injury risk. Your dominant side naturally wants to do more work, but resistance band training should correct rather than reinforce these differences. Perform unilateral exercises with careful attention to matching reps and effort between sides.
Sample Weekly Resistance Band Leg Routine
Structure your training for balanced development with this proven weekly schedule:
Monday: Power Day
– Banded monster walks: 3 sets of 20 steps each direction
– Banded squats: 4 sets of 12 reps
– Banded hip thrusts: 3 sets of 15 reps
– Standing leg curls: 3 sets of 12 reps per leg
– Seated calf raises: 4 sets of 20 reps
Thursday: Endurance and Definition
– Lateral squats: 3 sets of 12 reps per side
– Banded deadlifts: 4 sets of 10 reps
– Single-leg Romanian deadlifts: 3 sets of 10 reps per leg
– Banded leg extensions: 3 sets of 15 reps per leg
– Standing calf raises: 4 sets of 25 reps
Rest 60-90 seconds between sets and ensure proper form on every repetition. Increase resistance as soon as you can complete all sets with perfect technique.
Pro Tips to Maximize Your Band Training Results
Progress systematically by adding repetitions before increasing resistance, then adding sets before trying heavier bands. This graduated approach builds work capacity and prevents injury.
Anchor securely before every exercise to prevent dangerous sudden releases. Test anchor points by pulling firmly on the band before beginning movements.
Track your workouts to ensure you’re genuinely improving rather than going through the motions. Note the band resistance, reps, and sets for each exercise.
Transform Your Legs Without a Gym
Resistance bands for legs offer an incredibly effective solution for building strong, defined lower body muscles anywhere, anytime. By selecting the right band type, mastering proper technique on key exercises, and following a structured program, you’ll see noticeable improvements in strength and muscle tone within weeks. The secret lies in consistent practice with progressive challenge—start with the exercises outlined here, perfect your form, and gradually increase difficulty as you grow stronger. Your journey to powerful, sculpted legs begins with just one resistance band and the knowledge of how to use it properly.


