

Have you ever grabbed your resistance bands for a workout only to find they’ve become painfully tight and difficult to stretch? You’re not alone. Many fitness enthusiasts struggle with resistance bands that seem to tighten over time, making exercises uncomfortable or even impossible. This frustrating issue can derail your entire workout routine and leave you wondering what went wrong with equipment that should be reliable. Knowing how to loosen resistance bands properly can save you money, prevent workout interruptions, and extend the life of your fitness equipment.
Resistance bands are essential tools for strength training, rehabilitation, and mobility work, but their elastic properties can change unexpectedly. When bands become too tight, your exercises lose effectiveness as proper form becomes compromised. The good news is that most cases of overly tight resistance bands can be corrected with simple, effective techniques that restore their original flexibility. In this guide, you’ll discover proven methods to safely loosen resistance bands without damaging them, along with crucial maintenance tips to prevent future tightening issues.
Why Resistance Bands Suddenly Feel Too Tight
Understanding why your resistance bands tighten unexpectedly helps you address the root cause rather than just treating symptoms. Many users mistakenly believe their bands have magically increased resistance, when in reality specific environmental and usage factors have altered their elastic properties.
Temperature Extremes That Alter Band Tension
Resistance bands made from natural latex rubber significantly change tension based on temperature exposure. When stored in cold environments below 60°F (15°C), the rubber molecules contract, making bands feel unnaturally stiff and difficult to stretch. Conversely, excessive heat above 85°F (29°C) can cause temporary softening followed by accelerated degradation. The ideal storage temperature range for maintaining consistent resistance is between 65-75°F (18-24°C). If you’ve recently moved your bands from a garage, basement, or car trunk to your workout space, temperature shock could be the culprit behind their sudden tightness.
Improper Storage Methods That Cause Permanent Tightening
How you store resistance bands dramatically impacts their longevity and performance. Rolling bands tightly into storage containers creates permanent creases that restrict elasticity in those areas. Hanging bands on sharp hooks causes localized stress points that eventually lead to uneven tension. The most damaging practice is storing bands while they’re stretched, such as leaving them looped around exercise equipment overnight. This constant tension causes the rubber polymers to reorganize at a molecular level, resulting in permanently increased resistance. Proper storage in a relaxed, loosely coiled state prevents these issues.
Immediate Techniques to Loosen Overly Tight Resistance Bands
When you need to restore flexibility quickly before a workout, these immediate techniques provide noticeable improvement within minutes. These methods work by temporarily altering the molecular structure of the rubber to return it to its intended resistance level.
Warm Water Soak Restoration Method
This simple technique reverses cold-induced tightening in just 10 minutes. Fill a basin with warm (not hot) water at 100-110°F (38-43°C)—similar to bath temperature. Submerge your resistance bands completely for exactly 8 minutes, then remove and gently stretch them to 75% of their maximum length 5-6 times. The warmth relaxes the rubber polymers, allowing them to return to their normal configuration. Critical warning: Never use boiling water or microwaves, as temperatures above 120°F (49°C) will permanently damage the elastic properties. After treatment, dry bands thoroughly with a soft cloth before storing.
Manual Progressive Stretching Routine
For bands that feel stiff but aren’t severely tightened, a controlled stretching routine works wonders. Anchor one end securely and gradually stretch the band to 80% of its maximum length, holding for 20 seconds. Repeat this 8 times with 15 seconds of relaxation between stretches. On the ninth stretch, extend to 90% capacity and hold for 30 seconds. This method works by gently encouraging the rubber molecules to reposition without causing micro-tears. Pro tip: Perform this routine twice daily for two days for severely stiff bands, but stop immediately if you notice any thinning or discoloration.
Preventative Storage Solutions for Long-Term Flexibility

Preventing resistance band tightening is far more effective than trying to reverse it. Implement these storage techniques to maintain consistent resistance levels throughout your bands’ lifespan.
Optimal Storage Environment Specifications
Create a dedicated storage zone that maintains consistent conditions:
– Keep bands away from direct sunlight (UV rays degrade rubber)
– Maintain humidity between 40-60% (use a hygrometer to monitor)
– Store at least 3 feet away from heating/cooling vents
– Use breathable cotton bags instead of plastic containers
– Never store near chemical fumes like cleaning products or gasoline
Proper Coiling Technique for Maximum Longevity
How you coil your bands matters more than you might think. Follow this precise method:
1. Hold the band at both ends and gently shake out any twists
2. Create a loose loop about 12 inches in diameter
3. Continue coiling without tension until fully gathered
4. Secure with a soft fabric tie (never use rubber bands!)
5. Place in your designated storage area immediately
This technique prevents the molecular memory issues that cause permanent tightening. Bands stored this way maintain consistent resistance for 2-3 times longer than improperly stored counterparts.
Recognizing When Resistance Bands Need Replacement

Not all tightening issues can be reversed. Knowing when to replace rather than repair prevents dangerous workout situations and wasted effort.
Warning Signs of Irreversible Damage
Certain visual and performance cues indicate your bands have passed the point of safe restoration:
– Surface texture changes: Cracks, stickiness, or powdery residue
– Color inconsistencies: Darkened sections or uneven fading
– Performance issues: Bands that snap back unevenly or develop “weak spots”
– Odor changes: Strong chemical smell indicates rubber breakdown
Critical safety note: If your band shows ANY of these signs, stop using it immediately. Compromised bands can snap during use, causing serious injury to your face or eyes.
Cost-Benefit Analysis of Band Restoration
Consider these factors before investing time in restoration:
– New bands cost $10-$25 depending on quality and resistance level
– Restoration efforts typically take 2-3 days for noticeable improvement
– Success rate for severely tightened bands is only 60-70%
– Safety risks increase with each restoration attempt on damaged bands
For most users, replacing bands that show significant damage proves more cost-effective and safer than repeated restoration attempts.
Selecting the Right Resistance Level to Avoid Future Issues
Choosing appropriate resistance levels prevents the common mistake of purchasing bands that feel too tight from the start, eliminating the need for loosening techniques.
Testing Protocol Before Purchase
When buying new resistance bands, follow this verification process:
1. Stretch the band to shoulder-width while standing on it
2. You should be able to complete 12-15 controlled repetitions
3. The final reps should feel challenging but maintainable
4. After resting 2 minutes, you should complete 8-10 additional reps
Bands that feel impossible to stretch during this test will likely cause form breakdown and potential injury during actual workouts.
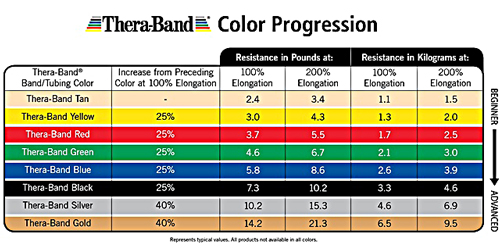
Understanding Progressive Resistance Systems
Quality resistance band sets follow standardized color-coding:
– Yellow: Light resistance (5-15 lbs) – ideal for rehabilitation
– Red: Medium resistance (15-30 lbs) – best for upper body
– Green: Heavy resistance (30-50 lbs) – suitable for lower body
– Blue: X-Heavy resistance (50-80 lbs) – advanced strength training
Start with lighter resistance than you think you need, especially if new to band training. You can always progress to heavier bands, but overly tight bands create unnecessary strain on joints.
Maintenance Habits for Consistent Band Performance
Implement these simple maintenance practices to keep your resistance bands performing optimally workout after workout.
Cleaning Methods That Preserve Elasticity
Clean your bands after every 5-6 uses with this safe technique:
– Mix 1 teaspoon mild soap with 1 cup lukewarm water
– Dip soft cloth and gently wipe entire band surface
– Rinse cloth with clean water and wipe again
– Air dry completely before storage
– Never use: Alcohol, petroleum products, or abrasive cleaners
Regular cleaning removes skin oils and dirt that accelerate rubber degradation.
Rotation System for Multiple Band Sets
If you own multiple resistance bands, implement this rotation schedule:
– Use different bands for upper vs. lower body workouts
– Allow 48 hours between uses for each band
– Keep a usage log to track frequency
– Rotate through your collection rather than relying on one favorite band
This system distributes wear evenly, preventing any single band from experiencing excessive stress that leads to tightening issues.
By implementing these techniques, you’ll maintain consistent resistance band performance while extending their useful lifespan. Remember that occasional tightening is normal with regular use, but with proper care and restoration methods, you can keep your bands performing like new for years. When bands eventually reach the end of their life, replace them promptly to maintain workout effectiveness and safety. The small investment in proper band care pays dividends through better workouts, improved results, and long-term savings on replacement equipment.


