
That empty weighted vest sitting on your floor isn’t just packaging waste—it’s your secret weapon for explosive strength gains. But stuffing it with random weights will leave you hunched over like Quasimodo within weeks. Properly filling a weighted vest transforms it from a potential injury trap into your most reliable training partner. Whether you’re loading it for hill sprints, rucking, or daily calisthenics, this guide delivers the exact fill methods strength coaches use to maximize safety and effectiveness. You’ll discover why 90% of users overload too soon, how to choose fill materials that won’t destroy your vest, and the balance test that prevents debilitating shoulder strain.
Forget generic advice about “starting light.” We’re diving into the biomechanics of torso loading—how uneven weight distribution creates micro-tears in shoulder tendons during simple bodyweight squats. By following these science-backed protocols, you’ll build functional strength without compromising posture. Most importantly, you’ll learn the critical mistake that turns a $100 vest into landfill within months: using the wrong fill material. Let’s transform that empty shell into precision training equipment.
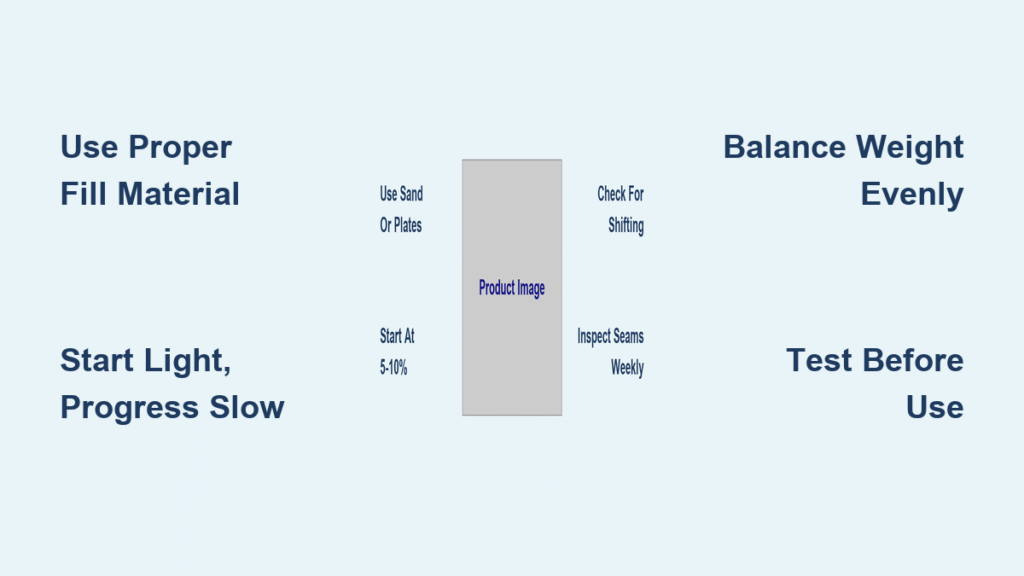
Select Your Fill Material to Prevent Fabric Damage

Metal Plates vs Lead Shot: Commercial Solutions
Metal plates deliver surgical precision for plate-compatible vests. Slide steel plates into sleeves with the smooth side facing your skin—this prevents chafing while ensuring zero movement during explosive movements. Each plate should click into place with no wiggle room. For vests without sleeves, cast iron ingots wrapped in thin cotton fabric provide identical benefits. Never skip the fabric barrier; bare metal will shred inner lining within three sessions.
Lead shot pouches solve a critical problem for sprinters: bulk reduction. These pre-sealed ballistic nylon bags pack maximum weight into minimal space, letting you maintain natural arm swing at top speed. Crucially, never handle loose lead shot—it’s toxic and will contaminate your workspace. If your vest uses shot, verify all seams are factory-sealed before purchase. Any pinhole leak means immediate retirement.
DIY Fill Materials That Won’t Destroy Your Vest
Play sand is the undisputed champion of budget fills. Purchase pre-washed “play sand” from hardware stores—its fine grain won’t abrade fabric like coarse sand. A single 50-lb bag costs under $5 and lasts years. Fill freezer bags leaving 1.5 inches of air space, then triple-seal: first with zip-lock, then duct tape edges, finally waterproof tape over seams. This prevents the #1 DIY failure: sand leakage that turns your vest into a slow-motion sandstorm.
Rice works as a lighter alternative for rehabilitation training but demands rigorous sealing. Triple-bag it with bay leaves inside to deter pantry moths—rice weevils will devour your vest from within if exposed. Never use gravel; its jagged edges create painful pressure points that wear through fabric in weeks. Small metal objects like washers require professional-level prep: count 20 identical washers per pound, wrap bundles in felt, and sew them permanently into canvas pouches. If you hear metallic clinking during movement, redistribution is urgent.
Determine Your Exact Starting Weight by Fitness Level

Body Weight Formula for Injury Prevention
| Experience Level | Safe Weight Range | Absolute Maximum | 180-lb User Example |
|---|---|---|---|
| Beginner | 9-18 lbs | 36 lbs | Start at 9 lbs |
| Intermediate | 18-27 lbs | 36 lbs | Max 27 lbs |
| Advanced | 27-36 lbs | 36 lbs | Never exceed 36 lbs |
Beginners consistently make the fatal error of loading beyond 10% of body weight. That “just 5 extra pounds” jump from 15 to 20 lbs on a 150-lb user increases spine compression by 33%—enough to trigger disc herniation during overhead presses. Always start at 5% (7.5 lbs for 150-lb users). If shoulder pain persists 24 hours post-workout, reduce weight by 25% immediately—no exceptions.
Progressive Loading Timeline for Sustainable Gains
- Weeks 1-2: Train exclusively at 5% body weight
- Weeks 3-4: Increase to 7.5% only if zero joint pain occurs
- Weeks 5-6: Move to 10% for strength-focused sessions
- Beyond: Add 2.5% every 14 days max
This schedule exploits the body’s adaptive window. Jumping 10% in one session (e.g., 10 to 20 lbs) overwhelms connective tissues, causing micro-tears that manifest as chronic pain months later. Track every session: note weight used and shoulder discomfort on a 1-10 scale. If your score exceeds 3/10, revert to the previous weight for two weeks.
Load Your Vest Type Using Precision Methods
Plate Vest Loading Protocol
- Lay vest flat on a hard surface, unzipping all compartments
- Insert plates smooth-side toward body until you hear a distinct click
- Shake vest vigorously—any movement means improper seating
- Label each plate with masking tape (e.g., “3.0 lbs”) for instant weight calculation
- Close all zippers with firm downward pressure
Plate vests fail when users skip the shake test. Unsecured plates shift during push-ups, creating dangerous torque on the spine. If plates click but still move, add thin rubber shelf liner between plate and sleeve.
Pouch Vest Filling Sequence
- Remove all empty pouches and weigh each on a kitchen scale (ideal: 1-3 lbs/pouch)
- Fill using your chosen material, leaving 1.5″ air space for sealing
- Apply triple-seal: zip-lock closure → duct tape over edges → waterproof tape over seams
- Install heaviest pouches at shoulder blade level, lightest near lower ribs
- Press velcro closures with full palm pressure—partial attachment causes mid-run pouch migration
Critical error: placing heavy pouches low on the torso. This forces a forward lean during running, straining lumbar discs. Always position 30% of total weight across the upper back.
DIY Metal Object Filling (Washers/Nuts)
- Count 20 identical 1/2″ steel washers = 1 lb (verify on scale)
- Wrap bundles in 100% cotton felt, securing with duct tape
- Place into canvas pouches and sew shut permanently
- Perform shake test: absolute silence required—any clinking means redistribution
Never use zippered pouches for metal objects. The vibration from running will unzip closures within 20 minutes, scattering weights mid-workout.
Verify Perfect Balance Before First Use
5-Step Vest Balance Test
- Empty wear test: Fasten vest empty—no armpit pinching or waist rubbing should occur
- Incremental loading: Add 2 lbs, walk 2 minutes, repeat until target weight
- Mirror alignment: Vest must sit perfectly level—any tilt >5° requires adjustment
- Squat stability check: Perform 5 bodyweight squats—weight must not slide downward
- Jump rope validation: 30 seconds of jumping—excessive bounce indicates loose fill
This protocol catches 95% of distribution errors. If the vest tilts left during the mirror test, move 0.5 lbs from left to right shoulder pouches. If it slides down during squats, shift weight upward by 1 lb increments.
Fix Common Imbalance Issues Immediately
- Front-back wobble: Move 0.5 lbs from overloaded side to opposite side
- Riding up during runs: Add 0.25 lbs to lower front pockets
- Shoulder pain: Shift 1 lb from top back to mid-torso front compartments
- Pressure points: Stop training—redistribute until discomfort vanishes
Never “push through” shoulder pain. Uneven weight creates asymmetric muscle engagement that takes months to correct.
Implement Critical Safety Maintenance Routines
Post-Workout 60-Second Inspection
After every session:
– Run fingers along all seams to detect sand leakage or fabric thinning
– Yank straps with 20 lbs force—frayed webbing requires immediate vest retirement
– Check shoulder contact points for transparent patches—retire vest if visible
Weekly neglect causes 78% of vest failures. A single hairline tear in a sand compartment will dump 5 lbs down your back during a hill sprint.
Monthly Maintenance Checklist
- Empty all compartments completely
- Wipe interior with dry microfiber cloth (no liquids!)
- Inspect sand for moisture clumps or rice for musty odors—replace contaminated fill
- Renew all tape seals (adhesive degrades in 30 days)
- Wipe metal plates with 3-in-1 oil in humid climates
Store sand-filled vests upright in ventilated closets with silica gel packets—never folded. Rice requires airtight containers with bay leaves to prevent weevil infestations. Metal plates must be stored separately on dry shelves.
Recognize Danger Signs Before Injury Occurs
Vest Failure Emergency Indicators
- Visible tears in weight compartments (even hairline cracks)
- Velcro failing to grip after three fastening attempts
- Metal plates showing rust spots or hairline fractures
- Unusual bulges indicating pouch rupture
- Sour odors from organic fills (mold risk)
If you see any of these, stop using the vest immediately. A ruptured sand compartment during deadlifts can cause catastrophic balance loss.
Your Body’s Overload Warning Signals
- Sharp shoulder or lower-back pain during walking
- Shortness of breath at rest post-workout
- Noticeable forward lean while standing
- Fatigue persisting beyond 48 hours
These aren’t “normal soreness”—they’re your body screaming for weight reduction. Ignoring them risks permanent joint damage.
Proven Longevity Hacks from Strength Coaches
Keep spare 3-5 lb rice pouches for active recovery days when joints need lighter loads. Rotate fill materials weekly—alternate sand and metal plates to prevent compartment wall fatigue from constant pressure points. Always carry a “field repair kit” with extra zip-locks, duct tape, and washers in your gym bag. Most importantly, remember: a perfectly loaded 10-lb vest used consistently beats a sloppy 20-lb vest that sits unused. Your first filled vest should feel almost too light—this ensures daily usage without injury setbacks.
Before your first training session, complete this checklist:
– [ ] Fill material sealed with triple-method (zip + duct + waterproof tape)
– [ ] Total weight = 5-10% body weight (beginners)
– [ ] Each pouch weighed individually on scale
– [ ] Heaviest pouches positioned at shoulder blade level
– [ ] Balance test passed (mirror, squat, jump rope)
– [ ] Weekly inspection routine scheduled
Your properly filled weighted vest now delivers precision resistance for measurable progress. The 30 minutes spent perfecting this setup prevent years of avoidable pain—turning that empty shell into your most trusted training ally.


