
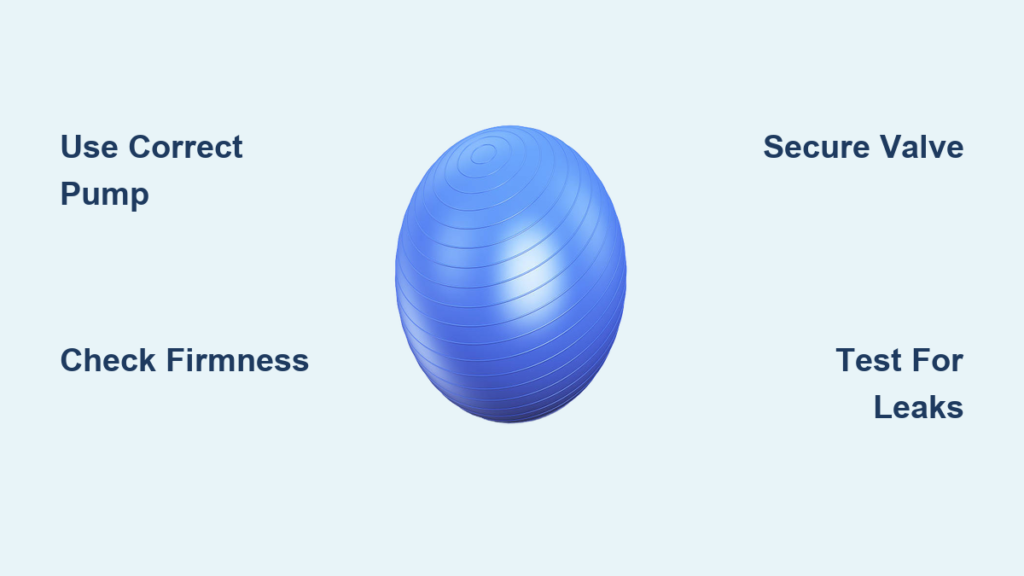
Nothing ruins your workout momentum like discovering your stability ball has lost air right before your core routine. A properly inflated ball provides the perfect balance of firmness and flexibility for effective exercises—but over-inflated balls become dangerously rigid while under-inflated ones fail to challenge your balance properly. Whether you’re a fitness newbie with a new purchase or a seasoned user needing to top off your trusty ball, mastering the inflation process ensures safety and maximizes workout effectiveness. This guide reveals exactly how to inflate a stability ball to its ideal firmness level with professional precision, avoiding common pitfalls that lead to frustrating leaks or dangerous over-inflation.
Gather Essential Inflation Tools
Before pumping your first stroke, having the right equipment prevents wasted effort and potential damage to your stability ball. The critical tool you need is a pump specifically designed for exercise balls—standard bicycle pumps or inflatables pumps often don’t create the proper seal with stability ball valves.
Hand pumps with wide nozzle adapters remain the gold standard for stability ball inflation. These allow gradual air addition with precise pressure control, helping you achieve that crucial 75-80% firmness sweet spot without accidentally over-inflating. Most hand pumps require just 10-20 steady strokes to reach proper inflation for standard 55-65cm balls. The manual nature of pumping also lets you pause frequently to check progress, preventing the common mistake of adding too much air before noticing.
Electric pumps offer speed but demand constant vigilance to avoid over-inflation disasters. Since these move air rapidly, you can easily exceed safe pressure before realizing it. If using electric, stop after every few seconds to test firmness with your hand—better to add air in small increments than deal with an over-inflated hazard. Check if your stability ball came with a dedicated pump before purchasing separate equipment.
Supplement your pump with these essential tools: a measuring tape to verify diameter (especially important if following manufacturer size guidelines), mild soap and water solution for leak detection, and a clean, flat surface for stable inflation. Avoid rough surfaces like carpet that could scratch the rubber during the inflation process.
Prepare the Ball and Workspace
Skip this preparation step and you’ll likely struggle with uneven inflation or accidental damage. Start by unboxing your stability ball and laying it flat on a smooth, clean surface like hardwood flooring or a large yoga mat—never on carpet or concrete where debris could puncture the rubber.
Before adding air, conduct a thorough inspection of the entire ball surface. Run your hands over the rubber, checking for manufacturing defects, thin spots, or tiny punctures invisible to casual glance. Even a pinprick hole can lead to rapid deflation during critical exercises. If you find damage, contact the manufacturer for replacement—never inflate a compromised ball that could rupture unexpectedly during use.
Locate the valve (typically a small, circular port) and clean the surrounding area with a damp cloth. Remove any dust, debris, or manufacturing residue that could interfere with your pump connection or cause air leakage. If your ball has a protective cap over the valve, remove it carefully—you’ll need it later to seal the ball properly after inflation.
Begin Initial Inflation

With your workspace ready, attach your pump nozzle firmly to the valve. Create a tight seal by pressing the nozzle straight in and sometimes twisting slightly until secure. A proper connection is non-negotiable—any gap means air escapes as fast as you pump it in.
Start with slow, controlled pumping strokes rather than rapid bursts. This gives you better pressure control and lets you monitor the ball’s expansion. For hand pumps, 10-20 steady strokes typically achieves initial inflation. Pause every 5 strokes to press the ball firmly with your hand—proper early inflation should feel firm but still have noticeable give.
Don’t aim for final firmness yet! At this stage, the ball should resist your pressure without feeling like a basketball. Remember that rubber stretches during inflation, so what feels adequately firm now will become softer as you add more air and the material expands.
Find the Perfect Firmness Level
This critical step separates safe, effective stability balls from dangerous or useless ones. Most fitness professionals recommend inflating to 75-80% of maximum capacity—the sweet spot where the ball provides challenging instability while maintaining enough give for comfort and safety.
The definitive test? Sit on the ball. When properly inflated, your hips should sit level with or slightly above your knees with thighs parallel to the floor. If your hips drop significantly below knee level, add more air. If the ball feels rock-hard or you wobble uncontrollably, release some air immediately.
Why does this matter? An under-inflated ball lets your hips sink too low, eliminating the instability that makes these balls effective for core training and potentially straining your spine. An over-inflated ball becomes dangerously rigid, removing the responsive cushioning that helps you maintain balance during exercises. That precise 75-80% firmness creates the ideal challenge for your stabilizer muscles without compromising safety.
Secure the Valve Properly
One careless moment here can undo all your careful inflation work. After achieving perfect firmness, remove the pump nozzle smoothly but quickly—slow removal gives air time to escape while jerking motions might damage the valve.
Immediately press the valve cover firmly into place using the correct technique for your specific valve type (push-in or twist-lock). Hold it firmly for 5-10 seconds to ensure proper sealing before releasing. Then wait at least 5 minutes before using the ball—this resting period lets the seal fully set and reveals any potential leaks.
Listen carefully for hissing sounds during this waiting period. Any air leakage means the valve isn’t sealed properly—remove the cover, check for debris, and reseat it more firmly. A properly sealed stability ball should maintain its firmness for weeks with only minimal natural pressure loss.
Fix Common Inflation Problems

Troubleshoot a Ball That Won’t Inflate
If air isn’t entering the ball, the valve pin is likely stuck closed. Press the small pin inside the valve with a pen tip to ensure it moves freely. Check your pump connection—many inflation failures stem from using the wrong adapter size. For stubborn cases, apply a drop of soapy water around the valve opening; the soap reduces surface tension and often creates a better seal.
Stop Air Leaks Effectively
New balls commonly leak slightly as the rubber settles—these usually resolve after several uses. For persistent leaks, locate the source by submerging the ball in water and watching for bubbles, or apply soapy water to the surface and look for expanding bubbles. Minor valve leaks often fix with proper resealing; significant surface leaks typically require replacement.
Fix an Over-Inflated Ball
Over-inflated balls pose immediate safety risks. Carefully press the valve pin to release air in short bursts, checking firmness after each release. Never release large amounts at once—better to add small increments than deal with an under-inflated ball. After deflating, wait several hours before reinflating to let the rubber return to its natural state.
Maintain Your Stability Ball Long-Term
Check Pressure Regularly
Rubber naturally loses air over time, so check firmness weekly during regular use. Temperature changes significantly affect pressure—balls feel firmer in warm conditions and softer when cold. Always verify proper inflation before workouts, especially after storage or transport.
Store Your Ball Correctly
For long-term storage, deflate completely, roll compactly, and store in a cool, dry place away from sunlight. Extreme heat accelerates rubber degradation. Use the manufacturer’s storage bag if provided, or a soft fabric alternative—never plastic bags that trap moisture.
Clean and Protect Your Ball
Wipe down with mild soap and water after workouts, avoiding harsh chemicals that degrade rubber. Dry thoroughly before storage. In shared environments, clean between users to maintain hygiene. Consider using removable exercise ball covers that can be washed separately.
Stay Safe During Inflation and Use
Inspect Before Each Use
Develop the habit of running your hands over the entire ball surface before every workout. Feel for thin spots, tears, or weak areas that could lead to sudden failure. Pay special attention to the valve area where leaks most commonly develop. When in doubt about safety, replace the ball—your stability during exercises depends on it.
Know Your Ball’s Weight Limit
Exceeding weight capacity causes catastrophic failures without warning. Most standard balls support 250-500 pounds—verify your specific ball’s rating printed on the surface or in documentation. If you approach this limit, invest in a heavy-duty model rather than risking injury.
Exercise Safely
Never use stability balls near sharp objects, open flames, or extreme heat. Ensure adequate clearance around your workout space to prevent falls into furniture. Beginners should master basic seated balance before attempting advanced movements—progress gradually as your stability improves.
A properly inflated stability ball provides years of effective training when maintained correctly. By following these precise inflation techniques and maintenance practices, you’ll maximize workout effectiveness while minimizing injury risks. Regular pressure checks, proper storage, and prompt attention to any issues keep your ball performing reliably for every core workout, physical therapy session, or balance training routine. Remember: the right firmness isn’t just about comfort—it’s the foundation of safe, effective stability ball training.


