
Nothing beats the convenience of walking while working or watching TV with your new DeerRun walking pad. This compact under-desk treadmill transforms sedentary time into active moments without disrupting your daily routine. Setting up your walking pad correctly ensures safe operation, reduces noise, and extends the equipment’s lifespan. This guide walks you through each critical step from unboxing to your first step, helping you avoid common pitfalls that frustrate new users. You’ll learn exactly how to position your unit, connect power safely, and verify everything works before stepping on the moving belt for the first time.
Proper setup takes just 15-20 minutes but prevents the majority of issues users encounter during initial operation. Many people rush through this stage only to deal with misaligned belts, electrical problems, or safety concerns later. By following these systematic steps, you’ll create a stable foundation for daily use while protecting your investment. Whether you’re setting up in a home office, living room, or workspace, these instructions apply to all DeerRun walking pad models currently available.
Unbox Your DeerRun Walking Pad Without Damage
The unboxing process sets the stage for successful setup, and DeerRun packages their walking pads with protective materials that require careful removal. Begin by cutting the outer packaging straps and removing the cardboard box, taking care not to puncture the foam inserts inside. Most DeerRun models arrive with the main walking platform already assembled, so your primary task is safely extracting the unit from its protective cocoon.
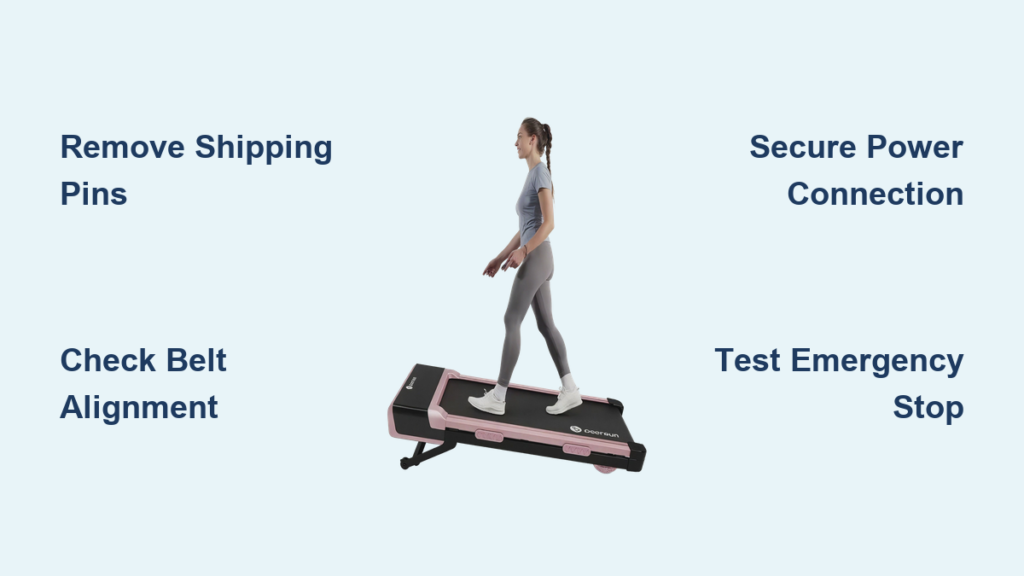
As you remove protective layers, pay special attention to the walking belt area. Many models include red or yellow shipping pins that lock the belt in place during transit—these must be completely removed before operation. Check both sides of the belt for these pins, which typically protrude slightly from the belt edges. Leaving them in place can damage the belt mechanism when you first start the machine.
What to Expect in the Box
Your DeerRun walking pad package contains the main treadmill unit, power cord, user manual, and sometimes additional accessories like lubricant or assembly tools. Some models include a separate console display that snaps into place on the front of the unit. Lay out all components on a clean surface before proceeding to verify nothing is missing or damaged during shipping.
Remove Packaging Materials Thoroughly
Completely strip away all plastic wrapping from the walking surface and console display. Residual plastic film creates slipping hazards and interferes with belt operation. Examine the power cord for any shipping straps that might restrict movement, and ensure the emergency stop clip is attached to its designated spot on the console.
Position Your DeerRun Walking Pad on Stable Flooring

Choosing the right location significantly impacts your walking experience and equipment longevity. The ideal spot offers a flat, hard surface with at least 24 inches of clearance behind the unit for safe stepping on and off. Avoid plush carpeting that can destabilize the unit, and never place your walking pad on uneven surfaces that cause wobbling during operation.
Measure your intended space before moving the unit into position—most DeerRun models require approximately 40 inches in length and 20 inches in width. If placing under a desk, verify you have sufficient headroom to maintain proper posture while walking. The walking pad should sit completely level, with no rocking when you apply gentle pressure to the corners.
Ensure Floor Surface Stability
Place a level across the walking pad surface after positioning it. If the unit rocks or wobbles, add thin shims under the affected corners until the platform sits completely stable. An unstable foundation causes excessive vibration, accelerates wear on internal components, and creates tripping hazards during use.
Create Adequate Clearance Zones
Mark off a safety perimeter around your walking pad with painter’s tape to visualize required clearance. You need at least 12 inches of space on both sides of the unit and 24 inches behind it for safe entry and exit. This buffer zone prevents accidental collisions with furniture or walls during operation.
Connect Power Safely to Prevent Electrical Issues

Improper power connection causes more startup problems than any other setup step. Begin by locating the power cord, which is typically secured to the walking pad’s base with zip ties or Velcro straps. Carefully cut or remove these restraints without damaging the cord’s insulation.
Before plugging in, locate the power switch on the walking pad’s base—usually near the power cord entry point. Ensure this switch is in the “Off” position before connecting to any outlet. DeerRun walking pads operate on standard household current (120V in North America), but always verify your specific model’s requirements in the user manual.
Route the Power Cord Properly
Run the power cord along baseboards or use cord management clips to keep it away from walking paths. Never run the cord under rugs or furniture where it can overheat or become damaged. If the cord doesn’t reach your outlet, use a heavy-duty extension cord rated for the walking pad’s power requirements rather than stretching the original cord.
Verify Electrical Compatibility
Check your outlet with a simple plug tester to confirm proper wiring before connecting your walking pad. Incorrect wiring can damage the unit’s electronics and create safety hazards. If your outlet tests faulty, consult an electrician before proceeding with setup.
Complete the Essential Pre-Operation Checklist
This critical step catches most potential problems before they affect your first walking session. Begin by visually inspecting the walking belt for proper alignment—it should sit centered on the deck with equal space between the belt edges and the platform sides. A misaligned belt causes uneven wear and creates tripping hazards during use.
Test the emergency stop mechanism by attaching the safety clip to your clothing and stepping away from the unit. The belt should stop immediately when the clip detaches. This simple test verifies your most important safety feature works correctly before you step on the moving surface.
Inspect Walking Belt Alignment
Run your fingers along both sides of the belt to feel for consistent tension. The belt should feel firm but not overly tight—you should be able to press down slightly with moderate finger pressure. If one side feels noticeably looser or tighter, consult your manual for belt adjustment instructions before first use.
Verify All Components Are Secure
Check that the console display clicks securely into place (if applicable to your model) and doesn’t wobble during operation. Ensure any handrails or accessory attachments are firmly secured with all provided hardware. Loose components create distracting noises and may become safety hazards during use.
Start Your First Walk Safely at Proper Speed
Your initial walking session should focus on acclimation rather than performance. Begin by standing beside the unit and starting the belt at the lowest speed setting (typically 0.5-0.6 mph). Hold onto your desk or a stable surface as you step onto the moving belt, placing your feet in the center of the walking surface.
Walk at this slow pace for 1-2 minutes to adjust to the sensation of the moving surface. Gradually increase speed in 0.1 mph increments as you become comfortable, never exceeding 1.0 mph during your first session. This cautious approach prevents falls and helps your body adapt to the new movement pattern.
Familiarize Yourself with Console Controls
Practice adjusting speed while standing safely beside the unit before stepping on the belt. Learn how to access different display modes showing time, distance, speed, and estimated calories burned. Knowing these controls builds confidence for future sessions when you’ll operate them while walking.
Gradually Build Walking Duration
Limit your first session to 5-10 minutes to allow your muscles and joints to adapt. Increase duration by no more than 2-3 minutes per session during your first week of use. This gradual progression prevents excessive soreness and helps establish sustainable walking habits without burnout.
Troubleshoot Common First-Time Setup Issues

Even with careful setup, you might encounter minor problems during initial operation. If the console doesn’t power on, first verify the power switch is in the “On” position and the cord is fully inserted at both ends. Try a different outlet to rule out electrical issues, and check for tripped GFCI protection if using an outlet in kitchens or bathrooms.
Belt-related problems are the most frequent setup issues. A belt that won’t start moving usually indicates the emergency stop clip remains attached. A belt that stops unexpectedly often means improper weight distribution—keep your steps centered on the walking surface. Excessive noise typically signals the need for belt lubrication or debris removal from beneath the walking surface.
Address Belt Tracking Problems Immediately
If the belt drifts consistently to one side, turn off the unit and unplug it before making adjustments. Most DeerRun models include rear roller adjustment screws that let you center the belt. Turn the screw on the opposite side of the drift direction 1/4 turn clockwise, then test the belt at low speed. Repeat as needed until the belt runs straight.
Fix Console Display Errors
Error codes on the display usually indicate specific issues documented in your user manual. Note the exact code and consult the troubleshooting section for solutions. Common fixes include resetting the unit by unplugging for 30 seconds, verifying proper power connection, or checking for obstructions in the belt mechanism.
Maintain Your DeerRun Walking Pad for Longevity
Establish a simple maintenance routine from day one to extend your walking pad’s lifespan. Wipe down the walking belt after each use with a slightly damp cloth to remove dust and skin oils that reduce traction. Monthly, inspect the belt for signs of excessive wear like fraying edges or thinning material that might require replacement.
Lubricate the walking surface according to your manual’s specifications—typically every 3-6 months depending on usage. Use only the manufacturer-recommended lubricant (usually silicone-based) and apply sparingly to the deck beneath the belt. Over-lubrication attracts dirt and creates slipping hazards during operation.
Schedule Monthly Maintenance Checks
Set calendar reminders for routine inspections covering these critical points:
– Belt tension and alignment
– Power cord condition for fraying or damage
– Console display functionality
– Emergency stop mechanism operation
– Overall stability of the unit
Address Minor Issues Before They Worsen
When you notice unusual sounds, vibrations, or behaviors, investigate immediately. A slight squeak today could indicate a major problem tomorrow. Most minor issues have simple solutions documented in your user manual—consult it before contacting customer support to potentially save time and avoid unnecessary service calls.
Proper setup of your DeerRun walking pad creates the foundation for years of reliable service. By taking time with unboxing, choosing the right location, connecting power correctly, and verifying all safety features, you ensure safe, quiet operation from day one. Regular maintenance preserves performance while preventing the minor issues that often lead to equipment abandonment. Start with short walking sessions, gradually build your routine, and soon you’ll wonder how you ever managed without this convenient way to stay active throughout your day.


