
Nothing disrupts your home workout routine like a walking pad that suddenly becomes noisy, jerky, or unresponsive. Learning how to clean a walking pad properly is the key to preventing these frustrating issues and extending your equipment’s lifespan. Dust, hair, and debris accumulate rapidly in the motor chamber and around moving parts, creating abrasive conditions that accelerate wear on critical components. Most walking pad failures stem from simple neglect—not mechanical defects—meaning regular maintenance can prevent 90% of common problems before they develop.
This comprehensive guide delivers actionable cleaning procedures that apply across popular models including LifeSpan, SpaceWalk, and CyberPad units. You’ll discover specific techniques for daily dusting, weekly lubrication, and comprehensive system cleaning that restore smooth operation. Whether you’ve just unboxed your first walking pad or want to revive an older unit, these methods keep your equipment running reliably for years.
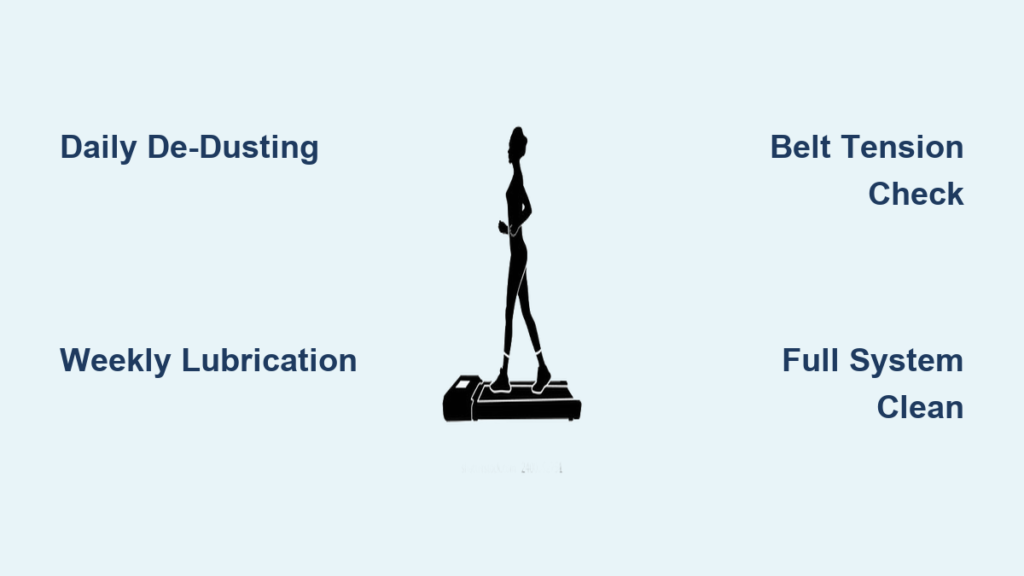
Daily Motor Chamber De-Dusting Protocol
The motor chamber requires immediate attention after each use to prevent dust and hair from compromising performance. Unlike other maintenance tasks, daily de-dusting represents the single most impactful activity you can perform to extend your walking pad’s lifespan. Dust infiltrates motor windings and cooling passages, causing overheating that degrades electrical components over time. Pet owners face particular challenges as fur accumulates rapidly around bearings and motors.
Identify All Vent Openings Before Cleaning
Before starting your cleaning routine, locate every vent and opening on your walking pad’s motor housing. Most units feature multiple vents—typically on the sides, top, and front of the motor housing—that serve as both cooling channels and debris entry points. Understanding your specific model’s ventilation design ensures thorough cleaning of all vulnerable areas. Run your finger along the motor housing edges to detect hidden vents that might otherwise be missed during routine maintenance.
Use High-RPM Electric Duster for Effective Cleaning

Standard canned air proves inadequate for proper motor chamber cleaning as it loses pressure quickly and often leaves propellant residues. Instead, invest in a high-RPM electric duster like the WolfBox MF50, which delivers consistent, focused air streams throughout the cleaning process. Direct the nozzle into each vent opening, working methodically around the entire motor housing. The high-velocity air dislodges accumulated dust without packing it deeper into the housing. Continue blowing until no additional particles emerge from the openings—typically 15-20 seconds per vent.
Pro tip: Homes with pets or multiple users should perform this de-dusting routine every other day. The five minutes invested prevents hours of repair work down the line.
Essential Pre-Use Warm-Up Steps
Proper warm-up procedures protect both your walking pad and personal safety. Never stand directly on the belt when pressing the start button, as this forces the motor to overcome your full body weight from a dead stop. This action creates locked rotor amperage—a dangerous electrical surge that can damage the controller board, especially on budget models.
Correct Startup Procedure for Motor Protection
The proper startup sequence involves stepping onto the side rails first, pressing start, and waiting until the belt reaches target speed before stepping onto the walking surface. For the first use each day, extend this warm-up by running the belt at maximum speed for one to two minutes without stepping on it. This extended warm-up allows lubricants to distribute evenly across bearing surfaces and identifies potential mechanical issues before your weight is applied.
Without proper warm-up, you’ll experience jerky belt motions and squeaking during your walk—clear indicators that components are under excessive stress. This stress dramatically shortens your walking pad’s lifespan. The good news? This simple protocol takes less than two minutes and applies only once per daily use session.
Weekly Lubrication and Belt Maintenance
Walking pads require lubrication approximately every forty hours of operation or every three months—whichever comes first. Proper lubrication reduces friction between the belt and deck, preventing the motor from working overtime and significantly extending equipment lifespan.
Proper Lubricant Application Technique
Apply silicone-based lubricant in a zig-zag motion beneath the belt, specifically in the space between the belt and deck pad. This distribution pattern ensures even coverage across the entire walking surface. After application, run the treadmill at one mile per hour for two minutes without walking on it, allowing the lubricant to distribute evenly. Critical warning: Walking on the belt immediately after lubrication causes uneven application and creates slip hazards.
Before applying fresh lubricant, always inspect the belt underside. Silicone lubricant can trap dust over time, forming an abrasive sludge that accelerates deck wear. If you observe grey paste buildup, wipe it away completely with a clean rag before proceeding. Applying new lubricant over existing sludge creates a sandpaper-like surface that rapidly degrades your walking deck.
Belt Tension and Alignment Checks
Walking belts require regular adjustment to maintain proper tension and alignment. A belt that drifts to one side indicates uneven tension, while a loose or slippery belt suggests insufficient overall tension. Both conditions accelerate wear and create safety hazards.
When addressing belt drift, tighten the side that appears too tight—this counterintuitive approach works because tightening the tight side creates a slope that encourages the belt to roll toward the slack side. Use an Allen wrench to make quarter-turn adjustments while the belt runs, then wait fifteen seconds to observe the effect before additional adjustments.
Proper tension follows a specific test: lift the walking belt at the deck center—it should rise approximately three to four inches before meeting resistance. Less than three inches indicates excessive tension; more than four inches suggests insufficient tension. Both extremes require correction to prevent accelerated wear.
Recognizing When You Need a Full System Sweep
Despite diligent daily and weekly maintenance, walking pads eventually require comprehensive cleaning involving partial disassembly. Three critical symptoms indicate when a full system sweep has become necessary:
- Loud noises during operation: Persistent squeaking, screeching, or grinding sounds typically originate from debris-contaminated bearings or worn belts
- Burning smells: Rubber smells indicate belt slippage; machinery smells suggest electrical overheating
- Inconsistent belt motion: Jerky or sluggish movement under load signals mechanical problems simple adjustments cannot fix
Ignoring these symptoms leads to expensive repairs or premature replacement. A full system sweep restores your walking pad to like-new operating conditions and typically resolves whatever prompted the maintenance session.
Step-by-Step Full System Cleaning Process
Safety First: Warranty Considerations
Before disassembly, check your walking pad’s warranty status. Opening the motor chamber typically voids manufacturer warranties, so contact the manufacturer about replacement options if your unit remains under warranty. However, many owners choose repair over replacement for environmental and economic reasons.
Warning: Disassembling your treadmill may void the warranty. If you’re within the warranty period, consider replacement options first.
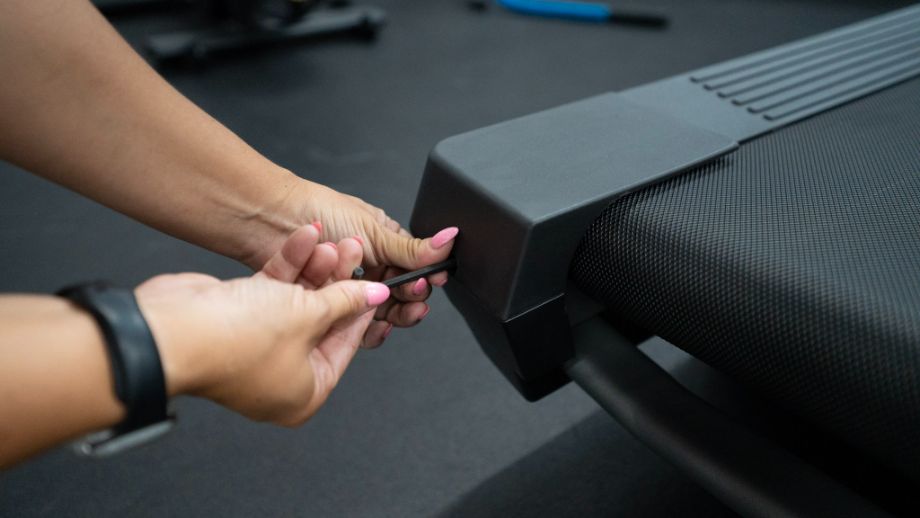
Motor Housing Removal and Component Cleaning
Begin by removing all fasteners securing the motor housing panels. Document wire routing and component positions with photographs before separation—this simplifies reassembly significantly. With the unit fully accessible, clean each component systematically:
- Walking deck: Remove accumulated lubricant, dust, and debris using old rags
- Motor chamber: Use compressed air to blow debris from cooling fins and circuit boards
- Bearings: Twist axle ends to assess condition—smooth rotation indicates health
Drive Belt Replacement: The Critical Component
The drive belt represents your walking pad’s most vulnerable component. Regardless of symptoms, replace it during any comprehensive maintenance session. Run your finger across the belt’s inner surface—black powder indicates rubber deterioration requiring immediate replacement.
When ordering replacements, note the model number and count the ribs on the inner surface. Most manufacturers install belts with fewer ribs than the pulley accommodates (e.g., SpaceWalk 5L ships with a five-rib belt on an eight-groove pulley). Pro tip: Order a belt matching your pulley’s full groove count—this upgrade eliminates slippage and dramatically extends component life.
Maintenance Schedule Quick Reference
Daily Tasks (5 Minutes)
- De-dust motor chamber using high-RPM electric duster
- Follow proper warm-up procedures before first use
Weekly Tasks (15-20 Minutes)
- Inspect belt underside for grey paste buildup
- Check and adjust belt tension and alignment
- Perform thorough motor chamber cleaning
Periodic Tasks (Every 40 Hours or 3 Months)
- Full lubrication application with zig-zag pattern
- Two-minute stationary run after lubrication
- Verify proper tension using three-to-four-inch lift test
As-Needed Tasks: Full System Sweep
- Perform when loud noises, burning smells, or inconsistent motion occur
- Includes drive belt replacement, component cleaning, and precision reassembly
Long-Term Care Strategy
Implementing a preventive replacement strategy reduces unexpected downtime. When you first receive your walking pad, immediately record the drive belt model number, check the pulley groove count, and order replacement belts. Having spares on hand prevents extended downtime when belts inevitably fail.
Learning how to clean a walking pad properly requires consistent attention and appropriate tools, but the payoff is substantial. Daily de-dusting prevents accumulated debris from causing bearing failure and motor damage. Weekly lubrication and belt adjustments maintain optimal operating conditions and catch developing problems early.
The difference between a long-lasting walking pad and one that fails prematurely comes down to your commitment to proper care—not the initial purchase price. By implementing these procedures, you maximize performance, longevity, and safety while minimizing total cost of ownership. How to clean a walking pad effectively transforms a potential source of frustration into reliable fitness equipment that serves your health goals for years to come.


