
That extra 12% calorie burn during your daily walk? It’s not magic—it’s physics. Strap on a poorly fitted weighted vest with too much weight, and you’ll trade metabolic gains for joint pain within days. Yet skip this tool entirely, and you miss one of fitness’s best-kept secrets for building real-world strength. This guide cuts through marketing hype to show you exactly how to use a weighted vest safely across walking, running, and strength training—starting today.
Forget what influencers claim about slamming on 40 pounds. Smart loading beats heavy loading every time. Your first session should feel almost too light—because it is. We’ll break down precisely how much weight to start with (spoiler: it’s likely half what you think), which vest style won’t turn you into a sweaty mess, and the exact progression steps that prevent injury while maximizing results. No fluff. Just actionable protocols backed by biomechanics.
Why Your Starting Weight Must Be Lighter Than You Think
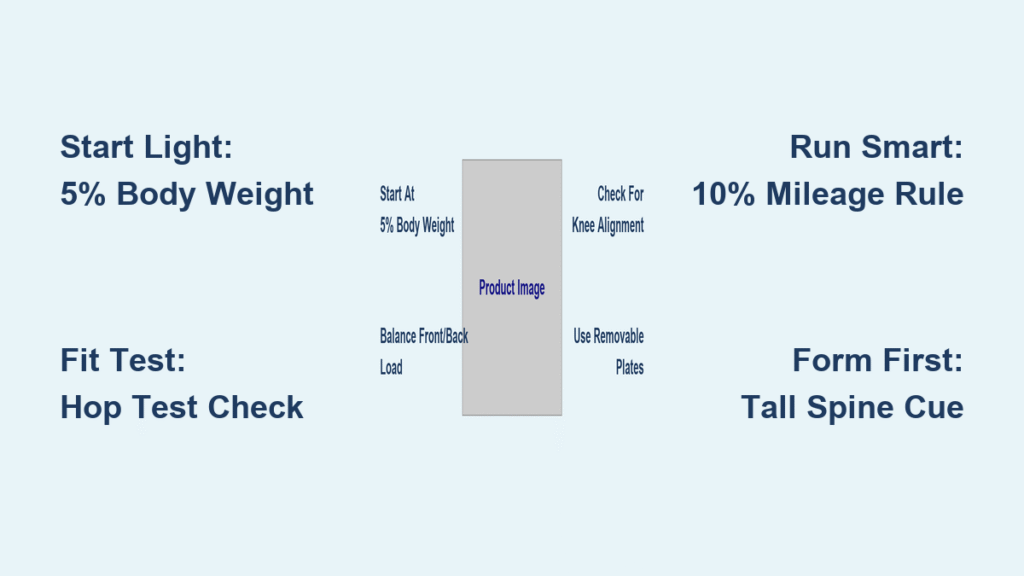
Jumping straight into heavy loads is the #1 reason weighted vests end up as closet decor. Your joints adapt slower than your ego. For walking or running, begin with 5% of your body weight—period. A 160-pound person starts at 8 pounds, not 20. This isn’t conservative; it’s physics. Every 1% of added weight multiplies ground reaction forces by 3-4x during impact activities. Go heavier, and you’re not building strength—you’re grinding cartilage.
Critical starting weights by activity:
– Walking/running: 5% body weight (max 10% long-term)
– Strength training: Fixed 10-15 pounds regardless of size
– Daily wear: 4-6 pounds for ≤30 minutes
If you’re thinking, “But I’m strong!”—pause. Master bodyweight squats with perfect form before adding load. The vest amplifies every flaw. If your knees cave during unweighted lunges, added weight will accelerate knee damage. Start light, nail your technique, then progress weekly by just 1-2 pounds. Your future self will thank you.
Shoulder-Holster vs. Tactical Plate-Carrier: Which Vest Fits Your Workouts?

Not all weighted vests function the same. Choose wrong, and you’ll battle chafing, overheating, or shifting plates mid-burpee. Match your vest style to your primary activity:
Shoulder-holster vests (like hydration packs) ride high on your chest/back with minimal torso contact. Ideal for runners or hot climates—they breathe better and won’t trap sweat against your core. Avoid if you have shoulder impingement; the narrow straps concentrate pressure.
Tactical plate-carriers use rigid steel plates locked into front/back pockets. Best for explosive movements like plyometrics or pull-up circuits. The weight stays put during jumps, preventing dangerous shifts. Skip these for long walks—they create pressure points across your sternum.
Torso-covering vests with wide Velcro straps distribute weight evenly across your upper back and chest. The go-to for walking and circuit training. Look for female-specific cuts if needed; standard vests often dig into breast tissue during push-ups.
Pro Tip: Try vests in-store if possible. Walk, lunge, and jump while loaded. If it bounces more than half an inch during hops, it’s too loose—no amount of tightening will fix poor sizing.
Fix Bouncing Vests in 60 Seconds With This Fit Test

A shifting vest destroys your form and grinds skin raw. Before your first workout, perform this hop test: Jump in place 3 times. If the vest moves vertically more than your thumb’s width, it’s faulty. Adjust these 4 checkpoints immediately:
- Torso length: Bottom edge must sit above your navel. If it covers your belly button, you’ll jam hips during squats.
- Shoulder straps: Minimum 2-inch width. Narrow straps = nerve compression and numb fingers.
- Snugness: Tighten side straps until you can barely fit two fingers underneath. It should feel secure but not restrict deep breaths.
- Sternum strap: Non-negotiable for running. Prevents shoulder roll and weight shift during impact.
Wear moisture-wicking fabric underneath. Cotton traps sweat, causing chafing within minutes. If shoulders ache, slide foam pads (like yoga block covers) under straps—never reduce padding by wearing thicker shirts.
Your First 7 Days: The Injury-Proof Break-In Schedule
Skipping this protocol risks tendonitis or stress fractures. Your connective tissues need time to adapt to new loads. Follow this exact sequence:
Days 1-3: Wear the empty vest (0-2 lbs) while doing chores for 10-15 minutes. Walk up stairs, carry groceries, or vacuum. Notice pressure points—adjust straps where fabric digs in.
Days 4-5: Add 50% of your target starting weight (e.g., 4 lbs if aiming for 8 lbs total). Perform 3 sets of:
– 10 shoulder rolls (forward/backward)
– 10 hip circles (each direction)
– 10 bodyweight squats with perfect form
Days 6-7: First outdoor walk at full starting weight. Stay within 5 minutes of home. If knee pain flares, remove vest immediately and restart at 3% body weight next session.
Red Flag: Sharp joint pain means STOP. Dull muscle soreness is normal; nerve tingling or joint swelling is not.
Walking With Weight: How to Avoid the Forward Hunch Trap
That extra load pulls you toward a slumped posture within minutes—wrecking your spine and negating benefits. Counteract it with this single cue: “Tall spine, shoulders over hips.” Imagine a string lifting your sternum toward the sky.
Non-negotiable walking form checks:
– Land heel-to-toe with full foot contact (no shuffling)
– Keep chin parallel to ground (no craning to see ahead)
– Engage core by drawing navel gently toward spine
– Maintain normal step frequency (don’t shorten stride)
Progress distance before weight. Add 10% more walking time weekly before increasing load. Example: Week 1 = 15 minutes at 8 lbs → Week 2 = 17 minutes at 8 lbs → Week 3 = 17 minutes at 9 lbs. This protects knees while building resilience.
Running With a Vest: The 10% Mileage Rule That Saves Knees
Running with added weight multiplies impact forces exponentially. Violate this rule, and you’ll face shin splints or stress fractures: Never exceed 10% of your weekly mileage with the vest. Run 20 miles weekly? Max 2 miles weighted.
Critical surface progression:
1. Start on gravel tracks or packed dirt trails
2. Advance to grass fields after 2 weeks
3. Only then attempt pavement
Footstrike adjustment: Land mid-foot under your hips—not ahead of your body. The vest amplifies braking forces with each heel strike. Shorten your stride slightly to maintain this alignment. If your calves burn excessively, reduce weight by 2 pounds immediately.
Strength Training Modifications That Prevent Back Damage
Weighted vests transform bodyweight exercises—but only if you adapt your form. The added anterior load shifts your center of gravity forward, tempting you to cheat. Avoid these dangerous mistakes:
Push-ups: Keep elbows at 45 degrees from your ribs. The vest’s front weight pulls hips down—fight this by squeezing glutes and drawing ribs toward pelvis. Stop if your lower back sags.
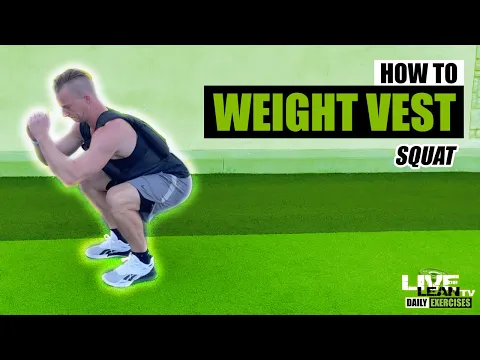
Squats: Descend until hip crease drops below knees. Maintain a torso angle matching your shin angle (no upright “airplane” position). If you lean excessively forward, reduce weight.
Lunges: Step 1.5x your normal length. Front shin stays vertical; rear knee points toward ground (not forward). Never let front knee collapse inward.
Never use vests for: Bent-over rows, Romanian deadlifts, or any hinge where torso goes parallel to floor. The vest amplifies shear forces on your lumbar spine—risk isn’t worth the reward.
Troubleshoot These 4 Problems Before They End Your Workout
Vest bouncing during runs: Tighten side straps incrementally while walking. If adjustable, shorten torso length by one notch. Add a sternum strap—it’s the single fastest fix.
Neck or shoulder pain: Slide shoulder pads under straps (yoga mat scraps work). Reduce weight by 10% immediately. Check strap placement—they should sit on your mid-deltoids, not your neck base.
Lower back fatigue: Engage core before each step by taking a deep breath into your belly. Reduce weight by 2 pounds. Perform 30 seconds of cat-cow stretches pre-walk.
Overheating: Wear a light-colored vest. Schedule workouts before 8 AM or after 6 PM. Sip 8 ounces of water every 15 minutes—dehydration accelerates fatigue.
The Real Timeline for Weighted Vest Results (No Hype)
Forget 30-day miracles. Weighted vests build resilience gradually:
– Weeks 1-2: Heart rate runs 5-10 BPM higher during walks (expected!)
– Weeks 3-4: Noticeably easier posture maintenance during daily activities
– Month 2: Complete 10% longer walks at same perceived effort
– Month 3: Add 2-3 reps to push-up sets without vest
– Ongoing: Bone density improvements only when combined with strength training
Critical Insight: Vest-only walking won’t melt fat. Pair it with nutrition for body composition changes. The vest amplifies what you’re already doing—it doesn’t replace fundamentals.
Start lighter than your pride allows. A 6-pound vest used consistently beats a 20-pound vest abandoned after two sessions. Master the hop test, respect the 10% mileage rule, and progress distance before weight. In 8 weeks, you’ll walk taller, move stronger, and burn calories more efficiently—all without adding a single minute to your routine. Your vest isn’t just gear; it’s a leverage tool. Use it wisely, and it becomes the hardest-working member of your fitness team.


