
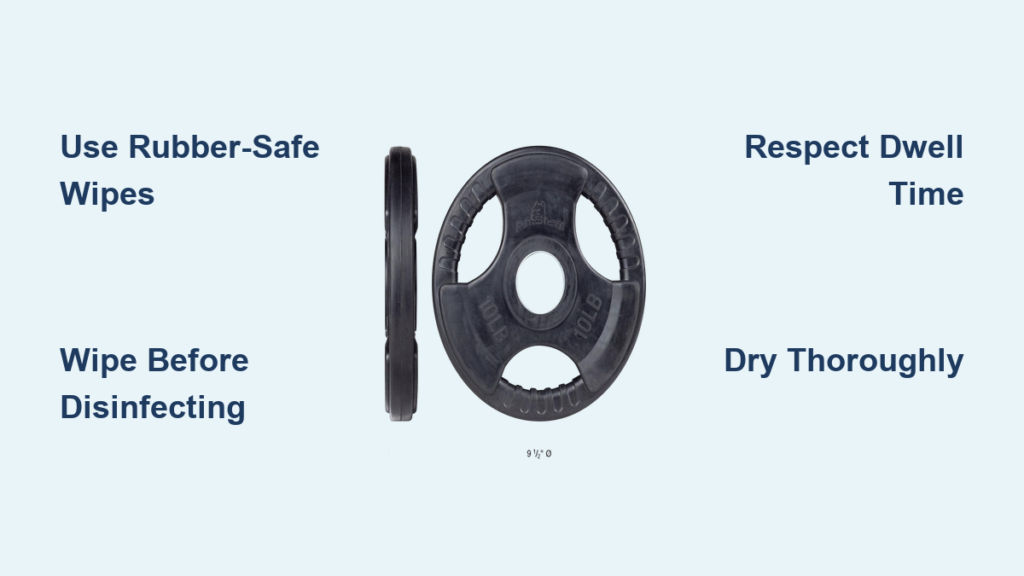
Sweat, chalk dust, and bacteria accumulate on rubber weight plates with every workout, creating unsanitary conditions that threaten both your health and equipment longevity. Unlike bare metal plates, rubber-coated weights present unique cleaning challenges—their porous surface traps contaminants while harsh chemicals can cause cracking, peeling, and premature deterioration. Learning how to clean rubber weight plates properly protects your investment, creates a safer workout environment, and extends equipment life by years. This guide delivers specific, actionable techniques that maintain rubber integrity while eliminating harmful pathogens—no more guessing which products damage your plates or leave them inadequately sanitized.
Most gym owners and home fitness enthusiasts unknowingly accelerate rubber plate deterioration through improper cleaning methods. The wrong disinfectant can strip protective coatings within weeks, while insufficient dwell time leaves dangerous bacteria thriving in microscopic crevices. By implementing these rubber-specific cleaning protocols, you’ll transform your weight plates from germ hotspots into hygienic, long-lasting training tools that perform reliably through thousands of lifts.
Gather Your Rubber-Safe Cleaning Supplies
Assemble these specific supplies before starting to ensure effective cleaning without damaging your rubber weight plates. Having everything ready prevents mid-process substitutions that could introduce harmful chemicals to your equipment.
You’ll need EPA-approved disinfectant wipes formulated for rubber surfaces (like GymWipes Antibacterial), disposable nitrile gloves, clean microfiber cloths, and a soft-bristled brush for textured areas. Never substitute standard gym wipes—many contain alcohol, bleach, or ammonia that degrade rubber polymers. Microfiber cloths outperform paper towels by trapping debris without leaving lint and can be washed and reused dozens of times.
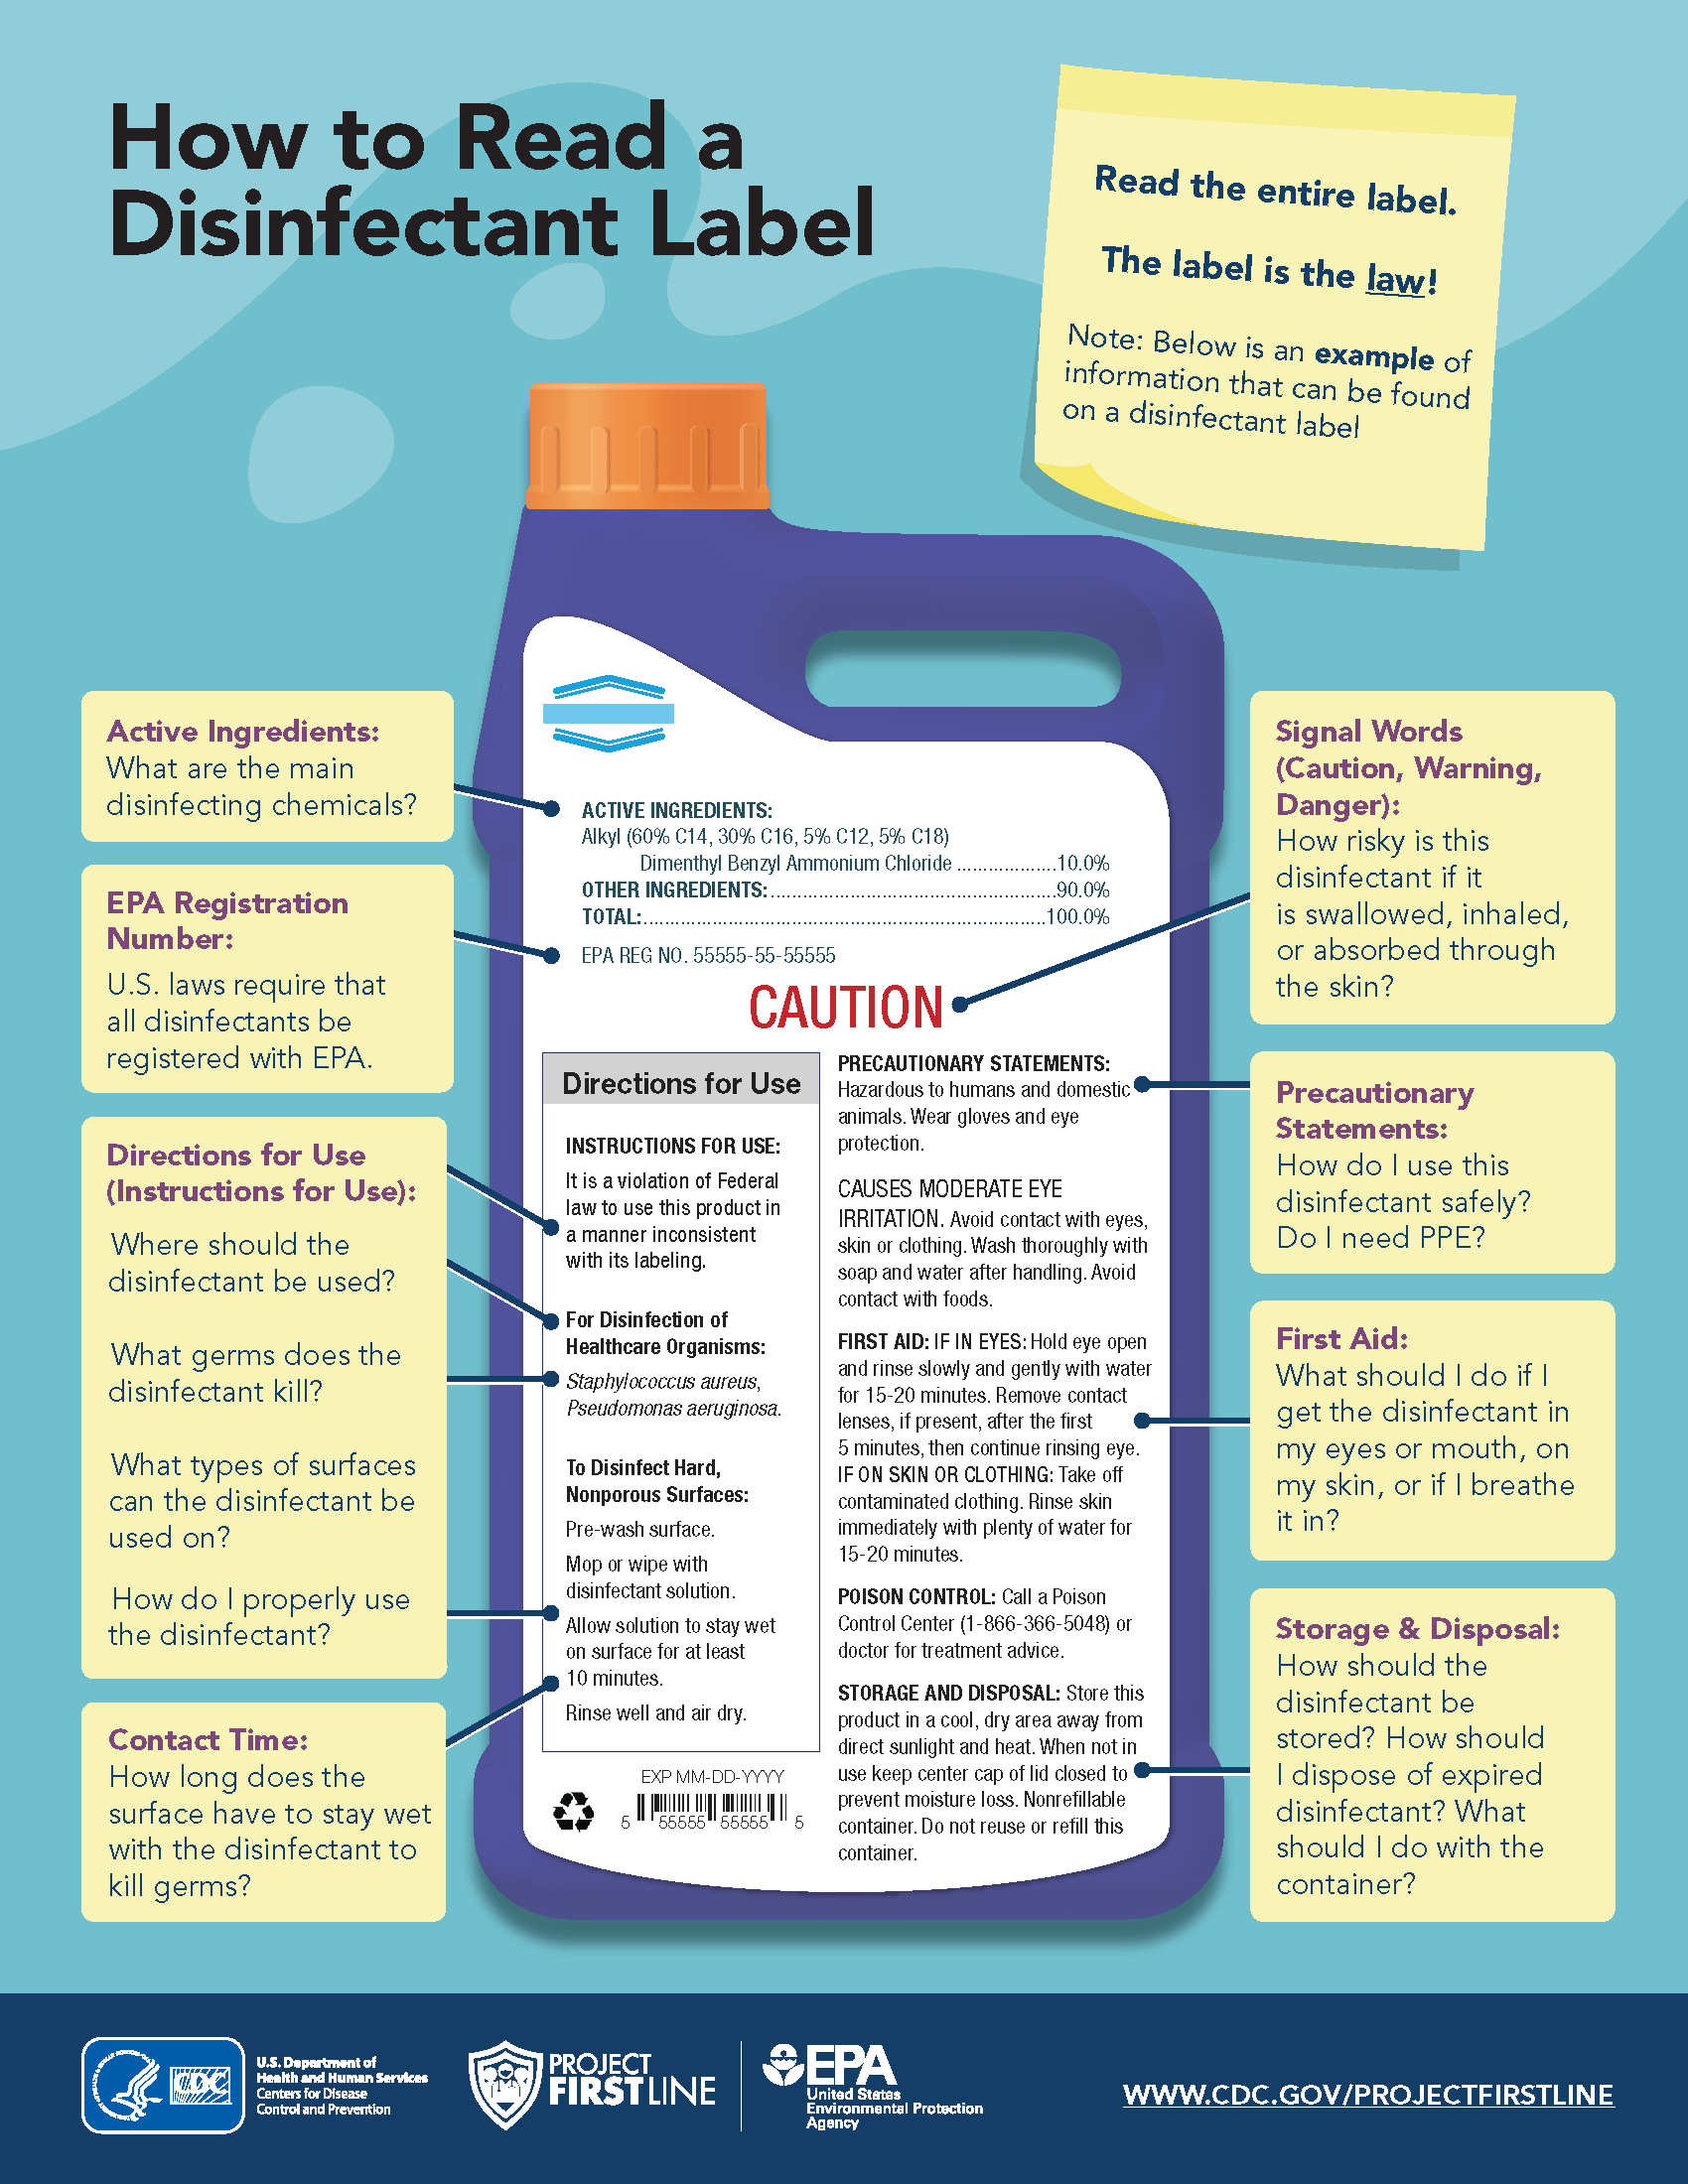
Verify your disinfectant is explicitly labeled as rubber-safe and EPA-approved for pathogens common in gyms. Check the product’s dwell time requirement—typically 30 seconds to 10 minutes—and ensure it eliminates bacteria like MRSA and viruses including influenza. Keep your supplies in a designated caddy near your plate storage area to encourage consistent cleaning habits after each workout session.
Protect Yourself With Proper Safety Gear
Cleaning rubber weight plates requires specific safety measures that prevent chemical exposure while ensuring thorough disinfection. Skipping these precautions risks skin irritation from disinfectants and incomplete pathogen elimination.
Always wear disposable nitrile gloves during cleaning sessions—they resist chemical permeation better than latex and prevent cross-contamination between plates. Never clean plates barehanded—disinfectants can cause dermatitis with repeated exposure, and you’ll transfer skin oils back onto freshly cleaned surfaces. For spray disinfectants, add safety goggles to protect against accidental splashes that could irritate your eyes.
Work in a well-ventilated space by opening windows or turning on exhaust fans, especially when cleaning multiple plates. This dissipates chemical fumes that can cause headaches or respiratory irritation during prolonged exposure. If your gym has poor airflow, consider using pre-moistened wipes instead of sprays to minimize airborne particles.
Remove Surface Debris Before Disinfecting
Effective rubber plate cleaning requires removing visible contamination before applying disinfectant—otherwise, chalk dust and sweat create barriers that block pathogen elimination. This critical step separates thorough cleaning from merely wiping surfaces.
Inspect each plate for chalk buildup, particularly in textured grip areas and finger grooves where residue accumulates. Chalk mixed with sweat forms a bacteria-friendly paste that standard disinfectants cannot penetrate. Use a dry microfiber cloth with light circular motions to lift debris from textured surfaces without pressing contaminants deeper.
For stubborn residue, lightly dampen your cloth with water (never cleaning solution yet) and gently rub problem areas. Avoid soaking plates—excess moisture can seep into the metal core through microscopic coating imperfections. Pay special attention to the inner hub where plates contact barbells, as metal-to-rubber contact transfers additional oils and debris.
Apply Disinfectant With Proper Technique
Your disinfectant application method determines whether rubber weight plates receive complete sanitization or partial coverage that leaves pathogens thriving. Master these techniques to maximize pathogen elimination while preserving rubber integrity.
Hold spray disinfectants 6-8 inches from the surface and mist until uniformly damp—not dripping wet. For wipes, unfold completely and use both sides to maximize coverage. Work systematically: top to bottom on one side, then flip and repeat, ensuring hub interiors and edge seams receive equal attention. Focus extra attention on finger grooves where bacteria concentrate from repeated handling.
Use a soft-bristled brush for textured areas with gentle circular motions—never scrub aggressively. Harsh brushing creates micro-scratches that trap future contamination. For smooth-surfaced plates, a microfiber cloth provides sufficient friction. If using spray, apply solution to your cloth first rather than directly on plates to control saturation.
Maintain Required Dwell Time for Effective Sanitization
Most rubber plate cleaning failures occur because users wipe surfaces before disinfectants complete their work. Understanding and respecting dwell time—the period disinfectant must remain wet on surfaces—is essential for eliminating dangerous gym pathogens.
Check your product label for exact requirements, but most EPA-approved disinfectants need 3-10 minutes of continuous wet contact. Set a timer immediately after application—this prevents rushing the process. If surfaces dry prematurely, reapply solution to maintain wetness throughout the full dwell period. Never skip this step—surfaces that look clean may still harbor 99% of pathogens without adequate dwell time.
During this waiting period, prepare your drying supplies and inspect other plates for cleaning. This strategic pause ensures you don’t disturb the disinfection process while maintaining workflow efficiency. For commercial gyms, implement a color-coded system where yellow tags indicate plates undergoing dwell time and green tags signal completion.
Dry Plates Thoroughly to Prevent Moisture Damage
Improper drying causes rubber weight plates to develop mold, mildew, and unpleasant odors—undermining your entire cleaning effort. Complete moisture removal protects both hygiene and equipment integrity.
Wipe plates with a clean, dry microfiber cloth using light pressure to absorb residual moisture without dragging contaminants across surfaces. Pay special attention to the hub area where water collects around the metal sleeve. For textured plates, use the edge of your cloth to lift moisture from grooves.
In humid environments, allow plates to air-dry upright for 10-15 minutes before storage. Place them on a clean rack with space between each plate to promote airflow. Never stack damp plates—this traps moisture against rubber surfaces, creating ideal conditions for microbial growth. Verify complete dryness by touching multiple spots before returning plates to storage.
Establish Usage-Based Cleaning Frequency
Cleaning schedules should match your rubber weight plate usage intensity—over-cleaning wastes time while under-cleaning risks hygiene failures. Implement these frequency guidelines based on your specific environment.
Commercial gyms require cleaning after every 1-2 users during peak hours, with full disinfection every 2 hours. Implement a “clean before you lift” policy where users wipe plates with provided disinfectant wipes. Home gyms with single users need weekly cleaning, plus immediate attention after intense sweaty sessions. Track usage patterns—plates showing visible chalk buildup or stickiness need more frequent attention regardless of schedule.
Seasonal deep cleaning every 3 months addresses embedded contaminants regular cleaning misses. During these sessions, inspect plates for damage, clean storage racks, and verify all disinfectants remain effective. For home users, schedule deep cleans with seasonal fitness program changes to build consistent habits.
Store Plates to Maximize Longevity
Your storage method significantly impacts rubber weight plate lifespan—improper storage causes premature cracking and discoloration that cleaning cannot reverse. Implement these storage practices immediately.
Keep plates in climate-controlled spaces away from direct sunlight, which causes UV degradation visible as fading and surface cracking. Store vertically on dedicated plate trees rather than horizontally on racks to minimize contact points. Never store plates on concrete floors—use rubber mats or wooden pallets to prevent moisture transfer and chemical reactions with floor sealants.
Maintain 2-3 inches between stacked plates to allow airflow and prevent moisture trapping. In humid climates, add silica gel packets to storage areas to absorb excess moisture. For outdoor storage (not recommended), cover plates completely with UV-protective tarps and elevate them at least 6 inches off the ground.
Avoid These 3 Costly Cleaning Mistakes
Most rubber weight plate damage stems from these preventable errors—recognize and eliminate them immediately to protect your equipment investment.
Using alcohol-based cleaners is the #1 mistake—alcohol dries rubber, causing irreversible micro-cracks within weeks. Similarly, scrubbing with abrasive pads creates surface scratches that accelerate contamination retention. Skipping pre-cleaning debris removal renders disinfectants ineffective by blocking surface contact.
Instead, verify all products are explicitly rubber-safe, use only soft microfiber cloths, and always remove visible debris first. When in doubt about a product, test it on a small inconspicuous area and wait 24 hours before full application.
Deep Clean Odor-Infested Plates in 4 Steps
Persistent rubber odors indicate bacterial colonies thriving beneath surface-level cleaning. Eliminate stubborn smells with this targeted deep cleaning protocol.
- Prepare a baking soda paste (3 parts baking soda to 1 part water) and apply to affected areas
- Let sit for 15 minutes to neutralize odors without damaging rubber
- Scrub gently with soft brush using your standard disinfectant
- Air-dry completely in well-ventilated area for 24 hours before reuse
For severe cases, add 1 cup white vinegar to a gallon of water for final rinse—vinegar’s acidity kills odor-causing bacteria while evaporating completely. Never mix vinegar with commercial disinfectants as this creates harmful fumes.
Maintain Peak Condition With Monthly Inspections
Monthly inspections catch developing issues before they compromise plate safety or hygiene. During your deep cleaning sessions, perform these critical checks:
Examine plates for hairline cracks, especially around the hub where stress concentrates. Press gently on suspect areas—if rubber feels soft or spongy, bacteria have likely infiltrated beneath the surface. Check for uneven wear patterns that indicate improper storage or usage habits. Verify textured grip surfaces remain effective by testing plate changes with damp hands.
Replace plates showing significant damage—compromised rubber cannot be properly sanitized and may fail during lifts. Document findings to track deterioration patterns and adjust your cleaning protocols accordingly.
Properly maintained rubber weight plates deliver years of reliable service while protecting user health. By implementing these specific cleaning protocols—using rubber-safe disinfectants, respecting dwell times, and storing correctly—you transform routine maintenance from a chore into an investment that pays dividends in equipment longevity and workout confidence. Start today by auditing your current supplies against these guidelines, and within one week you’ll notice cleaner plates, fresher air, and greater peace of mind during every lift.


