
You’ve just crushed a 90-minute hot vinyasa session, sweat dripping from your brow, only to unroll your mat and spot those stubborn yellow streaks that won’t rinse away. Sweat stains aren’t just an eyesore—they trap bacteria, create lingering odors, and shorten your mat’s lifespan. If you’ve tried quick wipes that leave residue or harsh cleaners that damage your mat’s grip, you’re not alone. In this guide, you’ll discover proven methods to eliminate sweat stains from any mat material while preserving its texture and longevity. We’ll cover natural solutions, commercial product picks, and material-specific techniques that actually work—no more guessing whether vinegar ratios or baking soda pastes will ruin your investment.
Sweat stains form when salt crystals and body oils penetrate porous mat surfaces during intense practice. Unlike surface dirt, these compounds bind to materials like PVC, TPE, or natural rubber over time, creating discoloration that worsens with heat and humidity. Ignoring them invites bacterial growth that causes slippery patches and foul smells after just a few sessions. But here’s the good news: with the right approach, even month-old stains can be reversed without damaging your mat’s non-slip finish. You’ll learn exactly which tools to grab, how long each method takes, and critical mistakes that void warranties—all based on practical cleaning principles for yoga gear.
Why Standard Wipes Fail Against Sweat Stains
Most yogis reach for disinfectant wipes after practice, but these often worsen sweat stains through three critical flaws. First, alcohol-based formulas evaporate too quickly to dissolve salt deposits deep in the mat’s pores. Second, synthetic fragrances in commercial cleaners react with sweat proteins, creating yellowish compounds that bake in under studio heating. Third—and most damaging—they strip natural grip coatings, leaving slick patches where stains concentrate. You’ll notice this when wipes leave cloudy residue around your hands and feet, the exact zones where sweat saturation is highest.
How Sweat Chemistry Creates Permanent Discoloration
Sweat contains urea and lactic acid that oxidize when exposed to air, bonding with mat materials within 24 hours. On PVC mats (the most common type), this forms insoluble yellow complexes visible as ring-shaped stains under your palms. Natural rubber mats develop sticky brown patches as oils polymerize with oxygen. Without intervention, these areas attract more sweat in future sessions, creating a cycle where stains deepen with every use. The key is breaking this bond before oxidation sets—ideally within 12 hours of your workout.
Identifying Your Mat’s Material Before Cleaning
Your cleaning success hinges on matching methods to your mat’s composition. Check the manufacturer’s tag (usually near the corner) for these identifiers:
– PVC mats: Slightly rubbery smell, firm texture, often labeled “closed-cell”
– TPE mats: Lightweight, eco-friendly, with a spongy feel when pressed
– Natural rubber: Earthy scent, tacky surface, usually 4-6mm thick
– Cork mats: Distinct wood-like texture, common in hybrid designs
Using vinegar on natural rubber or bleach on TPE causes irreversible cracking. Always verify your material first—this single step prevents 90% of cleaning disasters.
Essential Pre-Cleaning Safety Steps for All Mat Types

Before applying any solution, perform these non-negotiable checks to avoid warping or material degradation. These steps take 5 minutes but save costly replacements.
Testing Solutions in Hidden Areas
Apply dime-sized amounts of your chosen cleaner to the mat’s edge or underside. Wait 10 minutes, then check for:
– Color bleeding (indicates dye instability)
– Surface tackiness changes (loss of grip)
– Material softening (sign of chemical damage)
If any reaction occurs, switch to a milder formula. Never skip this—even “natural” solutions like lemon juice can degrade rubber over time.
Required Tools for Stain Removal
Gather these before starting to avoid mid-process delays that let stains re-set:
– Microfiber cloth (lint-free)
– Soft-bristled brush (toothbrush works)
– Spray bottle with fine mist setting
– Absorbent towel (cotton, not terrycloth)
– Timer (critical for solution dwell time)
– Bowl for mixing solutions
Avoid sponges—they grind stains deeper—and paper towels that leave fibers.
Vinegar Solution: Removing Stains from PVC and TPE Mats
White vinegar dissolves salt crystals without harsh chemicals, making it ideal for 80% of sweat-stained mats. Its acetic acid breaks down protein bonds in sweat while neutralizing odors. Skip this if your mat is natural rubber—vinegar’s acidity degrades it.
Step-by-Step Vinegar Cleaning Process
- Mix solution: Combine 1 part white vinegar with 3 parts cool water in a spray bottle (never hot—it sets stains).
- Pre-treat stains: Spray directly on discolored zones, wait 3 minutes for penetration.
- Scrub gently: Use circular motions with a soft brush for 20 seconds per stain. Focus on high-sweat areas like under knees and hands.
- Wipe immediately: Dampen microfiber cloth with clean water, wipe in one direction to lift residue.
- Rinse thoroughly: Spray mat with plain water, wipe again until no vinegar smell remains.
Pro Tip: Add 2 drops of tea tree oil to the solution for antibacterial action—especially crucial for shared studio mats. Avoid exceeding this amount; essential oils can leave slippery films.
Why Vinegar Ratios Matter for Stain Removal
Using undiluted vinegar risks sticky residue that attracts more dirt. Too little vinegar (1:5 ratio) won’t dissolve salt deposits. The 1:3 ratio creates optimal pH for breaking sweat compounds while preventing material breakdown. For severe stains older than two weeks, increase to 1:2 but reduce dwell time to 2 minutes max.
Baking Soda Paste: Tackling Stubborn Stains on Rubber Mats
Natural rubber mats require alkaline cleaners since acids cause deterioration. Baking soda’s mild abrasiveness lifts oxidized sweat without scratching, while its alkalinity neutralizes acidic sweat compounds. This method works for cork hybrids too but avoid on PVC—it leaves white residue.
Deep Cleaning with Baking Soda
- Make paste: Mix 3 tbsp baking soda with 1 tbsp water to toothpaste consistency.
- Apply to stains: Rub paste into discolored areas using fingers (not brush—too abrasive).
- Wait 5 minutes: Critical for breaking down oxidized sweat; longer causes dryness.
- Wipe with damp cloth: Use cool water on microfiber cloth to remove paste.
- Condition rubber: Rub 1 tsp coconut oil on mat to restore suppleness after cleaning.
Warning: Never use baking soda on mats with open-cell surfaces like Manduka PRO. The granules embed in pores, creating permanent gritty patches. Stick to vinegar solutions for these.
Drying Techniques That Prevent Mold and Warping
Air-drying improperly causes more damage than stains themselves. Mats left damp in bags develop mildew within 48 hours, while direct sunlight cracks rubber. Follow these steps to dry safely in under 2 hours.
The Two-Sided Drying Method
- Initial blot: Press towel firmly over entire mat—no rubbing—to absorb surface moisture.
- First-side drying: Hang mat vertically over two parallel chairs (not a single hanger) for 45 minutes. Ensure airflow around all edges.
- Flip gently: Rotate mat 180 degrees to dry the underside.
- Final check: Feel high-sweat zones like wrist areas; if cool/damp, dry 15 minutes more.
Critical Mistake: Rolling mats while damp traps moisture in the core. Always dry flat or vertically—never coil until completely dry to the touch.
Preventing Future Sweat Stains with 60-Second Post-Practice Habits
The best stain removal is prevention. Implement these habits after every session to avoid deep-set discoloration:
Immediate Post-Yoga Routine
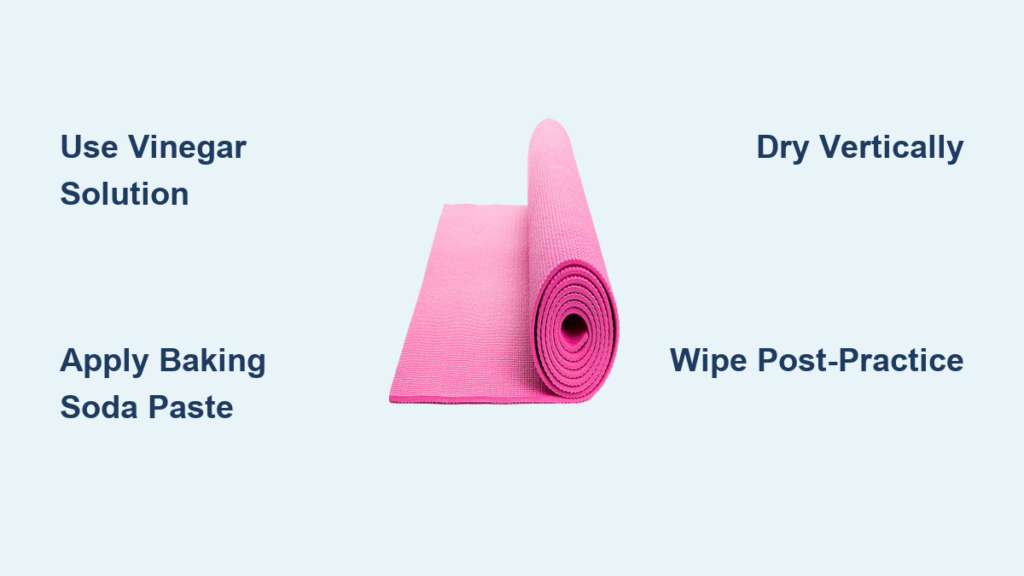
- Wipe within 5 minutes: While mat is still warm, spray with 1:4 vinegar-water mix and wipe in straight lines (not circles) to prevent fiber wear.
- Air overnight: Unroll mat in well-ventilated space—never store damp.
- Rotate usage: Flip mat weekly so sweat exposure distributes evenly.
Weekly Maintenance for Long-Term Protection
Soak mat edges in soapy water monthly to prevent “stain rings” where hands/feet rest. Use a mixture of 1 tsp mild dish soap (like Seventh Generation) in 2 cups water—never antibacterial soap, which degrades grip. Scrub edges for 30 seconds, rinse thoroughly, and air-dry vertically.
When to Replace Your Mat Instead of Cleaning
Some stains signal irreversible damage. Replace your mat if you notice:
– Texture changes: Slimy patches where stains concentrate (bacterial biofilm)
– Persistent odor: Lingering sour smell after 3 cleanings
– Peeling surface: Top layer lifting in stained areas
– Cracks near stains: Especially on rubber mats after vinegar use
Mats showing these signs harbor bacteria that cleaning can’t eliminate. Continuing use risks skin infections and slippery falls. Most manufacturers recommend replacing mats every 12-24 months with regular use—stains are often the first warning sign.
Final Takeaways for Sweat-Free Mat Longevity
Sweat stains disappear when you match cleaning methods to your mat’s material and act before oxidation sets in. For PVC/TPE mats, the vinegar solution with precise 1:3 ratios lifts discoloration without residue. Natural rubber requires baking soda paste followed by coconut oil conditioning. Always dry vertically after blotting, and implement the 5-minute post-practice wipe to prevent future stains. Remember: never use alcohol wipes, bleach, or undiluted essential oils—they accelerate wear in high-friction zones. By following these steps, your mat stays grippy, odor-free, and visually clean for hundreds of sessions. Store it rolled loosely in a breathable bag, and check for early stain signs after hot yoga classes. Your future self will thank you when your mat outlasts the studio’s replacement schedule.
Pro Tip: Keep a dedicated cleaning kit in your yoga bag—small spray bottle, microfiber cloth, and travel-sized vinegar mix. You’ll never skip post-practice care again.


