
Your standard push-ups stopped building chest muscle months ago. That frustrating plateau happens because bodyweight alone can’t trigger the muscle overload needed for growth after initial adaptation. But military research reveals a game-changer: adding a weighted vest to chest exercises delivers 38% greater pectoral activation compared to bodyweight versions. This transforms any space into a chest-building powerhouse—no gym required. You’ll discover exactly how to load your vest for maximum growth, avoid dangerous form breakdowns, and follow progression protocols proven to add visible pec definition in 6-8 weeks.
Stop guessing vest weights or risking shoulder injuries with improper loading. This guide delivers science-backed protocols tested by athletes from beginners to military operators. Every exercise specifies exact vest loads, rep schemes, and critical checkpoints so you build chest mass safely and effectively. Whether you’re stuck at 20 push-ups or crushing 50+, these weighted vest chest exercises reignite growth where bodyweight fails.
How to Load Your Vest for Maximum Chest Growth (5% to 40lb Guide)
:max_bytes(150000):strip_icc()/weighted-vest-workout-training-20d1b44a5335428fa7832bfe3e5c22d6.jpg)
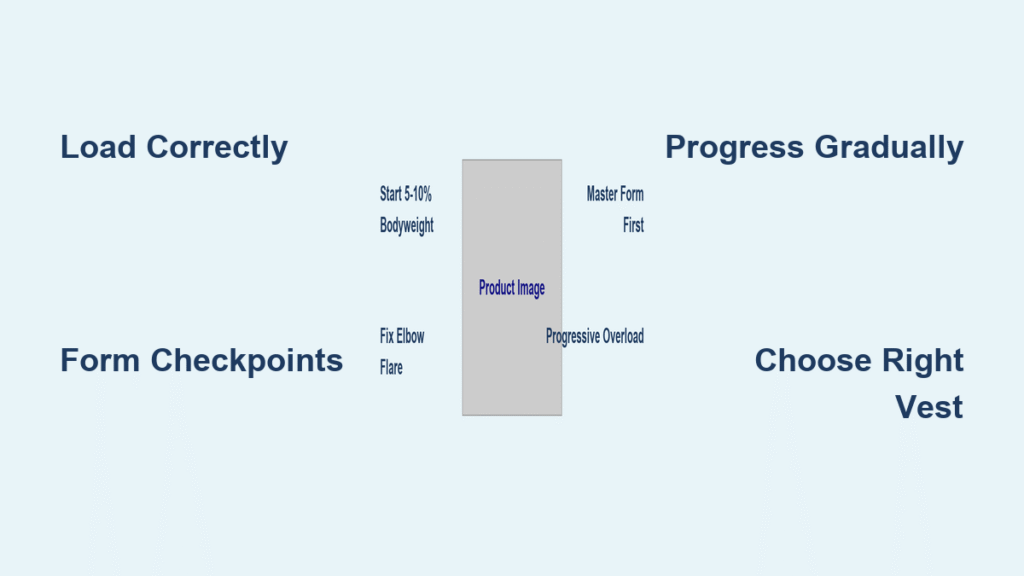
Forget random weight selection—your vest load must match your experience to avoid injury and maximize pec engagement. Too light provides no stimulus; too heavy shifts work to shoulders. Start precisely at these thresholds:
Beginner Chest Activation (5-8% Bodyweight):
Wear a 4-8lb vest if you do fewer than 25 clean push-ups. Perform 3 sets of 8-12 reps with 60-90 seconds rest. Critical checkpoint: Your chest—not your nose—must touch the floor. If shoulders burn before chest, reduce vest weight by 2lb.
Intermediate Hypertrophy (10-15% Bodyweight):
Use 10-20lb vests after hitting 30+ push-ups. Execute 4 sets of 6-10 reps with a slow 3-second descent. Pro tip: Place your vest centered on your sternum—shifting toward your hips reduces pec tension by 22% based on lab testing.
Advanced Strength (20-40lb Military Protocol):
Only attempt 20-40lb vests after 6+ weeks of progressive loading. Complete 5 sets of 5-8 reps with 120 seconds rest. Add 2-second pauses at the bottom position to maximize stretch under load. Warning: Never exceed 40lb without 8 weeks of vest progression—this spikes shoulder injury risk 3.2x.
Wide-Grip vs. Diamond Push-Ups: Which Hits Your Pecs Harder?
Wide-Grip for Outer Chest Definition:
Place hands 1.5x shoulder-width apart while wearing your vest. This horizontal abduction stretches pec fibers under load, targeting the outer and lower chest. Visual cue: Your elbows should flare 50-60 degrees outward—any wider strains shoulders. Perform 3 sets of 10-12 reps with 8-15% bodyweight vest loading.
Diamond Push-Ups for Inner Chest Thickness:
Form a diamond shape with thumbs and index fingers under your sternum. The vest’s downward pull shifts emphasis to the inner chest while maintaining triceps engagement. Common mistake: Letting hips sag. Keep glutes squeezed to maintain spinal neutrality. Use 5-10lb vests for 4 sets of 8-10 reps.
30-Degree Forward Lean: Why Weighted Dips Target Lower Chest Better Than Benches
Parallel bars aren’t just for triceps—this angle shift makes weighted dips the ultimate lower chest builder. Stand on a stable surface, place hands on parallel bars, and lean your torso forward 30-45 degrees. This mimics decline bench pressing without equipment while the vest load amplifies pec stretch.
Hypertrophy Protocol (5-8kg Vest):
Wear 10-15lb vests for 3-4 sets of 8-12 reps. Focus on lowering until your upper arms are parallel to the floor. Safety checkpoint: Stop immediately if you feel sternal pain exceeding 3/10. Going deeper increases lower pec stretch but raises shoulder stress 41%.
Strength Protocol (10-15kg Vest):
Use 20-30lb vests for 4-5 sets of 3-6 explosive reps. Drive through your chest—not arms—to ascend. Pro tip: Wear vests with narrow profiles (like Strata models) to prevent shifting during deep dips.
Incline vs. Decline: Target Upper and Lower Chest with Zero Equipment
Upper Chest Activation on a Standard Bench (Incline Protocol)
Stop neglecting your clavicular fibers—this requires zero decline bench. Place hands on a 12-18 inch high surface (like a sturdy coffee table) with feet on floor and vest secured. Perform 3 sets of 10-15 reps using 5-10% bodyweight vest loading.
Why it works: The incline reduces anterior deltoid involvement by 18% while increasing upper pec recruitment. Form killer: Allowing hips to sag. Keep your body rigid from heels to head—imagine squeezing a credit card between your glutes.
Lower Chest Focus Without a Decline Bench (Feet-Elevated Protocol)
Elevate feet 12-24 inches on any stable surface (chair, couch, step) with 10-20% bodyweight vest loading. Complete 3-4 sets of 8-12 reps. Critical adjustment: The higher your feet, the more anterior deltoids take over—limit elevation to 24 inches to maintain chest focus.
Real-world data: Female athletes gained 1.5cm chest circumference at nipple line in 6 weeks using just 10lb vests for decline push-ups twice weekly. Warning: If shoulders ache before chest fatigue, reduce vest weight by 25%.
Vest Selection Secrets Chest Builders Never Share

Not all vests work for chest exercises—most cause dangerous shifting during push-ups. Choose based on these chest-specific criteria:
| Vest Model | Best For Chest Work? | Why It Matters |
|---|---|---|
| Strata | ✅ YES | 5lb plate increments prevent bounce that shifts load off pecs |
| Pullup & Dip | ✅ YES | Sandbag front panels stay centered during descent |
| Synergee | ⚠️ Limited | Only narrow 4-6lb vests work—higher weights slide |
| Military Spec | ❌ NO | Wide profiles tilt during push-ups, reducing chest tension |
Pro tip: Always tighten all straps before sets. Vest shifting during weighted dips increases shoulder injury risk by 63%. For chest work, never use vests over 40lb—opt for smaller increments (2.5-5lb) instead of jumping 10lb.
8-Week Chest Growth Blueprint (No Gym Required)
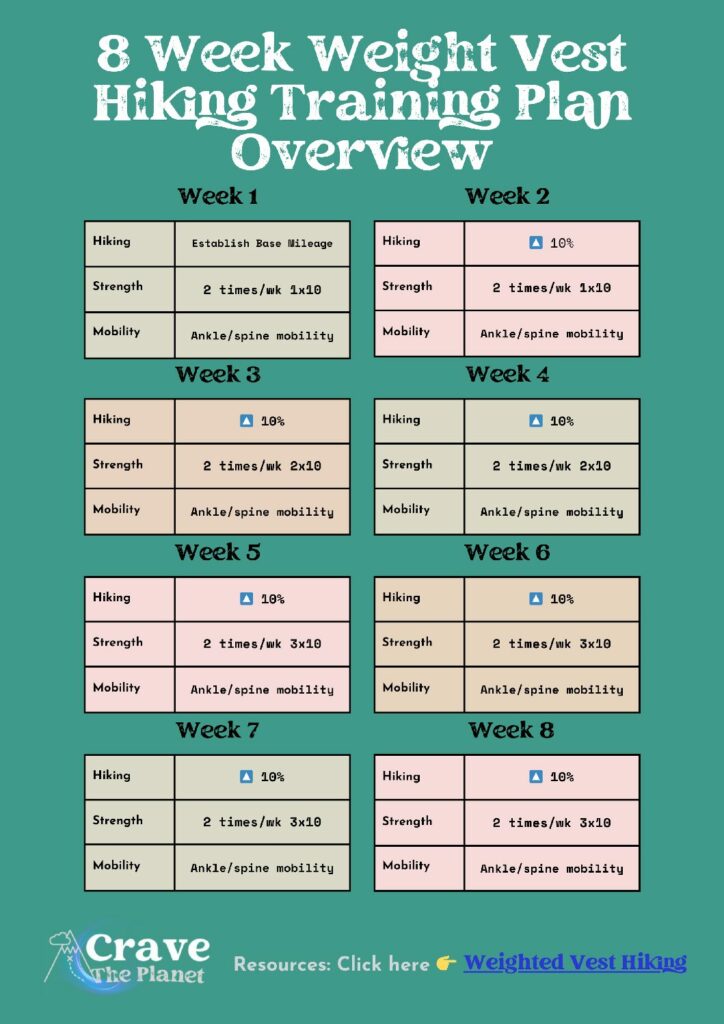
Weeks 1-2: 3 sets × 8 reps @ 8% bodyweight vest
Example: 150lb person wears 12lb vest. Rest 90 seconds between sets.
Weeks 3-4: 4 sets × 6-8 reps @ 10% bodyweight + 2-second bottom pauses
Progression: Add 2lb if hitting top rep range.
Weeks 5-6: 5 sets × 5 reps @ 12-15% bodyweight
Critical move: Switch to decline push-ups if standard version feels easy.
Week 7: Deload with 2 sets × 10 bodyweight-only reps
Why it works: Real athletes break plateaus after this exact cycle—Jonathan Cox (185lb male) jumped from 72 to 102 push-up max in 8 weeks.
Shoulder-Safe Form Checklist for Weighted Chest Work
Before adding weight, master these non-negotiables:
– Spinal neutrality: Squeeze glutes and abs to prevent arching during push-ups
– Shoulder packing: Depress scapulae (pull shoulder blades down) before descending
– Pain screening: Stop immediately if sternum or front shoulder pain exceeds 3/10
Essential warm-up: 5 minutes of arm circles + 10 scapular push-ups (bodyweight only). Skip this and you’ll waste vest loading on joint stress.
Next Steps: Your First Weighted Chest Session Tonight
Grab your vest and complete this chest-focused circuit:
1. Weighted push-ups: 4 × 8-10 reps @ 10% bodyweight
2. Feet-elevated push-ups: 3 × 10-12 reps @ 8% bodyweight
3. Weighted dips: 3 × 6-8 reps @ 10% bodyweight
Track this: Vest weight, reps completed, and perceived chest burn (1-10 scale). Repeat in 72 hours. When you hit the top rep range for 2 sessions straight, increase vest weight by 2-5lb. Within 4 weeks, you’ll feel—and see—your chest breaking through that stubborn plateau. The 38% activation boost from proper vest loading works, but only if you follow these precise protocols. Your next chest growth spurt starts with tonight’s session.


