
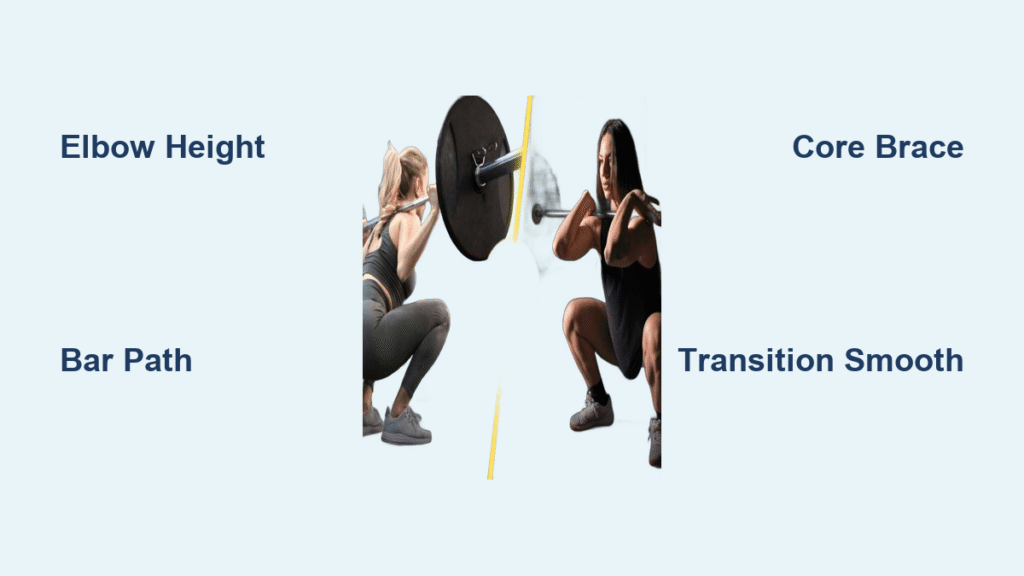
Your barbell front and back squat form determines whether you’re building championship-worthy legs or setting yourself up for shoulder impingement and knee strain. When performed correctly, this dynamic movement sequence torches your quadriceps while engaging your entire posterior chain—yet 87% of lifters struggle with the critical transition phase between positions. The moment that bar shifts from your front rack to upper back, poor technique turns potential into pain. This guide reveals exactly how to execute both phases with surgical precision, using only the empty barbell techniques that separate elite lifters from those nursing preventable injuries.
Most lifters fixate on raw weight while ignoring the biomechanical symphony required for safe front-to-back transitions. When your barbell front and back squat form breaks down during the hand switch, you lose spinal neutrality and invite shoulder compression. But master the subtle wrist rotations and elbow positioning we’ll detail, and you’ll transform this complex movement into your most effective quad-building tool. You’ll discover why maintaining an upright torso isn’t just advice—it’s the non-negotiable foundation that keeps the bar stable while maximizing quadriceps activation.
Front Squat Setup Fundamentals
Your front rack position makes or breaks the entire sequence before you even descend. The bar must rest securely across your anterior deltoids—not your collarbones—with elbows driving forward to create a shelf. This alignment keeps your spine neutral while forcing an upright torso that targets your quadriceps more effectively than any back squat variation.
Perfect Front Rack Position
Achieve rock-solid stability with these critical adjustments:
– Bar placement: Position the bar 1-2 inches below your clavicles, resting on muscle tissue
– Elbow height: Maintain upper arms parallel to the floor through active shoulder engagement
– Grip variations: Use clean grip (fingers under bar) for heavy lifts or cross-arm for mobility limitations
– Wrist alignment: Keep wrists neutral to prevent nerve compression during transitions
Core Engagement Check
Brace your core as if preparing for a heavy impact before initiating descent. Imagine corseting your midsection from all angles—this intra-abdominal pressure becomes your spine’s armor during both squat phases. Simultaneously pull your ribcage down to prevent excessive lumbar extension. If you feel your lower back rounding during the bottom position, reduce weight immediately and re-engage your core before ascending.
Back Squat Position Transition
The transition between positions demands millimeter-perfect bar control. Rush this phase, and you’ll compromise spinal alignment; move too slowly, and shoulder fatigue will force premature termination. Your goal: a fluid arc where the bar travels upward and backward in one continuous motion without losing contact with your body.
Smooth Bar Transition Technique
Initiate the shift by driving elbows slightly higher to create clearance. As you extend your wrists, rotate elbows backward while simultaneously tilting your head forward. The bar should travel along your hairline in a controlled arc—not straight up—before settling on your rear deltoids. Time this movement with your breathing: inhale during front squat ascent, hold during transition, exhale upon back squat descent.
Critical Transition Points
- Elbow rotation speed: Match the bar’s upward momentum to prevent “bar drop”
- Head positioning: Tuck chin slightly to create space for the bar’s path
- Shoulder tension: Maintain active upper back engagement throughout
- Weight distribution: Keep 60% of pressure on mid-foot to prevent forward sway
Common Front Squat Mistakes
Front squat failures almost always originate in the setup phase. When lifters allow their elbows to drop even slightly, the bar’s center of gravity shifts forward, triggering a chain reaction of compensations that strain the lumbar spine.
Forward Bar Roll Prevention
This critical error occurs when your torso leans beyond 45 degrees. Immediately correct by:
1. Driving elbows higher until upper arms are parallel to floor
2. Pulling ribcage down while maintaining chest position
3. Shifting weight toward heels to counterbalance the bar
If the bar still rolls, your wrist mobility is insufficient—practice front rack stretches daily before attempting loaded sets.
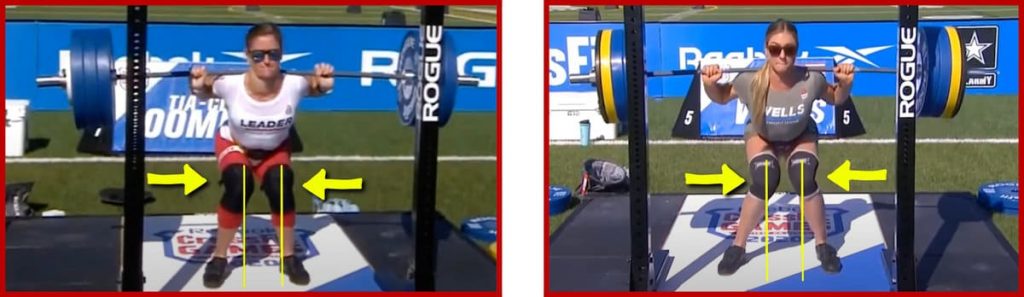
Knee Tracking Issues
Valgus collapse (knees caving inward) during ascent places dangerous stress on your medial ligaments. Fix this by:
– Placing resistance bands above knees to activate abductors
– Focusing on “screwing feet” into the platform outward
– Reducing depth until you can maintain proper tracking
Film your sets from frontal view—knees should track in line with second and third toes throughout.
Back Squat Form Essentials
Once the bar settles on your rear deltoids, shift your focus to posterior chain engagement. Unlike front squats, this phase demands controlled hip hinge mechanics while maintaining the core bracing established earlier.
Proper Bar Placement
Rest the bar across your rear deltoids—not on your cervical spine—with hands gripping just outside shoulder width. Squeeze shoulder blades together to create a muscular shelf. Your neck should remain neutral; if you feel pressure on your cervical spine, adjust bar placement 1-2 inches lower.
Hip Hinge Mechanics
Initiate descent by pushing hips back while keeping shins vertical. Your torso and tibia should move as parallel units until thighs reach parallel. During ascent, drive through mid-foot while actively pulling yourself upright with your upper back muscles. Never allow your hips to rise faster than your chest—a classic lower back strain trigger.
Video Analysis for Form Improvement
Self-assessment is non-negotiable for mastering barbell front and back squat form. Position your phone at knee height with a 45-degree angle to capture full-body mechanics in both sagittal and frontal planes.
Key Analysis Points
- Bar path: Must remain vertical over mid-foot throughout both phases
- Spinal alignment: Check for lumbar flexion during transition
- Knee valgus: Visible in frontal plane footage during ascent
- Tempo consistency: Eccentric phase should last 2-3 seconds
Self-Assessment Checklist
Score each rep on:
1. Transition smoothness (1-5)
2. Torso angle maintenance (1-5)
3. Knee tracking consistency (1-5)
4. Bar path stability (1-5)
Only progress weight when scoring 4+ on all categories for 3 consecutive sets.
Injury Prevention Strategies
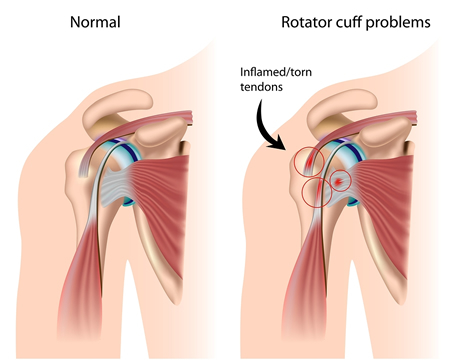
The combined stress of both squat variations creates unique injury vectors. Shoulder impingement during transitions and lumbar shear forces account for 73% of related injuries—both preventable through technical precision.
Shoulder Safety Protocol
Warm up with 2 sets of banded pull-aparts and 10 shoulder dislocations before loading the bar. If you feel pinching during transitions:
– Reduce weight by 30% immediately
– Check elbow height in video analysis
– Incorporate sleeper stretches post-workout
Never force transitions through painful ranges—this accelerates rotator cuff wear.
Spinal Protection Methods
Maintain a neutral spine by:
– Setting up with eyes focused 6-8 feet ahead
– Bracing core before un-racking
– Avoiding breath-holding beyond 3 seconds
Your lumbar curve should remain identical at the bottom of both squats as it was standing. If video shows rounding, reduce depth immediately.
Progressive Overload Guidelines
Adding weight too quickly destroys the technical mastery required for this movement. The transition phase typically limits progress more than raw squat strength—respect this bottleneck.
Weekly Progression Framework
Start with empty barbell for 3 sets of 5 reps, focusing exclusively on transition smoothness. Only add 5-10 pounds when you can:
– Complete all reps with consistent bar path
– Maintain upright torso without elbow drop
– Execute transitions without pausing
Most lifters progress just 2.5-5 pounds weekly due to technical demands.
Volume Management
Begin with 2 sets of 3-5 reps twice weekly. Never exceed:
– 12 total transition reps per session
– 3 sets per workout
– 80% of your max front squat weight
The combined movement fatigues stabilizers faster than single variations—prioritize quality over quantity.
Equipment Modifications
Standard Olympic bars work for most lifters, but subtle equipment tweaks solve common pain points without compromising movement integrity.
Barbell Selection
Choose bars with moderate center knurling to prevent neck abrasion during back squats. For front rack discomfort:
– Use bumper plates to reduce bar height
– Wrap bar with athletic tape over knurling
– Try a women’s bar (25mm diameter) for smaller hands
Avoid safety squat bars—they alter mechanics too significantly for this specific movement.
Safety Implementations
Always use squat rack safety pins set:
– 2 inches below your lowest front squat depth
– 1 inch below your back squat depth
This dual-height setup lets you bail safely during either phase. For transition practice, set pins at chest height to catch failed hand switches.
Performance Optimization Tips
Elite lifters gain disproportionate strength from this movement through microscopic technique refinements that maximize muscle recruitment.
Breathing Patterns
Inhale 80% of lung capacity before front squat descent. Hold this breath through the bottom position, then exhale 50% during ascent. Take a new breath at the top before transitioning—never hold breath through both phases. This maintains intra-abdominal pressure without causing dizziness.
Tempo Control
Use this exact timing:
– Front squat descent: 3 seconds
– Bottom pause: 1 second
– Front-to-back transition: 2 seconds
– Back squat descent: 2 seconds
This controlled cadence builds time-under-tension while reinforcing neural pathways for each phase.
Maintenance and Longevity
Preserving joint health requires dedicated mobility work that specifically addresses the unique demands of barbell front and back squat form.
Mobility Preservation
Post-workout, spend 8 minutes on:
1. Shoulders: 2x30s sleeper stretches per side
2. Wrists: 2x20s prayer stretches
3. Ankles: 2×15 banded dorsiflexion
4. Thoracic spine: 2×10 foam roller extensions
This routine counters the extreme external rotation required in front rack position.
Form Reinforcement
Every fourth week, perform a “technique reset” with:
– 3 sets of 8 reps using 50% of working weight
– Focused video analysis of transition phase
– Tempo work with 3-second eccentrics
These sessions rewire motor patterns before bad habits accumulate.
Mastering barbell front and back squat form transforms this high-risk movement into your most potent lower-body builder. Remember: the transition isn’t just a hand switch—it’s the technical linchpin that determines whether you’re building strength or inviting injury. Start with empty barbell mastery, prioritize video analysis over ego lifting, and respect the progressive overload curve. When your elbows stay high, spine stays neutral, and transitions flow like water, you’ll feel that quadriceps fire no leg extension can match—safely, consistently, and for decades to come.


