
You’re working hard in the gym but still not seeing the glute development you want. If squats and deadlifts aren’t giving you the round, powerful backside you’re after, the barbell hip thrust could be your missing link. This targeted movement isolates your glutes like no other exercise, letting you safely lift heavy weights while building serious posterior strength and shape.
Many lifters struggle with glute activation during compound movements, leaving this powerhouse muscle group underdeveloped. The barbell hip thrust solves this problem by putting your glutes in the driver’s seat—literally. By the end of this guide, you’ll know exactly how to set up, execute, and progress with barbell hip thrusts for maximum results.
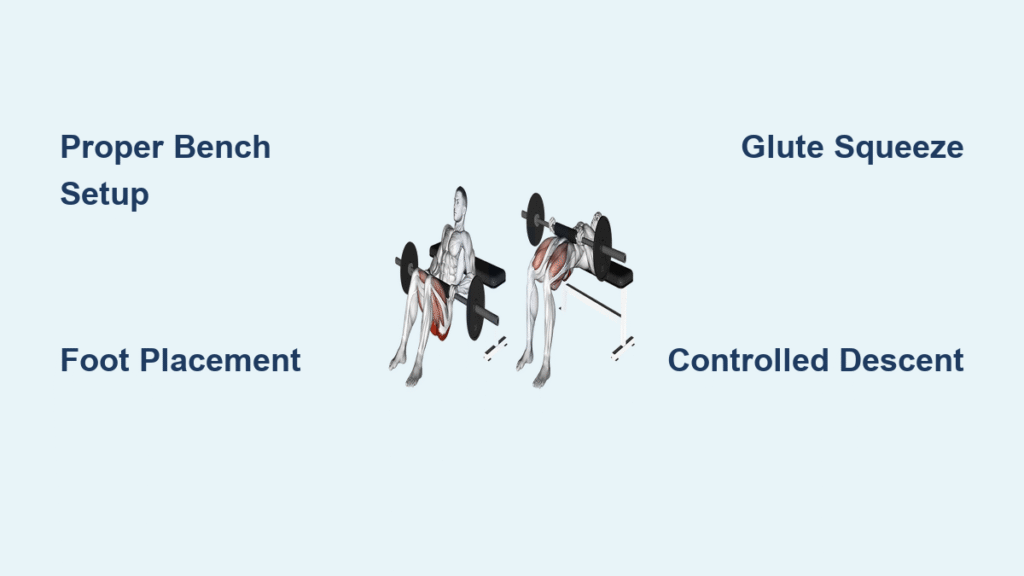
Essential Equipment Setup for Effective Hip Thrusts

Bench and Barbell Positioning Essentials
Position your weight bench horizontally against a solid wall to prevent dangerous sliding during heavy sets. Load your barbell with appropriate plates parallel to the bench before starting—this prevents unnecessary movement when you’re ready to roll it into position. Bumper plates work better than steel plates for noise reduction, especially in home gyms or crowded facilities.
Hip Protection Must-Haves
Never place a bare barbell directly on your hips—this causes significant discomfort and can limit your performance. Use a dedicated bar pad or fold a thick towel several times to cushion the barbell. Your padding should be thick enough to distribute pressure evenly across your hip crease without slipping during movement. This simple step makes heavy sets possible while protecting your hip bones from bruising.
Perfect Hip Thrust Starting Position Checklist
Bench Contact Points Verification
Sit on the floor with your back to the bench, sliding until the bottom of your shoulder blades touch the bench edge. Your upper arms should rest against the bench sides while your upper back maintains contact throughout the movement. Keep your chin tucked as if holding an egg under your jaw—this prevents neck strain and maintains proper spinal alignment.
Foot Placement for Maximum Power
Plant your feet flat on the ground between hip and shoulder-width apart, with toes slightly flared outward. Your feet should be positioned so that when you reach full hip extension, your shins form a vertical line. This stance creates optimal leverage for driving through your heels while protecting your knees from excessive stress. Test your position by lifting your toes slightly—your entire foot should remain firmly planted.
Execute Hip Thrusts with Flawless Form
Movement Execution Step-by-Step
- Drive through your heels, squeezing your glutes to initiate the upward movement
- Extend your hips upward until your body forms a straight line from knees to shoulders
- Achieve 90-degree knee angle at full extension—this confirms proper foot positioning
- Create a slight posterior pelvic tilt at the top to maximize glute contraction
- Pause 2-3 seconds while squeezing your glutes as hard as possible
- Lower under control until your torso reaches a 45-degree angle with the floor
Critical Breathing Technique
Exhale forcefully as you bridge your hips upward—this creates intra-abdominal pressure for stability. Inhale deeply during the controlled descent to reset your core for the next repetition. Never hold your breath during the movement; proper breathing maintains spinal stability and maximizes your power output throughout each set.
Foot Positioning Adjustments for Targeted Muscle Development

Standard Glute-Focused Foot Placement
Position your feet shoulder-width apart with a slight outward toe flare (about 15-30 degrees). This stance places maximum tension on your gluteus maximus throughout the entire movement while maintaining stability. Keep your weight evenly distributed across your entire foot—too much pressure on your heels or toes reduces glute activation.
Quadriceps-Emphasis Modification
Bring your feet closer together with toes pointed more forward (about 5-10 degrees outward). This shifts some tension to your quadriceps while still effectively targeting your glutes. Use this variation when you want to incorporate more quad development or address muscle imbalances between your glutes and quads.
Common Hip Thrust Form Mistakes and Fixes
Foot Placement Error Correction
Mistake: Feet positioned too close to your body
Fix: Adjust until your shins are vertical at full hip extension
Result: Eliminates knee discomfort and allows complete hip extension for maximum glute activation
Lower Back Overextension Solution
Mistake: Arching your lower back excessively instead of extending through your hips
Fix: Focus on posterior pelvic tilt and keeping your rib cage down at the top position
Result: Directs tension to your glutes where it belongs while protecting your lumbar spine
Programming Your Barbell Hip Thrusts for Results
Optimal Rep Ranges by Training Goal
- Strength Building: 1-5 reps with heavy loads (85-95% of your 1RM)
- Muscle Growth: 8-12 reps with challenging but manageable weight
- Endurance & Activation: 12-20 reps with lighter loads for warm-ups
Train hip thrusts 1-2 times weekly for best results, aiming for 5-10 total sets per week. Beginners should start with just 4 sets weekly and gradually increase volume. Always allow 24-48 hours of recovery between glute-focused sessions to maximize muscle growth.
Progressive Overload Strategy
Start with bodyweight hip thrusts to master the movement pattern before adding load. Once comfortable, progress to dumbbells before introducing the barbell. When using a barbell, increase weight in small increments (2.5-5 pounds) only when you can maintain perfect form for all repetitions. Never sacrifice form quality for heavier weight—your last rep should look identical to your first.
Troubleshooting Common Hip Thrust Problems
Eliminating Lower Back Discomfort
Causes: Incorrect foot placement, overextending at the top, insufficient core engagement
Solutions: Adjust foot position until shins are vertical at extension, reduce weight temporarily, practice posterior pelvic tilt, strengthen your core with planks and dead bugs
Improving Glute Activation
Indicators: Feeling the exercise primarily in your quads or hamstrings instead of your glutes
Solutions: Lightly palpate your glutes during the movement to increase mind-muscle connection, use lighter weight initially, incorporate glute activation warm-ups like banded clamshells or fire hydrants before your main sets
Advanced Barbell Hip Thrust Variations
Single-Leg Hip Thrust Progression
Elevate one leg while performing the movement with the other. This variation addresses strength imbalances between sides and significantly increases core stability demands. Start with bodyweight or light dumbbell resistance before progressing to barbell loading. Focus on maintaining an even pelvis position throughout the movement—no hip hiking or dropping.
B-Stance Hip Thrust Technique
Position one foot slightly behind the other, with the heel of your rear foot aligned with the toes of your front foot. This stance provides more stability than single-leg variations while still creating significant unilateral demand. The B-stance allows you to use heavier loads than single-leg thrusts while still addressing muscle imbalances.
Safety Protocols and Recovery Guidelines
Essential Pre-Training Checks
Consult a physician before starting barbell hip thrusts if you have pre-existing back conditions. Always begin with a thorough warm-up including glute activation exercises and dynamic stretches. Start with bodyweight movements if you’re new to hip thrusts to ensure proper movement patterns before adding load.
Injury Prevention Must-Dos
Maintain core engagement throughout the entire movement—never let your ribs flare upward at the top position. Stop immediately if you experience sharp pain (not to be confused with normal muscle fatigue). Focus on movement quality over weight lifted—perfect form with moderate weight delivers better results than poor form with heavy weight. Allow proper recovery between sessions with adequate protein intake (0.7-1 gram per pound of bodyweight) and sufficient sleep.
Results Timeline and Expectations
Realistic Progress Markers
- 4-12 weeks: Noticeable improvements in glute shape and strength
- 8-12 weeks: Significant strength increases allowing heavier loads
- 18+ sessions: Measurable muscle growth in your glutes
- 3-6 months: Visible changes in clothing fit and posture
Consistency is your most powerful tool—aim for 1-2 hip thrust sessions weekly minimum. Pair progressive overload through gradual weight increases with proper nutrition and recovery for optimal results. Remember that everyone’s body responds differently; focus on your personal progress rather than comparing to others.
Mastering barbell hip thrusts takes practice but delivers unmatched glute development. Start with conservative weights, prioritize perfect form, and progress gradually. Your dedication to this movement will reward you with stronger, more powerful glutes that enhance both your athletic performance and physique. The key is consistency—show up, execute properly, and let the results follow.


