
Your deadlift stalls halfway up. Your bench press wobbles off your chest. You’re grinding through squats like you’re carrying an anvil. Chances are, it’s not your primary lifts failing—it’s your underdeveloped back. The barbell row solves this by forging the posterior chain that powers every major compound movement. When you learn how to do a barbell row with surgical precision, you transform it from a back-day afterthought into your most potent assistance exercise. This guide delivers the exact technique cues, mistake fixes, and programming protocols used by strength coaches to build thicker lats, bulletproof spinal stability, and lockout strength that transfers directly to your deadlift and bench.
Most lifters treat barbell rows as an upper-back isolation move, but they’re actually full-body power generators. Done correctly, they engage your lats, rhomboids, traps, rear delts, biceps, forearms, erector spinae, glutes, hamstrings, and core simultaneously. This makes them uniquely valuable for lifters who want to move heavier weight while protecting their spine. Forget endless lat pulldowns—you’ll gain more functional back strength in 8 weeks of properly executed barbell rows than years of random pulling exercises. Let’s fix your form and program so you build a back that actually supports your big lifts.
How to Do a Barbell Row: Perfect Setup for Power Transfer
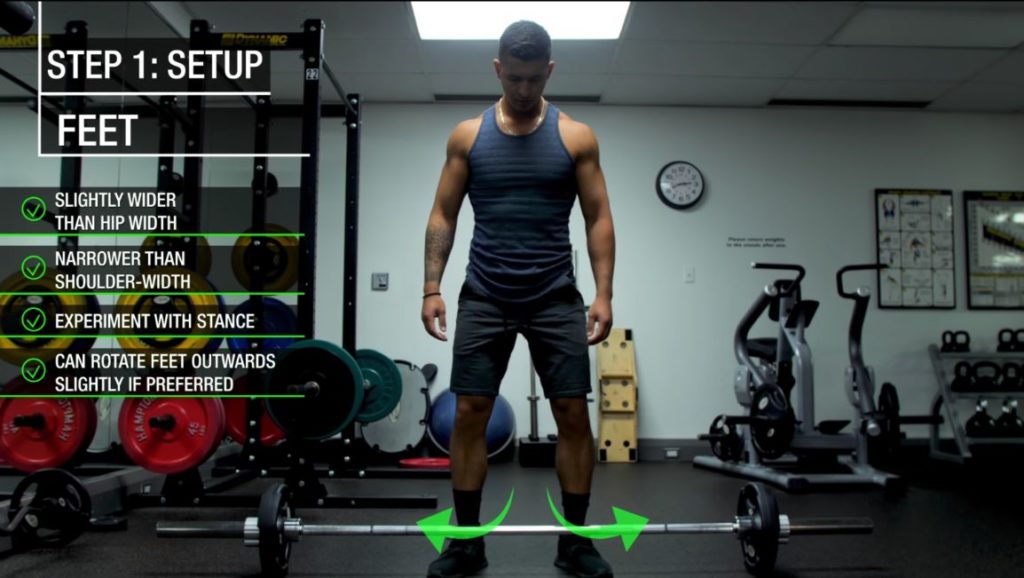
Your stance and grip make or break the entire movement. Stand with your mid-foot directly under the barbell—this aligns your center of gravity over your balance point for maximum force transfer. Use a medium stance: heels slightly wider than hip-width but narrower than shoulder-width. Point your toes outward about 30 degrees so your knees track in the same direction during the hinge, clearing the bar path from obstruction.
Grip Selection That Prevents Injury and Maximizes Tension
Take a double-overhand pronated grip (palms facing down) at medium width—narrower than your bench press grip but wider than your deadlift grip. Hold the bar low in your fingers rather than deep in your palms to prevent callus pinching and skin tearing. Wrap your thumbs fully around the bar for maximum control and muscle contraction. For heavy sets where grip fails before your back fatigues, use chalk or straps—but never switch to a mixed grip. Unlike deadlifts, the barbell row doesn’t require rotational control, so mixed grip unnecessarily torques your biceps tendons and creates muscular imbalances.
How to Do a Barbell Row: Master the Hip Hinge Position
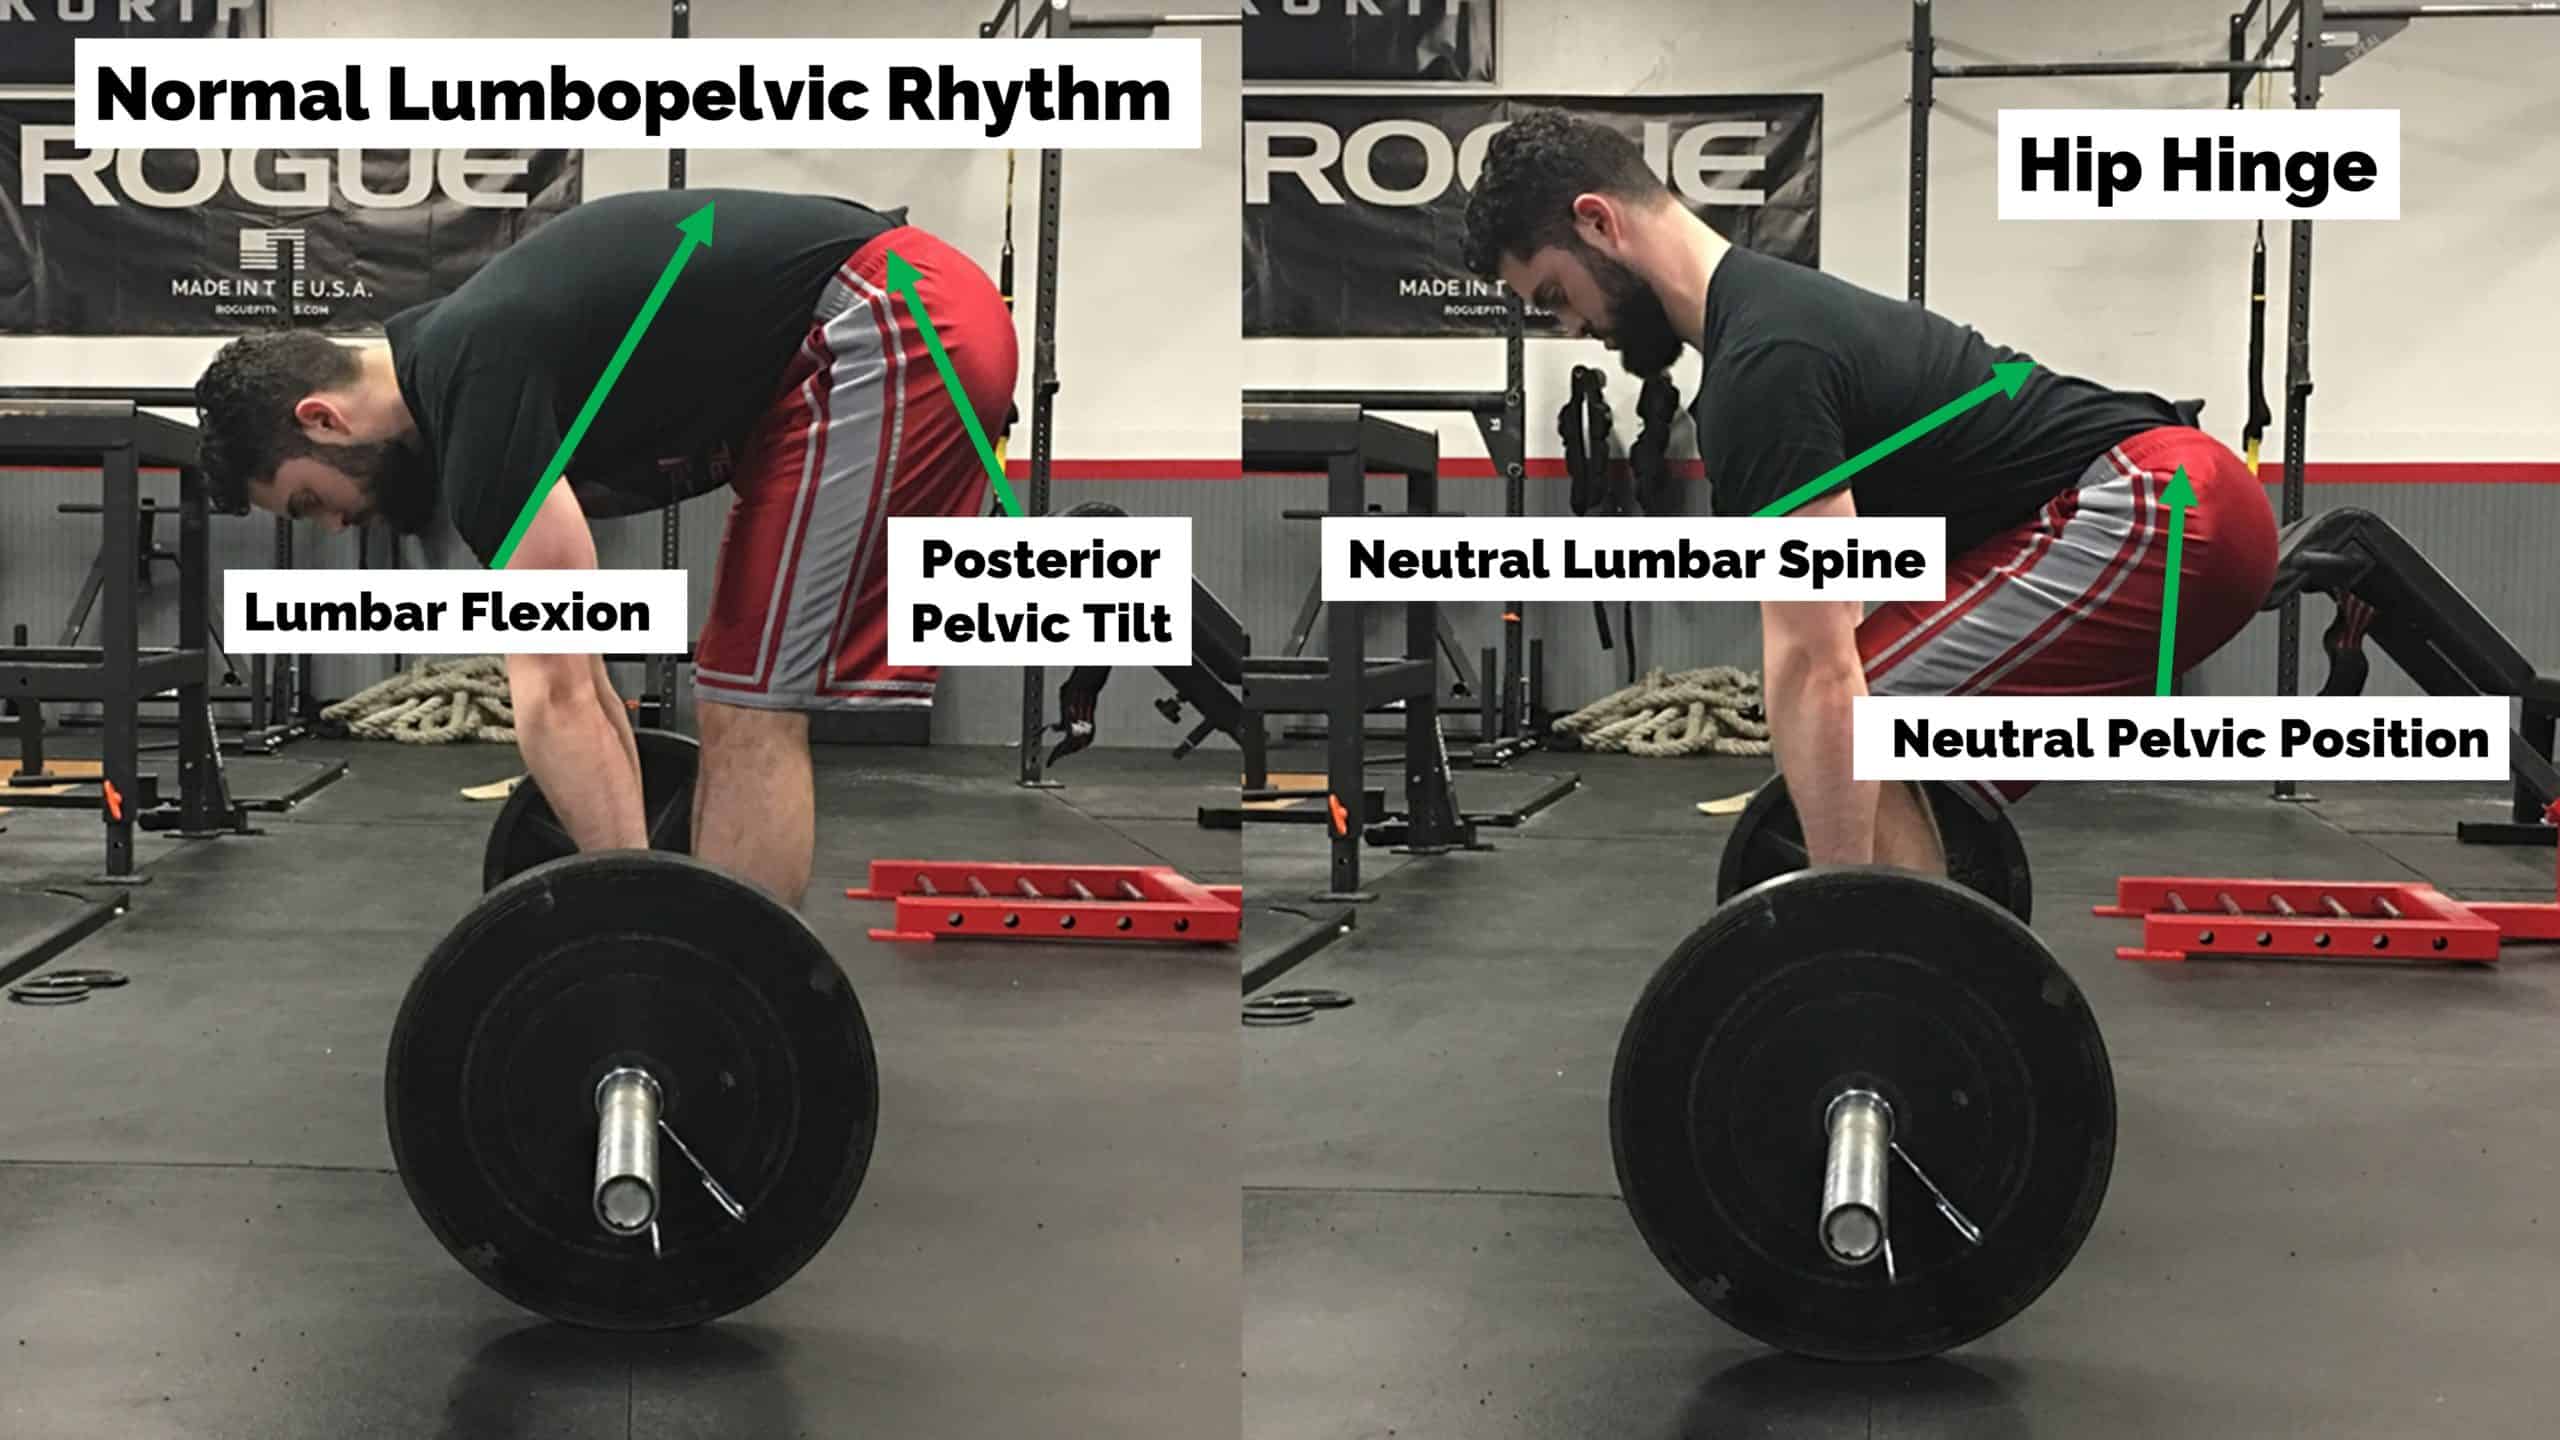
The hip hinge separates effective rows from dangerous spinal compromises. Push your hips back like you’re closing a car door with your butt until your torso sits perfectly horizontal (or within 15 degrees of parallel to the floor). Keep your knees unlocked but nearly straight—higher than your deadlift position—to keep your knees out of the bar path. Your shoulders should sit directly in front of the bar, creating a straight line from head to hips when viewed from the side. This position loads your hamstrings and glutes while minimizing shear forces on your spine.
Critical Check: Neutral Spine Before Every Rep
Achieve a neutral lumbar spine by maintaining a small natural arch—never rounded like a Halloween cat nor hyper-extended like a gymnast bridge. Create this position by actively raising your sternum toward the ceiling while keeping your head in line with your spine. Brace your core hard by taking a deep diaphragmatic breath and contracting your abs as if expecting a punch to the gut. This Valsalva maneuver stabilizes your entire trunk. Crucially, reset this brace every single time the bar settles on the floor—you’ll lose tension and risk injury if you skip this step between reps.
Row Technique Breakdown: Pull Like a Pro
Initiate the Pull with Explosive Precision
- Straighten elbows completely at the bottom position—do not pre-bend them.
- Take slack out of the bar by gently pulling upward until the plates touch the barbell sleeves.
- Drive elbows toward the ceiling explosively—this cue activates your upper back instead of your arms.
- Keep the bar traveling straight up over your mid-foot; any forward drift shifts load to your spine.
- Touch your lower chest or upper abdomen—the bar must contact your torso, not float beside it.
- Allow torso to rise ≤15 degrees as the bar leaves the floor; this permits hip assistance without turning into a deadlift-shrug hybrid.
- Finish with scapulae fully retracted and elbows behind your torso—imagine crushing a tennis ball between your shoulder blades.
Lower with Control to Maximize Muscle Damage
Lower the bar fast but controlled—faster than your concentric pull but not a reckless drop. Let the plates settle completely on the floor for 1-2 seconds before initiating the next rep. Use this pause to: re-flatten your torso to horizontal, re-brace your core, and reset your grip if needed. Never bounce the bar off the floor—each rep must start from a dead stop to maintain constant tension on your back muscles and prevent spinal compression from momentum.
Fix Common Row Mistakes Before They Injure You

| Mistake | Why It Hurts You | Instant Fix |
|---|---|---|
| Rounded back | Causes disc shear and nerve compression | Raise chest harder; narrow grip; elevate bar on 45cm plates |
| Rising torso >15° | Shifts load to hips, reduces upper-back activation | Reduce weight; focus on rowing elbows up, not hips |
| Bar drifting forward | Creates imbalance and shin/knee contact | Reset bar over mid-foot; push knees out during hinge |
| Flared elbows (90°) | Stresses shoulders; bar hits too high | Tuck elbows to 75°; lead with elbows toward ceiling |
| Bouncing reps | Uses momentum instead of muscle tension | Pause 1 second on floor; pull from dead stop every rep |
Programming Your Rows for Real Strength Gains
For Strength (3×/week programs)
Hit 5 sets of 5 reps with strict form. Add 2.5 kg (5 lbs) only when you complete all 25 reps with perfect technique—no torso rise beyond 15 degrees or bouncing. If form breaks, repeat the weight or deload 10%. This protocol builds the posterior chain strength that directly boosts your deadlift lockout and bench stability.
For Muscle Growth
Use 3-4 sets of 8-12 reps at 60-70% of your 1-rep max. Focus on explosive concentric pulls (1 second) and controlled eccentrics (3 seconds down). The extended time under tension maximizes lat hypertrophy while maintaining functional strength.
Essential Warm-up Sequence
1. 5 minutes light cardio (bike or rower)
2. Dynamic thoracic mobility: cat-camel stretches ×10
3. Ramp-up sets: empty bar ×10, 40% ×5, 60% ×3
Safety & Progression: Avoid Back Pain Forever
Never row with a rounded back—film yourself from the side to verify your spine position before adding weight. Master technique with moderate loads (50-60% 1RM) before chasing PRs. Use a lifting belt only after you can brace effectively without it; belts are performance tools, not crutches for poor form. If sharp lower-back pain occurs, immediately switch to chest-supported rows while rehabbing with Romanian deadlifts and good mornings to improve hip-hamstring flexibility.
Row Variations Explained: Choose Your Weapon
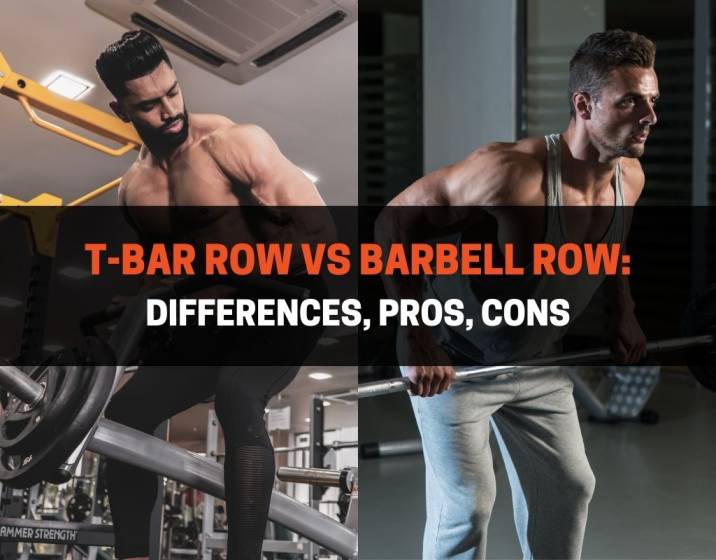
| Variation | When to Use It | Key Execution Tip |
|---|---|---|
| Pendlay Row | Powerlifting strength work | Torso stays strict horizontal; bar returns to floor each rep |
| T-Bar Row | Lower-back fatigue is high | Maintain identical torso rules; use v-grip for lat focus |
| Dumbbell Row | Unilateral strength deficits | Keep torso parallel to floor; drive elbow toward hip |
| Chest-Supported Row | Rehab or deload weeks | Eliminate lower-back involvement while maintaining volume |
Performance Standards: Are You On Track?
Healthy adult male 5-rep max benchmarks:
– Novice: 0.75 × bodyweight (e.g., 75kg for 100kg lifter)
– Intermediate: 1.0 × bodyweight
– Advanced: 1.25 × bodyweight
Females typically achieve 60-65% of male ratios due to upper-body strength differences. If you’re below novice standards, prioritize form over weight—your back will thank you when your deadlift jumps 20kg.
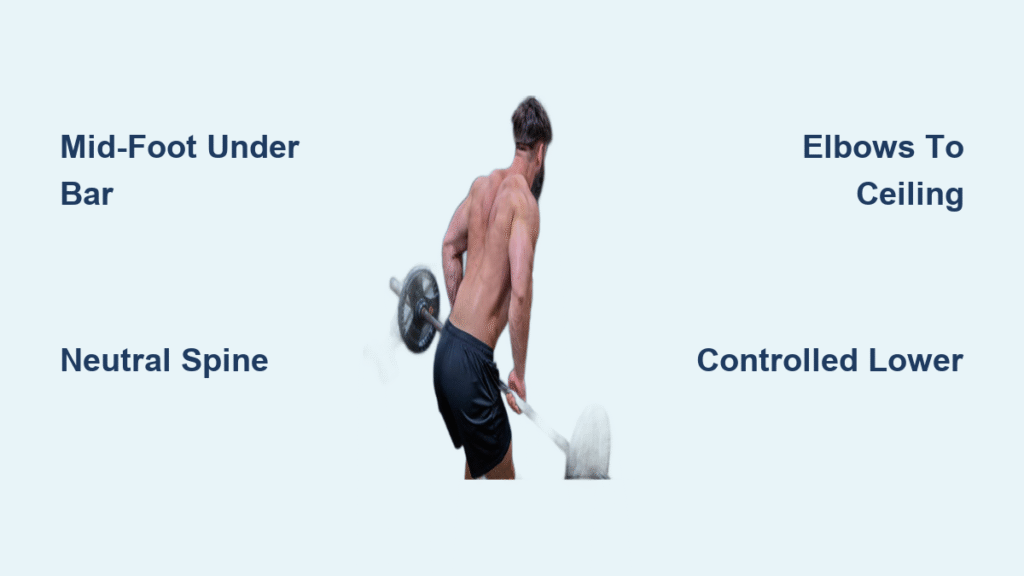
Quick Reference Cue Card: Print This
- Mid-foot under bar, medium stance, toes 30° out
- Grip medium, pronated, low in fingers, thumbs wrapped
- Hinge hips back, torso horizontal, chest up, back neutral
- Row elbows to ceiling, bar touches lower chest
- Torso rise ≤15°, scapulae fully retracted at top
- Lower controlled, reset on floor every rep
The barbell row isn’t just another back exercise—it’s your deadlift lockout insurance, your bench press stabilizer, and the fastest route to a thicker posterior chain. Master these mechanics, progress patiently using the programming protocols, and watch every major lift transform. When you consistently apply these cues, you’ll stop asking how to do a barbell row correctly and start reaping the strength rewards in every compound lift you perform. Your back holds up your entire lifting career—treat it with the precision this movement demands.


