You’ve probably seen experienced lifters lying on a decline bench, moving a barbell in a smooth arc behind their head, and wondered what magic this movement holds. The barbell pullover exercise has been a staple in physique development for decades, yet remains one of the most misunderstood movements in the gym. Many lifters either avoid it completely due to perceived shoulder risks or perform it incorrectly, missing out on its unique ability to build that dramatic V-taper back that transforms your entire physique.
When executed with precision, the pullover exercise barbell variation delivers unmatched latissimus dorsi development while simultaneously engaging your lower chest in a way few other exercises can. This comprehensive guide cuts through the confusion and gives you the exact protocol for mastering this classic movement. You’ll learn how to set up properly, execute with perfect form, avoid common pitfalls, and integrate this powerhouse exercise into your routine for maximum back development.
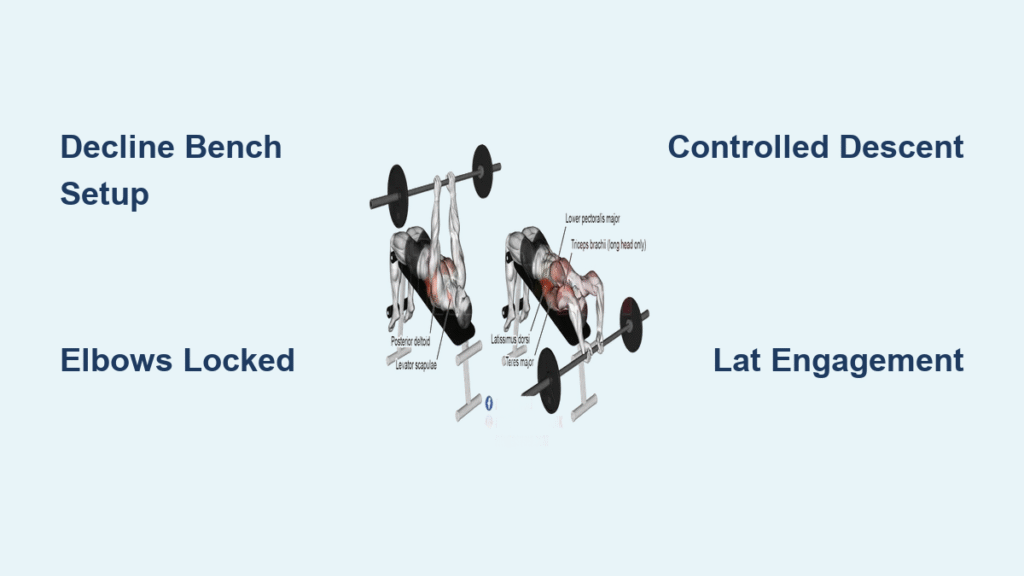
Decline Bench Setup for Optimal Performance
Bench Angle Selection Matters
Choose a decline bench specifically designed without overhead supports to accommodate the barbell’s necessary arc trajectory. The ideal decline angle ranges between 15-30 degrees—steeper angles increase lower chest involvement while shallower angles emphasize lat isolation. Position the bench away from walls or equipment that might interfere with the bar’s path, ensuring at least two feet of clearance above your head throughout the full range of motion.
Critical Bench Contact Points
Establish three non-negotiable contact points: your head, upper back, and lower back must maintain constant pressure against the bench surface. Any gap between your body and the bench creates instability that transfers stress to your shoulder joints. Before loading the bar, test your positioning by attempting to lift each contact point individually—if you can lift any section off the bench, readjust your position to maintain full-body contact.
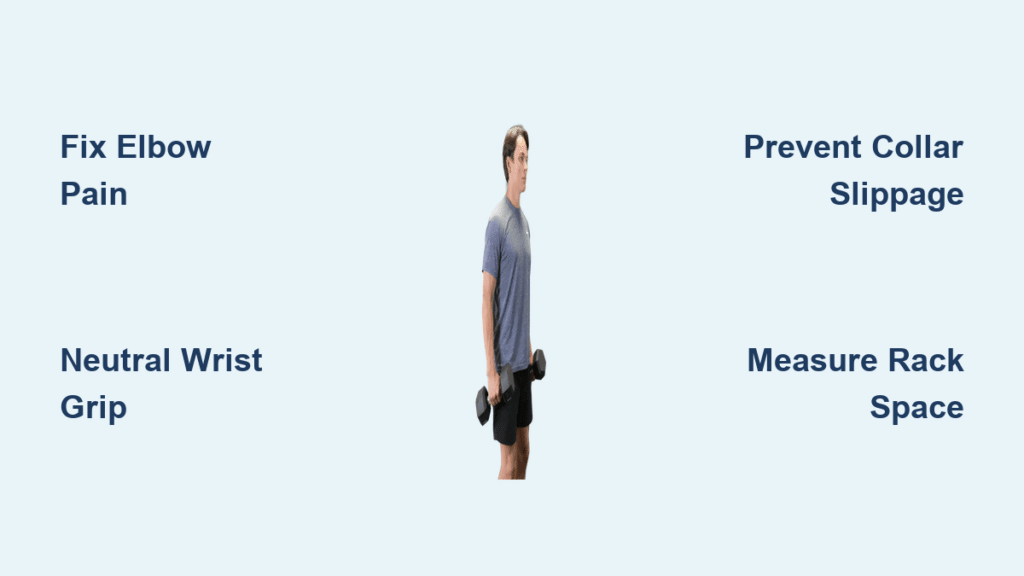
Perfect Grip and Starting Position
Hand Placement Precision
Grasp the barbell with an overhand grip at shoulder-width spacing—this width maximizes lat engagement while maintaining wrist neutrality. Your thumbs should wrap securely around the bar for safety (despite some lifters preferring a thumbless grip). Position the barbell directly overhead with arms fully extended and perpendicular to the floor. Your arms should create a straight line from shoulder to wrist, with elbows locked in a neutral position—not hyperextended.
Foot Security Protocol
Slide your feet under the provided pads until your shins form approximately 90-degree angles. Proper foot positioning prevents the natural tendency to slide down the decline bench as you lower the weight behind your head. Test the security by attempting to slide downward—if movement occurs, reposition your feet deeper under the pads. Your lower body should remain completely stable throughout the movement, serving as your foundation.
Three-Phase Movement Execution
Phase 1: Controlled Descent (3-4 Seconds)
Begin by inhaling deeply through your nose, expanding your ribcage to create intra-abdominal pressure for spinal stability. Lower the barbell posteriorly by moving your arms backward in a smooth arc pattern while maintaining dead-straight arms. Never bend your elbows during this phase—any elbow flexion shifts tension from lats to triceps. Focus on leading with your elbows rather than your hands to maximize lat stretch.
Phase 2: Maximum Extension (1-Second Hold)
Continue the descent until the barbell passes behind your head, achieving maximum safe shoulder extension. You’ll feel an intense stretch through your lats and chest. The endpoint occurs when your upper arms approach parallel with your torso—never force beyond this range. Hold this position for one second to maximize muscle fiber recruitment. Critical warning: If you experience shoulder pinching or discomfort at this point, reduce your range of motion immediately.
Phase 3: Powerful Contraction (1-2 Seconds)
Exhale forcefully while pulling the barbell upward through the same arc path. Focus on driving your elbows toward your hips to maximize lat engagement—imagine trying to squeeze a tennis ball between your shoulder blades. Return to the starting position with arms perpendicular to the floor, maintaining constant tension on the working muscles. Never lock out your elbows at the top position, as this removes tension from your lats.
Muscle Activation Breakdown
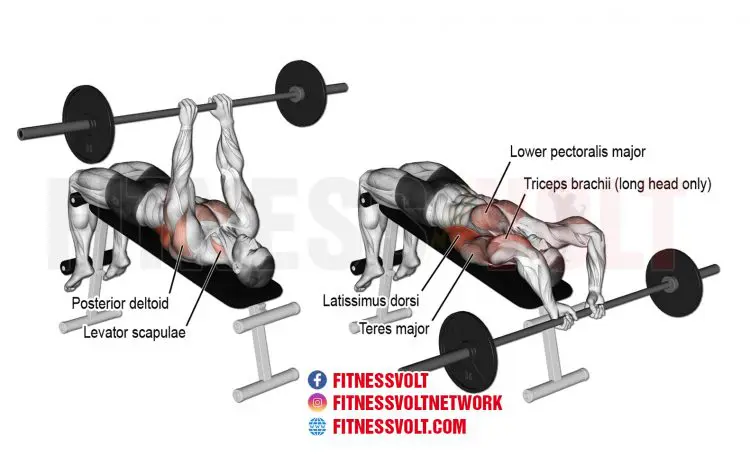
Primary Movers Identified
The barbell pullover uniquely targets latissimus dorsi as the primary mover—the massive back muscle responsible for creating that dramatic V-taper. Simultaneously, the lower portion of pectoralis major assists throughout the arcing motion, making this a hybrid chest-back developer. Pro tip: To emphasize lats, consciously pull your shoulder blades down and back during the contraction phase. To emphasize chest, focus on squeezing your lower pecs as you return to the starting position.
Secondary Stabilizers
Your posterior deltoids stabilize the shoulder joint during the extreme range of motion. The upper back musculature maintains scapular stability, while forearm flexors prevent grip failure as the bar reaches full extension overhead. These stabilizers work overtime when you maintain proper form, contributing to overall shoulder health and joint integrity.
Common Form Mistakes That Limit Results
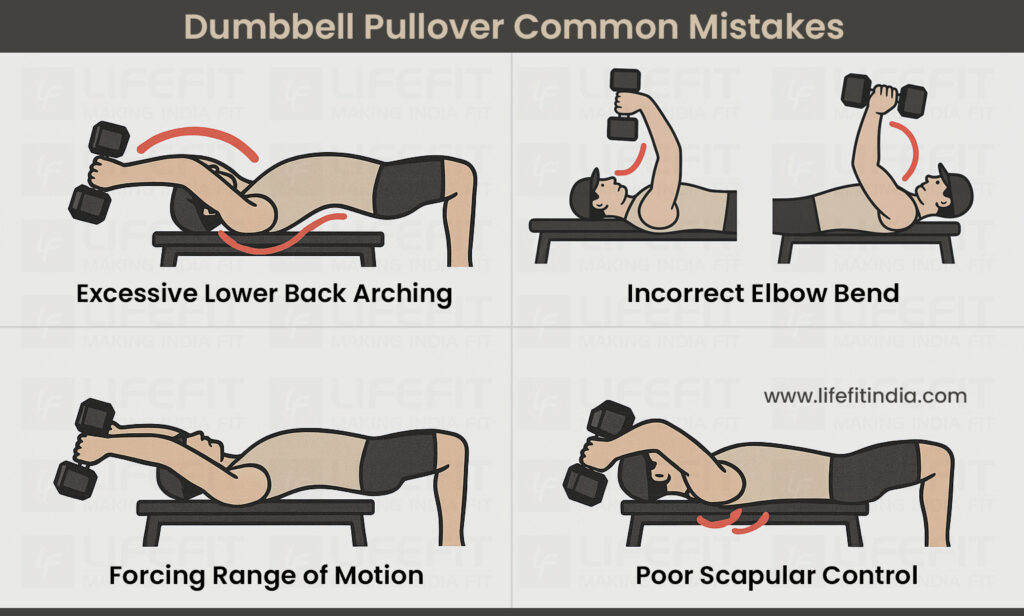
Elbow Bend Errors
The most prevalent mistake involves bending elbows during descent, transforming the isolation exercise into a triceps movement. Keep your elbows locked throughout—imagine your arms as steel cables connecting your shoulders to the barbell. Fix this: Perform the movement with lighter weight while consciously focusing on keeping elbows straight.
Range of Motion Issues
Overextending behind the head places excessive stress on shoulder capsules. Stop the descent when your upper arms reach approximately 180 degrees from your torso. Similarly, shortening the range by not bringing the bar fully overhead reduces lat activation significantly. Fix this: Practice the movement without weight first to establish your safe range of motion.
Breathing Breakdown
Holding your breath throughout the movement creates unnecessary intra-abdominal pressure and dizziness. Instead, inhale during the lowering phase and exhale during the lifting phase to maintain oxygen delivery and core stability. Fix this: Count “1-2-3-4” during the descent while inhaling, then “1-2” during the ascent while exhaling.
Progressive Overload Strategies
Micro-Loading Protocol
Add 2.5-5 pounds per side when you can complete 12 strict repetitions for three consecutive workouts. The barbell pullover responds exceptionally well to gradual increases, but avoid large weight jumps that compromise form. Pro tip: Use fractional plates (1.25lb or 2.5lb) for precise progression when you hit plateaus.
Rep Range Variations
For hypertrophy focus, work in the 10-12 rep range. For strength development, progress to 6-8 reps with heavier loads. Advanced lifters can experiment with 4-6 rep ranges using spotter assistance for the final reps. Critical note: Never sacrifice form for heavier weight—this exercise thrives on controlled movement, not maximal loading.
Safety and Injury Prevention
Pre-Exercise Screening
Test shoulder mobility before loading the barbell. Lie on the bench and lower empty hands behind your head—if you experience pain or severe restriction, address mobility issues before adding weight. Quick fix: Perform doorway pec stretches for 30 seconds before attempting the pullover.
Spotter Positioning
Position a spotter at your head level, ready to assist if the bar drifts off the proper arc. The spotter should place hands near the bar’s center, prepared to guide—not lift—the weight if form breaks down. Safety note: Never attempt heavy pullovers without a spotter—unlike many exercises, you cannot safely “dump” the weight if you fail.
Programming Integration
Weekly Frequency
Perform barbell pullovers 1-2 times per week as part of your back or chest training. This frequency allows adequate recovery while providing sufficient stimulus for continued progress. Expert recommendation: Place pullovers after compound movements like rows or pull-ups when your lats are pre-fatigued for maximum effectiveness.
Exercise Placement
Position pullovers after compound movements when your lats are pre-fatigued. This sequencing allows you to use lighter weights while maintaining high muscle fiber recruitment. Pro tip: For advanced lifters, try performing pullovers before your main compound lifts as a pre-exhaust technique to maximize lat activation during subsequent exercises.
Final Note: The barbell pullover exercise delivers unparalleled lat development when executed with precision. Start with just the bar or even lighter weights to master the movement pattern before adding significant load. Focus on the stretch and contraction rather than how much weight you can move—this is an isolation exercise that thrives on perfect form, not maximal loading. Consistently incorporating this movement with proper technique will transform your back development, creating that coveted V-taper that makes your entire physique look more impressive. Your future self will thank you for taking the time to master this classic movement correctly.