
Your back workout feels incomplete—despite hitting pull-ups and deadlifts, that coveted lower-lats thickness remains elusive. Enter the supinated barbell row, the unsung hero that simultaneously torches your middle back and transforms your biceps. Unlike traditional overhand rows, this underhand variation uniquely targets the lower lat fibers responsible for that dramatic V-taper while delivering serious arm growth. Most lifters sabotage this movement by loading excessive weight or ignoring critical safety cues, turning it into a biceps-tendon time bomb. This guide reveals how to execute perfect form, program intelligently, and avoid the injury pitfalls that derailed legends like Dorian Yates.
Lock Down Your Setup for Maximum Safety
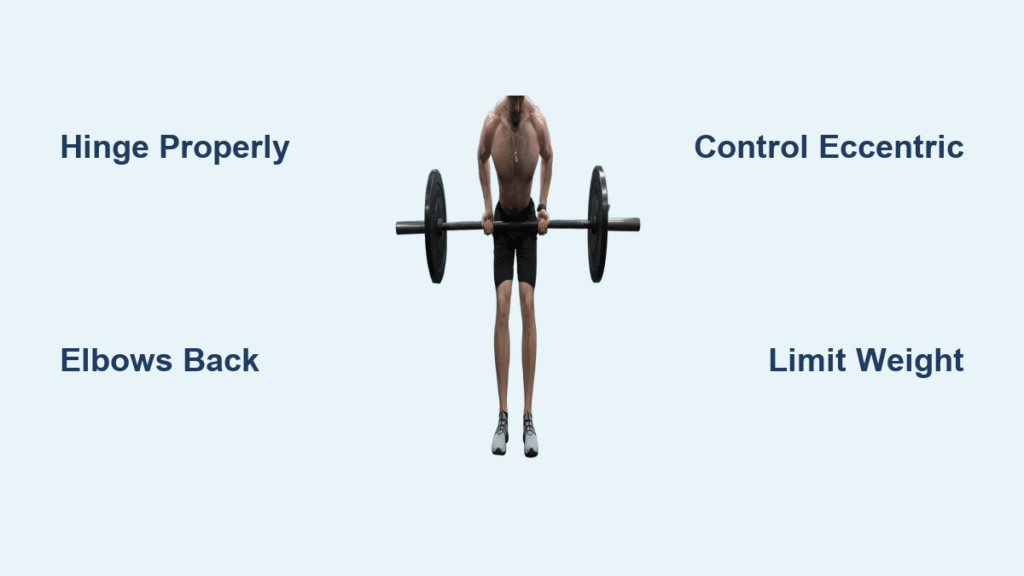
Nail the Hip Hinge and Torso Angle
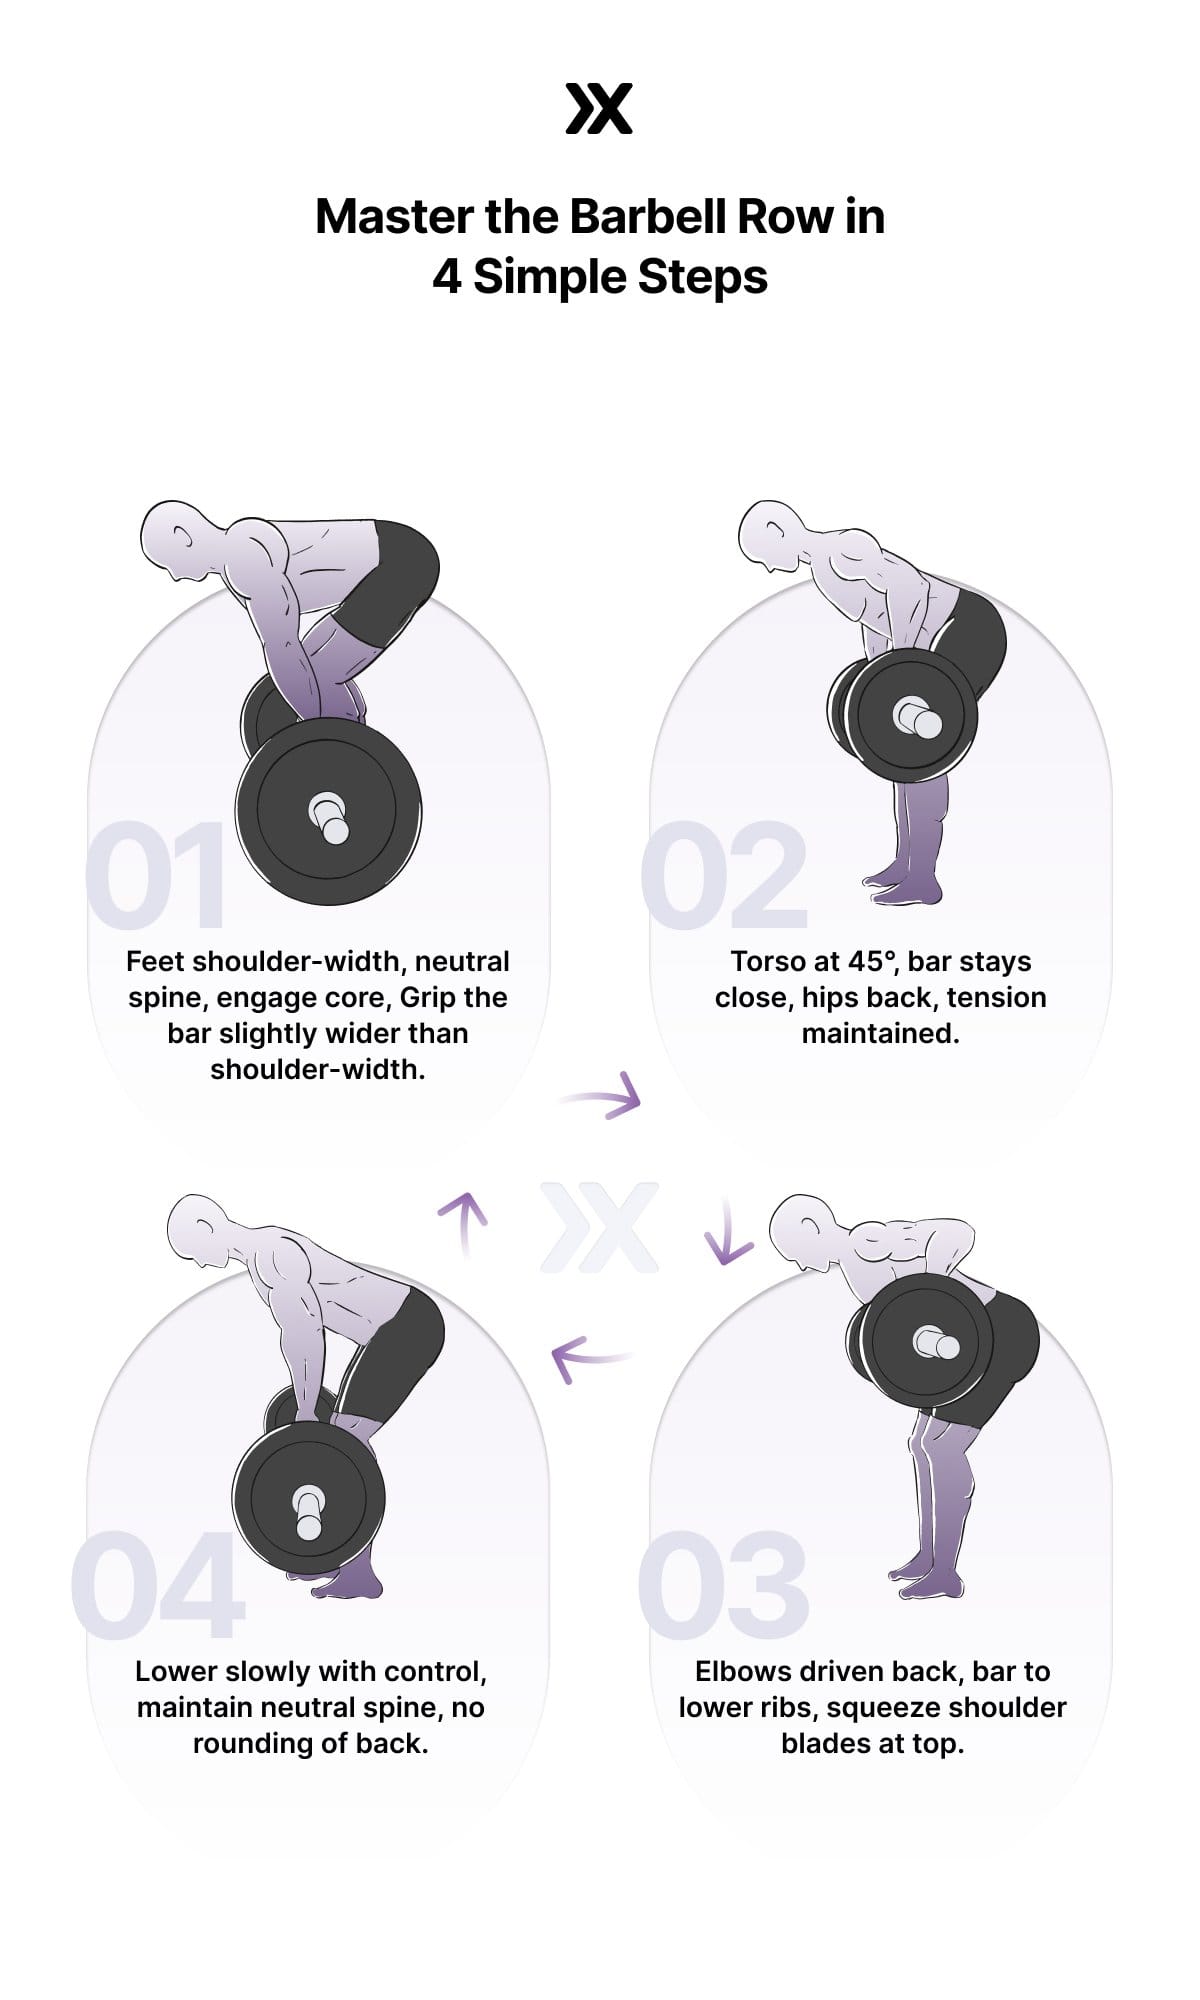
Forget “bending over”—this requires a precise deadlift-like hinge with your chest nearly parallel to the floor. Stand with feet shoulder-width apart, knees softly bent, and push your hips back until your torso hits 45 degrees. Crucially, maintain a neutral spine from skull to tailbone—no rounding or over-arching. Your chest must stay protracted (proud) throughout, eyes focused 6-8 inches ahead to prevent neck strain. If your hamstrings scream, reduce the hinge depth slightly; forcing excessive parallel positioning compromises spinal safety.
Perfect Your Grip and Bar Position
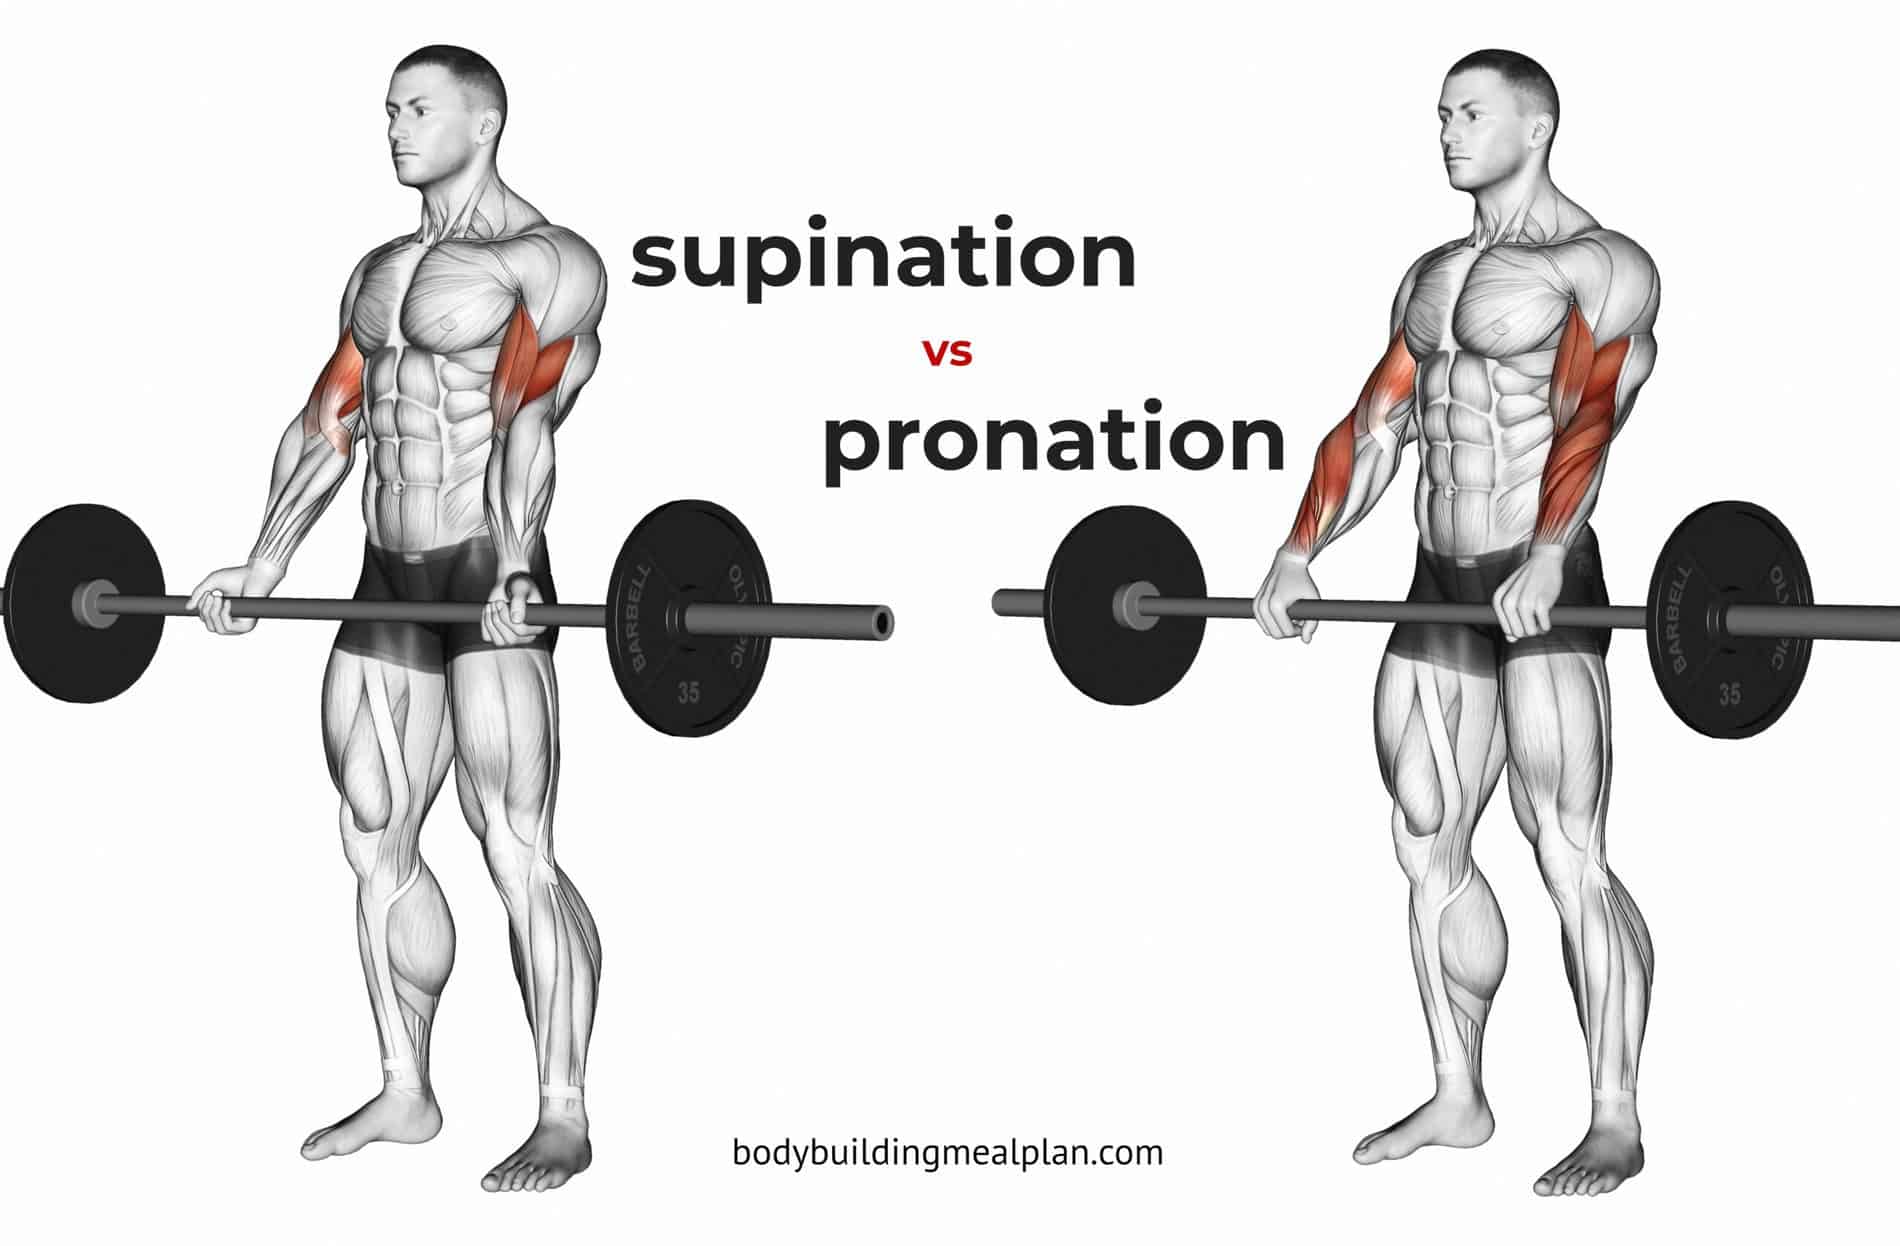
Grip the barbell with palms up at shoulder-width—wider grips reduce biceps activation while narrower ones strain wrists. At full arm extension, the bar should hang directly below your shoulders with arms straight but elbows slightly bent. This “micro-bend” is non-negotiable for biceps tendon safety, preventing dangerous maximal stretch under load. Check your wrist alignment: knuckles to elbows must form a straight line. If your wrists hyperextend, switch to an EZ-bar or use a thumbless hook grip (thumb wrapped over fingers) to maintain neutral positioning.
Activate Your Core Like a Powerlifter
Brace your core as if preparing for a 500-pound deadlift—take a 360-degree breath into your belly and tighten abdominal muscles hard. This intra-abdominal pressure shields your spine during the pull. Test your bracing: gently poke your abs—they should feel like a solid drum. Without this foundation, your lower back will round during heavy sets, transferring dangerous shear forces to your lumbar discs. Hold this brace from setup through the entire set; resetting between reps is mandatory.
Execute Flawless Rows That Grow Lower Lats
Drive Elbows, Not Hands to Engage Lats
Initiate every rep by driving elbows backward toward your hip pockets—not upward. This mental cue shifts focus from biceps to lats and traps. The bar should travel vertically toward your belly button, never your chest. If your elbows flare outward, you’re recruiting rear delts instead of lower lats. Keep the bar path close to your body—imagine dragging it up your thighs. At peak contraction, your upper arms should sit slightly behind your torso line with shoulder blades retracted hard (visualize crushing a tennis ball between them).
Master the Eccentric for Hypertrophy
Lower the bar under strict 3-4 second control—no dropping. Resist gravity throughout the eccentric phase; this builds muscle damage and teaches positional strength. At full extension, stop just before shoulders protract (no “hanging” stretch). This protects biceps tendons by avoiding maximal stretch under load—a key factor in Dorian Yates’ infamous 400-pound tear. If you hear plates clanging at the bottom, you’re moving too fast. Reset your scapular position before each pull: retract shoulder blades first, then initiate the row.
Why Underhand Rows Outperform Standard Variations
Targeted Muscle Activation Breakdown
The supinated grip uniquely emphasizes lower lat fibers—the section creating back thickness from waist to armpit—while delivering intense biceps brachii stimulation. This dual activation makes it superior for hypertrophy versus pronated rows, which prioritize upper lats for width. Your middle/lower traps and rhomboids handle scapular retraction, but crucially, the underhand position reduces upper-trap dominance that plagues overhand rows. Secondary stabilizers like erector spinae work isometrically to maintain spinal neutrality, while teres major/minor lock down shoulder joints.
Critical Grip Comparison for Injury Prevention
| Benefit | Supinated Row | Pronated Row |
|---|---|---|
| Lat Development | Lower fibers & thickness | Overall width |
| Biceps Growth | High activation (elbow flexion) | Minimal involvement |
| Joint Stress | Wrist/shoulder-friendly | High wrist torque |
| Max Safe Load | ≤1x bodyweight | 1.5x+ bodyweight |
This table reveals why supinated rows are hypertrophy goldmines but strength liabilities. While you’ll lift less weight than pronated rows, the trade-off is unparalleled lower-lat and biceps development with reduced wrist strain. Crucially, exceeding 1x bodyweight dramatically increases biceps tendon rupture risk—especially when fatigued.
Prevent Biceps Tears Like a Pro
Smart Loading Strategies That Actually Work
Dorian Yates’ 400-pound tear (at 280 pounds bodyweight) wasn’t random—it happened during pre-contest training when intensity techniques maxed out recovery. For 95% of lifters, working loads should never exceed bodyweight. Start conservatively: 40-60 pounds for beginners (including 45-pound bar), focusing on 12-15 perfect reps. Progress by adding sets or reps before increasing weight. Only add 5-10 pounds when you hit 2+ extra reps on your final set. Advanced lifters handling 225+ pounds must use lifting straps to prevent grip failure from shifting load to biceps.
Form Cues That Save Your Arms
Two non-negotiable safety rules: pull to waist level (not chest) and maintain slight elbow bend at full extension. The waist-pull reduces biceps lever arm stress by 30% versus chest pulls. That micro-bend at the bottom prevents maximal tendon stretch—Yates’ tear occurred during full elbow extension under heavy load. Cue “row with elbows, not hands” to engage lats first. If elbows lock straight during eccentrics, reduce weight immediately. When elbows feel “tweaky,” switch to neutral-grip rows for 2-3 weeks.
Fix These Common Form Disasters Immediately
Stop Rising Your Torso Mid-Rep
Your chest lifting toward the ceiling turns rows into upright rows, killing lat activation. This happens when lifters chase heavier weights than their hinge stability allows. Solution: Reduce weight by 20% and place a foam roller vertically against your chest. Maintain contact throughout the set—this forces chest-down positioning. Film your sets: if your hip angle changes more than 5 degrees from start to finish, you’re cheating.
Eliminate Wrist Hyperextension
Bent wrists under load cause joint pain and reduce force transfer by 40%. Fix this instantly with a thumbless “hook” grip: wrap fingers over thumb on the bar. For chronic wrist issues, switch to an EZ-bar—the angled handles create natural wrist alignment. Never let wrist position dictate your training; compromised form invites injury regardless of weight lifted.
End Jerky Momentum Rows
Using body English to heave the bar shifts tension off your back and into your biceps tendons. Reset completely between reps: lower the bar, retract scapulae, then pull. If you can’t control the eccentric for 3+ seconds, the weight is too heavy. Quality over quantity applies doubly here—5 strict reps build more muscle than 10 sloppy ones while keeping tendons intact.
Program Rows for Your Specific Goals
Bodybuilding Hypertrophy Protocol
Perform 3-4 sets of 8-12 reps at 60-75% of your max, emphasizing 3-4 second eccentrics and 1-2 second peak contractions. Pair with pull-ups for complete lat development. Never train to failure—stop 1-2 reps shy to preserve form. Train this variation once weekly during hypertrophy phases, alternating with pronated rows every 4-6 weeks to prevent overuse.
General Fitness Application
Use moderate loads (50-60% max) for 12-15 reps to reinforce hip-hinge mechanics while building posterior-chain endurance. This builds functional strength for daily movements like lifting groceries or children. Focus on perfect scapular retraction at the top—imagine pinching a pencil between your shoulder blades. Perform after compound lifts like deadlifts when fatigue is manageable.
Advanced Strength Loading (Use Extreme Caution)
Only experienced lifters should attempt 4-5 sets of 5-6 reps at 75-85% max. Mandatory: Use lifting straps to prevent grip failure and keep weight ≤1.2x bodyweight. Limit this protocol to 3-4 weeks during strength mesocycles, followed by a 10-15% deload. If elbows ache during warm-ups, skip this loading scheme entirely—biceps tears aren’t worth the ego lift.
Variations That Solve Your Specific Problems
Chest-Supported Rows for Lower-Back Relief
Lie face-down on a 30-45 degree incline bench to eliminate spinal loading. This version lets you focus purely on back contraction without hip-hinge fatigue. Ideal for lifters with lower-back issues or those needing higher volume (4×15 reps). Keep elbows tucked and pull toward lower ribs—bench support prevents torso rise.
EZ-Bar Rows for Wrist Pain
The curved bar reduces wrist strain by 50% while maintaining supinated benefits. Use shoulder-width hand placement on the angled grips. This variation allows 10-15% heavier loading for most lifters without joint discomfort. Start with lighter weights to adapt to the different grip angle.
Dumbbell Rows for Muscle Imbalances
Perform single-arm rows on a bench to correct strength asymmetries. The supinated hand position targets lower lats while allowing greater range of motion than barbells. Focus on slow eccentrics (4 seconds) and full scapular retraction. Use 10-20% less weight per arm than your barbell max.
The supinated barbell row remains unmatched for building that elusive lower-lats thickness while adding serious biceps mass—but only when executed with precision. Respect the biceps tendon by capping loads at bodyweight, prioritize controlled eccentrics, and never sacrifice form for heavier weights. Implement these protocols for 6-8 weeks, and you’ll develop back depth that turns heads in the gym while keeping your arms intact. When in doubt, choose perfect form over ego lifting—your future self (and tendons) will thank you.


