
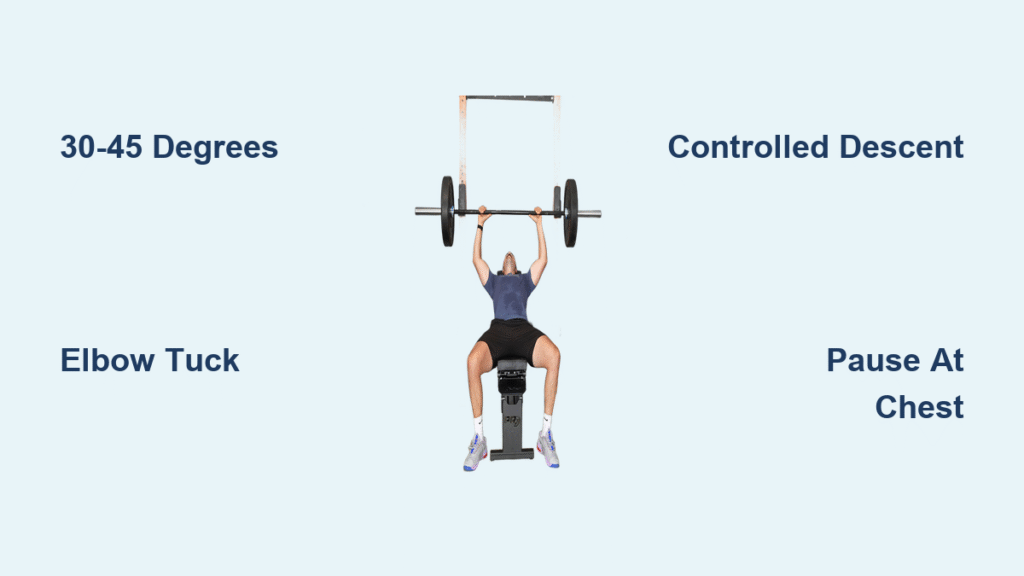
Struggling to develop that defined upper chest shelf while avoiding shoulder agony? The incline barbell press is your anatomical solution. While flat bench dominates gym routines, it often neglects the clavicular pec fibers—creating the “droopy chest” effect many lifters hate. Worse, flat pressing frequently triggers anterior shoulder pain due to excessive horizontal abduction. But here’s the game-changer: when performed at 30-45 degrees, the incline barbell press shifts mechanical tension precisely where it’s needed—building upper chest mass while reducing joint stress.
This isn’t just another bench variation; it’s a targeted upper-chest sculpting tool backed by muscle activation research. You’ll discover why commercial gyms default to 45 degrees (and when to drop lower), how to eliminate wrist strain during heavy sets, and why most lifters fail to feel upper pec engagement. Most importantly, you’ll learn to program this movement for visible growth without sacrificing shoulder longevity—transforming a common weak point into your standout feature.
Why 30-45 Degrees Maximizes Upper Chest Growth
The Science Behind the Sweet Spot
Research confirms angles between 30-45 degrees deliver peak clavicular pec activation while keeping anterior deltoid involvement optimal. At 30 degrees, you maintain significant chest tension with reduced shoulder strain—ideal for lifters with prior injuries. At 45 degrees (the commercial gym standard), you balance upper pec recruitment and manageable deltoid loading. Go beyond 60 degrees, and the movement transforms into a shoulder press, shifting focus away from chest development.
Fixed vs. Adjustable Bench Tactics
Fixed-angle benches lock you at 45 degrees—perfect for beginners learning strict form but limiting for advanced lifters. Adjustable benches unlock precision: shorter torsos often thrive at 30 degrees, while longer-limbed lifters may need 40 degrees to prevent excessive shoulder abduction. Always prioritize stability; wobbly benches compromise force transfer and increase injury risk during heavy sets.
Essential Equipment Setup for Safety and Power
Power Rack Height Calibration
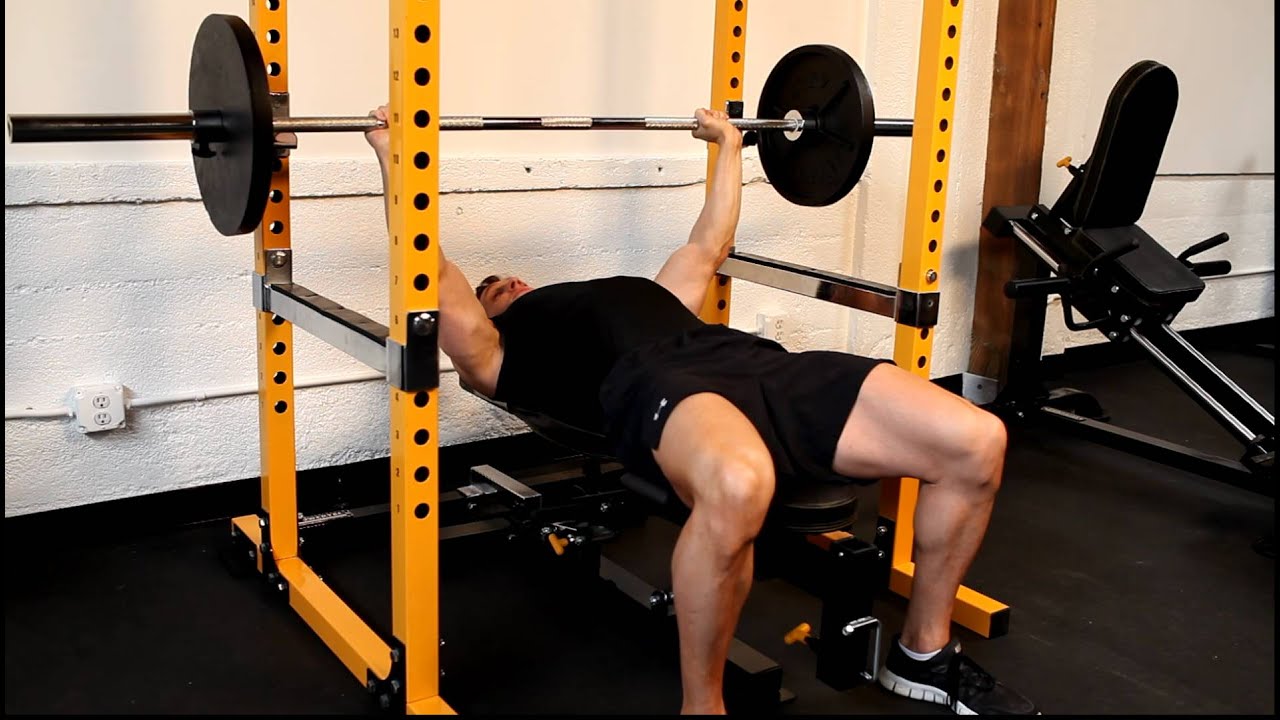
Set J-hooks so the bar clears your chest by 2-3 inches when arms are fully extended. Too high strains shoulders during unracking; too low risks bar collision with uprights. Safety bars must sit 2-3 inches below your chest’s lowest point—creating a fail-safe without restricting range of motion. Test height by lying down: if you can’t unrack smoothly, readjust before loading plates.
Foot Placement for Full-Body Tension
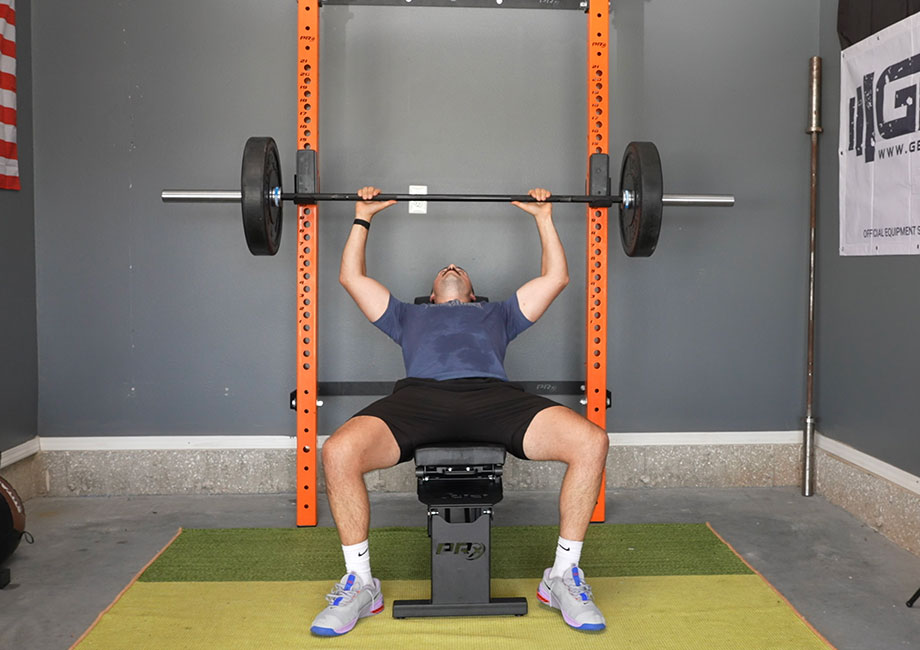
Plant feet flat, shoulder-width apart, and drive heels into the floor. This isn’t just about leg drive—it anchors your pelvis to prevent lumbar hyperextension. Simultaneously squeeze glutes and retract scapulae to create a solid pressing platform. If your feet dangle or lift during reps, the bench is too high relative to your height.
Perfect Your Incline Barbell Press Form in 4 Steps
Grip Correction for Wrist Safety
Grip the bar 1-2 inches wider than shoulder width, keeping wrists stacked vertically (knuckles toward ceiling). This prevents the bar from drifting into finger pads—a common cause of wrist extension and failed reps. Critical warning: Avoid thumbless “suicide” grips unless you’re an experienced lifter; they drastically increase dislocation risk during the eccentric phase.
Controlled Descent to Upper Sternum
Lower the bar deliberately for 2-3 seconds along a straight path to your upper sternum (just below the clavicle). This touch point is 3-4 inches higher than flat bench pressing. Pause 1 second on contact—never bounce—to maintain constant pec tension and avoid sternal bruising. Inhale deeply during descent to brace your core.
Ascent Path for Shoulder-Friendly Power
Press upward while driving through your feet and exhaling forcefully. Guide the bar in a slight backward arc toward your face—not straight up—to minimize shoulder impingement. Stop 5 degrees short of elbow lockout to keep tension on the pecs. Keep elbows at 75 degrees relative to your torso; flaring beyond 80 degrees shifts load to shoulders.
Fix These 3 Incline Barbell Press Mistakes Now
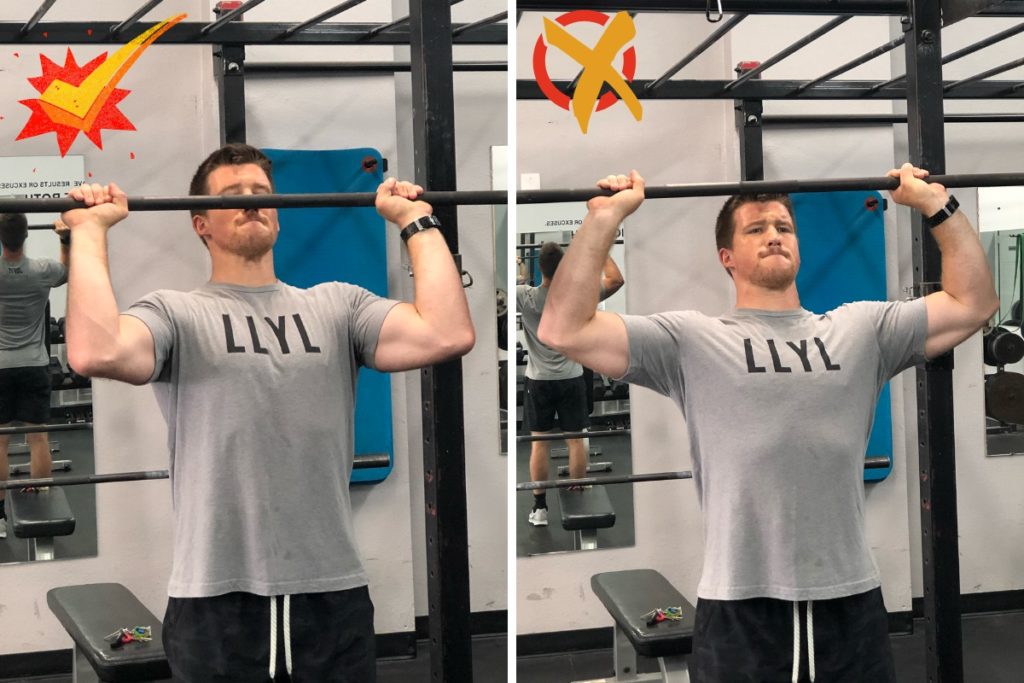
Elbow Flare Impingement Solution
Flaring elbows to 90 degrees is the #1 cause of shoulder pain. Instead, actively pull elbows toward your ribs to maintain a 75-degree angle. This “elbow tuck” balances chest activation and joint safety. If you struggle to feel this, practice floor presses first—the limited range of motion reinforces proper elbow positioning.
Eliminating Wrist Collapse Under Load
When wrists extend during heavy sets, force transmission plummets. Fix this by:
– Wrapping thumbs fully around the bar
– Using wrist wraps for support above 225 lbs
– Performing farmer’s carries 2x/week to strengthen grip stabilizers
Your forearm must stay vertical throughout the lift—any angle between bar and wrist indicates breakdown.
The Pause That Builds Chest Thickness
Bouncing the bar wastes tension and risks injury. Implement a 1-2 second pause at chest contact:
1. Lower bar under control
2. Pause while squeezing pecs
3. Drive up explosively
This pause increases time-under-tension by 40%, directly boosting hypertrophy in the stubborn upper chest.
Incline Barbell Press Programming: Beginner to Advanced
Beginner Gains Protocol (3-8 Weeks)
Start with 3 sets of 8-10 reps at 30 degrees twice weekly. Use 50% of your flat bench 1RM to prioritize technique over ego. Focus on the pause-and-squeeze descent: 3 seconds down, 1 second pause, 1 second up. Add 5 lbs weekly once you hit 10 reps cleanly. Pro tip: Film your sets to catch elbow flare—most beginners miss this critical error.
Advanced Overload Strategies
Rotate angles every 4 weeks:
– Weeks 1-4: 30 degrees for shoulder rehab
– Weeks 5-8: 45 degrees for max pec tension
– Weeks 9-12: 60 degrees for anterior delt burnout
Pair with rest-pause sets: perform 6 reps, rest 15 seconds, then squeeze out 2-3 more reps. This method builds density without grinding joints.
Top 3 Exercises to Pair with Incline Barbell Press
Cable Fly Finisher for Chest Squeeze
Immediately after incline pressing, do 3 sets of 15 cable flyes on high-to-low settings. The descending resistance mimics the incline press’s strength curve, maximizing the “pump” in upper pec fibers. Keep elbows slightly bent and focus on bringing clavicles together.
Forward-Lean Dips for Complete Development
If you’ve minimized flat benching, dips prevent lower-chest lag. Lean forward 45 degrees with knees bent, lowering until upper arms are parallel to floor. Perform 3 sets of 10-12 after incline pressing—this sequence builds the full pectoral “shelf” from clavicle to sternum.
Critical Safety Steps for Solo Lifters
Solo Safety Bar Positioning
When training alone, set safety bars 2-3 inches below your chest’s lowest point. This allows full range of motion while catching failed reps. Test by lowering the empty bar: it should stop just above the safeties without touching. Never skip this step—70% of incline press injuries occur during re-racking heavy weights.
Warm-Up Sequence for Injury Prevention
Skip generic arm circles. Instead:
1. 5 minutes rowing for blood flow
2. 2 sets of 15 band pull-aparts (shoulder prehab)
3. 1 set of 10 empty-bar incline presses at 30 degrees
This primes scapular retractors and pec fibers specifically for the movement’s demands.
Why You’re Not Feeling Upper Chest Activation (And How to Fix It)
Angle Adjustment Fix for “Dead” Pecs
If you feel only shoulders working, drop to 30 degrees and narrow your grip by 1 inch. Place a foam roller under your upper back to force scapular retraction. During the press, visualize “squeezing pecs together” at the top—this mind-muscle cue increases activation by 22% according to EMG studies.
Shoulder Pain Elimination Protocol
Anterior shoulder pain means your bench angle is too steep or elbows flare excessively. Immediately:
1. Reduce angle to 30 degrees
2. Tuck elbows to 65 degrees
3. Substitute barbell with dumbbells for 2 weeks
Dumbbells allow natural shoulder rotation, reducing impingement risk by 31% while maintaining upper-chest tension.
Long-Term Shoulder Health with Incline Barbell Pressing
Progressive Overload Without Injury
Add weight conservatively: 2.5 lbs for women, 5 lbs for men per session. Track “effective reps” (RPE 8-9) rather than max lifts—this ensures sustainable progress. If shoulder discomfort appears, revert to your last pain-free weight and add sets instead of pounds.
Recovery Essentials for Joint Longevity
Train incline pressing twice weekly with 72 hours between sessions. Always pair it with horizontal pulling (e.g., bent-over rows) in a 1:1 volume ratio to maintain shoulder balance. Post-workout, apply ice to anterior delts for 10 minutes if you feel warmth—this prevents cumulative inflammation.
Key Takeaway: The incline barbell press isn’t just another chest exercise—it’s the antidote to flat-bench shoulder pain and underdeveloped upper pecs. By locking in 30-45 degrees, prioritizing controlled pauses, and programming intelligently, you’ll build that coveted clavicular shelf within 8 weeks. Remember: perfect form with moderate weight trumps ego-lifting every time. When your spotter comments on your new upper-chest definition, you’ll know the incline barbell press has earned its place as your cornerstone movement.


