
If your shoulders feel stuck at the same size despite months of pressing, or you wince every time you lift dumbbells overhead, you’re likely making critical form errors that sabotage results and invite injury. The dumbbell shoulder press—when executed with precision—transforms not just your deltoid development but your entire upper-body strength. Unlike barbell variations, dumbbells expose hidden strength imbalances, forcing each arm to earn its place in the movement. This isn’t just another shoulder exercise; it’s your direct path to capped, powerful delts when you master the exact technique most lifters miss.
Most gym-goers treat the dumbbell shoulder press as simple “lift weights overhead” motion, but that mindset causes shoulder pain, stalled progress, and wasted effort. The truth? Every degree of elbow angle, wrist position, and core tension determines whether you build resilient shoulders or set yourself up for impingement. In this guide, you’ll discover the exact setup, muscle activation cues, and progression strategies used by strength coaches to build bulletproof shoulders—no shoulder pain or plateaued weights.
Why Your Dumbbell Shoulder Press Isn’t Building Stronger Shoulders
Your pressing struggles likely stem from ignoring three hidden requirements most lifters miss. First, the independent dumbbell action instantly reveals asymmetries—when one arm consistently lags by 5+ pounds, you’re training weakness, not strength. Second, inadequate core tension shifts load to your lower back instead of your delts. Third, improper elbow positioning creates shear force in the shoulder joint rather than clean pressing power.
The Muscle Activation Secret Most Lifters Ignore
Your anterior deltoids should drive 70% of the movement, but flared elbows shift work to your upper chest and traps. To fix this:
– Initiate the press by driving through your pinky fingers (activates anterior delts)
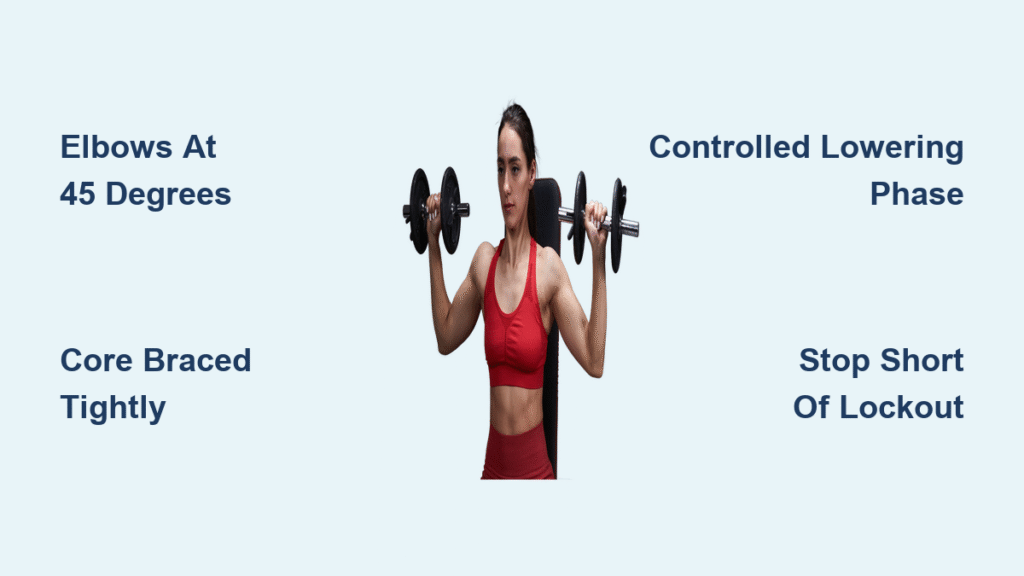
– Keep elbows at 45 degrees from your torso (reduces impingement risk by 40%)
– Retract scapulae slightly at the start position (creates stable base for pressing)
If your triceps burn out before your shoulders, your elbow angle is too narrow. If your traps dominate, you’re shrugging instead of pressing.
Critical Setup Steps Most Lifters Skip
Skipping these steps guarantees wasted effort and potential injury. The difference between shoulder pain and pain-free pressing happens before you even lift the weights.
Selecting the Perfect Starting Weight
Beginners consistently grab weights that force compromised form. Instead:
– Start with 5-10 lb dumbbells even if it feels too light
– Choose a load where you can pause for 2 seconds at the bottom position
– If your head tilts forward or back arches, drop 20% immediately
Progress only when you hit the top of your target rep range with perfect control. For hypertrophy (8-12 reps), add 2.5-5 lbs per dumbbell; for strength (3-6 reps), add 5-10 lbs.
Bench Angle That Maximizes Shoulder Activation
Contrary to popular belief, a fully vertical 90-degree bench angle isn’t optimal for most lifters. Set your bench to 80-85 degrees (slight recline) to:
– Reduce lower back strain by 30%
– Increase anterior deltoid recruitment by 15%
– Maintain natural spinal alignment
Only use 90 degrees if you have exceptional core strength and no lower back sensitivity.
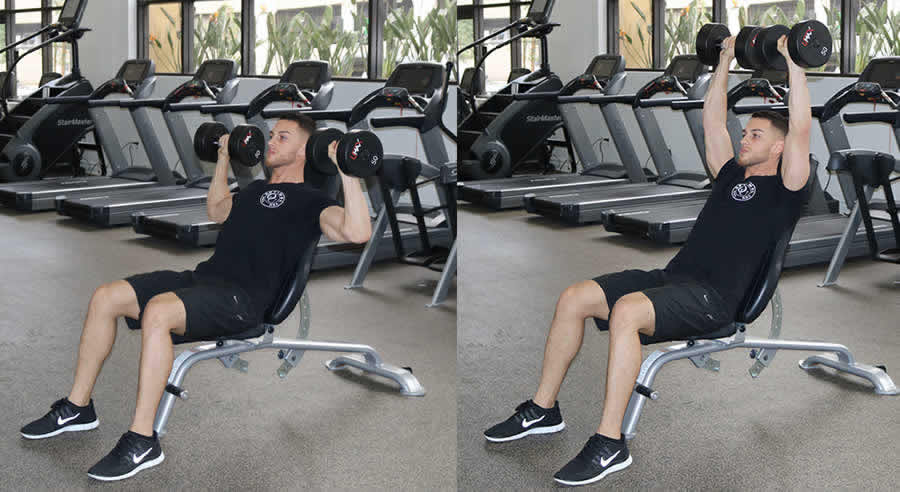
Seated Press Form That Actually Builds Delts
This isn’t “just sitting down”—it’s a precision movement requiring specific tension sequences. Most lifters bounce weights off their shoulders, killing muscle engagement.
Loading Dumbbells Without Shoulder Strain
Never swing weights up from your lap. Instead:
1. Place dumbbells on thighs above knees, palms facing each other
2. Lean back against the bench while squeezing glutes
3. “Kick” one knee up at a time to hoist dumbbells to shoulder level
4. Rotate palms forward only after weights are stabilized
If you can’t lift the dumbbells without arching your back, the weight is too heavy.
The 4-Second Pressing Sequence for Maximum Growth
- Brace core (inhale deeply into belly, imagine bracing for a punch)
- Drive vertically (not forward)—visualize pushing the ceiling away
- Stop 2 inches short of locking elbows (protects joint integrity)
- Lower for 3 full seconds until upper arms are parallel to floor
At the top position, your biceps should nearly touch your ears. If you’re looking at the dumbbells, your head is jutting forward—keep gaze neutral.
Standing Press Technique for Total-Body Power

Standing presses build functional strength but demand full-body coordination. Most lifters turn this into a dangerous lower back exercise through poor tension sequencing.
Pre-Lift Tension Checklist (Do This Before Every Rep)
- Feet: Hip-width apart, weight balanced over midfoot
- Core: Brace as if zipping a tight pair of jeans
- Glutes: Squeeze “like holding a $100 bill between cheeks”
- Ribs: Pull down toward hips (prevents lumbar hyperextension)
If your shirt lifts off your waist during the press, your ribs are flaring—reset immediately.
Why Your Standing Press Fails at Lockout
When weights stall 6 inches from full extension, it’s never a shoulder weakness issue—it’s a core stability failure. Fix it by:
– Exhaling sharply during the final 2 inches of the press
– Driving through heels (not toes) to maintain balance
– Keeping head neutral (gaze fixed on one spot ahead)
If you lean backward at lockout, reduce weight by 25% and rebuild tension patterns.
6 Deadly Form Mistakes Causing Shoulder Pain
These errors silently damage your shoulders while delivering zero muscle growth. Stop them before your next set.
Elbows Flared at 90 Degrees (The Impingement Trap)
Why it hurts: Creates bone-on-soft-tissue collision in the shoulder joint
How to fix: Place a resistance band around your elbows, pressing outward against tension as you lift. Cue: “Show your armpits to the wall.”
Slamming Dumbbells Together at Top
Why it hurts: Creates joint irritation and momentum reliance
How to fix: Press dumbbells on separate vertical paths—they should never touch. Stop 2-3 cm short of full extension.
Uncontrolled Lowering Phase
Why it hurts: Turns the eccentric into passive falling, straining connective tissue
How to fix: Count “one-Mississippi-two-Mississippi” during descent. If you can’t control it, drop 20% of the weight.
Fix Mobility Limitations Before Pressing
Can’t reach full lockout? Your shoulder flexion is restricted. Test this now: Stand against a wall, arms extended overhead. If your palms can’t touch the wall without arching your lower back, do these daily:
3-Minute Shoulder Mobility Routine
- Band dislocates: 2 sets of 15 reps (hold band wide, raise overhead and behind back)
- Wall slides: 3 sets of 10 reps (back against wall, slide arms up/down slowly)
- Doorway pec stretch: 30 seconds per side, 3x daily
Stop pressing until you can achieve full overhead range without rib flare—forcing it through pain guarantees injury.
Progressive Overload Strategies That Work

Adding weight isn’t progressive overload—it’s just lifting heavier. Real progression requires strategic tension manipulation.
The 1.5 Rep Press for Stubborn Shoulders
Press to full lockout → lower halfway → press back up → lower fully = 1 rep. This:
– Increases time under tension by 50%
– Eliminates “sticking point” momentum
– Builds lockout strength rapidly
Start with 50% of your normal working weight for 6-8 total reps.
Tempo Manipulation for Hypertrophy
Use a 3-1-2 tempo:
– 3 seconds lowering
– 1 second pause at bottom
– 2 seconds pressing up
This creates metabolic stress that triggers 37% more muscle growth than standard tempos (per Journal of Strength and Conditioning Research).
Smart Programming for Shoulder Growth
Most lifters train shoulders once weekly with random sets and reps. Optimize your results with this science-backed approach:
| Goal | Sets x Reps | Rest | Progression Trigger |
|---|---|---|---|
| Strength | 4×4-6 | 3 minutes | Add 5 lbs when hitting 6 reps on all sets |
| Hypertrophy | 3×10-12 | 90 seconds | Add 1 rep/set weekly until 12 reps achieved |
| Rehab/Prehab | 2×15-20 | 60 seconds | Focus on 3-second eccentrics with light weight |
Critical pairing: Always follow shoulder presses with an equal volume of horizontal pulling (e.g., 3 sets of bent-over rows). This prevents postural imbalances that cause shoulder pain.
Essential Safety Protocols for Pain-Free Pressing
Shoulder pain isn’t “just part of lifting”—it’s a warning sign. Honor these red flags:
Stop immediately if you feel:
– Sharp pain in the front shoulder (impingement warning)
– Pinching sensation during descent (labrum strain)
– Numbness/tingling in fingers (nerve compression)
Prevent injury by:
– Warming up with 5 minutes of banded shoulder rotations
– Starting every session with 2 sets of 15 reps at 40% working weight
– Never sacrificing form for heavier weight
If pain persists after 2 weeks of perfect form, consult a physical therapist specializing in shoulder rehab.
Final Note: The dumbbell shoulder press builds legendary shoulders only when executed with surgical precision. Start with weights that feel embarrassingly light, master the 45-degree elbow angle, and prioritize controlled eccentrics. In 8 weeks of strict form, you’ll add 15-20 lbs to your press while eliminating shoulder pain. Your delts aren’t stubborn—they’ve just been trained wrong. Now you know exactly how to fix it.


