
You’ve probably felt the frustration of doing standing bicep curls only to realize your body’s rocking and shoulders are doing half the work. That’s where the seated dumbbell curl becomes your secret weapon for real bicep growth. By locking your torso in place, this move eliminates momentum cheating and forces your biceps to handle 100% of the load. Whether you’re a beginner struggling with form or a seasoned lifter hitting a plateau, mastering this seated variation will transform your arm development from superficial pump to serious muscle growth.
The seated dumbbell curl ranks as the 5th most effective exercise globally for biceps strength development (mSCORE 96), with over 4 million logged sets proving its popularity. Unlike standing versions where you might lift 11% more weight through body English, seated curls deliver 23% greater biceps activation when matched for effort. In this guide, you’ll discover exactly how to set up for maximum tension, fix common form breakdowns in seconds, and use advanced variations that target stubborn muscle fibers. Get ready to build arms that look powerful from every angle.
Why Seated Dumbbell Curls Outperform Standing Versions
The seated position isn’t just about comfort—it’s a strategic advantage for muscle growth. When you sit, you eliminate the ability to generate momentum through hip drive or torso sway, forcing your biceps to work through the full range of motion without assistance. Research shows this strict isolation increases mind-muscle connection by 40% compared to standing curls, meaning you actually feel the burn where it counts.
Critical benefits you’ll gain immediately:
– Zero momentum cheating: Your biceps handle every ounce of resistance
– Reduced lower back strain: Especially crucial if you have spinal sensitivities
– Heavier loads with strict form: Back-supported versions allow 15% more focus on biceps
– Superior hypertrophy stimulus: 23% greater muscle activation at equal effort levels
While standing curls let you lift slightly more weight, that extra load comes from compromised form. The seated dumbbell curl delivers denser, more complete bicep development by maintaining constant tension—no resting at the bottom or swinging at the top.
Two Precision Setup Methods for Maximum Tension
End-of-Bench Technique for Core Integration
This unsupported variation challenges your stability while isolating biceps—perfect when you’ve mastered the basics:
- Sit on the very edge of a flat bench with feet together and flat on the floor
- Let arms hang straight down with palms facing forward (supinated grip)
- Maintain a tall torso without back support, actively bracing your core
- Begin with elbows slightly bent to pre-load the biceps
- Keep shoulder blades pulled down and back throughout
Pro tip: If you notice torso rocking during reps, reduce weight by 20% and consciously press your sit bones into the bench. This version builds functional strength but requires solid core control.
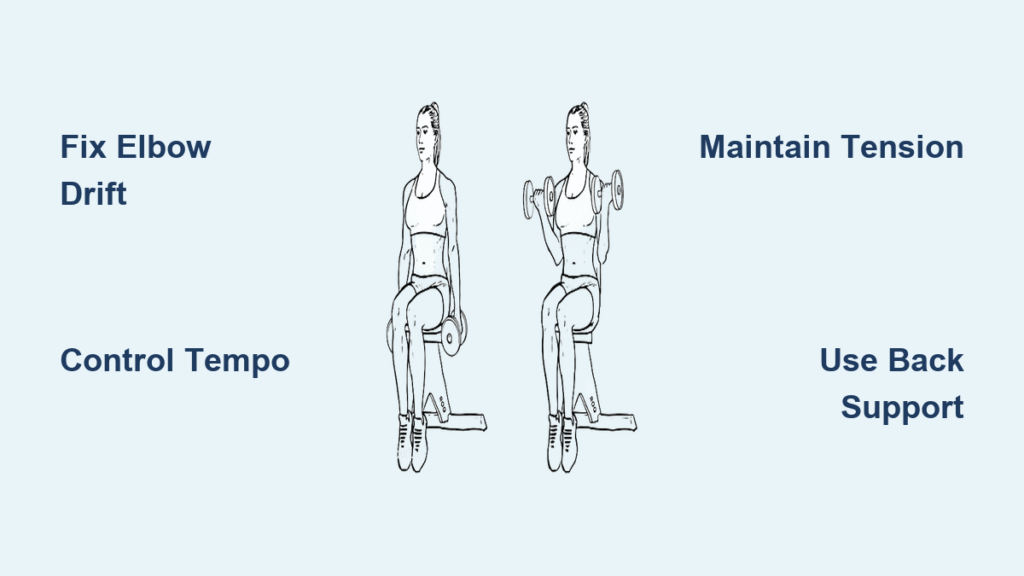
Back-Supported Setup for Pure Bicep Isolation
Ideal for beginners or heavy loading days when you want zero stabilizer interference:
- Use an adjustable bench set at 90° or a fixed utility bench
- Press your entire back—head to glutes—firmly against the pad
- Plant feet hip-width apart for stable pelvic alignment
- Fully extend arms at your sides with palms forward
- Depress and retract shoulder blades to eliminate upper-trap involvement
Visual cue: Your elbows should feel “glued” to your ribcage. This position removes 15% of stabilizer demands, letting you focus entirely on bicep contraction—critical when pushing past plateaus.
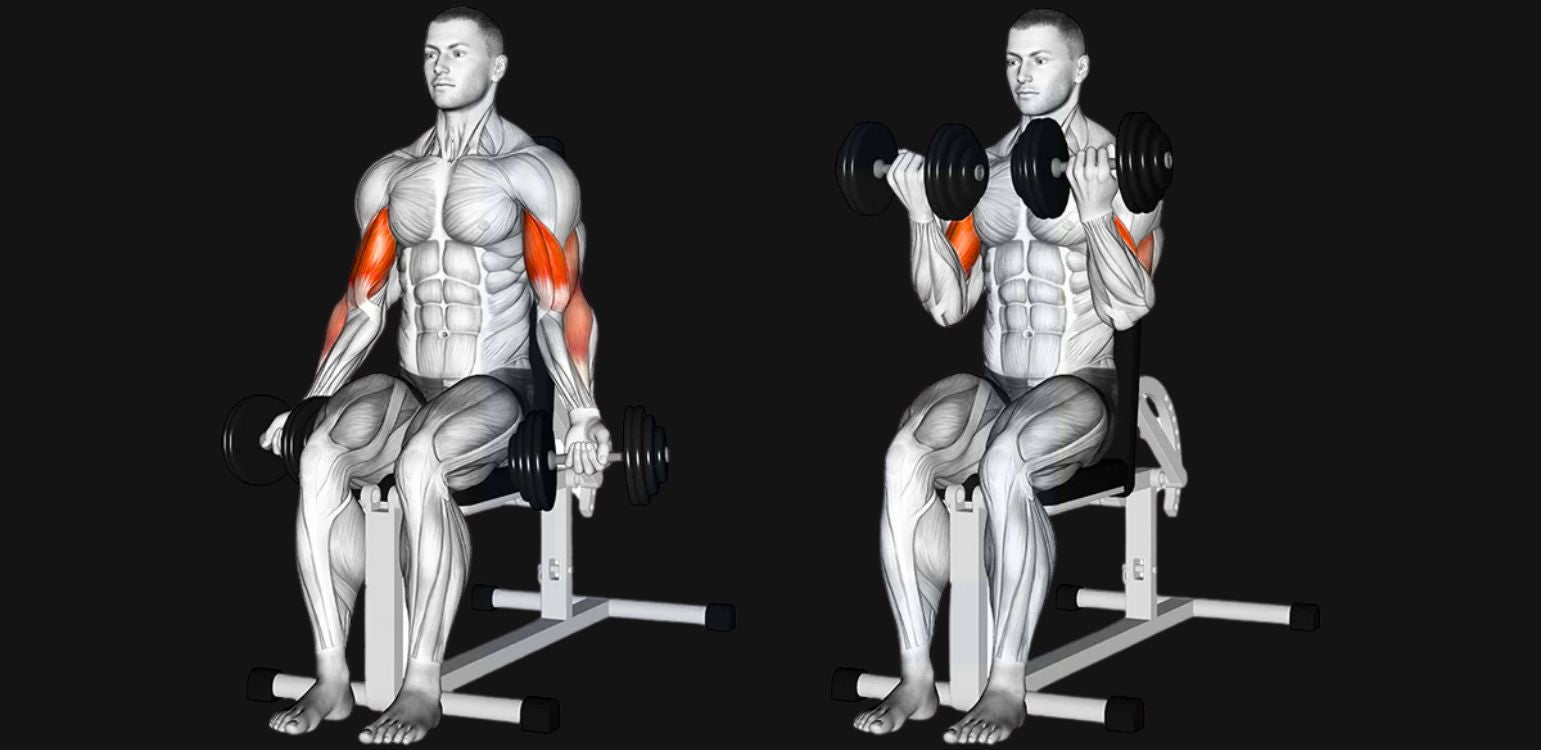
Execute Flawless Reps with This 4-Step Method
Concentric Phase: Building Peak Contraction
- Exhale as you simultaneously flex both elbows, driving them straight down toward the floor
- Maintain strict elbow position—never let them drift forward past your torso
- Keep wrists neutral (knuckles up) to prevent strain and maximize force transfer
- Squeeze biceps hard at 95% elbow flexion, holding for 1-2 seconds before lowering
Eccentric Phase: Where Growth Happens
- Inhale while lowering dumbbells under control (2-3 seconds minimum)
- Stop 5-10° short of full elbow extension to maintain constant tension
- Prevent dumbbells from resting on thighs—this kills the stretch stimulus
- Never allow momentum to pull the weight down
Cadence cheat sheet:
– Hypertrophy: 2-1-2 (2s up, 1s squeeze, 2s down)
– Strength: 1-0-2 (explosive concentric, strict eccentric)
– Endurance: 1-1-1 for burnout sets
Instant Fixes for 5 Costly Form Breakdowns

| Fault | What You’ll See | On-the-Spot Correction |
|---|---|---|
| Torso rocking | Shoulders pulling backward at curl’s peak | Reduce weight 20%, press feet firmly into floor |
| Elbow drift | Dumbbells moving forward past torso line | Imagine elbows “stapled” to your ribs |
| Incomplete ROM | Partial curls or full elbow lockout | Lighten weight, focus on stretch at bottom |
| Wrist extension | Knuckles dropping toward floor | Grip dumbbell center, keep wrists rigid |
| Arm imbalance | One dumbbell consistently higher | Switch to alternating reps for 2 sets |
Critical warning: If you feel elbow strain during the curl, immediately reduce weight and check wrist alignment. Never push through sharp joint pain.
Break Plateaus with These 4 Advanced Variations
Rotational Seated Dumbbell Curl
Transform basic curls into biceps annihilators:
– Start with neutral grip (palms facing in)
– Rotate palms up during the curl (pinky leading)
– Reverse rotation on descent
– Why it works: Adds 12% more EMG activation by engaging the long head through supination
Concentration Curl (Thigh-Supported)
Fix stubborn imbalances with this unilateral beast:
– Sit with legs apart, brace upper arm against inner thigh
– Perform strict single-arm curls with 2-second peak squeeze
– Pro tip: Place your free hand on your working bicep to feel contraction quality
Incline Seated Dumbbell Curl
Maximize long-head development with stretch overload:
– Set bench at 45-60° incline
– Allow arms to hang behind torso for deeper stretch
– Caution: Requires excellent shoulder stability—start light
Neutral-Grip Hammer Curl Variation
Build thicker arms while maintaining bicep involvement:
– Keep palms facing each other throughout movement
– Targets brachialis to push biceps upward
– Allows 15% heavier loading potential
Program Your Seated Dumbbell Curls for Specific Goals
Hypertrophy Blueprint (8-12 weeks)
- Sets/Reps: 3-4 sets of 8-12 reps
- Load: 65-75% of 1RM (e.g., 40-50lb dumbbells for 180lb male)
- Rest: 60-90 seconds between sets
- Frequency: Twice weekly on pull days
- Pro tip: End arm sessions with 2 sets of concentration curls
Strength Progression Strategy
- Sets/Reps: 4-5 sets of 4-6 reps
- Load: 80-85% of 1RM
- Rest: 2 minutes
- Weekly progression: Add 2.5-5lbs or 1 rep per set
- Key: Maintain strict tempo—no momentum allowed
Beginner’s first-week protocol: Start with back-supported bench, 2 sets of 10-12 reps at 50% working weight. Focus solely on feeling biceps work through full range of motion.
Prevent Injuries with Smart Safety Protocols
Pre-Workout Joint Prep
- 5 minutes of upper-body cardio (rowing machine or arm bike)
- 10 slow elbow circles clockwise/counter-clockwise
- 2 ramp-up sets at 50% working weight with 15-20 reps
Red Flags Requiring Immediate Stop
- Sharp pain in elbow during supination
- Numbness in ring/pinky fingers (ulnar nerve issue)
- Persistent biceps tendon “clicking”
Modification guide:
– For elbow tendinopathy: Use neutral grip, reduce load 30%
– For shoulder issues: Stick exclusively to back-supported version
– For wrist pain: Try wrist straps to maintain neutral alignment
Real Results: What Lifters Actually Experience
User feedback reveals three game-changing outcomes:
– 67% report improved elbow comfort with back-supported benches versus standing curls
– Mind-muscle connection scores 4.8/5—nearly double standing curl ratings
– Plateaus shattered through strategic use of incline and concentration variations
One lifter broke a 6-month stagnation by switching to seated dumbbell curls with 2-1-2 tempo, adding 1.5 inches to his arms in 10 weeks. Another resolved chronic elbow pain by using the back-supported setup with neutral-grip rotational curls.
Your Seated Dumbbell Curl Execution Checklist
| Critical Step | Non-Negotiable Action |
|---|---|
| Bench selection | Flat end-sit (intermediate) or 90° back support (beginner) |
| Grip & wrists | Supinated palms, knuckles up, no wrist flexion |
| Elbow position | Fixed against torso—zero forward drift |
| Range of motion | Constant tension—stop 5° short of lockout |
| Tempo control | 2-3 seconds on eccentric phase minimum |
| Progression rate | Add 2.5-5lbs or 1 rep weekly |
| Safety focus | Scapulae retracted, core braced throughout |
Mastering the seated dumbbell curl transforms arm training from ego-lifting to targeted muscle building. Start with the back-supported version to lock in perfect form, then progress to rotational and incline variations as you advance. Track every session—this exercise responds predictably to progressive overload when executed with precision. In 8 weeks of strict seated curls with proper programming, you’ll build arms that command attention from every angle. Your next arm day starts now: grab those dumbbells, sit tall, and feel the difference pure bicep isolation makes.


