
That satisfying burn across your shoulder blades when you pull heavy weight toward your torso? That’s the magic of the barbell back row – a foundational movement that builds thickness through your entire posterior chain. Yet countless lifters waste hours at the rack pulling with flawed technique, wondering why their lats stay stubbornly narrow or why their lower back screams after every set. The truth is, mastering the barbell back row separates those with functional strength from those nursing preventable injuries. When performed correctly, this horizontal pull develops the dense upper-back musculature that powers deadlift lockouts, stabilizes heavy squats, and creates that coveted V-taper physique. Let’s dismantle the complexity and rebuild your row with surgical precision.
Why Your Barbell Back Row Isn’t Building Back Thickness
Most lifters treat the barbell back row as simple “pull the bar up” movement, missing critical muscle activation cues that transform mediocre reps into back-building power. Your latissimus dorsi should dominate each pull, but without proper scapular retraction, you’ll default to biceps-dominant yanking. The difference lies in elbow positioning: drive them backward and upward toward your hip pockets, not straight up toward the ceiling. This subtle shift engages the rhomboids and mid-traps to squeeze your shoulder blades together while the lats create width. Meanwhile, your erector spinae and core maintain rigid torso stability – an isometric challenge that builds functional strength transferable to every compound lift.
Fixing the “Biceps Takeover” Problem
If your arms fatigue before your back during barbell back row sets, you’re likely pulling with your hands instead of your elbows. Reset your grip width to match your bench press stance – this symmetry balances push-pull development. As you initiate each rep, consciously retract your scapulae first before bending your elbows. Imagine pinching a pencil between your shoulder blades at the top position. This two-phase movement (retract then pull) forces lat engagement while reducing biceps involvement. For stubborn cases, switch to an overhand grip and place your free hand on your lat to feel the contraction before adding weight.
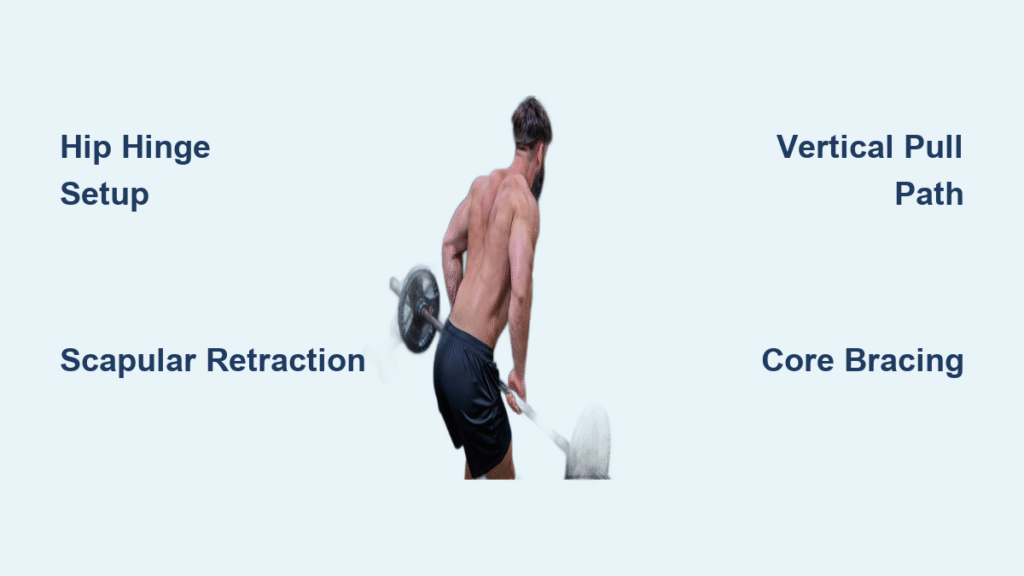
Barbell Back Row Setup: The Hip Hinge Foundation
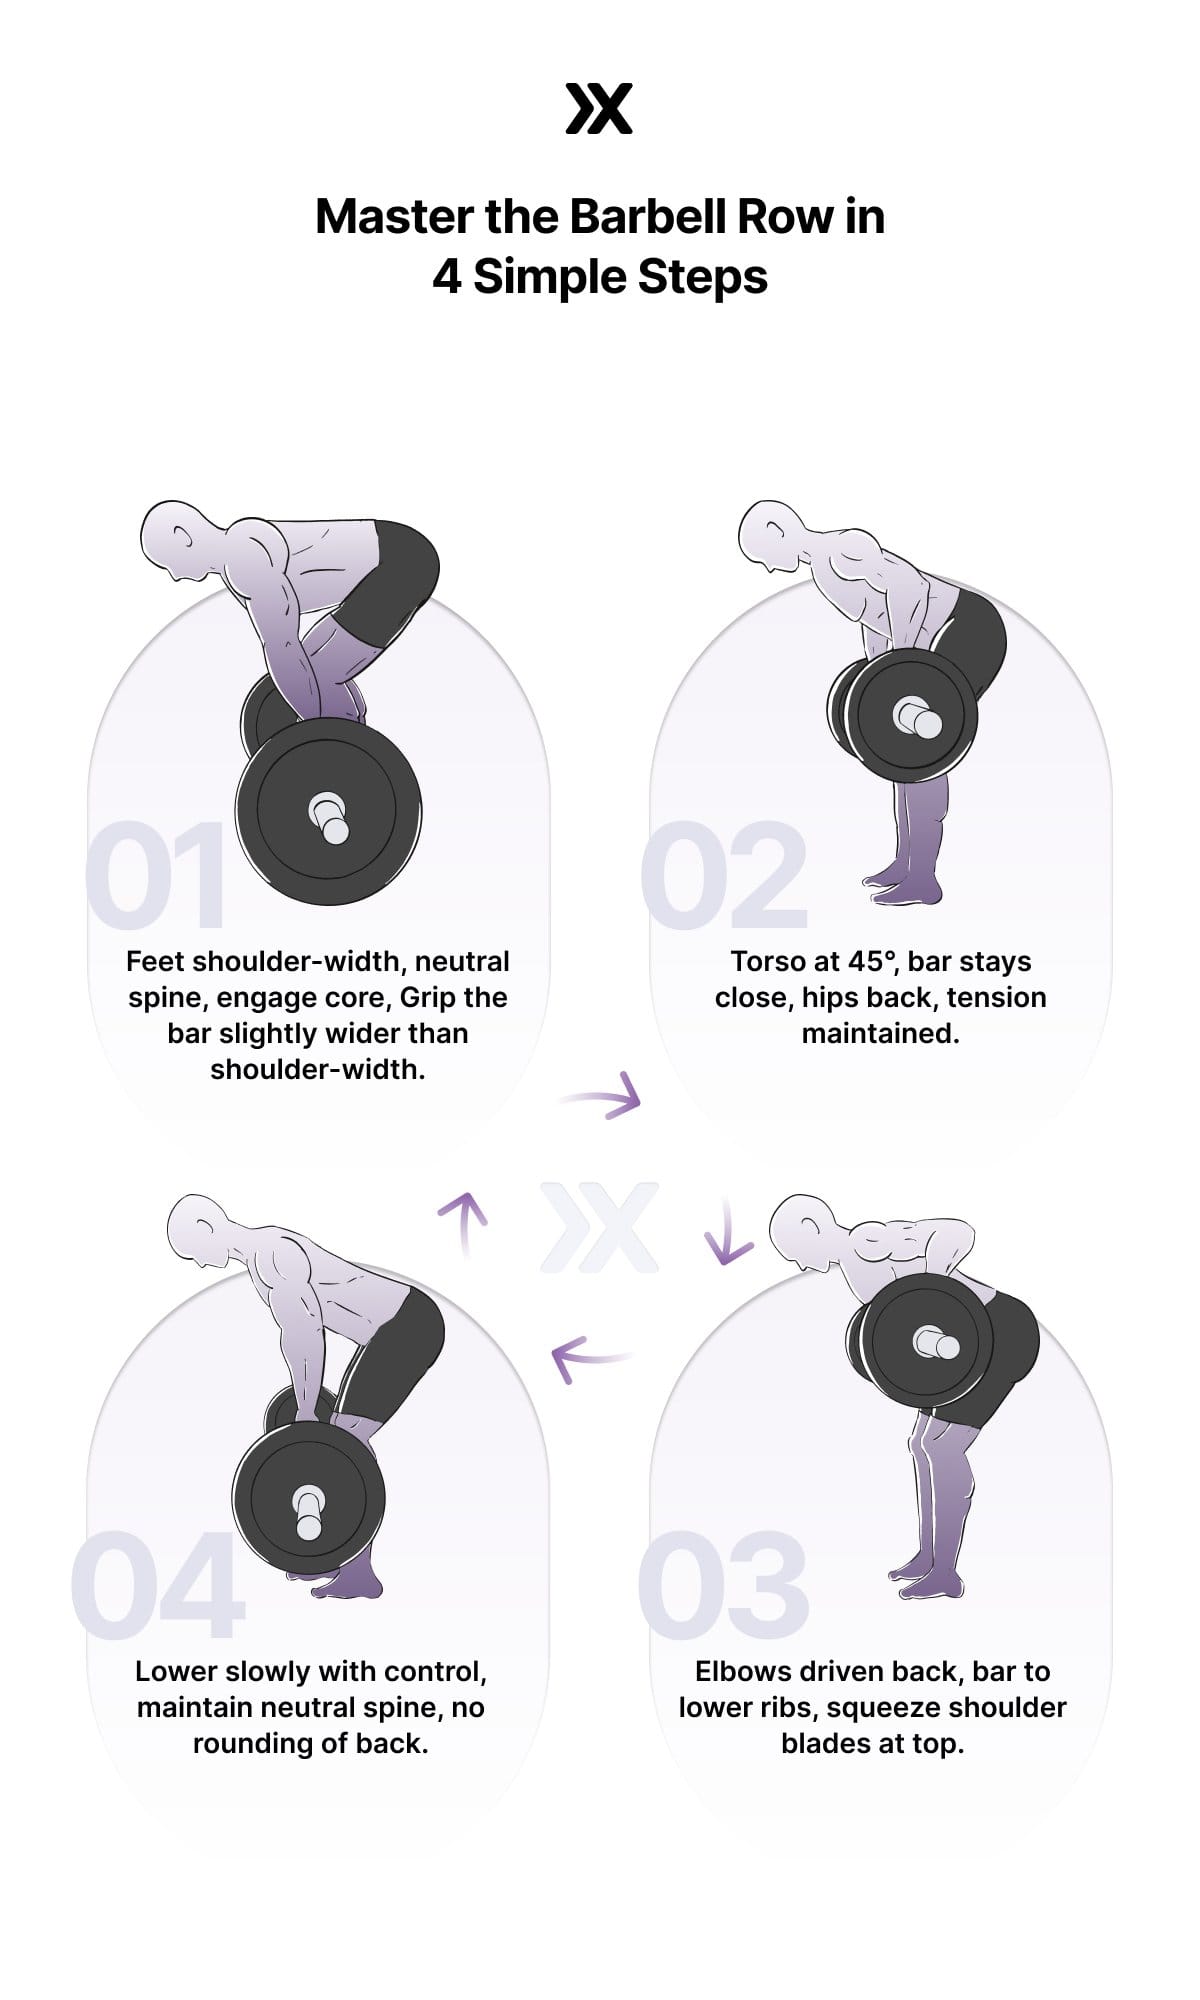
Stand with feet hip-width apart, gripping the bar just outside your shins. Your starting stance determines everything – too narrow and you’ll lose balance; too wide and you’ll restrict range of motion. The critical detail lies in your hip hinge angle. Most lifters mistakenly force their torso parallel to the floor, but optimal positioning sits between 0°-15° above parallel. This slight elevation creates mechanical advantage for heavier loading while protecting spinal integrity. Check your angle by placing a broomstick vertically against your spine – your head, upper back, and sacrum should touch the stick throughout the movement.
Knee Position and Torso Alignment Secrets
Maintain soft knee bends (never locked) with shins nearly vertical to prevent hamstring strain. Your chest must stay proud – collapse here shifts stress to your lumbar spine. To lock this position: take a deep belly breath, brace your abs as if about to be punched, then hinge at the hips until you feel tension in your glutes. Fix your gaze on a spot 3 feet ahead on the floor; this visual anchor prevents neck strain and maintains consistent torso angle. If your lower back rounds immediately, reduce knee bend slightly and push your hips farther back until your spine stays neutral.
Barbell Back Row Execution: The Vertical Pull Path
Initiate every rep by retracting your shoulder blades, then pull the bar in a near-vertical path toward your lower abdomen. In strict form, the bar should touch between your navel and sternum – if it consistently hits your thighs, your torso angle is too upright or weight is excessive. At the top position, pause for one second while squeezing your shoulder blades together. Crucially, avoid flaring elbows outward; they should track behind your torso at approximately 45 degrees. The eccentric (lowering) phase demands equal attention – control the descent for 3 seconds until arms fully extend without relaxing your shoulder girdle.
Breathing for Spinal Protection
Time your breaths to maintain intra-abdominal pressure: inhale deeply through your nose as you lower the bar, expanding your belly against your belt. This creates a natural “air brace” protecting your spine. Exhale sharply through pursed lips during the pull phase, matching the exhalation to the concentric effort. Never hold your breath across multiple reps – this dangerous habit spikes blood pressure and compromises core stability. Practice this pattern unloaded first: 3 seconds down (inhale), 1 second pause (squeeze), 1 second up (exhale).
Barbell Back Row Load Selection: When to Drop the Weight
Your working weight should allow perfect form through all prescribed reps. If your torso angle increases during the set (hips rising faster than chest), reduce load by 15-20%. Similarly, if the bar contacts your thighs instead of abdomen, the weight is too heavy. A reliable benchmark: your barbell back row working weight should lag 10-30% behind your bench press. For example, if you bench 225 pounds, expect to row 155-200 pounds for 8 clean reps. Advanced lifters often report rowing 1.3-1.5x bodyweight, but prioritize form quality over arbitrary numbers.
Progressive Overload Without Form Breakdown
Implement double progression: once you hit the top of your rep range (e.g., 12 reps), add 5-10 pounds and restart at the lower end (8 reps). Track three metrics beyond weight: torso angle consistency, bar contact point, and scapular squeeze quality. Every fourth set, perform a “form check” rep – pull explosively but stop 2 inches short of full contraction to verify elbow path. If your hips drive forward before your elbows move, strip 20% weight and focus solely on scapular retraction for two weeks. This prevents the “deadlift-row hybrid” that destroys lower backs.
Fixing Barbell Back Row Form Breakdowns

The most dangerous mistake involves excessive hip extension – your torso rises as hips shoot forward during the pull. This transforms the row into a partial deadlift, overloading lumbar erectors. Immediate correction: reduce weight by 25% and practice against a wall. Stand 6 inches from a wall with chest up; as you pull, ensure your glutes never touch the wall. Another common flaw: elbows flaring outward during heavy sets. Narrow your grip by half an inch and visualize pulling your elbows through your back pockets. If lower back pumps excessively, your core bracing has failed – add plank variations and Romanian deadlifts to strengthen spinal stabilizers.
Shoulder Impingement Solutions
When shoulder pain strikes during barbell back row, it’s usually from incomplete scapular retraction. At the top position, actively depress and retract your shoulder blades as if sliding them into back pockets. Avoid excessive internal rotation – keep elbows slightly forward of your torso, not tucked tightly against ribs. For persistent issues, switch to an underhand grip for 2-3 weeks; this slight pronation reduces impingement risk while maintaining lat engagement. Always warm up with band pull-aparts to activate scapular stabilizers before loading the bar.
Barbell Back Row Variations for Targeted Development
The Pendlay row (starting from dead stops on the floor) eliminates momentum and builds explosive deadlift lockout strength. Perform with torso parallel to floor, pulling explosively to mid-torso with strict reset between reps. For lifters with chronic lower back sensitivity, the T-bar row provides chest support while allowing heavier loading – position yourself at landmine attachment with chest pressed against pad, pulling toward lower abdomen. Grip width dramatically alters muscle emphasis: snatch-grip rows (hands outside shoulders) target upper-back width, while underhand grips increase lat and biceps activation.
Sumo-Stance Barbell Back Row Benefits
Adopt a wide sumo stance with toes pointed slightly out, allowing plates to pass outside your knees. This variation engages adductors and glutes more intensely while reducing hamstring tension. Pull the bar vertically to navel level with elbows flared wider than conventional style. The wider base improves stability for lifters with long femurs, and the altered leverage often allows 10-15% heavier loading while maintaining strict form. Use this version when conventional rows cause knee discomfort or when targeting lower lats.
Programming Your Barbell Back Row for Growth
Place barbell back row early in back-dominant workouts – either as the primary movement on pull days or after deadlifts if lower back fatigue is minimal. For muscle growth, target 3-5 sets of 8-12 reps with 90 seconds rest. Heavy strength weeks drop to 4-6 reps at 80-85% 1RM; volume weeks hit 12-15 reps with controlled eccentrics. Crucially, alternate heavy barbell back row weeks with chest-supported variations like seal rows every 3-4 weeks. This rotation prevents cumulative lower back fatigue while maintaining progressive overload. Every sixth week, implement a deload: reduce weight 20% and focus exclusively on perfect scapular retraction and vertical bar path.
Lower Back Fatigue Management Protocol
If your erectors feel fried after deadlifts, skip conventional rows entirely and use chest-supported alternatives. When programming barbell back rows after heavy pulls, reduce volume to 2 sets of 6-8 reps with strict form. Always finish row sessions with 3 sets of 15-second bird-dog holds to reinforce spinal stability. Monitor fatigue through your morning posture – if you wake with excessive lumbar stiffness, replace barbell rows with face pulls and band rows for a week. Remember: the barbell back row builds back strength only when your spine remains protected.
Barbell Back Row Strength Standards Made Practical
While strength ratios provide context, your personal progression matters more than arbitrary benchmarks. Novice lifters should aim for 0.75x bodyweight for 8 reps with strict form (torso 0°-15° above parallel). Intermediate lifters target bodyweight for 8 reps, while advanced athletes handle 1.3-1.5x bodyweight. Video record heavy sets monthly – most lifters discover their torso angle increases 10-15 degrees under fatigue without realizing it. Track not just weight, but bar contact points: consistent upper-abdomen contact indicates maintained form, while thigh contact signals breakdown. If your bench press is 225 pounds, a 185-pound barbell back row for 8 reps represents excellent balance.
Mastering the barbell back row transforms your entire training ecosystem. The hip hinge strength, scapular control, and core bracing developed here transfer directly to deadlifts, squats, and even overhead pressing. Start lighter than you think, obsess over perfect scapular retraction, and progress only when your form passes the video test. Within 8 weeks, you’ll feel the difference in your back thickness, deadlift lockout power, and overall structural resilience. Your spine will thank you, and your reflection will confirm – this is how legendary backs are built.


