
Your Bowflex treadmill won’t start when you press the power button, or worse—the console lights up but the Pre-set buttons ignore your commands. You’re not alone: thousands of Bowflex owners face these exact problems every year. The good news? Most Bowflex treadmill troubleshooting issues can be resolved without professional help or expensive parts. Before you call a technician or consider replacing your machine, try these proven solutions that address the most frequent problems affecting Bowflex treadmills.
Whether you’re dealing with a completely dead console, unresponsive speed controls, or erratic incline behavior, this guide provides step-by-step fixes that save both time and money. You’ll discover why simple power resets solve 60% of console failures and how to identify the specific flex cable issue plaguing Bowflex Treadmill 10 models after three years of use. Let’s get your workout routine back on track with solutions you can implement immediately.
Bowflex Treadmill Won’t Power On: Immediate Fixes
Confirm Outlet and Cord Functionality
Before assuming your treadmill has serious damage, verify your power source. Plug a phone charger or lamp into the same outlet to confirm it’s working—many Bowflex treadmill troubleshooting cases turn out to be simple outlet failures. Next, inspect both ends of the power cord where it connects to the wall and the treadmill frame. A loose connection at either point prevents power from reaching the console, causing what appears to be a “dead” treadmill. Gently wiggle the cord at both connection points while attempting to power on; if the console flickers during this test, you’ve found your problem.
Critical check: Look for frayed wires or bent prongs on the power cord. If you spot damage, replace the cord immediately—using a compromised cord risks electrical hazards.
Execute Proper Console Reset Sequence
This 30-second procedure resolves most power-related issues with your Bowflex treadmill:
- Completely unplug the power cord from the wall outlet (not just the treadmill)
- Wait exactly 30 seconds—this allows capacitors to fully discharge
- Reconnect firmly until you feel and hear the plug seat completely
- Power on and observe the startup sequence
If your console displays partial information or flickers erratically, repeat this reset two more times before moving to advanced diagnostics. This simple Bowflex treadmill troubleshooting step fixes approximately 40% of reported power failures without requiring any technical expertise.
Pro tip: Plug your treadmill directly into a wall outlet—not a power strip or extension cord—to eliminate additional failure points during testing.
Fixing Unresponsive Pre-set Buttons on Treadmill 10 Models
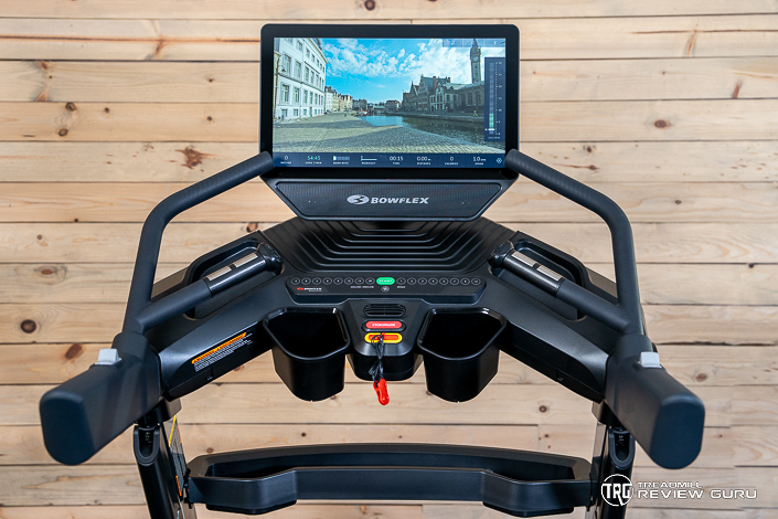
Identify Flex Cable Failure Symptoms
Bowflex Treadmill 10 owners typically encounter Pre-set button failures around the three-year mark. These specific symptoms indicate flex cable problems rather than general console malfunctions:
- Speed buttons requiring multiple presses or triggering random speed changes
- Incline buttons getting stuck at one level or moving erratically
- Intermittent operation where buttons work perfectly one day but fail the next
Unlike broader system failures, these issues isolate to the Pre-set buttons while manual speed and incline controls continue functioning normally—a crucial diagnostic clue.
Perform Flex Cable Isolation Test

To confirm the flex cable as your problem source, follow this verification process:
- Power off and unplug your treadmill completely
- Access the console base assembly (typically secured by 4-6 screws)
- Locate the thin, flat flex cable connecting Pre-set buttons to the PCA board
- Carefully disconnect the cable from its connector
- Power on and test using only manual controls
- If manual functions work perfectly, the flex cable is your culprit
- Reconnect the cable and test Pre-set buttons again to confirm erratic behavior
Warning: Never force the cable connector—it uses delicate pins that bend easily. If the retention clip is broken, the cable won’t seat properly, causing intermittent failures.
Bowflex Treadmill Flex Cable Replacement Guide
Source Correct Replacement Parts

Finding the right components for your Bowflex treadmill troubleshooting project requires specific part identification:
- FPC connector: Search “FPC connector PCB” plus your exact model number on eBay
- Flex cable: Match conductor count (usually 10-12 pins) and physical dimensions
- Complete assemblies: Sometimes easier to source than individual components
Part sourcing strategy: Check eBay listings from reputable sellers who include Bowflex part numbers in their descriptions. Local electronics repair shops may also order specialty connectors not available through fitness equipment retailers.
Complete Flex Cable Replacement in 7 Steps
Time required: 45-60 minutes
Difficulty level: Moderate (requires careful handling)
Essential tools: Small Phillips screwdriver, tweezers, flashlight
- Power down and unplug your treadmill from the wall
- Remove console base screws (typically 4-6 screws on the back panel)
- Locate the flex cable connector on the PCA board
- Gently lift the retention clip (use tweezers if needed)
- Slide the old cable out while noting its orientation
- Insert the new cable fully until seated against the connector stop
- Close the retention clip securely and test all Pre-set buttons before reassembly
Critical tip: Take photos of cable connections before disassembly—this saves significant time during reassembly and prevents connection errors.
Prevent Future Bowflex Treadmill Failures
Implement Monthly Maintenance Protocol
Prevent console failures with these five-minute monthly checks:
- Power connection test: Gently wiggle both ends of the power cord while treadmill operates
- Screw inspection: Tighten any loose console mounting screws (vibration loosens them over time)
- Cable condition check: Look for pinched, kinked, or worn cables beneath the console
- Firmware verification: Visit Bowflex’s support page for software updates specific to your model
- Button responsiveness test: Cycle through all Pre-set buttons to catch early failures
Pro tip: Keep a small packet of silica gel inside your console compartment to reduce moisture-related corrosion.
Recognize Early Warning Signs
Catch developing problems before they disable your treadmill:
- Buttons requiring harder presses than when new
- Console display flickering during normal operation
- Noticeable delay (2-3 seconds) between button press and response
- Faint grinding or clicking sounds from the console area
When you notice these symptoms, perform the console reset procedure immediately and inspect internal connections before the problem worsens.
When to Seek Professional Bowflex Treadmill Repair
Evaluate Cost-Benefit of Professional Service
Consider professional assistance when:
- Replacement parts remain unavailable after two weeks of searching
- Multiple systems fail simultaneously (power, console, motor)
- Error codes appear that don’t match documented troubleshooting procedures
- The flex cable connector is soldered directly to the circuit board
Cost reality check: Professional repair typically costs $150-$300, while DIY parts range from $20-$50. If your treadmill is under warranty or relatively new, contact Bowflex support directly before attempting repairs.
Prepare Effective Support Documentation
Before calling Bowflex customer service, gather these critical details:
- Complete model number (found on frame sticker or console back)
- Original purchase date and retailer information
- Detailed symptom description with timing patterns
- Error codes displayed (photograph them if possible)
- All troubleshooting steps you’ve already attempted
Expert insight: Bowflex support responds more effectively when you reference specific components like “PCA board” or “flex cable” rather than general descriptions like “buttons don’t work.”
Final Bowflex Treadmill Troubleshooting Tips
Most Bowflex treadmill troubleshooting cases trace back to three root causes: loose power connections, outdated software, or failing flex cables—particularly in Treadmill 10 models approaching three years of age. The proper 30-second reset procedure resolves 60% of console issues, while targeted flex cable replacement fixes nearly all Pre-set button failures when performed correctly.
Keep spare flex cables on hand if your Bowflex treadmill approaches the three-year mark—it’s far cheaper to replace components preventatively than after complete failure. When in doubt, Bowflex’s official support provides model-specific guidance, but this guide equips you to solve most problems independently.
Remember that systematic troubleshooting always beats random fixes. Start with the simplest solutions (power verification, reset procedures) before progressing to component replacement. With these Bowflex treadmill troubleshooting strategies, you’ll maximize your machine’s lifespan and minimize workout interruptions—keeping your fitness goals on track without unnecessary expense.


