That familiar ache in your lower back after a hard rowing machine session isn’t normal wear and tear—it’s your body screaming for help. Nearly half of all rowing injuries happen during land-based training, with the ergometer responsible for 32-53% of back pain cases in competitive athletes. Unlike on-water rowing where the boat glides beneath you, the fixed mechanics of the rowing machine force your spine into dangerous forward flexion. Combine this with high-repetition strokes and fatigue-induced form breakdown, and you’ve created a perfect storm for injuries that can derail your fitness goals. This guide reveals exactly why your rowing machine might be hurting you and how to fix it before pain becomes permanent.
Rowing Machine Back Pain: Why Your Spine Hurts
Lumbar Spine Injury Rates Among Erg Users
Back pain dominates rowing machine injuries, affecting over half of serious users annually. When you feel that familiar twinge during the recovery phase, you’re experiencing “nonspecific low back strain”—the most common erg-related complaint documented in sports medicine clinics. This isn’t just muscle soreness; it’s your spine buckling under unnatural stress from thousands of repetitive strokes.
What Actually Happens to Your Back

During each stroke, your lumbar spine undergoes extreme flexion at the catch position. The rowing machine’s fixed footrests prevent the natural hip hinge motion you’d use in a boat, forcing your spine into deeper compression. This creates four destructive forces:
- Disc compression as vertebrae pinch together under load
- Facet joint irritation from excessive spinal movement
- Muscle strain as weak core muscles fail to stabilize your trunk
- Ligament sprain from overstretching during aggressive finishes
Red Flags You Shouldn’t Ignore
Distinguish dangerous injury from normal soreness with these critical signs:
– Radiating pain down your leg (indicates possible disc involvement)
– Morning stiffness lasting beyond 30 minutes
– Pain that intensifies as your workout progresses
– Numbness or tingling in your feet (requires immediate medical attention)
Quick Posture Fix for Immediate Relief
Before your next session, perform this 30-second spine reset: Sit at the catch position with knees bent. Place one hand on your lower back. If you feel a deep “C” curve, you’re over-compressing your spine. Slide your hips back until your hand detects a neutral curve—imagine a straight line from hips to shoulders. This simple adjustment reduces spinal stress by up to 40% according to biomechanical studies.
Rib Stress Fractures: The Hidden Chest Injury

How Ribs Crack on a Stationary Machine
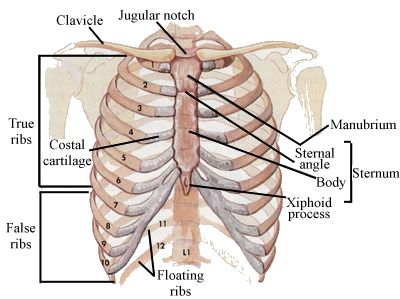
Rib stress fractures affect 9% of competitive rowers annually—far higher than the general population. The mechanism is deceptively simple: each stroke creates micro-movements in ribs 5 through 9 as your breathing muscles contract rhythmically. Over thousands of repetitions, these tiny stresses accumulate into hairline cracks, often without warning.
Warning Signs vs. Normal Muscle Soreness
Rib Stress Fracture Indicators:
– Sharp, localized pain when taking deep breaths
– Point tenderness over specific ribs (usually ribs 6-8)
– Pain that spikes during the drive phase of your stroke
– Discomfort when coughing or sneezing
Normal Muscle Soreness:
– Dull, diffuse ache across chest muscles
– Improves with gentle stretching
– Doesn’t worsen with breathing
– Feels better after warming up
Breathing Technique That Prevents Rib Injuries
Most rowers unknowingly hold their breath during the drive phase, creating dangerous pressure spikes in the chest cavity. Instead, synchronize your breath with your stroke:
1. Catch: Inhale deeply as you reach forward
2. Drive: Exhale smoothly through pursed lips
3. Finish: Complete exhale as you pull to your chest
4. Recovery: Begin inhaling as you slide forward
This rhythmic pattern distributes forces evenly across your rib cage rather than concentrating stress on vulnerable areas.
Shoulder Pain From Rowing Machines
Rotator Cuff Impingement Patterns
Shoulder injuries rank third among erg-related complaints, typically manifesting as impingement syndrome. The fixed handle position forces shoulders into unnatural movement patterns compared to on-water rowing. As fatigue sets in, weak scapular stabilizers allow your shoulder blades to wing outward, compressing the subacromial space with every stroke.
“Death Grip” Connection to Shoulder Problems
That white-knuckled grip isn’t just hard on your hands—it’s destroying your shoulders. When you grip the handle too tightly, tension travels up your arms, forcing shoulders upward and forward. This pinches rotator cuff tendons against the acromion bone. Quick grip check: Can you wiggle your fingers while holding the handle? If not, loosen immediately. Your grip should feel like holding a bird—firm enough it won’t fly away, gentle enough you won’t hurt it.
5-Minute Shoulder Saver Routine
Before every session, activate critical stabilizers:
– Arm circles: 10 forward, 10 backward
– Scapular push-ups: 15 reps (focus on shoulder blade movement)
– Band pull-aparts: 20 reps with light resistance band
This routine primes the muscles that maintain shoulder health during high-repetition rowing.
Knee Pain on Rowing Machines

Patellofemoral Syndrome From Over-Compression
Knee pain strikes when you bend too deeply at the catch. Most rowers position shins well past vertical, creating extreme compressive forces on the kneecap. This position, combined with powerful leg drive, grinds your patella against the femur—leading directly to patellofemoral pain syndrome.
Foot Placement Mistakes That Ruin Knees
Your foot straps are critical for knee alignment. Common errors include:
– Straps too high: Forces knees outward, stressing IT bands
– Straps too low: Allows heels to lift excessively, increasing patellar strain
– Uneven tension: Creates asymmetrical loading between legs
Seat Height Adjustment Formula
Optimal foot placement: When sitting at the finish position with legs straight, the foot strap should cross the ball of your foot. This allows proper force transfer while maintaining knee health.
Wrist and Forearm Overuse
Intersection Syndrome: “Oarsman’s Wrist”
This peculiar injury affects the intersection point between forearm muscle groups. Repetitive motion creates friction where tendons cross, leading to sharp pain on the thumb side of your forearm. It’s particularly common when rowing with cold hands or improper grip.
Grip Technique That Prevents Elbow Pain
Start your stroke correctly to avoid forearm overload:
1. Begin with straight arms at the catch
2. Engage your lats before bending elbows
3. Keep wrists neutral throughout the drive
4. Relax grip during recovery
Forearm Strength Circuit
Build injury-resistant forearms in 5 minutes:
– Wrist curls: 15 reps palm-up, 15 reps palm-down
– Reverse curls: 12 reps focusing on controlled lowering
– Farmer’s walks: 30 seconds holding heavy dumbbells
Prevention Strategies That Actually Work
Technique Fundamentals Checklist
Before every session:
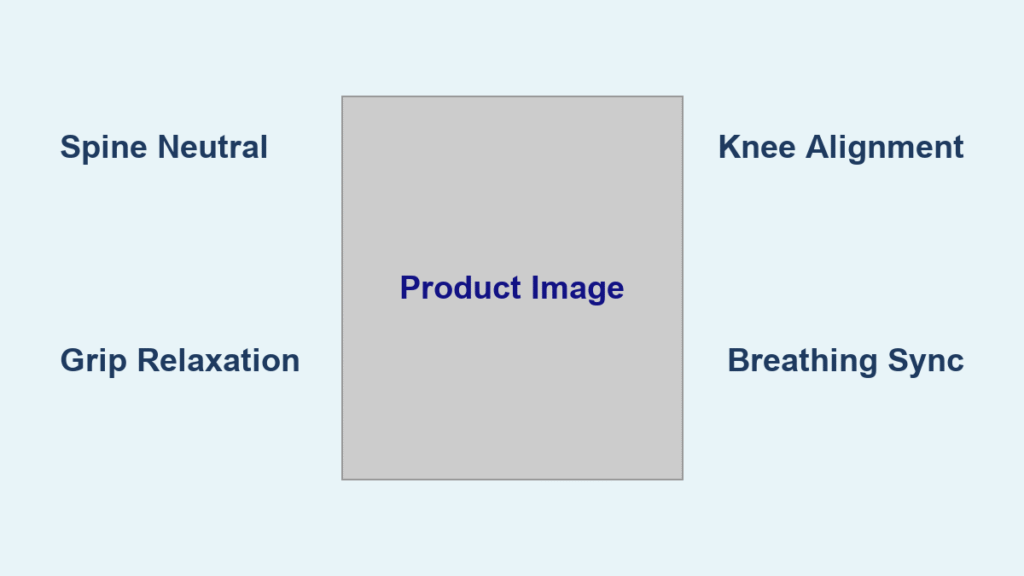
– Spine neutral throughout entire stroke
– Knees over ankles at catch (shins vertical)
– Relaxed grip on handle
– Shoulders down and back
– Core engaged before drive phase
Weekly Load Management
Follow the 10% rule religiously: Never increase weekly rowing volume by more than 10%. Track sessions in a simple log—when pain appears, you’ll spot the pattern. For example, if you rowed 5,000 meters last week, add no more than 500 meters this week.
Cross-Training Schedule
Break up rowing sessions with:
– Monday: Rowing intervals
– Tuesday: Cycling or swimming
– Wednesday: Rowing technique focus
– Thursday: Core strength training
– Friday: Rowing steady state
– Weekend: Active recovery (walking, yoga)
Recovery and Return-to-Rowing Protocol
Phase 1: Acute Care (Days 1-7)
- Stop erging immediately—no exceptions
- Ice affected area 3-5 times daily for 10-15 minutes
- Maintain fitness with gentle cross-training (swimming works well)
- Monitor pain levels—anything above 2/10 means stop
Phase 2: Rehabilitation (Weeks 1-4)
- Begin physical therapy focusing on identified weaknesses
- Address technique flaws through video analysis
- Gradually reintroduce ergometer at 50% resistance
- Strengthen supporting muscles specific to your injury
When to Seek Professional Help
See a sports medicine physician immediately if you experience:
– Numbness or tingling in extremities
– Severe pain preventing daily activities
– Pain lasting more than 2 weeks despite rest
Your rowing machine isn’t the enemy—poor mechanics and excessive loading are. By implementing these specific fixes before pain becomes chronic, you’ll transform your erg from injury risk to your most reliable fitness tool. Remember: the best rowers aren’t the strongest, but those who master technique to row pain-free for decades. Start with the 30-second spine reset today, and you’ll row tomorrow with confidence.


