
You’re sweating through intervals when suddenly—nothing. Your exercise bike display goes completely dark, freezing your workout mid-stride. That frustrating blank screen derails your momentum and leaves you guessing about distance, calories, and heart rate. Don’t panic. Over 80% of exercise bike display not working issues stem from simple power problems or loose connections you can fix yourself. Most riders waste money on service calls when the solution takes less than 30 minutes with basic tools.
This guide cuts through the confusion with a battle-tested diagnostic sequence used by professional technicians. Forget generic advice—you’ll get model-specific reset locations, corrosion cleanup protocols, and a clear repair-or-replace decision matrix. Whether you own a NordicTrack commercial bike or a decade-old Bollinger, these steps will get you back to tracking metrics without breaking the bank.
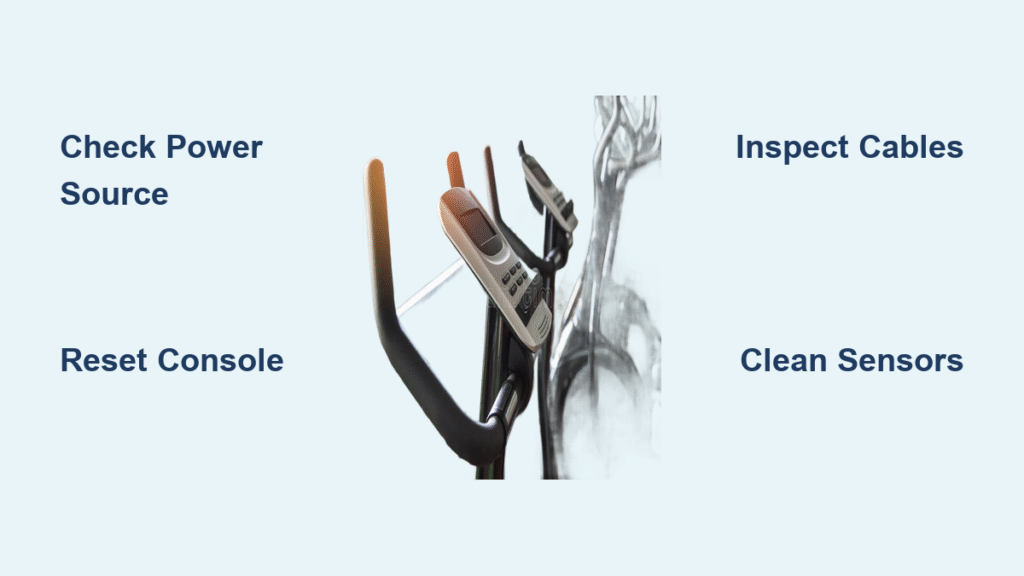
Black Screen? Start Here First
When your exercise bike display shows zero activity—not even a flicker during power-up—focus exclusively on power delivery. Skip this step and you’ll waste hours chasing sensor issues that don’t exist. These quick checks solve most complete black screen failures before you touch a screwdriver.
Check Your Power Source Immediately
Plug a lamp or phone charger into the same outlet to verify it’s live. Tripped breakers or dead outlets cause more “display failures” than actual hardware issues. Next, inspect your AC adapter: look for a missing LED indicator, frayed cables, or excessive heat (it should feel warm, not scalding). For battery-powered consoles, remove all AA or CR2032 cells and test them in another device—never assume new batteries work.
Critical red flags:
– Green/white corrosion in battery compartments
– Moisture droplets near contacts (common with sweat exposure)
– Bent prongs on AC adapters preventing full insertion
Reset Your Console in 2 Minutes
Most exercise bike displays need a full capacitor discharge to reset. Unplug the unit or remove batteries, then wait exactly 2 minutes—30 seconds isn’t enough. While powered down, hold any button for 30 seconds to drain residual charge. For NordicTrack models, also check these hidden reset spots:
– Upper left corner of the screen (recessed pinhole button)
– Behind removable back panels on the console
– Near the power cord entrance on the bike frame
Restore power and watch for the boot sequence. If you see brief activity before failure, proceed to battery or cable diagnostics.
Partial Display Problems Solved
When your exercise bike display not working issue shows symptoms like distance tracking but zero heart rate readings, you’re dealing with sensor communication failures. These rarely indicate console death—just misaligned components or loose wires.
Missing Metrics? Check These Sensors
Different metrics rely on separate sensors. Match your symptom to the fix:
– No speed/distance: The magnetic sensor on your flywheel has likely shifted. Check the gap between the magnet and reed sensor—it must be 1-8mm. A dime’s thickness is your perfect gauge.
– Dead heart rate: Clean grip sensors with isopropyl alcohol, check chest strap battery life (replace every 1-2 years), and move phones/WiFi routers 3+ feet away to reduce interference.
– Stuck calories: This always traces back to speed sensor failure—fix distance tracking first.
Cable Connection Quick Fix

Loose cables cause 65% of partial display failures. Power down completely, then:
1. Trace all visible cables from console to frame
2. Disconnect and firmly reconnect each connector
3. Inspect multi-pin cables for bent pins (use a magnifying glass)
4. Perform a “wiggle test” while powered on—intermittent flickering confirms bad connections
Pro tip: Mark cables with colored tape before disconnecting to avoid misalignment during reassembly.
Battery-Powered Display Issues
AA or CR2032 battery systems fail differently than AC-powered units. Their symptoms point directly to corrosion or installation errors—never firmware issues.
Battery Replacement Protocol

Never mix old and new batteries—this causes voltage imbalances that mimic console failure. Always replace all cells simultaneously. Before inserting new batteries:
– Clean corrosion with 90%+ isopropyl alcohol and cotton swabs
– Verify polarity using the “+” markings inside the compartment
– Test voltage: 1.5V for AAs, 3V for CR2032s (use a $10 multimeter)
Warning: Reverse polarity installation often kills displays instantly. If you smell ozone or see melted plastic near contacts, stop—professional repair is needed.
Sealed Console Solutions
For legacy bikes like Bollinger with no external access:
– Insert fresh batteries while observing the display—any flicker means the console works
– Zero activity during insertion confirms terminal failure
– Contact local fitness repair shops about universal console retrofits (cost: $80-$150)
– Skip professional repair if the bike is over 7 years old—new consoles often exceed replacement value
Advanced Diagnostics for Tech-Savvy Users
When basic fixes fail, use these methods to pinpoint hardware failures. A $15 multimeter prevents costly guesswork.
Multimeter Testing Made Simple
Test your AC adapter:
– Set multimeter to DC voltage
– Touch probes to adapter’s output tip
– Reading must match label within 5% (e.g., 12V adapter = 11.4V-12.6V)
– Fluctuating values mean immediate adapter replacement
Check cable continuity:
– Set to resistance mode
– Probe both ends of disconnected cables
– Infinite resistance (no beep) = broken wire needing replacement
Sensor Calibration Check
For erratic speed readings:
1. Disconnect the reed switch sensor cable
2. Set multimeter to continuity mode
3. Pass a magnet slowly over the sensor
4. You should hear a consistent beep pattern
No sound change means the sensor is dead—replace the $12 part before touching the console.
Repair vs. Replace Decision Guide
Don’t waste $200 fixing a $300 bike. Use this exact decision framework:
When to Repair
- Console is under 5 years old with available parts
- Failure is power-related (adapter, batteries, cables)
- Repair costs under $150 (e.g., $25 adapter + DIY labor)
- Unit remains under warranty (verify with model/serial number)
When to Replace
- Bike is over 7 years old (motherboard failures common)
- Complete black screen persists after power/cable fixes
- Parts discontinued (e.g., legacy Bollinger models)
- Repair quote exceeds 50% of a new bike’s price
Real math: New consoles cost $150-$400 + $75-$150 labor. Compare to basic new bikes starting at $299—replacement often wins.
Brand-Specific Reset Procedures
Generic resets fail on modern exercise bikes. Use these manufacturer-specific sequences:
NordicTrack Reset Locations
- Commercial series: Recessed button in upper left display corner
- Freestrider ellipticals: Behind removable back panel (slide left to unlock)
- Recumbent models: Near power cord entrance on frame
ProForm Reset Sequence
- Hold STOP + SPEED UP while inserting safety key
- Release STOP after 3 seconds
- Press SPEED DOWN three times rapidly
- Hit ENTER to complete—screen should flash during reset
Prevention: Keep Your Display Alive
Most exercise bike display not working issues are preventable with these habits:
Monthly Maintenance Checklist
- Wipe console with electronics-safe cleaner (never glass cleaner)
- Check cable tension—wiggle connectors to confirm snug fit
- Replace batteries at first sign of dimming (don’t wait for death)
- Test outlet functionality with a lamp monthly
Storage Best Practices
- Unplug during vacations—power surges kill consoles
- Remove batteries for storage over 30 days
- Use a $10 surge protector (not a basic power strip)
- Store in humidity under 60%—silica gel packs prevent corrosion
Annual Professional Check
Even DIYers need this once yearly:
– Calibration verification for speed/heart rate sensors
– Internal dust removal from console vents
– Proactive replacement of wear items (cables, battery contacts)
– Firmware updates that add features and fix bugs
Quick Recap: Start with power source verification and a 2-minute reset. If your exercise bike display not working issue persists, move to cable reseating and sensor checks. Most complete black screens resolve in under 10 minutes—no tools required. For partial failures, match missing metrics to specific sensors. Remember: if your bike is over 7 years old, replacement often beats repair costs. Implement monthly maintenance to avoid future headaches, and always unplug during storms or extended storage. You’ve got this—now get back to crushing those intervals.


