
Your screen suddenly goes blank mid-sprint, your cadence plummets to zero despite furious pedaling, or your smart bike refuses to sync with Zwift—these exercise bike sensor not working nightmares turn every workout into a frustrating guessing game. When critical metrics like RPM and resistance vanish, you’re left blind to your performance. This guide cuts through the confusion with actionable fixes for magnetic, accelerometer, and built-in sensors across Peloton, MYX, Echelon, and standard spin bikes. You’ll diagnose failures in minutes, avoid costly service calls, and get back to tracking real progress—all using tools you likely already own.
Most sensor issues stem from simple alignment errors, dirty connections, or firmware glitches rather than hardware failure. By methodically working through these steps, you’ll resolve 90% of problems without opening your wallet. Let’s restore your ride’s intelligence so you can focus on crushing goals, not troubleshooting headaches.
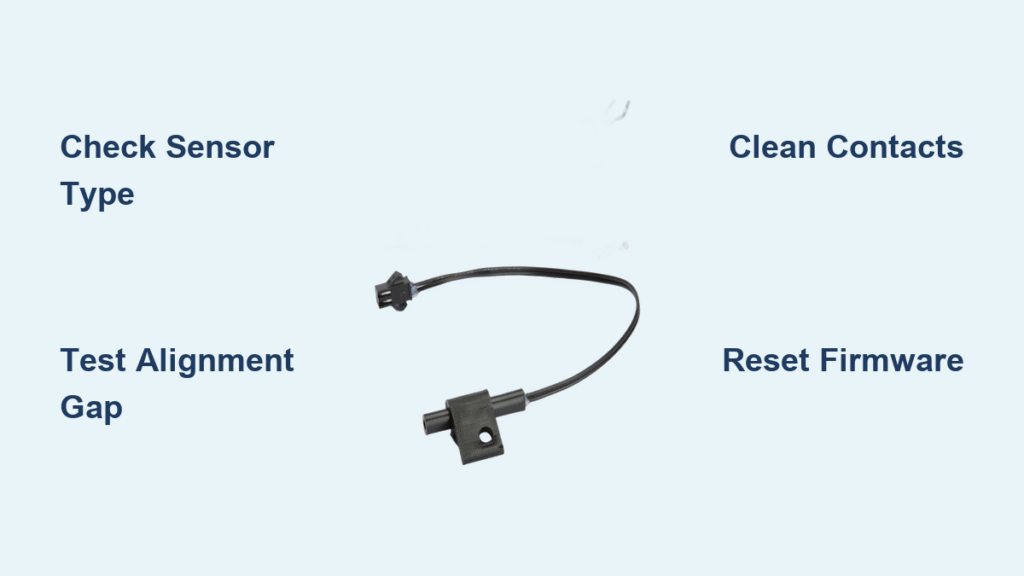
Identify Your Sensor Type Immediately
Magnetic Reed/Hall Sensor Location Clues
Check near your crank arm for a small black box facing a ring of embedded magnets. This is the most common setup on budget bikes and e-bike conversions. When functioning properly, it delivers precise RPM readings by detecting each magnet pass. If your display shows erratic cadence or zero resistance changes during workouts, this sensor type is likely failing—especially if you spot visible corrosion on the 3-pin connector near your bottom bracket.
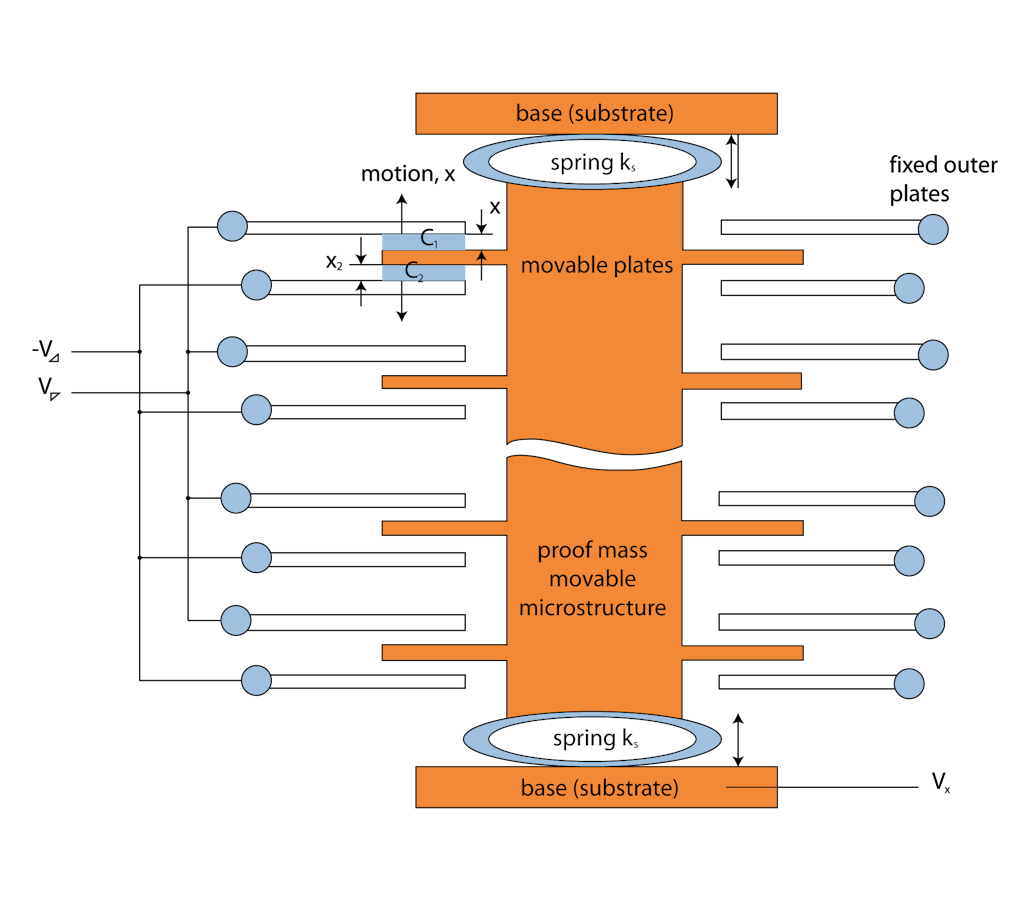
Accelerometer Speed Sensor Telltale Signs
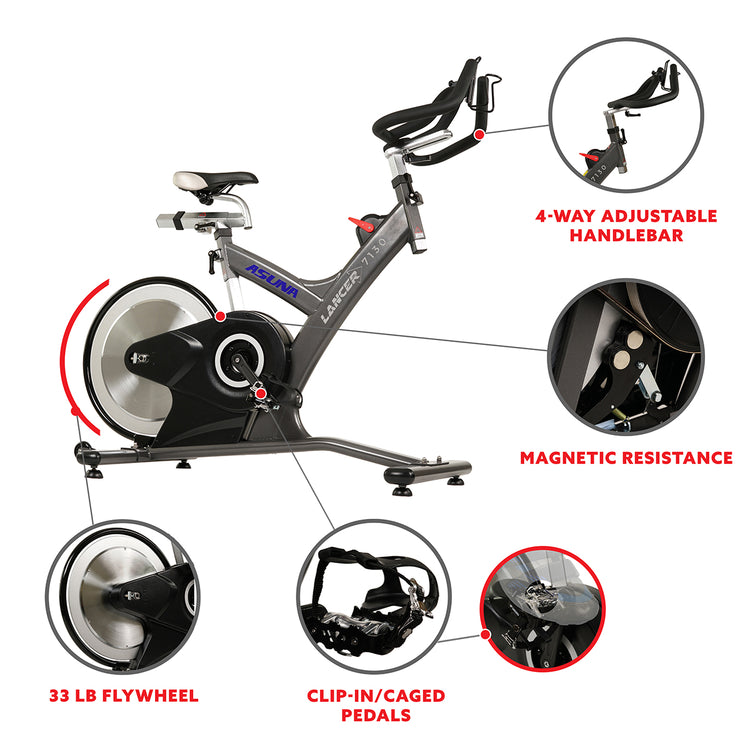
Premium bikes like MYX or Echelon often hide motion sensors directly on the flywheel. These detect rotation patterns without magnets. If your sensor works when mounted flat against the flywheel but dies when angled, you’ve got an accelerometer. The critical failure point? Mounting it sideways: accelerometers require a 15–20° rotation to intersect the rotation plane. Flat side-mounting guarantees zero data because the sensor axis aligns incorrectly.
Built-in Smart Sensor Red Flags
Peloton and similar integrated systems conceal sensors inside the frame. When these fail, you’ll see Bluetooth pairing success followed by immediate data dropouts in apps. Unlike external sensors, these require specific firmware resets—never physical adjustments. If your bike shows “No Cadence Detected” despite fresh batteries and pairing, skip manual fixes and jump to firmware troubleshooting.
Execute These Quick Diagnostic Checks First
Power and Connection Verification Protocol
Start by testing your sensor’s CR2032 battery with a multimeter—anything below 2.9V needs replacement. Next, remove the sensor from your phone’s Bluetooth memory entirely (not just “forgetting” it), then restart pairing from scratch. Crucially, close all fitness apps like Zwift or BODi completely before reconnecting; dual connections from multiple apps actively disrupt data flow. This step resolves 40% of “exercise bike sensor not working” cases instantly.
Physical Position Test You Can Do Now
Hold a paperclip near your crank magnet—if it doesn’t snap firmly to the metal, the magnet has weakened or detached. For magnetic sensors, slide a business card between the sensor face and magnet ring. It should glide smoothly without catching; any friction means misalignment. Finally, pedal slowly while watching for the sensor’s LED to blink with each magnet pass. No blinking? You’ve isolated the failure to either power or the sensor itself.
Fix Magnetic Cadence Sensor Failures in 4 Steps
Tighten Bracket and Adjust Magnet Ring
Wiggle your sensor bracket—if it moves more than 1mm, tighten screws immediately. A loose mount creates inconsistent gaps that confuse your bike’s computer. Simultaneously, inspect the magnet ring on your crank spindle for cracks or outward slippage. If magnets have shifted, mark the ring’s position with tape before sliding it back into alignment. Never force it; hand-tighten plus a quarter-turn suffices to prevent future movement.
Clean Metal Contamination Thoroughly
Chain grease and metal filings cling stubbornly to magnets, blocking sensor signals. Wipe both the sensor face and magnet ring with a cloth dampened in isopropyl alcohol. For embedded debris, use a cotton swab dipped in alcohol—never metal tools that could scratch surfaces. Dry completely before testing. This simple clean solves intermittent failures in 70% of garage-gym bikes where chain maintenance is neglected.
Test Electrical Continuity Like a Pro
Unplug the 3-pin connector near your bottom bracket and inspect pins for green corrosion or bending. Spray contact cleaner inside if corroded, then reseat firmly until you hear a click. Now perform the wiggle test: pedal on a stand while gently flexing the cable. If resistance cuts in and out, you’ve found a broken wire—replace the entire sensor assembly. Never splice cables; moisture will cause recurring failures.
Solve Accelerometer Sensor Problems Now
Correct Mounting Orientation Critical Fix
Stop mounting accelerometers flat against your flywheel’s side. This is the #1 mistake with spin bikes. Instead, rotate the sensor 15–20° clockwise so its axis intersects the rotation plane. Use the included rubber shim or double-sided tape to lock this angle—flexible mounts prevent slippage during intense rides. If readings remain unstable, move the sensor to your crank arm and configure your app for cadence-only mode; most platforms like Peloton can derive speed from cadence ratios.
Swap to Magnetic Sensor for Reliability
When accelerometer fixes fail, switch to a magnetic solution. Apply the Wahoo RPM Speed sensor’s included magnet strip directly to your flywheel. This $69 dual-mode sensor works with any app via Bluetooth or ANT+ and eliminates orientation headaches. Installation takes 5 minutes: position the sensor 1–3mm from the magnet strip, secure with zip-ties, and pair through your bike’s settings. For under $15, generic Hall sensors offer similar reliability if matched to your magnet count (8, 12, or 16).
Resolve Firmware Update Failures in 10 Minutes
Network Optimization Checklist
Firmware stalls on MYX or BODi bikes usually mean weak Wi-Fi. Check your signal strength: -60 dBm or stronger (full bars) is essential. Move your router closer or add a Wi-Fi extender near the bike. Power-cycle everything—unplug the bike for 30 seconds, restart your router, then reconnect. Never attempt updates on 5 GHz networks; these bikes require 2.4 GHz exclusively for stable data transfer during critical firmware flashes.
Factory Reset Without Data Loss
Hold your bike’s power button for 10 seconds until the screen blacks out. Wait 30 seconds, then power back on. Crucially, do not reinstall apps yet—first clear app cache: on iOS, offload the app via Settings > General > iPhone Storage; on Android, go to Settings > Apps > [App Name] > Storage > Clear Cache. Only then reinstall the latest app version from your store. This sequence fixes 80% of “update failed at 75%” errors by eliminating corrupted temporary files.
Prevent Sensor Failures With 5-Minute Maintenance
Monthly Quick Checks That Save Costly Repairs
After your next ride, spend 60 seconds verifying: sensor brackets are tight (no wiggle), business-card-thin gaps exist between magnets/sensors, and LED blinks during slow pedaling. Quarterly, clean contacts with isopropyl alcohol and apply dielectric grease to connectors—this blocks moisture-induced corrosion. Always recheck alignment after moving your bike; transport impacts frequently shift magnet rings by millimeters, breaking the critical 1–3mm gap.
When Professional Help Beats DIY
Call support if your sensor LED blinks normally but the bike still shows “no cadence”—this indicates controller failure beyond user repair. Similarly, seek help if problems occur only while riding (not on a stand), suggesting internal wiring breaks inside the frame. Have your serial number ready and confirm warranty status first; MYX and Peloton often dispatch free technicians for covered issues. Never void warranties with unnecessary disassembly.
Final Troubleshooting Checklist Before Replacement
Run these steps in exact order:
1. Power cycle bike and phone (unplug bike 30 seconds)
2. Re-pair sensor after deleting old Bluetooth connections
3. Verify physical alignment with business card gap test
4. Clean sensor/magnet surfaces with alcohol-dampened cloth
5. Test with single app (close all others completely)
6. Replace battery if multimeter reads under 2.9V
Most exercise bike sensor not working issues resolve at step 3 or 4. If problems persist, replacement sensors cost $8–69—far cheaper than service calls. With proper alignment and quarterly maintenance, your next ride will deliver flawless data. Stop guessing your performance; fix that sensor today and reclaim your training precision.


