
Your exercise bike’s speedometer suddenly reads zero while you’re pedaling at full speed. This frustrating issue affects older models, particularly Sears exercise bikes with mechanical cable-driven systems. Most problems trace back to the rear unit where the cable connects to the gauge, but the good news is that most fixes require only basic tools and patience.
This guide walks you through diagnosing and repairing your non-functioning speedometer, from simple cable adjustments to internal gear replacements. You’ll learn what causes these failures, how to spot them early, and when to call for professional help. Whether you’re dealing with erratic readings or complete speedometer failure, these proven solutions will get your workout metrics back on track.
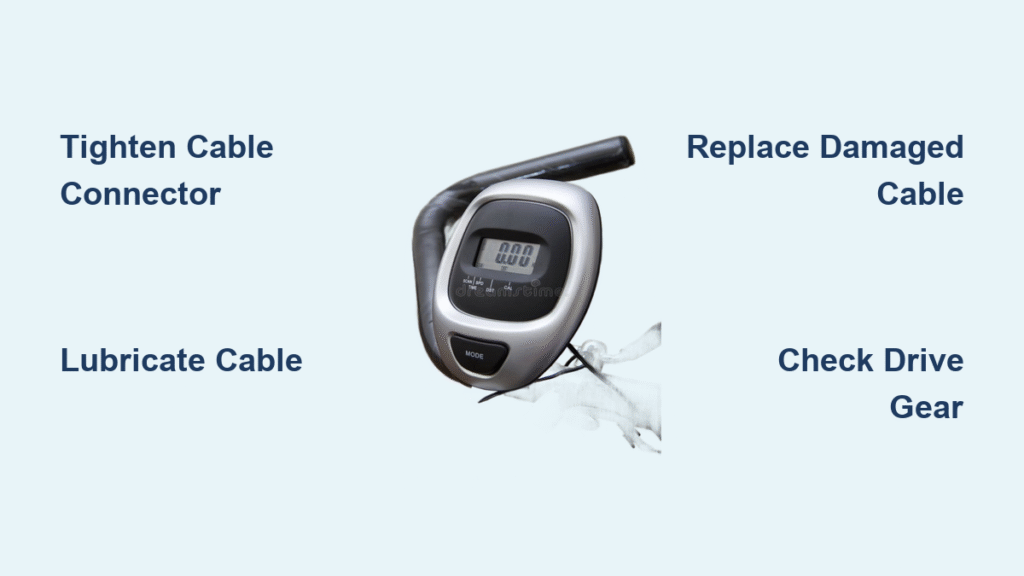
Diagnose Speedometer Failure Symptoms
Initial Problem Assessment
Start by documenting exactly what’s happening. Does the gauge read zero constantly, show erratic numbers, or work only occasionally? These symptoms point to different root causes that determine your repair approach. Pedal slowly and watch the gauge needle response—this simple test reveals whether you’re dealing with a connection issue or internal damage.
Quick diagnostic checklist:
– Pedal slowly and watch the gauge needle
– Check if the cable moves when the wheel spins
– Note any grinding, clicking, or unusual resistance
– Test at different speeds and resistance levels
Visual Inspection Process
Look where the cable enters the rear unit—this connection point fails most often. Check for loose fittings, frayed cable strands, or damaged threads on the connector. A quick visual scan often reveals the problem before you need tools. Shine a flashlight on the connection points to spot subtle wear that could be causing your speedometer to malfunction.
What to examine:
– Cable entry point into the rear unit
– Connector tightness at both ends
– Cable condition along its entire length
– Gauge face for cracks or damage
Fix Loose Cable Connections

Tighten Rear Unit Connector
Most intermittent speedometer issues stem from loose connections. The rear unit connector works loose over time from vibration and regular use. This is often the quickest fix requiring only basic tools. Before applying force, check for stripped threads—if the connector spins without tightening, you’ll need a different approach.
Step-by-step tightening:
1. Locate the cable connector at the rear unit
2. Use pliers to gently tighten the connector nut
3. Check for stripped threads before applying force
4. Test by spinning the wheel while observing the gauge
Secure Gauge Mounting
The gauge itself may vibrate loose, causing poor cable engagement. Check that the gauge mounting bracket hasn’t loosened from the handlebar or console mount. A wobbly gauge often creates inconsistent readings even when the cable connection is perfect. Tighten all mounting screws and verify the gauge sits flush against its mounting surface.
Connection points to check:
– Gauge mounting screws
– Cable attachment at gauge rear
– Handlebar bracket tightness
– Console assembly bolts (if applicable)
Repair Cable Wear and Damage

Identify Cable Problems
Frayed or kinked cables cause erratic readings or complete failure. The cable spins inside a protective sheath, and any damage creates friction that prevents smooth rotation. If you can manually spin the cable at the rear unit but the gauge doesn’t respond, your cable likely needs replacement. Look for visible fraying at connection points—this is the most common failure location.
Signs of cable damage:
– Visible fraying at connection points
– Kinks or sharp bends in the cable
– Resistance when manually rotating the cable
– Cable spins freely but gauge doesn’t respond
Cable Lubrication Technique
Dry cables create friction that prevents accurate readings. Light lubrication often restores function without replacement, especially on older bikes with original cables. Use only light machine oil—never heavy grease that attracts dirt and creates more problems. Proper lubrication should make the cable rotate smoothly with minimal resistance.
Proper lubrication method:
1. Disconnect the cable at both ends
2. Apply 2-3 drops of light machine oil along the cable
3. Work the oil in by gently rotating the cable
4. Reconnect and test for smooth operation
Cable Replacement Guide
When lubrication and tightening fail, cable replacement becomes necessary. This process varies by model but follows similar principles across most cable-driven systems. Measure your old cable before purchasing a replacement—exercise bike cables come in specific lengths that must match your bike’s design. Universal cables work for many models, but older Sears units may require specialty parts.
Replacement steps:
1. Remove old cable by disconnecting both ends
2. Measure the cable length for correct replacement
3. Route new cable following the original path
4. Connect and test before final tightening
Replace Internal Drive Gears
Diagnose Gear Failure
When the cable spins freely but the gauge shows no movement, the internal drive gear in the rear unit likely stripped its teeth. This requires more extensive repair but is still manageable for DIY enthusiasts. The drive mechanism should rotate smoothly when the wheel turns—if it feels loose or disconnected internally, gear replacement is needed.
Gear failure symptoms:
– Cable rotates normally at rear unit
– Gauge needle remains at zero
– Pedaling resistance feels normal
– No grinding noises from the rear unit
Access Internal Components
Removing the rear unit cover reveals the drive mechanism. This step requires specific tools based on your bike model, particularly for older Sears exercise bikes with proprietary systems. Take photos during disassembly—you’ll thank yourself when reassembling the unit. Some models require wheel removal for proper access to the rear unit cover.
Access procedure:
1. Power down the bike completely
2. Remove rear wheel if necessary for access
3. Unscrew rear unit cover using appropriate tools
4. Document assembly with photos before disassembly
Replace Stripped Drive Gear
The drive gear connects the bike’s wheel rotation to the cable. Stripped teeth prevent this transfer, requiring gear replacement or professional service. Check the part number on the damaged gear—older Sears models may require specialty suppliers for exact replacements. If the original part is unavailable, consider upgrading to a modern compatible unit.
Gear replacement process:
1. Remove damaged gear carefully
2. Check part number for exact replacement
3. Install new gear ensuring proper engagement
4. Test rotation before reassembly
Prevent Speedometer Problems
Weekly Maintenance Routine
Simple preventive steps extend your speedometer’s life significantly. Most failures develop gradually, making regular inspection crucial for older exercise bikes. Check cable tension during your weekly cleaning routine—loose connections cause 80% of speedometer issues on mechanical systems. A quick 2-minute check can prevent hours of troubleshooting later.
Weekly inspection checklist:
– Check cable connector tightness
– Look for new fraying or wear
– Test gauge response at low speed
– Clean around the rear unit
Monthly Lubrication Schedule
Regular lubrication prevents the friction that causes cable wear. Use only light machine oil—heavy greases attract dirt and create more problems. Apply lubrication sparingly; excess oil attracts dust that creates abrasive buildup. Focus on connection points where metal contacts metal, as these areas experience the most friction.
Lubrication points:
– Cable entry at rear unit
– Cable connection at gauge
– Any exposed cable sections
– Moving parts in rear unit
Storage Best Practices
Proper storage prevents corrosion and connection issues, especially important for bikes kept in garages or basements where humidity fluctuates. Cover the rear unit when storing long-term—this simple step prevents moisture buildup that causes internal corrosion. Store your bike with pedals in neutral position to maintain consistent cable tension.
Storage guidelines:
– Keep in dry environment
– Cover rear unit to prevent dust
– Avoid tension on the cable
– Store with pedals in neutral position
Troubleshoot Complex Issues
When Basic Fixes Fail
Some problems require deeper investigation. If tightening, lubrication, and cable replacement don’t restore function, check these additional factors. Test your gauge with a known working cable—this eliminates the gauge as the problem source. Verify cable-gauge compatibility, especially if you’ve recently replaced components.
Advanced diagnostic steps:
1. Test gauge with known working cable
2. Check entire drive system from pedals to rear unit
3. Verify cable-gauge compatibility
4. Inspect for electrical interference
Professional Service Indicators
Know when to seek expert help. Internal gear replacement on older Sears models may require specialized tools or discontinued parts. If you’ve tried multiple solutions without success, or if the repair requires disassembling complex internal mechanisms, professional service becomes cost-effective.
Call for service when:
– Internal gears need replacement
– Specialized tools required
– Parts discontinued or unavailable
– Multiple system failures occur
Electronic vs. Mechanical Systems
This guide focuses on mechanical cable-driven systems common on older bikes. Electronic displays present different challenges requiring voltage testing and component replacement. If your bike has a digital display but no speed reading, check power connections before assuming speedometer failure.
Electronic system issues:
– Power supply problems
– Loose internal connections
– Console malfunction
– Sensor misalignment
Safety During Repairs
Essential Safety Steps
Never attempt repairs with the bike plugged in or while it’s unstable. These mechanical systems can pinch fingers or cause other injuries if handled carelessly. Wear gloves and eye protection—small parts can fly when under tension. Use the correct tools for each job; improper tools often cause more damage than the original problem.
Safety checklist:
– Disconnect power completely
– Stabilize bike before working
– Wear gloves and eye protection
– Use proper tools, not substitutes
Post-Repair Testing
After completing repairs, verify proper operation through systematic testing. Start slowly and increase speed gradually while monitoring for issues. Check readings at multiple resistance levels—some problems only appear under specific conditions. Listen for unusual noises that might indicate improper assembly.
Testing protocol:
1. Start with slow pedaling
2. Gradually increase speed
3. Check readings at different resistances
4. Monitor for unusual noises
Your exercise bike speedometer failure usually stems from simple issues like loose connections or worn cables. Start with the basic fixes—tightening connections and lubricating the cable—before moving to more complex repairs. Most mechanical speedometers respond well to proper maintenance and occasional cable replacement, keeping your older exercise bike functional for years to come.
Remember that persistent issues on very old models might indicate it’s time to upgrade rather than repair. Document all repairs and consider whether the cost and effort justify keeping the original system versus modernizing with electronic components. With regular maintenance, your speedometer should provide accurate readings through thousands of workout miles.


