
That sinking feeling when you’re pedaling furiously but going nowhere, or grinding so hard your knees scream for mercy? It’s almost always a resistance problem. Mastering how to adjust resistance on exercise bike settings transforms your machine from a coat rack into your most powerful fitness ally. Whether you’re chasing weight loss, building endurance, or crushing HIIT sessions, precision resistance control is the difference between wasted effort and transformative results. Most riders treat resistance as a set-it-and-forget-it feature, but your body changes daily and workouts demand dynamic adjustments. This guide cuts through the confusion with actionable techniques you can apply immediately.
Mechanical Resistance Knob Control
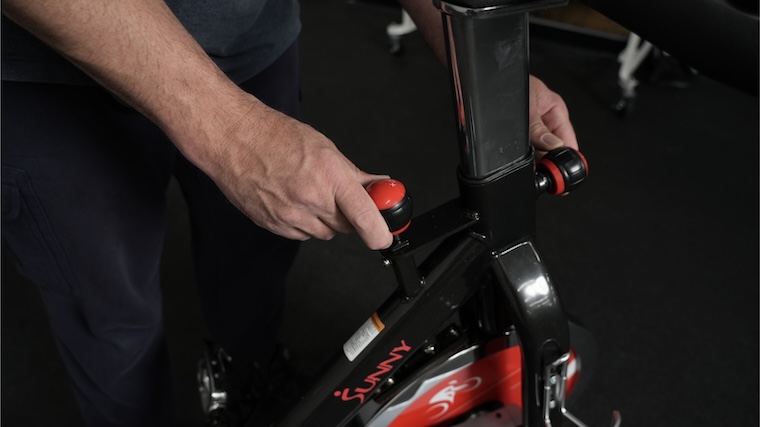
Locate Your Resistance Knob
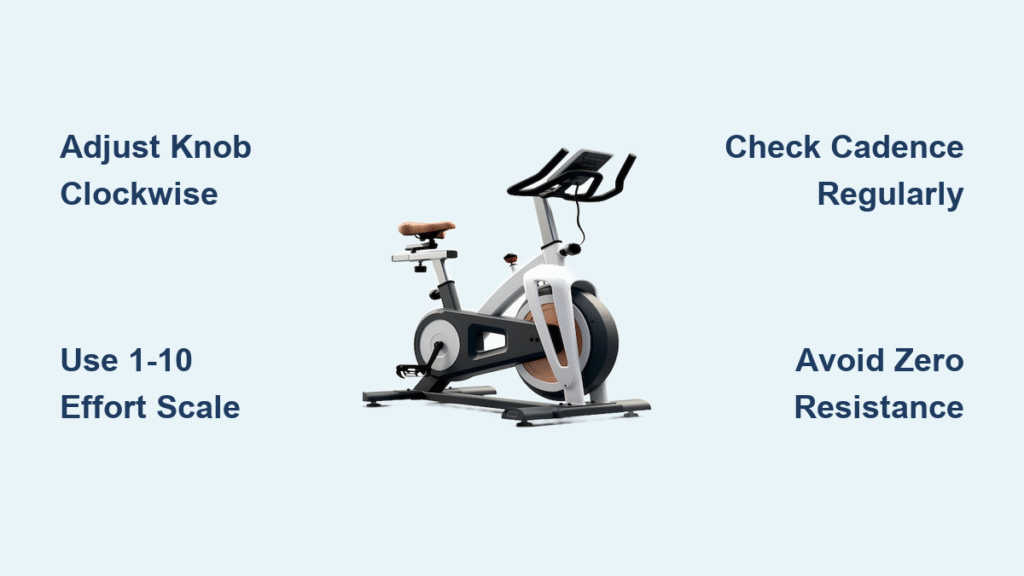
Find the micro-adjustable knob beneath your handlebars—it’s your direct terrain simulator. This isn’t just a dial; it’s your connection to virtual hills and valleys. Turn clockwise (right) to climb mountains, counterclockwise (left) to glide across flats. On Sunny cycle bikes and similar models, this knob operates with surgical precision. Never force it—you should feel smooth resistance changes without grinding. If it sticks, stop immediately; forcing it causes internal damage.
Micro-Adjustment Techniques
Precision beats guesswork every time. Use these exact references during rides:
– Quarter turn (90°): Fine-tune effort during seated climbs
– Half turn (180°): Moderate shift for transitioning between terrain
– Full turn (360°): Significant jump for standing hill attacks
Pro tip: Mark your “flat road baseline” with nail polish on the knob shaft. You’ll instantly recognize your starting point for every workout.
Real-Time Adjustment Process
- Establish rhythm at low resistance before adjusting
- Lightly touch the knob—don’t grip or lean off balance
- Turn gradually while maintaining pedal stroke
- Wait 2-3 revolutions to feel full resistance change
- Stop immediately when tension matches your target effort
Never adjust while standing—that’s how riders lose balance and hit the floor. Sit down first, make the change, then stand when ready.
Electronic Resistance Button Systems
Activate Your Display
Electronic bikes require motion to wake up. Pedal at 30+ RPM for 5 seconds until the screen illuminates—this safety feature prevents accidental changes. If your display stays dark, check power connections first. Once active, press “Manual” mode to bypass pre-set programs and take full control. Your resistance buttons won’t respond until the system recognizes consistent pedaling.
Manual Mode Navigation
Skip the automated workouts initially. Press “Manual” to override factory settings, then use:
– Single press (+/-): Small 1-2 level increments
– Hold 2 seconds: Continuous adjustment
– Double-tap: Jump 3-5 levels for interval spikes
Critical: Electronic systems have lag. Wait 3 full pedal strokes after each adjustment before changing again. Rushing causes overshooting and wasted energy.
Dial in Perfect Resistance Levels

Use the 1-10 Effort Scale
Forget complex metrics—judge resistance by feel using this universal scale:
| Effort Level | Physical Sensation | Cadence Target |
|---|---|---|
| 5 (Flat Road) | Comfortable pace, could sing | 80-100 RPM |
| 7 (Jog) | Labored breathing, short phrases | 70-80 RPM |
| 9 (Hill) | Maximum sustainable effort | 60-70 RPM |
| 10 (Sprint) | All-out burst, <30 seconds | 90+ RPM |
If you’re gasping at level 7, your resistance is too high. If you’re breezing through level 9, it’s too low.
Check Your Cadence Relentlessly
Your RPM meter is your truth-teller. Target these zones:
– Fat burning: 65-75 RPM at level 6-7 effort
– Endurance building: 80-90 RPM at level 5-6
– Power sprints: 100+ RPM at level 4-5
When RPMs exceed targets, increase resistance. When cadence drops below minimums, decrease it immediately. Your bike’s display shows real-time feedback—glance every 30 seconds.
Posture Tells the Whole Story
Your body reveals resistance errors before you feel them. Correct resistance lets you sit tall with steady hips. Too high causes violent side-to-side rocking or death-gripping handlebars. Too low makes you bounce like a jackhammer. Stop pedaling if you catch yourself leaning forward—this strains your lower back within minutes.
Resistance Settings for Your Specific Goals
Cardiovascular Endurance
Low resistance (4-5), high cadence (90+ RPM) builds aerobic capacity. Breathe deeply through your nose—you should speak full sentences. Maintain this for 25+ minutes to trigger heart-strengthening adaptations. If your heart rate stays below 70% max after 10 minutes, increase resistance by 1 level.
Fat Burning Zone
Medium resistance (6-7) at 65% max heart rate maximizes calorie burn. You’ll sweat steadily but maintain conversation in short bursts. Critical mistake: Using zero resistance here. Always maintain at least level 3 to engage muscles properly. Sessions should last 30-45 minutes with resistance shifts every 5 minutes.
Strength and Power Building
Alternate heavy/light resistance every 90 seconds:
– Heavy (8-9): Standing climbs for 60 seconds
– Light (3-4): Seated recovery for 90 seconds
– Focus: Drive through heels during climbs to activate glutes
Never stay above level 9 for more than 30 seconds—this risks knee strain from excessive torque.
Avoid These Resistance Mistakes
Zero Resistance Danger
Never pedal with zero resistance. This creates dangerous knee hyperextension and provides zero training stimulus. Always maintain at least level 2-3 even during warm-ups. Think of it like driving in neutral—it feels easy but wrecks your transmission (or in this case, your joints).
Static Resistance Syndrome
Using one resistance setting for your entire workout is like running on a treadmill at constant speed—it plateaus results fast. Change resistance every 3-5 minutes to trigger metabolic adaptations. Set phone reminders if needed.
Sudden Drops Cause Falls
Reducing resistance while standing is the #1 cause of handlebar face-plants. Always sit down first, then decrease resistance gradually. If you must adjust mid-stand, reduce in quarter-turn increments while watching the knob.
Warm-Up Protocol
Start every session with 5 minutes at level 3-4. This lubricates knee joints and preps muscles. Skip this and you’ll feel “stuck” when increasing resistance later. Your warm-up RPM should hit 85+ before progressing.
Advanced Resistance Programming
Progressive Overload Strategy
Increase weekly resistance by 5%. Track your “flat road” setting—if level 5 felt right last week, try level 5.5 this week. Small jumps prevent burnout while building real strength. Note: Electronic bikes show exact levels; mechanical users should mark knob positions.
Interval Training Blueprint
The 60/90 method burns 28% more calories:
– Work: Level 8-9 for 60 seconds (standing)
– Recovery: Level 4-5 for 90 seconds (seated)
– Repeat 10x = 25-minute fat-melting session
Pro tip: Sync intervals to song choruses—push hard when vocals kick in.
Equipment-Specific Adjustments
Recumbent Bike Considerations
Recumbents feel 1-2 levels easier due to reclined position. Start at level 4 (not 5) for flat roads. Electronic controls dominate here—use manual mode since pre-sets often underestimate resistance needs. Expect smoother transitions but less dramatic changes than upright bikes.
Upright vs. Spin Bike Differences
- Upright bikes: Use electronic presets but switch to manual for control
- Spin bikes: Mechanical knobs require lighter touch—over-rotating causes sudden jumps
- Hybrid systems: Master both methods—use electronic for intervals, mechanical for steady-state
Maintenance and Troubleshooting
Monthly Resistance Check
Test systems weekly:
– Mechanical: Knob should turn silently through full range
– Electronic: Buttons respond within 1 second
– Listen for grinding/grating during changes
Clean mechanical knobs monthly with silicone lubricant—not WD-40, which attracts dust.
When to Call for Help
- Sticking knob: Requires internal lubrication (don’t force it)
- Electronic lag: Control board needs replacement
- Inconsistent resistance: Belt tension or magnet alignment issue
Never ignore unusual noises—they indicate 80% of future breakdowns. Most manufacturers offer free diagnostics for resistance issues under warranty.
Your perfect resistance level today won’t match tomorrow—and that’s ideal. Listen to your body’s daily signals: some days level 7 feels like level 5, other days it’s level 9. Adjust accordingly, prioritize fluid movement over arbitrary numbers, and remember that consistent micro-adjustments beat sporadic massive jumps. Master how to adjust resistance on exercise bike properly, and every pedal stroke becomes purposeful progress toward your goals. Your bike transforms from intimidating equipment into a precision fitness instrument—ready whenever you are.


