
Your resistance band workout can deliver gym-quality results at home—only if your bands stay securely anchored. A snapped band isn’t just frustrating; it can cause serious injury to you or damage to your property. Proper anchoring transforms these affordable tools into a complete strength training system, unlocking hundreds of exercises that target every muscle group safely. Without the right anchor points and attachment methods, you’re limiting your workout potential and risking dangerous failures. This guide reveals exactly how to secure resistance bands for any exercise, identify truly stable anchor points, avoid common mistakes that lead to accidents, and build a versatile home gym that delivers consistent, injury-free results.
Identify Secure Anchor Points for Home Workouts
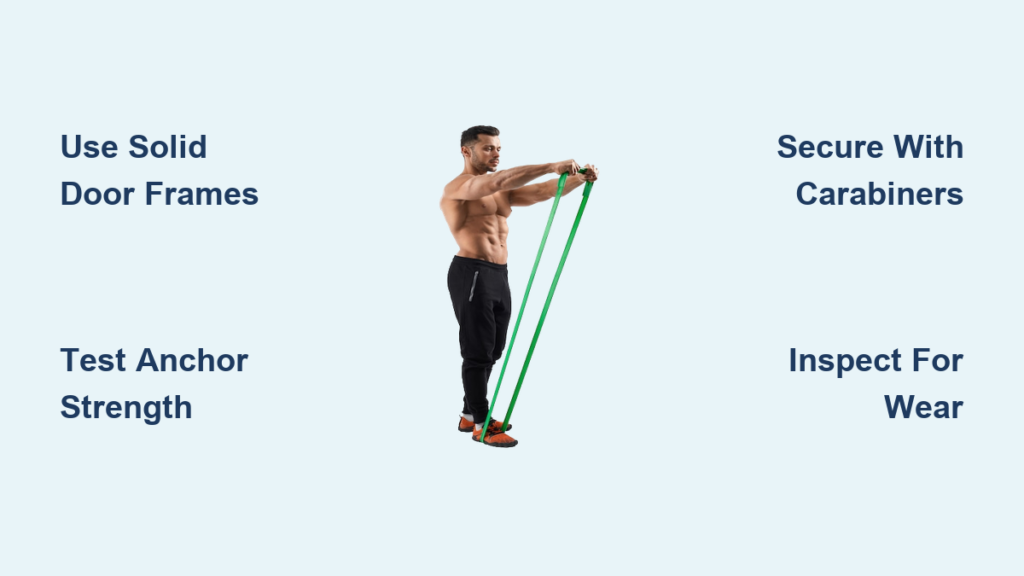
Your home contains multiple potential anchor points, but not all withstand resistance band tension safely. Solid wood door frames (not hollow-core doors), steel door jambs, and concrete walls provide reliable anchoring when properly utilized. Avoid drywall anchors, doorknobs, and lightweight furniture that inevitably fail under tension. Before attaching any band, test potential anchor points by applying gradual force equivalent to your maximum workout resistance—typically 5-150 pounds depending on band thickness and stretch distance.
Door frames represent the most accessible anchor point for beginners. Confirm you’re working with solid wood construction by tapping the frame—if it sounds hollow, it lacks sufficient strength. Load-bearing walls with wooden studs behind drywall offer excellent anchoring potential when using appropriate hardware. Concrete basement or garage walls provide exceptional strength for permanent mounting solutions. Never anchor to drywall alone without hitting a stud, as the drywall will crumble under tension. When in doubt about an anchor point’s integrity, choose a different location—your safety outweighs workout convenience.
Install Door Anchors Correctly for Versatile Training

Door anchors enable safe resistance band workouts without permanent modifications to your home. These specialized devices consist of a sturdy strap that passes through the door gap with a reinforced attachment point on the interior side. Proper installation requires closing the door completely and inserting the anchor strap horizontally across the top, bottom, or side of the door gap, depending on your exercise needs.
Position the anchor tab on the side of the door where you’ll be exercising: top for upper body movements like chest presses, bottom for leg exercises like hamstring curls, and side for rotational movements. Test the installation by pulling firmly on the anchor tab before attaching bands—the door must remain completely closed with zero strap movement. For added protection against door frame damage, place a towel or thin cardboard between the door and frame during use.
Different anchor positions unlock specific exercise categories. Top-anchored bands excel at horizontal pushing and pulling movements, bottom anchors transform your setup for lower body work, and side anchoring enables rotational exercises targeting your core. Many quality door anchors feature multiple attachment points, allowing quick position changes between sets without reinstalling the entire system.
Mount Permanent Wall and Floor Systems for Professional Results
For dedicated home gyms, permanent wall and floor mounts provide the most secure and reliable anchoring solution. Wall mounts consist of heavy-duty metal brackets that bolt directly into wall studs or concrete, creating anchor points that rival commercial gym equipment in strength. Floor mounts work similarly but anchor to the ground, enabling exercises like band-resisted deadlifts and squats where downward resistance is essential.
Installing a wall mount requires locating studs with a stud finder, marking positions, and drilling pilot holes for mounting bolts. Concrete or brick walls need masonry bits and appropriate wall anchors. The bracket should span at least two studs when possible, distributing load across a wider area. Most quality wall mounts include protective covers that prevent band abrasion and wall damage during use.
Floor-mounted systems require secure attachment to concrete or a reinforced wooden platform. These installations excel for band-resisted lower body movements where downward force is applied. Serious practitioners often combine wall and floor mounts in a single rig, creating a comprehensive anchoring system that supports the full exercise spectrum. While requiring more installation effort, permanent mounts deliver unmatched reliability for consistent training.
Create Safe Outdoor Anchoring Solutions

Trees offer natural anchor points when selected and used properly. Choose healthy, live trees with trunks at least 8 inches in diameter—saplings or damaged trees risk breaking under tension. Wrap your band or strap around the trunk at exercise height using a tree-friendly strap that won’t damage bark, and always test the setup with gradual tension before exercising.
Dedicated outdoor anchor systems provide safer, more convenient options for regular training. Ground anchors feature corkscrew designs that twist into soil, creating hold points rated for specific weight capacities. These removable solutions work well for renters or temporary setups. For permanent installations, concrete-encased posts offer exceptional stability for intense training sessions.
Public spaces like beaches and parks require portable solutions since you can’t modify property. Use resistance band-specific door anchors that work on sturdy poles, heavy-duty sandbags designed to anchor bands, or specialized outdoor anchors with wide base plates. Always survey outdoor locations for hazards, ensure adequate space around your anchor point, and choose times that won’t interfere with others enjoying the space.
Connect Bands Securely to Prevent Accidents

Proper band attachment techniques ensure your anchoring system functions safely throughout every repetition. Most resistance bands terminate in handles, reinforced loops, or flat end-tabs requiring different connection methods. Heavy-duty carabiners offer the most versatile connection—choose aluminum or steel models rated for appropriate weight capacities, ensuring the gate closes fully and locks before applying tension.
Loop-ended bands attach directly by threading through the anchor point and back through itself, creating a slipknot that tightens under tension. This method works well for door anchors but requires periodic wear inspection. Bands with flat end-tabs often include reinforced grommets designed for carabiner attachment—never force carabiners through stretched or damaged grommets.
Before exercising, visualize the entire movement range to confirm the band won’t slip, the attachment won’t shift, and you have adequate clearance. Keep fingers away from the band path during attachment and removal, as tensioned bands can snap back dangerously if released unexpectedly. Developing a consistent attachment routine prevents most accidents.
Test Every Anchor Before Each Workout Session
Pre-workout testing takes seconds but prevents the majority of resistance band accidents. Begin with visual inspection of all connection points for fraying, cracking, or damage. Replace any worn components immediately—bands cost less than medical bills. Check that door anchors haven’t shifted, wall mounts remain secure, and outdoor points haven’t loosened.
Perform physical testing by applying gradual tension to each connection point while monitoring for movement. Pull firmly on the anchor tab, simulating maximum workout force. Listen for creaking or popping sounds indicating stress. Door anchors should show zero movement—any slipping requires repositioning. Wall and floor mounts must feel completely solid with no wobble.
For door anchors specifically, confirm the door remains fully closed throughout testing with no visible frame damage. Some users keep scrap material between the door and frame to prevent cosmetic damage. Document issues discovered during testing and address them before exercising. This consistent routine becomes automatic with practice and provides ongoing safety assurance.
Avoid Dangerous Anchoring Mistakes That Cause Injuries
Understanding common anchoring errors helps prevent dangerous situations. The most frequent mistake involves using inappropriate anchor points—doorknobs, hollow doors, and lightweight furniture inevitably fail under band tension. Doorknobs tempt beginners but are designed only for pulling doors closed, not withstanding lateral force from resistance bands.
Improper door anchor installation causes many accidents, particularly positioning the anchor on the wrong side of the door or failing to close the door completely. Some users anchor to the door panel itself rather than the frame, creating situations where bands can pull the door open. Always anchor to the door frame or jamb, never the door panel, and verify the door is fully closed and latched.
Neglecting wear and damage on bands and hardware causes numerous injuries annually. Resistance bands degrade with use, sunlight exposure, and age—tiny nicks or UV damage can cause sudden failure. Inspect bands thoroughly before each workout and replace damaged components immediately. Maintaining a replacement schedule rather than waiting for visible damage provides an extra safety margin.
Mastering resistance band anchoring transforms these simple tools into a comprehensive strength training system. By selecting appropriate anchor points, installing them correctly, maintaining equipment regularly, and following safety protocols consistently, you create a training environment that delivers effective workouts without injury risk. Start with a basic door anchor system to learn fundamentals, then expand to permanent mounts as your training needs evolve. The investment in proper anchoring techniques pays dividends in safety, workout effectiveness, and the confidence that comes from training without worrying about equipment failure. With these anchoring principles mastered, you’ll unlock the full potential of resistance band training for lifelong fitness.


