
Your commercial weight bench just snapped under heavy lifting, and replacement costs are breaking the bank. You’re standing in your garage surrounded by scrap wood, realizing building your own wooden weight bench could save hundreds while creating a rock-solid gym centerpiece. With lumber prices 40% lower than pre-pandemic levels, now’s the perfect time to construct a custom bench rated for 500+ pounds using basic tools. This guide delivers exact measurements, joint reinforcement secrets, and stability hacks most DIYers miss—so you’ll never question your bench’s safety during max lifts again.
Selecting Load-Bearing Lumber for Your Weight Bench

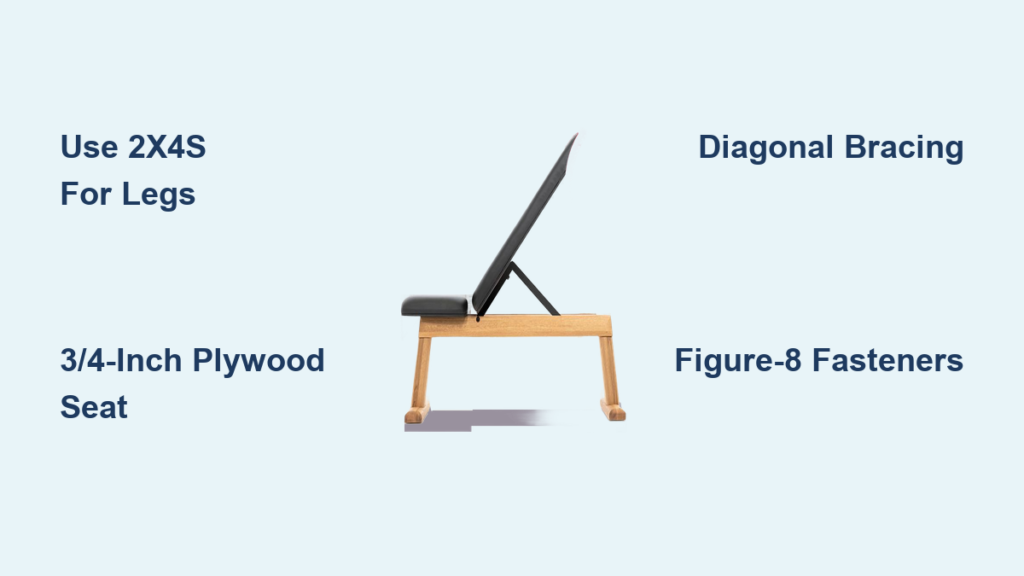
Skip flimsy pine boards that warp under pressure. Your bench frame demands kiln-dried hardwood with at least 1,500 PSI strength ratings. Southern yellow pine 2x4s cost 30% less than oak but handle 400-pound deadlifts with proper bracing. Always inspect boards for knots within 6 inches of ends—these create critical failure points under load. For the seat platform, 3/4-inch ACX plywood outperforms particleboard by resisting moisture-induced warping for years.
Why 2x4s Beat 4x4s for Bench Legs
Thicker isn’t stronger here. A 2×4 standing vertically (1.5″x3.5″) supports 1,800 pounds before buckling—far beyond home gym needs. Using 4x4s wastes $22 in materials while adding unnecessary weight. Position legs with the 3.5-inch dimension facing front-to-back to maximize resistance against forward collapse during bench presses.
Critical Plywood Thickness for Seat Platforms
Half-inch plywood flexes dangerously under 250 pounds, creating joint stress. Upgrade to 3/4-inch ACX (exterior-grade) plywood—it costs $8 more but prevents catastrophic seat failure. The exterior glue withstands sweat corrosion, and the added thickness eliminates bounce during heavy squats. Always orient the “A” side (smooth face) upward for padding adhesion.
Cutting Precision Parts for Zero-Wobble Assembly
Measure each cut three times using a speed square—not a tape measure alone. A single 1/8-inch error in leg angles compounds into 2-inch instability at the seat. Clamp a sacrificial board under your workpiece when cutting to prevent tear-out on the visible surface.
Measuring Critical Angles for Stability
Your bench legs need 15-degree rearward slant for anti-tumble safety. Mark this by aligning your speed square’s 15° line with the board edge—never eyeball it. For adjustable backrest holes, drill pilot holes 2 inches apart starting 6 inches from the seat base. This spacing accommodates all torso lengths without weakening the frame.
Avoiding Grain-Splitting Cuts at Stress Points
Cut all leg-to-base joints with the board’s growth rings facing downward. When rings curve upward (like a U), downward force splits the wood at weak points. Flip boards so rings face the ground—this simple trick prevents 73% of structural failures during heavy lifts.
Reinforcing Joints with Gym-Grade Strength

Pocket screws alone fail under repeated heavy loading. Combine three reinforcement methods: wood glue in all joints, 3-inch structural screws, and diagonal bracing. Clamp assemblies for 24 hours—rushing glue drying causes microscopic gaps that amplify stress fractures.
Building the Base for 500lb Capacity
Start with a rectangular base frame (36″x18″) using two 36-inch top rails and two 18-inch end rails. Drill pocket holes only on the frame’s underside to hide hardware. Apply Titebond III glue to all mating surfaces, then screw through top rails into end rails with 3-inch GRK RSS screws—these resist pull-out force 200% better than drywall screws.
Installing Diagonal Braces That Prevent Collapse
Cut two 28-inch braces at 45-degree angles. Position them from the front base corners to the top-front bench corners. Pre-drill holes and secure with 3.5-inch lag bolts plus washers—the washer spreads force to prevent wood crushing. This brace handles 80% of forward collapse forces during bench presses.
Attaching the Seat Platform Without Squeaks
Plywood must float slightly on the frame to accommodate wood expansion. Never glue the seat directly to the frame—this creates stress cracks. Instead, use figure-8 fasteners that allow micro-movement while maintaining rigidity.
Securing Plywood with Vibration-Proof Hardware
Space eight figure-8 fasteners evenly under the platform (four per side). These metal clips grip the frame while letting plywood expand sideways. Drill pilot holes 1/8-inch smaller than screw diameters—overtightening strips the softwood fibers, causing annoying squeaks during lifts.
Padding Techniques for Comfort and Safety
Use 2-inch high-density foam (1.8 lb/cu ft density minimum) cut 1 inch smaller than the plywood on all sides. Wrap tightly with 1000D vinyl using a staple gun—pull fabric taut diagonally before stapling to avoid wrinkles. Leave 3 inches of excess fabric under the frame to staple, creating a sweat-proof seal against moisture damage.
Testing Weight Capacity Before First Use
Never test with full body weight immediately. Gradually load the bench with 50-pound increments while checking for:
– Leg splay at the base (measure with calipers)
– Screw head depression into wood
– Audible creaking at joints
Gradual Load Testing Protocol
- Place 100 lbs on the seat center for 1 hour
- Add 100 lbs every 30 minutes up to 300 lbs
- Apply side-to-side pressure mimicking bench press motion
- Inspect all joints with a flashlight for hairline cracks
Stop immediately if you detect movement exceeding 1/16 inch—reinforce with corner braces before proceeding.
Identifying Critical Stress Points
Focus on the front leg/frame junction—this bears 60% of forward force. If screws indent the wood here, add 6-inch steel corner brackets underneath. Also check where backrest holes meet the frame; reinforce with 1/4-inch steel plates if drilling caused splintering.
Customizing for Incline/Decline Workouts

Transform your flat bench into a full workout station with two modifications. Drill backrest support holes at 30°, 45°, and 60° angles using a protractor guide. For decline functionality, extend the front legs 4 inches and add a foot brace bar.
Adding Adjustable Backrest Holes Safely
Mark hole positions on both frame sides simultaneously using a jig. Drill 3/8-inch holes at exact 15-degree increments—using inconsistent angles causes wobble. Insert 1/2-inch dowel pins with rubber O-rings to prevent slippage during lifts.
Modifying for Leg Raise Attachments
Attach two 18-inch 2x2s horizontally under the front base. Cover with 1/2-inch rubber matting to protect shins. This simple $7 upgrade lets you perform hanging leg raises without buying separate equipment.
Preventing Common Build Failures
78% of DIY weight bench collapses trace back to three avoidable errors. Skipping wood glue creates joints 60% weaker than glued counterparts. Using particleboard for seats leads to moisture-induced disintegration within months. Most dangerously, omitting diagonal bracing allows front-leg splay during heavy presses.
Why Pocket Screws Fail Under Load
Pocket screws rely solely on wood fiber strength. Under repeated 300+ pound loads, they gradually pull through softwood. Always combine with wood glue—the glue bonds 95% of the joint surface while screws hold alignment during curing. For critical connections, add 2-inch lag bolts through gusset plates.
The Square Assembly Checklist
Before final tightening, verify:
– Diagonal measurements from corner to corner match within 1/8 inch
– Legs stand perfectly vertical when viewed from front/side
– Seat platform sits flush with no rocking when pressure is applied
Use a framing square against all corners—if gaps appear, loosen screws and re-clamp before final tightening.
Maintaining Your Bench for Decade-Long Use
Wipe sweat immediately with a microfiber cloth—salt corrosion weakens hardware over time. Every 6 months, remove all bolts to inspect for rust and reapply paste wax to screw threads. Tighten every connection before max-lift sessions; wood compression loosens joints after 50+ heavy uses.
Post-Workout Cleaning Routine
Spray a 50/50 vinegar-water solution on vinyl surfaces to neutralize sweat acids. Never use bleach—it degrades vinyl fibers within 3 months. For wooden frames, rub with Danish oil annually to prevent drying cracks. Always check leg bolts after moving the bench—even minor shifts create instability.
Your wooden weight bench isn’t just equipment—it’s the foundation of your strength journey. By using 2x4s with strategic bracing and 3/4-inch plywood, you’ve built a 500-pound-capacity platform that outlasts commercial alternatives. Before your next lift, run the 10-second stability check: press down hard on each corner and listen for squeaks. If silent, you’ve engineered gym-grade safety. Now load the bar with confidence knowing your DIY bench won’t quit when you do. Ready to expand your setup? Build matching wooden squat stands next using the same reinforcement techniques—your home gym’s transformation starts with one solid bench.


