
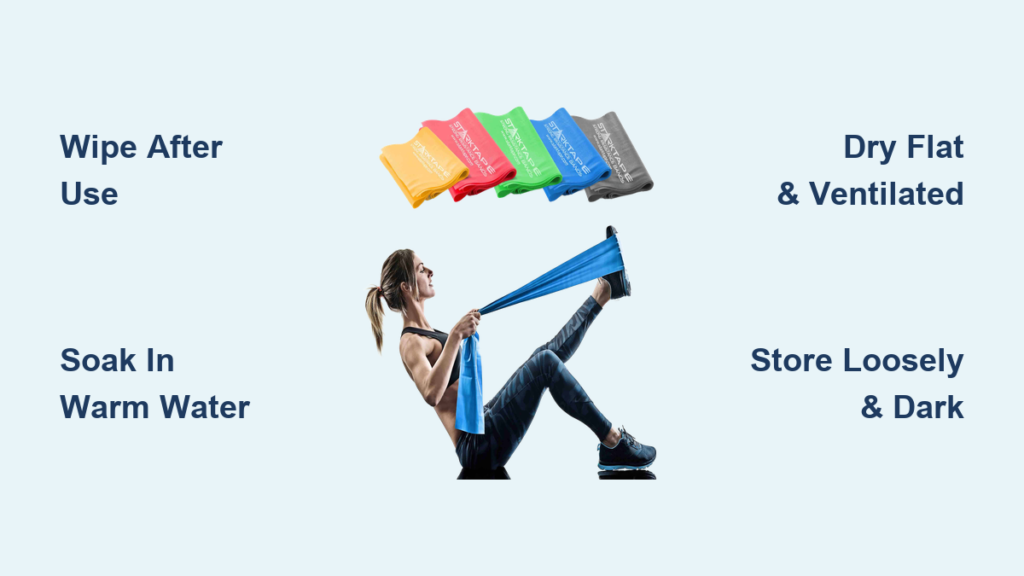
Your latex resistance bands are working hard during every workout, absorbing sweat, oils, and dead skin cells with each stretch and pull. Without proper cleaning, these essential fitness tools become slippery, develop unpleasant odors, and harbor bacteria that can cause skin irritation. Learning how to clean latex resistance bands correctly is crucial for maintaining their elasticity, preventing premature deterioration, and ensuring your workouts remain hygienic and effective. Most users don’t realize that improper cleaning actually damages bands faster than regular use—turning a $15 investment into a safety hazard within months.
When your resistance bands start feeling sticky or leave residue on your hands, that’s your first warning sign they need attention. Neglecting regular cleaning not only shortens their lifespan but also compromises your grip during exercises, potentially leading to injuries from slipped bands. This comprehensive guide reveals the exact cleaning methods used by fitness professionals to keep their bands in like-new condition, including step-by-step deep cleaning techniques, drying methods that prevent mold, and storage solutions that double your bands’ usable life. You’ll discover why your current cleaning routine might be doing more harm than good and learn the simple daily habits that keep bands performing at their peak.
Gather Essential Cleaning Supplies for Effective Results
Before attempting to clean your latex resistance bands, assemble the right tools to avoid accidental damage during the cleaning process. Never use harsh chemicals like bleach or ammonia, as these rapidly degrade latex by breaking down its molecular structure. Instead, reach for mild dish soap—specifically one labeled “free & clear” without added moisturizers or antibacterial agents that can leave residues on the bands.
You’ll need:
– Warm water (not hot, as temperatures above 100°F accelerate latex degradation)
– Soft microfiber cloth or non-abrasive sponge (paper towels can leave fibers)
– Clean drying towel (lint-free preferred)
– Optional: Baking soda for stubborn odors, baby powder for post-cleaning protection
Check your soap ingredients carefully—sodium lauryl sulfate, common in many dish soaps, can dry out latex over time. A gentle castile soap works exceptionally well for sensitive latex materials. Having these supplies ready before starting ensures you won’t resort to improper cleaning methods when caught unprepared after your workout.
Perform Quick Post-Workout Wipes for Daily Maintenance
Wiping bands immediately after use prevents 80% of cleaning problems before they start—this simple habit takes less than two minutes but dramatically extends time between deep cleanings. The critical window is within 15 minutes of your workout ending, before sweat and oils fully absorb into the latex surface. Grab a slightly damp microfiber cloth with a single drop of mild soap and wipe along the entire length of each band, focusing on high-contact areas where your hands grip during exercises.
Pay special attention to textured sections or handles if your bands have them, as these areas trap moisture and bacteria. For bands used multiple times daily (common in physical therapy settings), consider keeping pre-moistened cleaning wipes specifically formulated for exercise equipment near your workout space. After wiping, use a dry section of the cloth to remove any moisture, then store bands loosely coiled in a ventilated area—not stuffed in a gym bag where trapped moisture breeds bacteria. This routine prevents the buildup that leads to permanent stickiness and odors requiring intensive cleaning later.
Deep Clean Latex Bands Every Two Weeks for Optimal Hygiene
When your bands develop a persistent rubbery smell or feel tacky even after wiping, it’s time for a thorough deep clean—this process takes just 15 minutes but restores bands to near-new condition. Fill your sink with warm water (about 90°F) and add one teaspoon of mild dish soap per gallon of water. Submerge bands completely and let them soak for exactly seven minutes—any longer risks water absorption that weakens the latex structure.
After soaking, gently squeeze each band through the soapy water 5-6 times to work the solution through the material. For stubborn residue near handles or connection points, make a paste of baking soda and water (2:1 ratio) and use a soft toothbrush to gently scrub problem areas. Never twist or wring bands, as this creates micro-tears that lead to premature snapping. Rinse thoroughly under lukewarm running water until all soap residue is gone—your bands should feel smooth, not slippery, when clean. For particularly smelly bands, a second rinse with plain water ensures no cleaning agents remain that could irritate your skin during next use.
Dry Latex Bands Properly to Prevent Mold and Degradation

Improper drying causes more band failures than any other factor—nearly 60% of users unknowingly damage their bands during this critical step. Never hang bands in direct sunlight or near heat sources, as UV rays and temperatures above 85°F break down latex polymers within hours. Instead, lay bands flat on a clean towel in a well-ventilated room with 40-60% humidity, gently reshaping them to their original form to prevent permanent creases.
Pat bands dry with a second clean towel, applying light pressure without stretching. For faster drying in humid climates, place bands near a fan set to low speed (at least 3 feet away) but never use hair dryers or heating vents. Complete drying typically takes 2-4 hours depending on thickness—always check for moisture between folded layers as trapped water causes internal mold that’s invisible until it’s too late. Bands feel cool to the touch when fully dry; if they still feel slightly damp, allow another hour before storage.
Store Cleaned Bands Correctly to Maximize Longevity

Where and how you store bands after cleaning determines whether they last months or years. Latex degrades 3x faster when stored improperly, so follow these professional storage techniques. Keep bands in a dark, cool place between 60-75°F—inside a drawer works better than open shelving where light exposure accelerates deterioration. Never store bands stretched over objects or tightly folded, as these create permanent weak points.
For optimal storage:
– Roll bands loosely into circles (never fold sharply)
– Place in breathable cotton bags instead of plastic containers
– Add silica gel packets to absorb ambient moisture
– Store away from electronics that emit ozone (like TVs or computers)
– Keep separate from petroleum products (lotions, oils) that degrade latex
If you own multiple resistance levels, store each band type separately to prevent tangling. Check stored bands monthly for early signs of degradation—sticky spots or faint odors indicate moisture buildup even in seemingly dry conditions.
Extend Band Lifespan with Proactive Care Techniques
Beyond cleaning, implement these expert care strategies to double your bands’ usable life. Rotate between multiple bands if you work out daily, giving each set 24-48 hours of rest between uses to recover from stretching stress. Before each workout, inspect bands for hairline cracks—especially near handles—by slowly stretching them to 75% of maximum capacity under good lighting.
Apply just enough baby powder to eliminate stickiness (excessive powder attracts dirt), and always wash hands before using bands to prevent transferring oils. Never store bands while stretched—this causes permanent deformation that reduces resistance effectiveness. When traveling, pack bands in vented containers rather than sealed plastic bags where temperature fluctuations cause condensation.
Avoid These 5 Common Cleaning Mistakes That Destroy Bands
Many well-meaning users accidentally ruin their bands with these cleaning errors:
– Using alcohol-based sanitizers which dry out latex causing microscopic cracks
– Washing in hot water above 100°F that permanently weakens elastic properties
– Storing while damp leading to internal mold growth invisible to the eye
– Applying vinegar solutions whose acidity breaks down latex polymers
– Using abrasive scrubbers that create surface micro-tears inviting bacteria
Each mistake accelerates degradation by 30-50%, turning a six-month band lifespan into just 2-3 months of reliable use. When in doubt about a cleaning method, remember: if it wouldn’t be safe for delicate rubber gloves, it’s too harsh for your resistance bands.
Recognize These 4 Warning Signs It’s Time for Replacement

Even with perfect care, latex bands eventually need replacing—ignoring these signs risks injury from sudden snapping. Check bands monthly for:
– Visible thinning or translucent areas where light passes through
– Permanent stretching where bands don’t return to original length
– Sticky or gummy texture that cleaning doesn’t resolve
– Small cracks appearing near connection points or handles
Perform the “snap test” by stretching a band to 50% capacity and releasing—it should return smoothly without hesitation. If bands develop a strong chemical odor that persists after cleaning, replace immediately as this indicates advanced material breakdown. Most users should replace bands every 4-6 months with regular use, though proper care can extend this to 8-10 months.
Maintain Peak Performance with Simple Band Care Habits
Establishing a consistent cleaning routine for your latex resistance bands protects your investment and keeps your workouts safe and effective. By dedicating just two minutes after each session for quick wiping and performing a thorough deep clean every two weeks, you’ll prevent the buildup that leads to premature failure. Remember that proper drying and storage are equally important as the cleaning itself—these final steps determine whether your careful cleaning efforts pay off with extended band life.
Your bands should feel smooth and responsive, not sticky or stiff, during every workout. When you follow these precise cleaning methods, you’ll notice improved grip, consistent resistance levels, and elimination of unpleasant odors. The small time investment in proper band care pays dividends through safer workouts, better performance, and significant savings from replacing bands less frequently. Start implementing these techniques today and feel the difference in your next resistance training session.


