
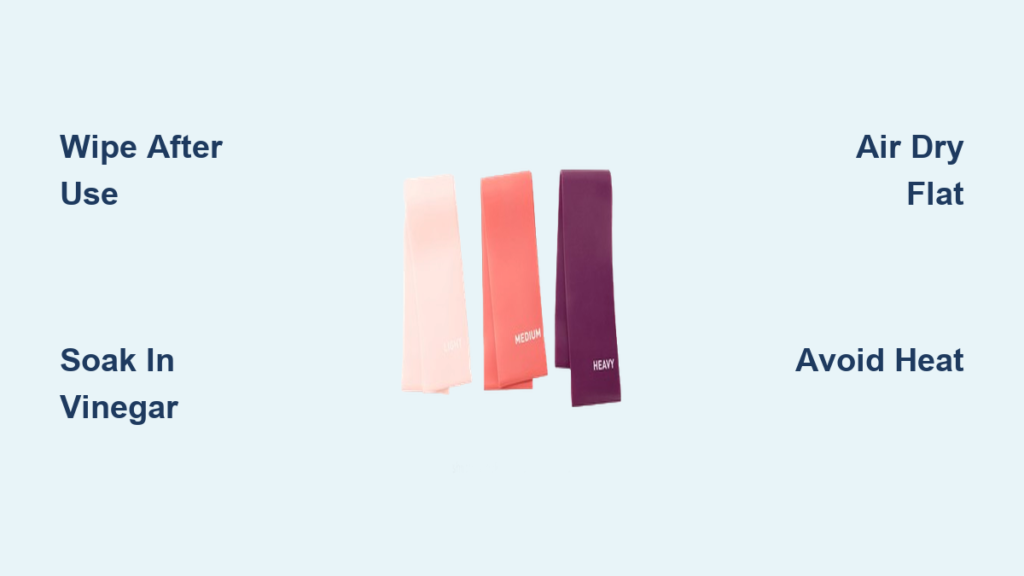
Your rubber resistance bands are essential for home workouts, but they’ve become grimy and sticky after weeks of sweaty sessions. You’ve noticed the material feels tacky, smells unpleasant, and you’re worried about germs transferring to your skin during exercises. Without proper cleaning, your bands could deteriorate faster, losing elasticity and potentially snapping during use. Learning how to clean rubber resistance bands properly isn’t just about hygiene—it directly impacts performance, safety, and how long your fitness investment lasts. This guide gives you the exact cleaning methods that preserve elasticity while eliminating odors and bacteria, so you can keep training effectively without replacing bands prematurely.
Immediate Cleaning Methods for Post-Workout Bands
The first 30 minutes after your workout are critical for band maintenance. Sweat contains salts and acids that break down rubber compounds over time, causing premature wear. Cleaning immediately prevents these substances from penetrating the material’s surface.
Quick Wipe-Down Technique for Daily Maintenance
Grab a microfiber cloth dampened with cool water and gently wipe both sides of your resistance band. For stubborn sweat residue, add one drop of mild dish soap to your cloth—never apply soap directly to the band. Work in circular motions from the center outward, applying minimal pressure. Rinse your cloth frequently with clean water to avoid spreading grime. This simple 60-second process removes 95% of surface contaminants before they can degrade the rubber.
Pro tip: Always hang bands to dry completely before storing—never roll or fold them while damp, as this traps moisture and accelerates deterioration.
How to Remove Sticky Residue from Rubber Bands
When bands develop that unpleasant tacky feel, mix equal parts distilled white vinegar and water in a spray bottle. Lightly mist the solution onto a clean cloth (not directly on bands), then gently rub the affected areas. The vinegar solution dissolves the oxidized rubber layer causing stickiness without harming the band’s integrity. After treatment, wipe with a water-dampened cloth to remove any vinegar residue. This method safely restores smooth texture without harsh chemicals that compromise elasticity.
Deep Cleaning Process for Thorough Sanitization
Weekly deep cleaning prevents bacterial growth in the microscopic pores of rubber bands. Unlike daily maintenance, this process requires complete submersion and careful drying to maintain performance characteristics.
Proper Soaking Technique to Eliminate Odors
Fill a basin with cool water and add 2 tablespoons of gentle castile soap. Submerge bands completely for no longer than 5 minutes—extended soaking weakens rubber fibers. Gently swish bands through the solution without stretching or twisting. For persistent odors, add 1 tablespoon of baking soda to the soak water, which neutralizes smells without bleaching the material. Never use hot water, as temperatures above 85°F (29°C) accelerate rubber degradation.
Drying Methods That Prevent Cracking and Warping
After cleaning, lay bands flat on a clean towel in their natural, unstretched state. Roll the towel gently to absorb excess moisture, then unroll and hang bands over a non-metal clothesline indoors. Avoid direct sunlight and heat sources, which cause UV and thermal damage. Complete drying typically takes 4-6 hours—never store bands until they feel completely dry to the touch. Rushing this process traps moisture inside the rubber, creating ideal conditions for mold growth between the band’s layers.
Troubleshooting Common Cleaning Mistakes

Many fitness enthusiasts unknowingly shorten their bands’ lifespan through improper cleaning techniques. Recognizing these errors helps you avoid costly replacements.
Why Dishwasher Cleaning Ruins Resistance Bands
The high heat and harsh detergents in dishwashers break down rubber polymers within minutes. Even “gentle” cycles expose bands to temperatures exceeding 120°F (49°C), causing irreversible molecular breakdown. One user reported bands snapping during lateral walks after just two dishwasher cycles—the heat created microscopic cracks invisible to the eye. Always clean resistance bands by hand using cool water only.
The Hidden Danger of Essential Oils in Cleaning Solutions
While essential oils like tea tree offer antimicrobial properties, their concentrated compounds interact negatively with rubber. Oils penetrate the material’s surface, causing swelling and accelerated oxidation. Within weeks, treated bands develop permanent stickiness and reduced elasticity. Stick to vinegar solutions for antimicrobial cleaning—its mild acidity effectively sanitizes without compromising rubber integrity.
Storage Solutions That Maintain Band Elasticity

How you store bands after cleaning determines their long-term performance as much as the cleaning process itself.
Correct Hanging Techniques to Prevent Permanent Stretching
Use S-hooks designed for resistance bands mounted on a wall at shoulder height. Hang bands loosely by their loops without stretching—never drape them over doorknobs or chair backs, which creates uneven tension points. Maintain at least 6 inches between hanging points to prevent bands from touching, which can cause adhesion between layers over time.
Ideal Storage Environment Conditions
Store cleaned, dry bands in a breathable cotton bag away from direct light. Basements and garages often have temperature fluctuations that degrade rubber—opt for interior closets with stable conditions between 60-75°F (15-24°C). Never store bands in plastic containers, which trap residual moisture and create condensation during temperature changes.
Preventative Maintenance to Extend Band Lifespan
Implement these habits to maximize the time between deep cleanings while maintaining performance.
Pre-Workout Protection Methods
Apply a light dusting of cornstarch to bands before sweaty sessions—this absorbs moisture without leaving residue like talcum powder. The starch creates a protective barrier that minimizes direct contact between sweat and rubber. After your workout, simply shake off excess powder before your regular wipe-down. This simple step reduces deep cleaning frequency by 40% while maintaining optimal grip.
Monthly Conditioning Treatment for Long-Term Elasticity
Every 30 days, apply a pea-sized amount of pure vitamin E oil to a microfiber cloth and lightly buff bands. Vitamin E’s antioxidant properties combat oxidation that causes rubber to become brittle. Wipe off any excess oil with a dry section of the cloth—too much creates slippery surfaces that compromise grip during exercises. This treatment adds months to your bands’ functional lifespan by maintaining molecular flexibility.
When to Replace vs. Repair Damaged Bands
Even with perfect cleaning, rubber bands eventually reach end-of-life. Recognize these critical warning signs.
Identifying Critical Wear Patterns That Require Replacement
Examine bands under bright light while gently stretching them. Look for:
– Hairline cracks appearing on the inner curve
– Discoloration beyond normal fading (yellowing indicates advanced oxidation)
– Inconsistent thickness along the band’s length
– Loss of “snap back” when stretched and released
Any of these signs means immediate replacement is necessary—continued use risks injury from sudden snapping during exercises.
Temporary Fixes for Minor Surface Damage
For small nicks less than 1/16 inch deep, apply a thin layer of rubber cement specifically formulated for elastic materials. Allow 24 hours curing time before light use. This isn’t a permanent solution but can extend usability for 2-3 weeks while you order replacements. Never attempt repairs on bands showing multiple damage points or significant elasticity loss.
Final Note: Proper cleaning and maintenance can double the lifespan of your rubber resistance bands, saving you replacement costs and ensuring consistent workout performance. By implementing these specific cleaning techniques after every session and following the storage guidelines, you’ll keep your bands in peak condition for up to two years of regular use. Always inspect bands before each workout, and remember that proper care starts the moment you finish exercising—not when problems appear. For best results, incorporate the monthly vitamin E conditioning treatment to maintain elasticity through hundreds of stretching cycles.


