
Struggling to break through your deadlift plateau? Many lifters hit a wall when trying to strengthen their lockout phase—the point where the bar is nearly at hip level. Resistance band deadlifts solve this exact problem by providing accommodating resistance that increases as you stand up, forcing you to work harder precisely where traditional deadlifts become easier. Whether you’re training at home with limited equipment or looking to enhance your gym performance, mastering the banded deadlift builds explosive hip extension power and targets your weakest range of motion. This guide delivers the precise setup, form cues, and programming strategies you need to transform your deadlift strength in just weeks.
Why Resistance Bands Transform Your Deadlift Strength
How Band Tension Creates Accommodating Resistance
The magic of banded deadlifts lies in their unique tension curve—bands provide less resistance at the bottom of the lift (where you’re weakest) and maximum tension at lockout (where you’re strongest). This contrasts sharply with barbell deadlifts, where the resistance remains constant throughout the movement. When you attach bands to your barbell, they start with minimal tension at the floor but stretch significantly as you rise, adding 30-100+ pounds of resistance by the time you reach full hip extension. This forces your glutes, hamstrings, and spinal erectors to work harder precisely where traditional deadlifts allow you to coast through the finish.
Lockout Strength That Transfers to Your 1RM
You’ll notice immediate improvements in your conventional deadlift after just 2-3 sessions of banded work. The bands’ downward pull at the top requires you to actively drive your hips forward and squeeze your glutes hard—not just stand up with the weight. This develops the exact muscular coordination needed for competition-style lifts. Powerlifters worldwide use this technique to build “sticking point strength,” with many reporting 5-10% increases in their raw deadlift within 8 weeks of strategic banded training. The explosive hip extension you develop also enhances athletic performance in sports requiring powerful hip drive like sprinting and jumping.
Perfect Your Band Setup for Maximum Effectiveness

Choosing the Right Band Type and Resistance
Not all resistance bands work equally well for deadlifts. Loop bands (continuous rubber circles) provide the most stable attachment to barbells, while figure-eight bands with handles offer better grip control but limit hand positioning options. Select bands based on your strength level:
- Light bands (15-35 lbs resistance): Ideal for beginners learning hip hinge mechanics or for warm-up sets
- Medium bands (35-65 lbs): Best for intermediate lifters adding accommodating resistance
- Heavy bands (65+ lbs): Reserved for advanced lifters targeting lockout strength
Pro Tip: Keep multiple band resistances available—you might use a medium band for conventional deadlifts but switch to light bands for sumo variations due to the different tension requirements.
Critical Band Placement Techniques
Your band anchor point dramatically affects the resistance profile. For optimal deadlift mechanics:
- Loop the band around the barbell ends just inside the collar plates
- Anchor the other end to a sturdy object at floor level (power rack uprights work best)
- Position the anchor point 12-18 inches behind the bar for standard deadlifts
The farther your anchor point sits from the bar, the earlier tension builds through the lift. Competitive powerlifters often use more distant anchor points (24-36 inches) to maximize tension throughout the entire range of motion, while beginners should start with closer anchors to reduce initial tension.
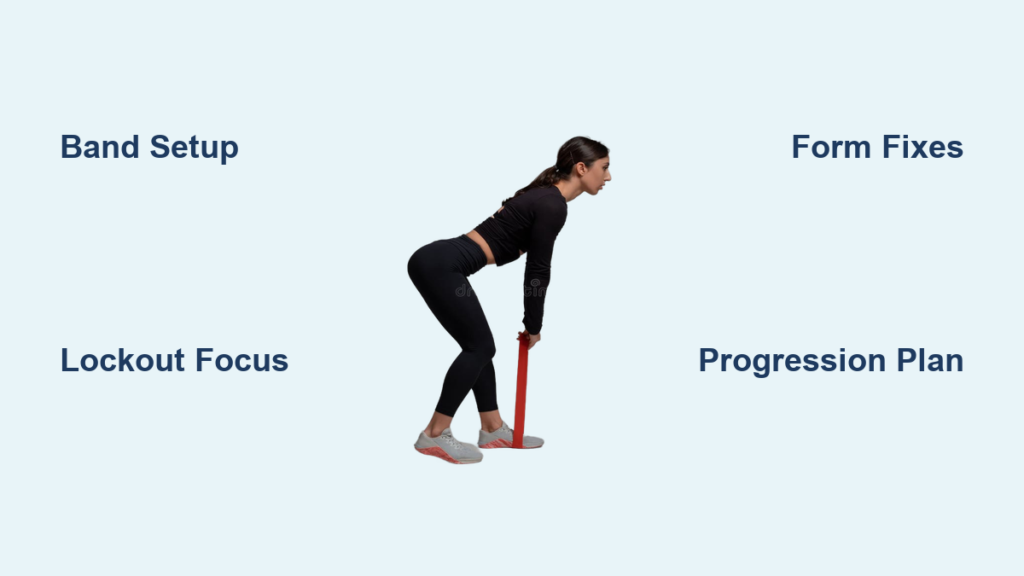
Master the Banded Deadlift Form Sequence
Step-by-Step Execution for Flawless Technique
Follow this precise sequence to avoid common form breakdowns:
- Setup Position: Stand with feet hip-width apart, shins 1 inch from bar. Grip bar just outside legs with double overhand grip.
- Tension Check: Before pulling, take all slack out of the band while maintaining neutral spine. You should feel consistent downward pull.
- Initiate Pull: Drive through midfoot while extending hips and knees simultaneously—bar stays glued to thighs throughout.
- Lockout Focus: At hip level, actively push hips forward against band resistance while squeezing glutes hard for 1-2 seconds.
- Controlled Descent: Lower bar with deliberate speed, resetting completely at bottom while maintaining band tension.
Warning: Never start the pull with slack in the band—this creates dangerous momentum that can strain your lower back. Always establish tension before initiating movement.
Fix These Three Common Form Breakdowns

Bar Drifting Away From Body
Why it happens: Lats disengaged or elbows flaring out
Fix: Before pulling, rotate elbows toward hips to create a “shelf” for the bar. Imagine trying to bend the bar around your thighs as you rise.
Incomplete Hip Extension at Lockout
Why it happens: Avoiding band’s maximum tension at top
Fix: Practice pause lockouts—hold the fully extended position for 2 seconds while actively driving hips forward against band resistance.
Loss of Neutral Spine Under Tension
Why it happens: Starting with too heavy a band or poor core bracing
Fix: Reduce band resistance and practice bracing by taking a deep breath into your abdomen before each rep. Maintain this brace throughout the entire movement.
Strategic Programming for Rapid Strength Gains
Match Band Work to Your Specific Goals
For Technique Development (Beginners):
– 3 sets of 5-8 reps with light bands
– Rest 90 seconds between sets
– Focus on perfect form—no rushing
For Lockout Strength (Intermediate):
– 4 sets of 3-5 reps with medium bands
– Bar weight at 70-80% of 1RM
– Rest 2-3 minutes between sets
– Use 1-2 second pause at lockout
For Explosive Power (Advanced):
– 3 sets of 8-10 reps with heavy bands
– Move bar as fast as possible while maintaining control
– Rest 3 minutes between sets
– Pair with conventional deadlifts in same workout
Pro Tip: Never exceed 50% of your total resistance from bands alone—your barbell weight should still provide the majority of the load. A good rule is: if using a 135lb bar, don’t add more than 65-70lbs of band resistance.
Critical Safety Measures Most Lifters Ignore
Prevent Band Snap Injuries
Resistance bands can snap with dangerous force if improperly used. Always:
– Inspect bands for cracks or fraying before each use
– Never stand directly in line with the band’s pull direction
– Use bands with reinforced stitching at attachment points
– Replace bands every 6-12 months with regular use
Secure Anchor Points Properly
A shifting anchor point ruins your lift and creates instability. Verify security by:
– Using 45lb plates (minimum) as floor anchors for medium bands
– Testing band tension by gently pulling before loading bar
– Positioning anchor points slightly behind the bar to create vertical pull vector
– Ensuring rack uprights are locked in position before attaching bands
Warning: If your anchor point moves during the lift, stop immediately—this indicates insufficient weight or improper placement.
Transform Your Deadlift in 8 Weeks
Follow this progression plan to maximize results:
Weeks 1-2: Technique Focus
– Light bands only (15-35lbs)
– 3 sets of 8 reps, perfecting form
– Record videos to check bar path
Weeks 3-4: Lockout Development
– Medium bands (35-65lbs)
– 4 sets of 5 reps with 2-second lockout pause
– Add 5lbs to bar each session
Weeks 5-6: Strength Integration
– Alternate banded and conventional deadlifts weekly
– Use banded work as primary lift one week, accessory the next
– Maintain same band resistance while increasing bar weight
Weeks 7-8: Peak Performance
– Heavy bands for lockout work only (last 2 sets)
– Medium bands for full-range work
– Test conventional deadlift 1RM
Final Note: Track your band resistance and bar weight in each session—progress comes from systematically increasing either the band tension, bar weight, or both. Within two months, you’ll notice dramatically stronger lockouts and improved hip drive that translates directly to heavier conventional deadlifts. Start light, prioritize perfect form, and let the bands build the strength your sticking points desperately need.


