
Your triceps make up two-thirds of your upper arm, yet most people neglect them while chasing that perfect arm shape. When your arms lack definition despite regular push-ups and bench presses, the dumbbell kickback is the missing piece you need. This targeted isolation movement specifically activates the lateral head of your triceps—creating that sculpted, horseshoe shape you’ve been working toward. Unlike compound exercises that engage multiple muscle groups, the kickback delivers focused tension exactly where you want it.
Most gym-goers perform dumbbell kickbacks incorrectly, swinging heavy weights while their upper arms drift away from their bodies. This common mistake turns an effective isolation exercise into a shoulder-straining waste of time. The real magic happens when you master the controlled movement with lighter weights, feeling every rep burn precisely in your triceps. In this guide, you’ll discover the exact positioning, muscle engagement techniques, and progression strategies that transform your arm development.
Choosing Your Dumbbells and Setup
Selecting the Right Weight
Start with 5-10 pound dumbbells—significantly lighter than you think you need. Your triceps respond better to precise control than heavy momentum. If you’re new to this exercise, begin with 5-pounders even if they feel too light at first. The goal is to feel the burn in your triceps, not your shoulders or lower back. Household alternatives like water bottles or soup cans work perfectly when you’re just learning the movement pattern.
Perfect Starting Position
Stand with feet hip-width apart, knees slightly bent. Hinge forward at your hips until your torso reaches nearly parallel to the floor—imagine you’re trying to close a car door while carrying groceries. Keep your spine neutral, core tight, and head aligned with your spine. Your upper body should form a straight line from head to hips. This position protects your lower back while maximizing triceps engagement.
Mastering Dumbbell Kickback Form
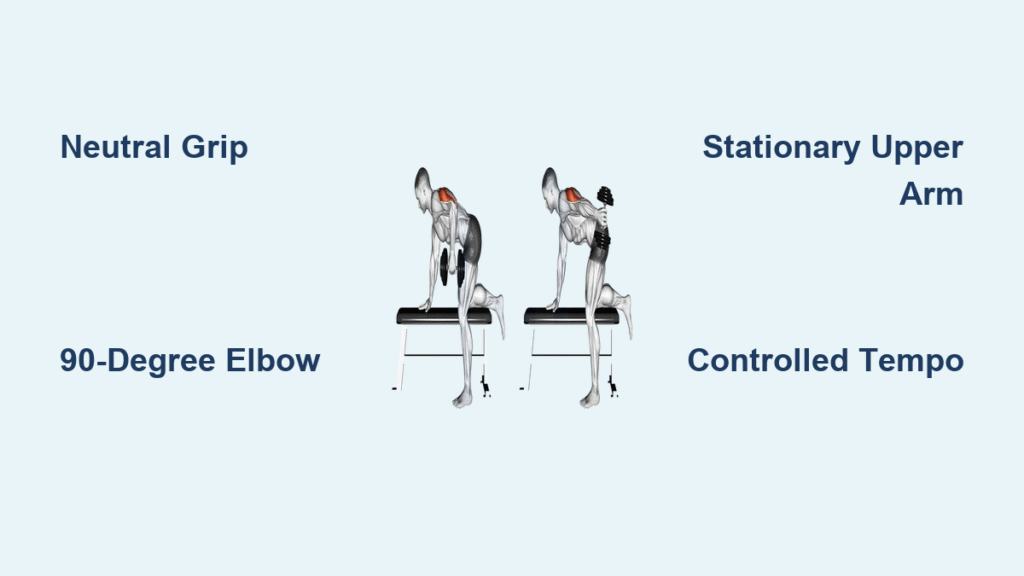
The Critical 90-Degree Angle
Hold dumbbells with a neutral grip (palms facing each other) and bend your elbows to exactly 90 degrees. Your upper arms should remain glued against your torso throughout the entire movement—this is non-negotiable for proper triceps activation. If your elbows drift away from your ribs, you’re compromising the exercise’s effectiveness. Think of your upper arms as fixed pivot points that never move.
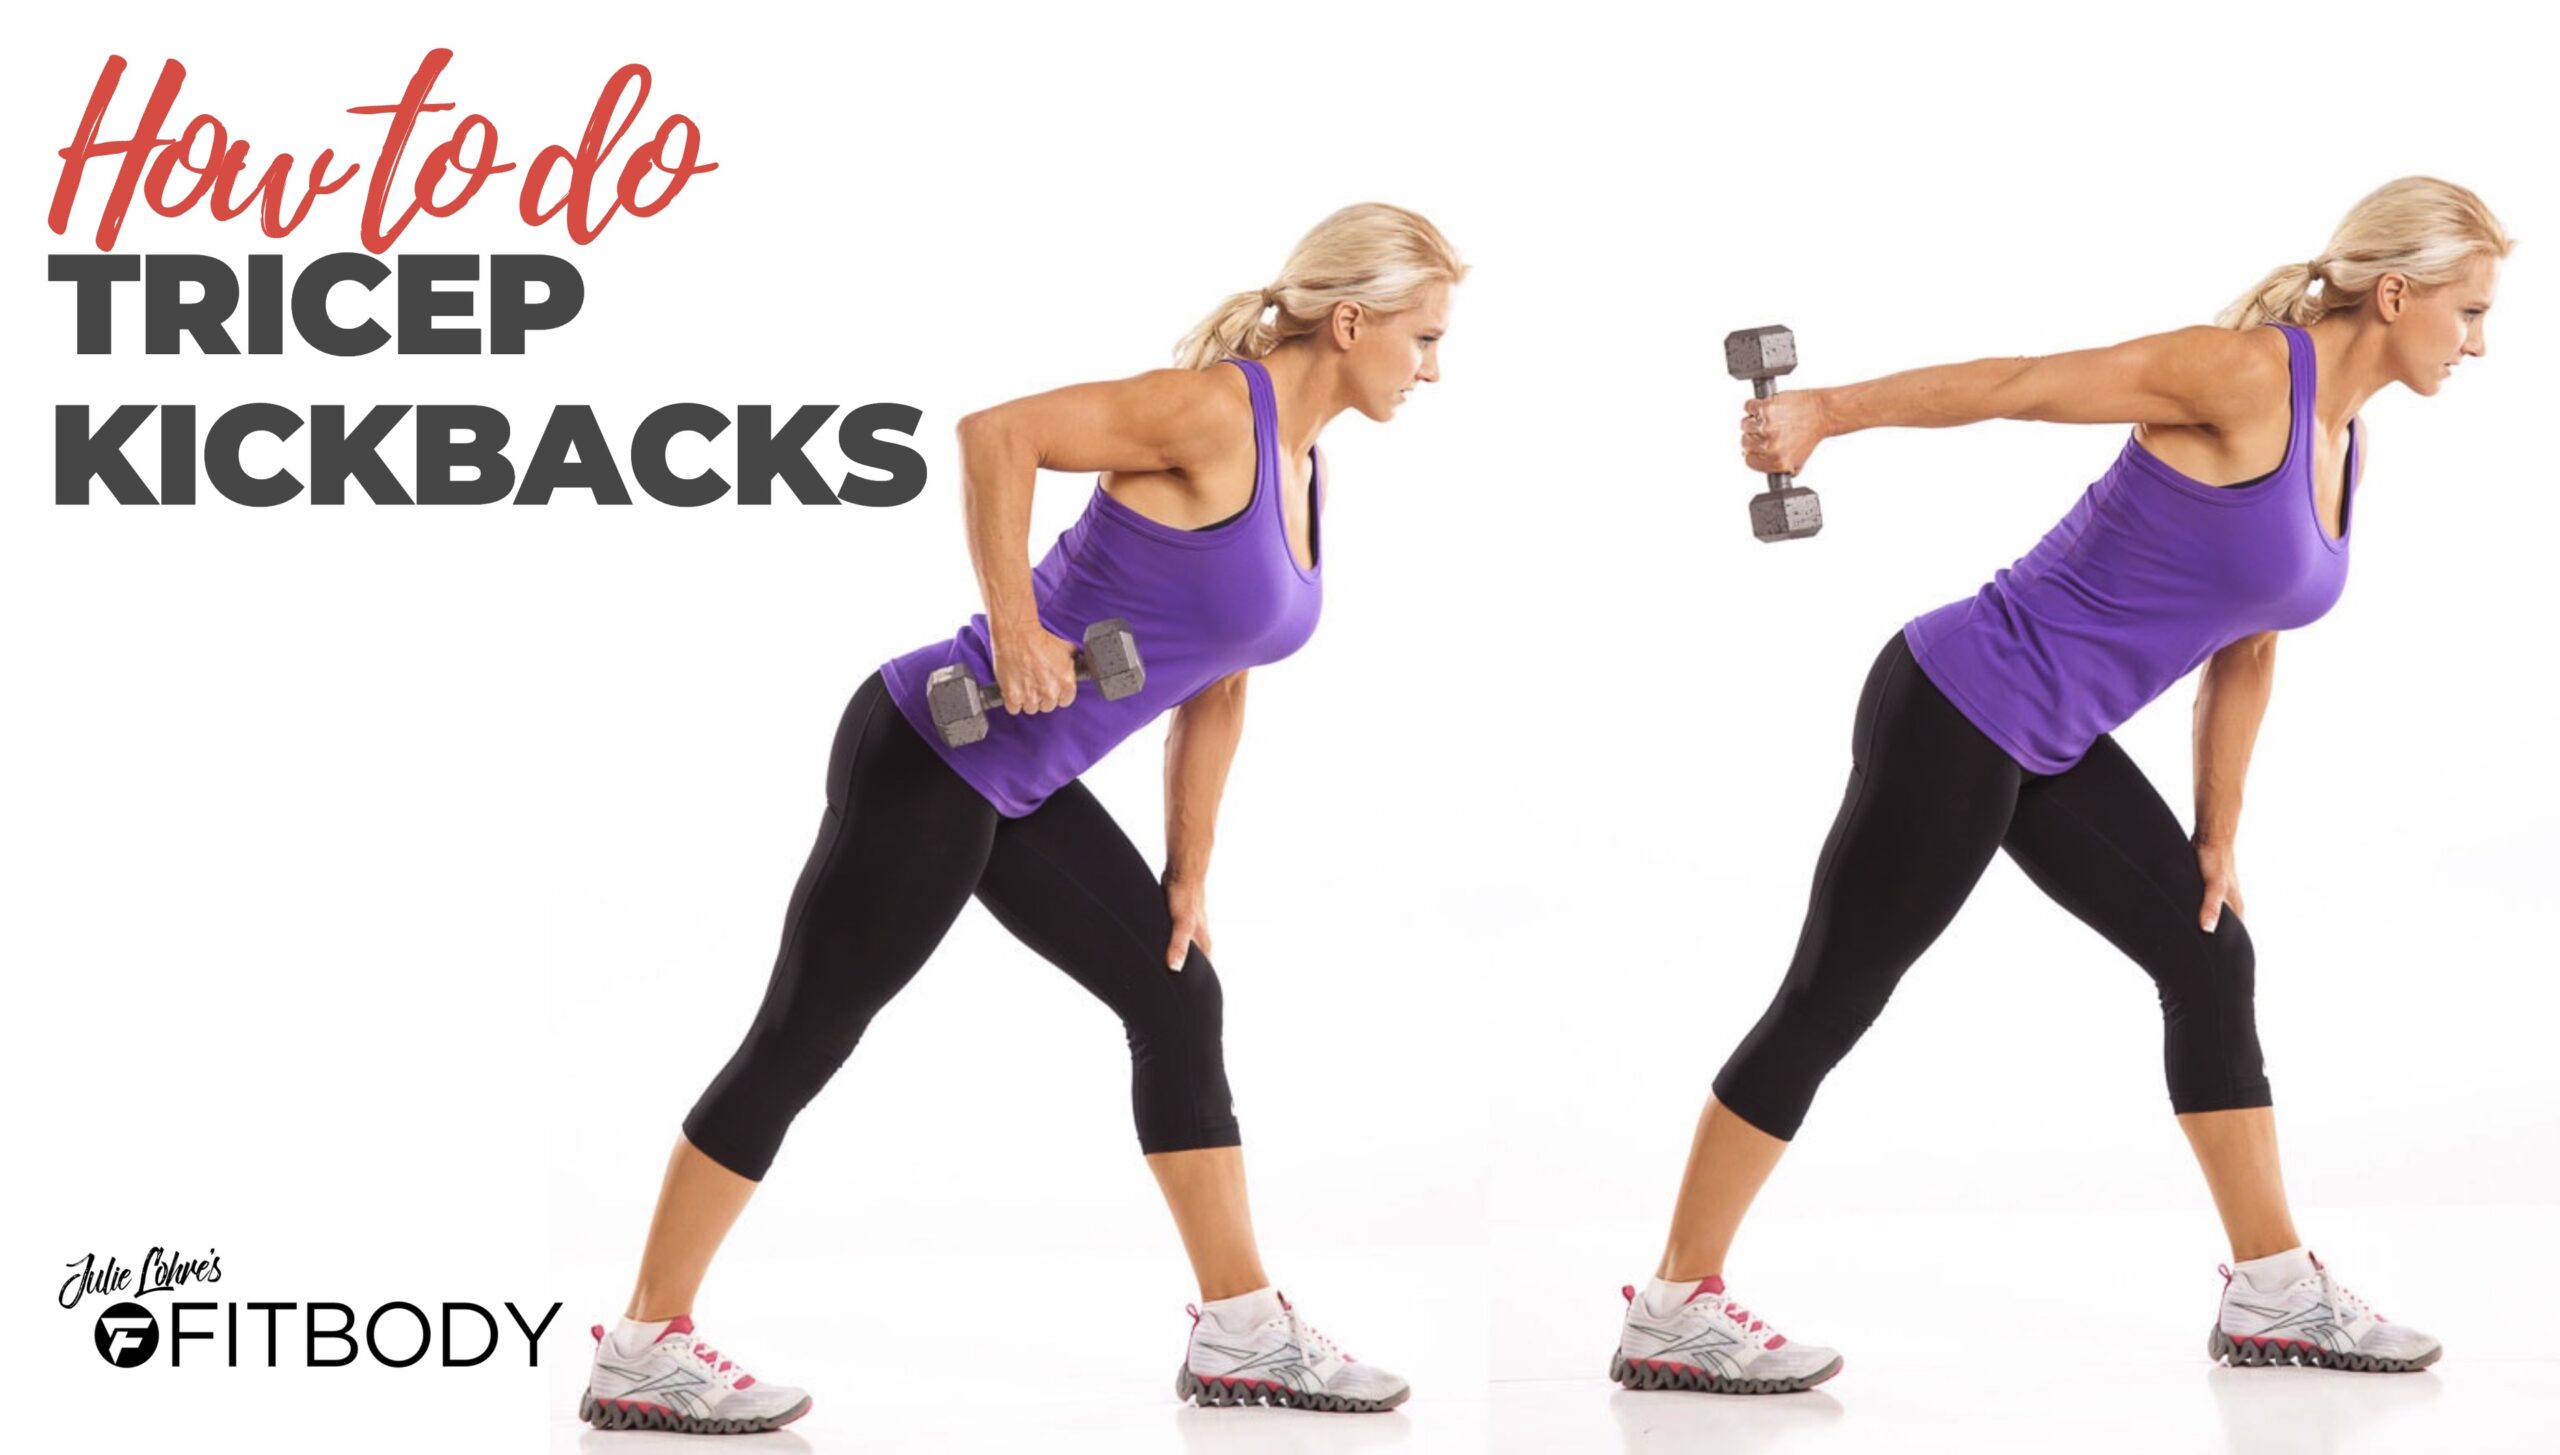
Executing the Movement Correctly
Exhale as you extend your arms backward by contracting your triceps. Focus exclusively on moving your forearms while keeping upper arms stationary. At full extension, straighten your elbows completely and hold for 1-2 seconds to maximize muscle contraction. Inhale while slowly returning to the starting position over 2-3 seconds—this controlled eccentric phase creates the muscle damage needed for growth. Your entire range of motion should be compact and precise.
Fix These Common Kickback Mistakes Immediately

Stop the Momentum Swinging
If you’re swinging the weights or using your entire body to lift, you’ve chosen too heavy a dumbbell. This mistake shifts work away from your triceps to your shoulders and back. Drop to lighter weights until you can complete all repetitions with strict form. You should feel your triceps burning by the final reps of each set—anything else means you’re performing the exercise incorrectly.
Maintain Stationary Upper Arms
When your upper arms drift away from your torso, the exercise becomes ineffective. Place your free hand against your side to feel if your working elbow stays in position. If your upper arm moves, reset your position before continuing. This stationary upper arm position creates the isolated tension your triceps need to grow.
Protect Your Lower Back
Arching or rounding your spine during kickbacks compromises spinal safety. If you feel lower back strain, immediately switch to the bench-supported version. Keep your core braced throughout the movement as if preparing for a light punch to the stomach. This engages your entire core musculature while stabilizing your spine.
Bench-Supported Single-Arm Kickback Technique
Setup for Maximum Triceps Focus
Position yourself at the end of a flat bench with your right knee and right hand supporting your upper body. Plant your left foot firmly on the floor for stability. Pick up the dumbbell with your left hand using a neutral grip. This supported position eliminates balance concerns and allows 100% of your focus on triceps contraction.
Single-Arm Execution Protocol
Tuck your left upper arm close to your torso, maintaining that crucial 90-degree elbow angle. Extend your arm backward by contracting your triceps hard, moving only at the elbow joint. Pause at full extension for 1-2 seconds while actively squeezing your triceps. Return slowly to the starting position over 3 seconds. Complete all repetitions on one arm before switching—this unilateral approach corrects strength imbalances between arms.
Programming Your Dumbbell Kickbacks for Results
Sets, Reps, and Frequency
Beginners: Start with 2 sets of 10-12 repetitions using light dumbbells
Muscle endurance: Perform 2-3 sets of 12-15 repetitions with controlled tempo
Strength focus: Complete 3 sets of 8-10 repetitions with slightly heavier weight
Include dumbbell kickbacks 2-3 times weekly, always allowing 48 hours of recovery between sessions. Never perform this exercise on consecutive days—your triceps need time to repair and grow stronger. Always place kickbacks after compound pushing movements like bench press or push-ups in your workout sequence.
Progressive Overload Strategies That Work

Smart Weight Progression
Increase weight only when you can complete all prescribed repetitions with perfect form. Add just 2.5-5 pounds at a time—small increments prevent form breakdown. Remember: your triceps develop better with lighter weights and perfect technique than heavy weights with compromised form. If you can’t control the lowering phase, you’ve gone too heavy.
Effective Kickback Variations
Resistance Band Kickback: Anchor a band at waist height for constant tension throughout the movement. This variation increases difficulty during the eccentric phase, maximizing muscle damage for growth.
Incline Bench Version: Lie face-down on a 45-degree incline bench to reduce lower back strain while changing the muscle activation angle. This modification is ideal if standing versions cause discomfort.
Single-Arm Standing: Perform the movement one arm at a time without bench support. This version increases core stability demands while allowing focused attention on each arm independently.
Safety Protocol and Warmup Essentials
Pre-Exercise Preparation
Spend 5-10 minutes warming up with light cardio like brisk walking or jumping jacks. Follow with dynamic arm circles and shoulder rotations to lubricate your joints. Always practice the kickback movement pattern without weight before adding resistance—this primes your neuromuscular system for proper execution.
During Exercise Safety Checks
Stop immediately if you experience sharp pain, numbness, or tingling. Maintain steady breathing—exhale during the extension phase, inhale during the return. Keep your core engaged throughout to protect your lower back. If your form breaks down before completing your set, end the set early rather than sacrificing technique.
Advanced Techniques for Maximum Triceps Development
Time Under Tension Tactics
Extend your lowering phase to 3-4 seconds to increase muscle fiber recruitment. This technique works exceptionally well with lighter weights and higher repetitions for definition-focused training. Imagine resisting an invisible force trying to bend your elbow back to the starting position.
Peak Contraction Mastery
Hold the fully extended position for 2-3 seconds while actively squeezing your triceps as hard as possible. This creates maximum muscle fiber engagement and strengthens the mind-muscle connection essential for development. Visualize pushing your hand through an imaginary wall at the top of the movement.
Complete Range of Motion
Ensure you’re achieving full elbow extension at the top without hyperextending. The complete range from 90 degrees to full extension maximizes tricep activation throughout the movement. Partial reps significantly reduce effectiveness—go through the entire motion with control.
Mastering the dumbbell kickback requires patience and attention to detail, but the results transform your arm development. Focus on perfect form with lighter weights before progressing, and your triceps will develop the defined, strong appearance you’re seeking. Remember that isolation exercises like the kickback work best when integrated into a balanced training program that includes compound movements and proper recovery. Within 4-6 weeks of consistent, correct execution, you’ll notice improved arm definition and strength that transfers to all your pushing movements.


