
If your glutes feel dormant after hours of sitting or fail to fire during squats, you’re missing out on one of the most powerful lower-body exercises available. The barbell hip thrust specifically targets your glute muscles like no other movement, transforming weak posterior chains into explosive power sources. Forget generic glute activation tricks—this guide delivers the exact setup, execution, and progression strategies to master how to do barbell hip thrusts correctly. You’ll learn to build stronger glutes, improve athletic performance, and reduce lower back strain through precise technique that works immediately.
Most lifters struggle with proper hip extension, mistakenly arching their lower back instead of driving through the glutes. Without the right form cues and equipment setup, you’ll waste sets on ineffective reps or risk injury. By the end of this guide, you’ll execute barbell hip thrusts with confidence—from your first bodyweight attempt to heavy-loaded sets that make your glutes burn. Let’s unlock your posterior chain potential starting with the non-negotiable equipment setup.
Perfect Your Hip Thrust Equipment Setup
Gear List That Prevents Injury and Maximizes Gains
Skip the hip bone bruising and unstable lifts with these essential items. You need a barbell loaded with bumper plates (steel plates work but create dangerous noise during descent), a rock-solid bench or plyo box that won’t slide, and a thick bar pad or folded towel to cushion your hip crease. Always use weight plates specifically sized for progressive loading—start light before scaling up. Without these basics, you’ll compromise form and invite lower back strain instead of pure glute activation.
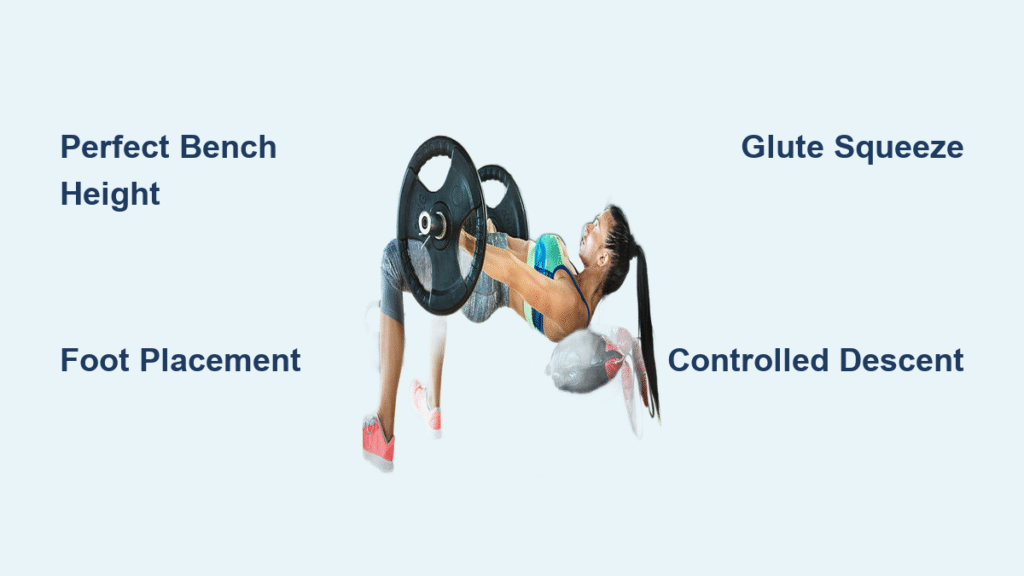
Bench Height: The Make-or-Break Positioning Detail
Your bench height determines whether you’ll hit full hip extension or strain your joints. Sit on the floor with your upper back against the bench—the ideal height positions the bench just below your shoulder blades. Test this by rolling the barbell into your hip crease: if your knees can’t form a 90-degree angle at peak extension, the bench is too tall. If your range of motion feels cramped, it’s too short. Standard gym benches typically work perfectly; avoid unstable alternatives that wobble under load.
Nail the Hip Thrust Technique in Three Phases
Initial Positioning: Where 90% of Lifters Fail
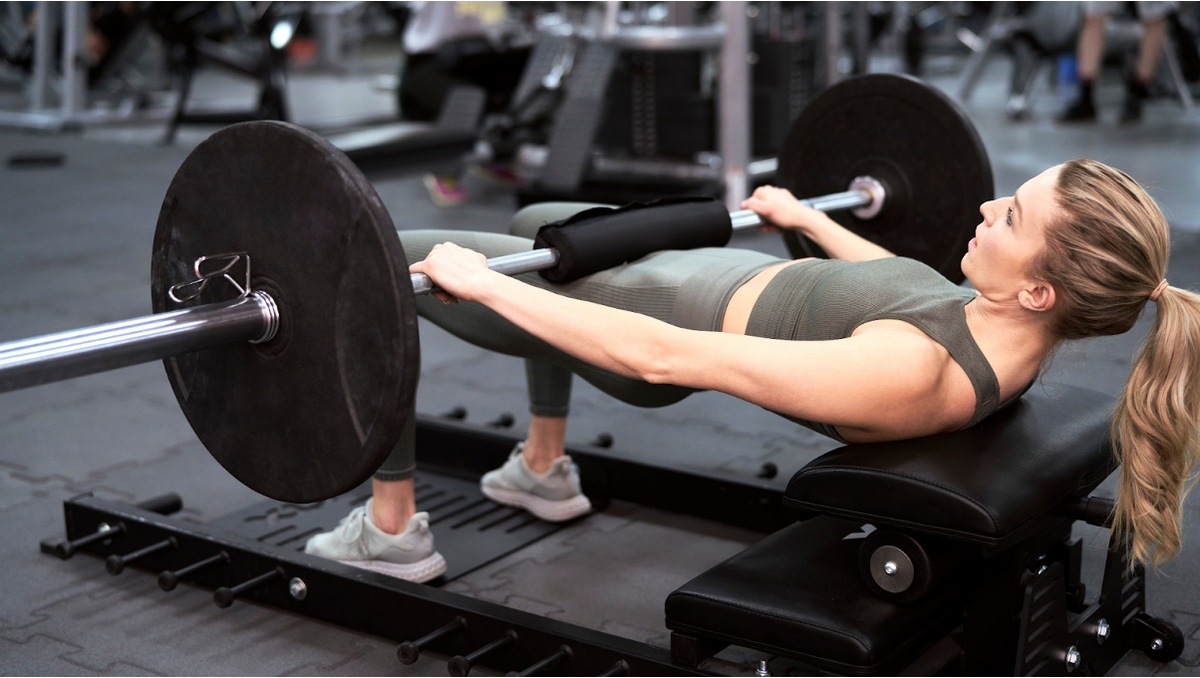
Sit on the floor with your back against the bench, rolling the loaded barbell over your thighs until it rests precisely in your hip crease—where your hip bones meet your upper thighs. Lift your hips slightly off the ground to slide into position, ensuring your entire foot stays flat on the floor. Rotate your feet into the floor to create a stable base, then tuck your chin as if holding an egg under it. This initial setup prevents the bar from sliding and protects your cervical spine throughout the movement.
Upper Body Lockdown for Power Transfer
Slide your upper back against the bench until the bottom of your shoulder blades makes solid contact. Rest your upper arms against the bench sides while rotating your shoulders slightly outward—this engages your lats and creates a stable platform. Your torso should form a 45-degree angle with the ground at the starting position. Never let your upper back lose contact during the lift; this common mistake shifts strain to your lower back instead of your glutes.
Foot Placement That Activates Glutes, Not Quads
Place feet shoulder-width apart with toes pointed slightly outward. Test your position by lifting your hips: at full extension, your shins must be perfectly vertical. If your knees shoot past your toes, slide feet forward; if your heels lift, bring them closer to your glutes. This 90-degree knee angle at the top is non-negotiable—it maximizes glute recruitment while protecting your knees from shear forces. Drive through your entire foot (big toe, little toe, and heel) to maintain tension.
Execute the Movement Without Compromising Form
Thrust Initiation: Drive Hips, Not Back
Squeeze your glutes forcefully while pushing your knees slightly forward into the floor—not your heels alone. Your chest should rise naturally with your hips as you bridge upward, maintaining that tucked chin position. Think “hips toward ceiling” rather than “chest up” to avoid lumbar hyperextension. If you feel your quads or hamstrings taking over, reset your foot position and reduce the weight immediately.
Peak Contraction: Where Glutes Earn Their Paycheck
At full extension, your body must form a straight line from knees through shoulders with a 90-degree knee angle. Engage your core to keep ribs pulled down—no rib flaring allowed. Pause for 2-3 seconds while squeezing your glutes as hard as possible. This isn’t about lifting the bar higher; it’s about maximum muscle contraction. If you feel lower back strain instead of glute burn, drop the weight and revisit your setup.
Controlled Descent: The Hidden Growth Phase
Lower by hinging at your hips first while keeping tension on your glutes—never collapse downward. Your chest follows your hips in a smooth arc, gaze fixed forward with chin still tucked. Stop just before your hips touch the floor to maintain constant tension. Rushing this phase wastes muscle-building time under tension and invites bar bounce injuries. Control the descent for 2-3 seconds to maximize hypertrophy.
Fix These 3 Critical Form Mistakes Immediately

Foot Position Errors That Limit Hip Extension
Problem: Feet too close to your glutes forces knee angles beyond 90 degrees at the top.
Solution: Slide feet forward until shins turn vertical in peak position.
Consequence: Reduced glute activation and knee discomfort that mimics meniscus issues.
Spinal Compensation That Causes Back Pain
Problem: Overarching your lower back to gain extra height instead of full hip extension.
Solution: Reduce weight by 50% and focus solely on glute-driven movement.
Symptom: Lower back soreness post-workout—not glute fatigue—is your warning sign.
Weight Distribution That Kills Power Transfer
Problem: Shifting weight to toes or lifting heels during the thrust.
Solution: Press through all three foot contact points while imagining screwing your feet into the floor.
Check: Your quads shouldn’t burn more than your glutes during sets.
Smart Weight Selection for Continuous Progress

Starting Guidelines: Quality Over Ego
Begin with just the bar or light plates allowing 2-3 sets of 6-12 reps with perfect form. If you can’t feel glute engagement, the weight is too light—but if your lower back aches before set completion, it’s too heavy. Your first goal is neural adaptation: teaching your body to recruit glutes before compensatory muscles. Never sacrifice form for weight, especially during the critical hip extension phase.
Progression Indicators That Beat Guesswork
Advance only when you hit all three markers: consistent form across all reps, deep glute burn during the peak hold, and zero lower back strain after workouts. Track these objectively—don’t assume you’re ready to add weight just because the last set felt easy. Progressive overload fails when lifters prioritize weight over muscle connection, turning hip thrusts into back extensions.
Advanced Loading Strategies Beyond Adding Weight
Once form is mastered, implement tempo variations (3-second eccentric phases), increase range of motion through deeper hip flexion, or pair hip thrusts with squats for post-activation potentiation. Shorten rest periods between sets to increase metabolic stress for hypertrophy. These methods build strength without constantly chasing heavier plates that compromise technique.
Master Breathing and Glute Activation Cues
Breathing Pattern for Spinal Protection
Exhale forcefully as you bridge upward to create intra-abdominal pressure that stabilizes your spine. Never hold your breath—maintain rhythmic breathing throughout the movement. Inhale during the controlled descent to reset core tension. This pattern prevents the Valsalva maneuver that spikes blood pressure and strains discs during heavy lifts.
Mind-Muscle Connection Fixes for “Dead Butt” Syndrome
If glutes won’t fire, palpate them with your hands during bodyweight warm-ups. Focus intensely on the 2-3 second peak hold, squeezing harder with each rep. Cross your arms over your chest or extend them sideways—whichever improves your neural connection. Remember: hip thrusts are about glute contraction, not bar height. Quality reps with lighter weight always beat heavy, sloppy sets.
Prevent Pain Before It Derails Your Training
Pre-Workout Screening That Saves Weeks of Recovery
Stop immediately if you feel sharp pain in hips, knees, or spine. Consult a physician before starting if you have disc issues or recent injuries. Always begin with bodyweight glute bridges (20-30 second holds) if recovering from lower back pain—this builds foundational activation before loaded hip thrusts. Never push through pain; weak glutes compensating with back strain creates chronic issues.
Equipment Safety Checks Non-Negotiables
Test bench stability by applying bodyweight before loading the bar. Always use a padded bar—hip bone bruising from bare steel can sideline you for weeks. Ensure bumper plates or collars prevent weight shifting during movement. If the bar rolls toward your knees, reposition it in your hip crease before starting. Equipment failures cause most preventable hip thrust injuries.
Mastering how to do barbell hip thrusts transforms your entire lower body. Start with bodyweight bridges to wake up dormant glutes, progress to light barbell sets with perfect form, and scale intelligently using tempo and range variations. Train them twice weekly as your primary glute exercise or as a finisher after squats—always prioritizing glute burn over ego lifting. In 8 weeks of consistent practice, you’ll notice stronger lifts, reduced sitting-related stiffness, and athletic power that transfers to every movement. Your glutes aren’t just for show; they’re your foundation for lifelong strength. Now go build them right.


