
If you’ve ever been mid-workout when your slam ball suddenly starts leaking sand or develops a tear, you know the frustration of having your training interrupted. Slam balls are essential tools for functional fitness training, but their heavy use can lead to common problems like leaks, valve failures, and surface damage. When your slam ball stops performing properly, it doesn’t necessarily mean you need to replace it immediately. Many issues can be fixed with basic tools and materials you likely already have at home. This guide will walk you through diagnosing and repairing the most frequent slam ball problems, potentially saving you the cost of a new ball while extending the life of your current equipment.
Identifying Your Slam Ball Problem Before Repairing
Before attempting any repair, you need to accurately diagnose what’s wrong with your slam ball. Different issues require specific solutions, and misidentifying the problem could waste your time or worsen the damage. Most slam ball issues fall into three main categories: air leaks, surface tears, and valve malfunctions. Each presents distinct symptoms and requires different repair approaches. Taking 5-10 minutes to properly assess your ball’s condition will ensure you apply the correct fix the first time.
How to Locate Hidden Leaks in Your Slam Ball
Finding the exact location of a leak is often the most challenging part of slam ball repair. Many leaks are nearly invisible to the naked eye, especially when the ball is dry. Start by inflating your ball to its normal firmness, then submerge it in a tub of water while gently squeezing different sections. Watch for streams of bubbles that indicate where air is escaping. Mark these spots with a washable marker. For smaller leaks that don’t produce obvious bubbles, rub a mixture of water and dish soap over the ball’s surface—leaks will create visible foam. Pay special attention to seams and valve areas, as these are common weak points.
Determining If Your Slam Ball Is Beyond Repair
Not all damage can be effectively fixed. Before investing time in repairs, assess whether your slam ball is worth saving. Consider these red flags: extensive surface cracking across multiple areas, large tears (longer than 2 inches), complete valve detachment, or internal structural damage visible through the outer shell. If the ball feels uneven when inflated or has multiple leak points clustered together, replacement is likely your best option. Slam balls with compromised structural integrity can fail unexpectedly during use, potentially causing injury. When in doubt, consult your manufacturer’s warranty information—many quality slam balls come with 6-12 month coverage for manufacturing defects.
Repairing Small Leaks and Pinholes in Slam Balls

Small leaks are the most common slam ball issue and typically the easiest to fix. These often appear as tiny pinholes or hairline cracks that develop from repeated impact against hard surfaces. The good news is that with proper repair techniques, these minor issues can be permanently sealed, restoring your ball to full functionality. This repair process takes approximately 20-30 minutes and requires minimal materials.
Gathering Essential Materials for Slam Ball Leak Repair
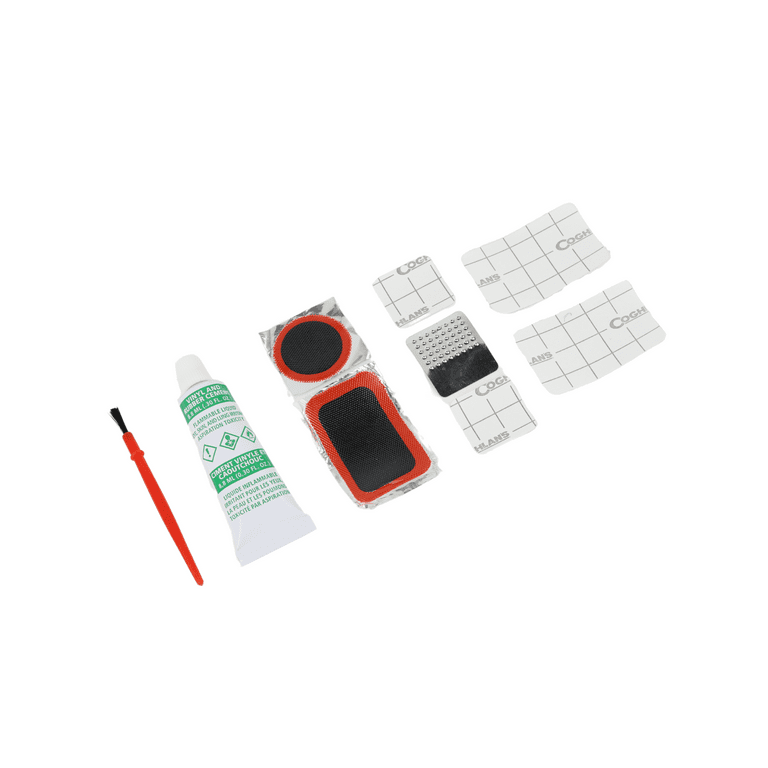
For effective leak repair, you’ll need these specific items: heavy-duty rubber cement or bicycle tire sealant, fine-grit sandpaper (200-400 grit), rubbing alcohol, clean cloth, and a small paintbrush or applicator. Avoid using standard household glue, as it won’t adhere properly to the ball’s textured surface and will likely fail under stress. Water-based sealants work best for slam balls because they remain flexible after drying, accommodating the ball’s movement during use. Purchase these materials from your local sporting goods store or online retailer—most cost under $10 and can be used for multiple repairs.
Step-by-Step Process to Seal Slam Ball Leaks
Begin by thoroughly cleaning the area around the leak with rubbing alcohol to remove dirt and oils that could prevent proper adhesion. Lightly sand the repair area in a 2-inch radius around the leak to create a slightly rough surface for better bonding. Apply a thin, even layer of rubber cement using the paintbrush, covering the leak and extending about 1 inch beyond it in all directions. Allow this first coat to dry for 5-10 minutes until tacky, then apply a second coat. For larger leaks, press a small patch of inner tube rubber into the wet cement before applying the second coat. Let the repair cure for at least 24 hours before reinflating and testing your ball. During this curing period, store the ball at room temperature away from direct sunlight.
Fixing Larger Tears and Rips in Slam Ball Surfaces
When your slam ball develops tears longer than half an inch, standard leak repair methods won’t suffice. These larger damages require reinforcement with patches to prevent further tearing during use. While more involved than fixing small leaks, this repair process is still manageable with basic tools and can save you from purchasing a replacement ball. Set aside 45-60 minutes for this repair, as proper patch adhesion requires careful preparation and sufficient drying time.
Selecting the Right Patch Material for Slam Ball Repairs
The key to successful tear repair is choosing appropriate patch material that matches your slam ball’s construction. Most quality slam balls use thick rubber or PVC exteriors, so inner tube rubber from bicycle or exercise ball repairs works perfectly. Cut your patch material at least 1.5 inches larger than the tear in all directions—this overlap is crucial for distributing stress away from the damaged area. Avoid using duct tape or fabric patches, as these won’t withstand the repeated impacts of slam ball training. For best results, select patch material with similar flexibility to your ball’s exterior to maintain proper performance characteristics.
Advanced Patching Technique for Significant Slam Ball Damage

Start by cleaning both the tear area and patch material with rubbing alcohol. Use sandpaper to roughen both surfaces slightly. Apply rubber cement to both the ball’s tear area and the patch, allowing each to become tacky. Position the patch carefully over the tear, starting from one edge and smoothing outward to eliminate air bubbles. Apply firm pressure across the entire patch surface for 30 seconds. For added security, apply a thin border of rubber cement around the patch edges. Place a heavy book on top of the patched area while it dries to ensure maximum contact. Allow 48 hours for complete curing before subjecting the ball to heavy use.
Maintaining Your Slam Ball to Prevent Future Damage
Proper maintenance extends your slam ball’s lifespan significantly, reducing the need for frequent repairs. Many common issues stem from improper storage, incorrect usage surfaces, or neglecting minor damage until it becomes severe. Implementing these simple care practices takes minimal effort but pays off in extended equipment life and consistent performance.
Best Storage Practices to Preserve Slam Ball Integrity
Store your slam ball in a cool, dry place away from direct sunlight and extreme temperatures. Never leave it in a hot car or garage where temperatures fluctuate dramatically, as this causes the materials to expand and contract, weakening structural integrity over time. Keep the ball partially inflated during storage—completely deflated balls develop weak spots where folds form. For added protection, store it in a mesh bag rather than directly on concrete floors, which can cause moisture absorption in certain materials. Check your ball monthly for developing issues before they become major problems.
Optimal Usage Techniques That Minimize Slam Ball Wear
The surface you use significantly impacts your slam ball’s longevity. Always use your slam ball on appropriate surfaces—rubber gym flooring, turf, or dirt—never concrete or asphalt. These hard surfaces accelerate wear and create micro-tears that lead to larger problems. Rotate which part of the ball contacts the ground during workouts to distribute wear evenly. After each use, wipe down your ball with a damp cloth to remove dirt and sweat that can degrade the surface over time. Never exceed the ball’s recommended weight capacity, as overloading stresses the materials beyond their design limits.
When to Replace Rather Than Repair Your Slam Ball
Despite your best repair efforts, all slam balls eventually reach the end of their service life. Knowing when to replace rather than continue repairing is crucial for safety and performance. If you’ve performed multiple repairs on the same ball within a six-month period, or if the ball no longer maintains proper firmness even after repairs, it’s time for replacement. Significant changes in the ball’s feel during use—like unusual give or inconsistent bounce—are warning signs of internal damage that can’t be repaired. Continuing to use a severely compromised slam ball risks sudden failure during exercise, which could lead to injury from unexpected movement or falling equipment.
By following these repair and maintenance guidelines, you’ll maximize your slam ball’s service life while ensuring safe, effective workouts. Remember that prevention is always better than repair—proper usage and storage habits will significantly reduce the frequency of needed fixes. When repairs are necessary, address issues promptly before small problems become unfixable. With these techniques, you’ll keep your slam ball performing like new for many training sessions to come.


