
A yoga mat crammed in a closet or leaning against a wall doesn’t just create visual clutter—it accelerates wear and tear, traps moisture, and makes your practice space feel disorganized before you even unroll your mat. Learning how to hang yoga mat properly solves these problems while protecting your investment and enhancing your home practice environment. The right hanging solution keeps your mat dry, prevents permanent creases, and transforms storage from an afterthought into an intentional part of your wellness routine. Whether you live in a studio apartment or have a dedicated yoga room, there’s a hanging method that fits your space constraints, budget, and aesthetic preferences.
This comprehensive guide reveals every practical approach to hanging yoga mats, from professional installations to clever DIY hacks. You’ll discover which methods work best for different mat types, how to avoid common installation mistakes that damage walls or mats, and expert tips for maximizing both functionality and longevity. By implementing these solutions, you’ll create a more inviting practice space while extending the life of your yoga equipment.
Select the Best Hanging Method for Your Space

Choosing how to hang yoga mat depends on your specific living situation, budget, and how many mats you need to store. Evaluating your options before purchasing hardware prevents wasted time and money on solutions that won’t work in your unique space.
Wall-Mounted Hooks for Permanent Storage
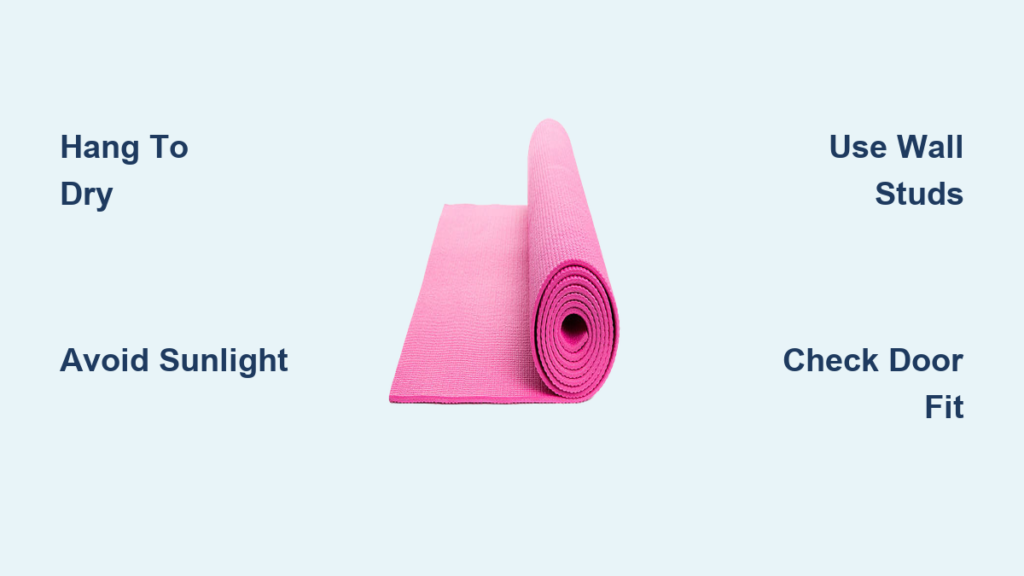
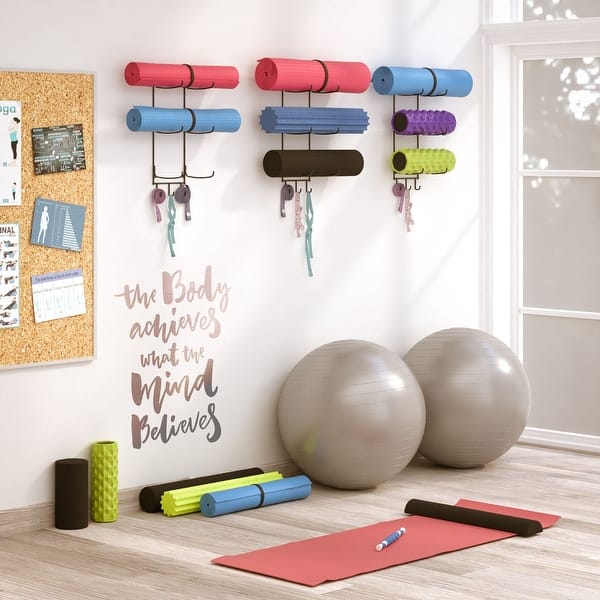
Wall-mounted hooks provide the most reliable long-term solution for hanging yoga mats, especially when installed into wall studs. Properly secured hooks support even thick, heavy mats without sagging or pulling away from the wall over time. Standard J-hooks from your local hardware store work effectively—choose ones with a curved design that prevents your mat from sliding off accidentally.
For households with multiple practitioners, install several hooks spaced 18-24 inches apart along one wall to create individual storage spots. This eliminates the “whose mat is this” confusion that often happens in shared spaces. When positioning hooks, ensure your mat hangs freely without touching the floor—typically 60-72 inches from the ground works well for most adults. If you have children or shorter family members, consider installing hooks at varying heights for universal access.
Doorway Solutions for Renters and Small Spaces
Door-mounted options offer the perfect compromise when wall space is limited or when your lease prohibits permanent installations. Over-door hooks hang securely on standard interior doors without requiring screws or nails, making them completely portable between locations.
Look for over-door hooks with padded grips that won’t damage your door finish, and always check the weight capacity—most yoga mats weigh between 2-8 pounds depending on thickness and material. The best over-door hooks feature a secondary safety clip that prevents accidental dislodging when the door swings. For heavier mats, consider doorway mounting brackets that screw into the door frame rather than hanging over the door—these provide more stability but leave small holes when removed.
DIY Carabiner System for Maximum Flexibility
Create a versatile hanging solution for under $10 with just three components: a sturdy wall hook, a locking carabiner, and your yoga mat’s built-in strap. This simple system works with virtually any mat that has a carrying strap or loop, which most modern mats include.
Install a heavy-duty screw hook into a wall stud at your preferred height, then clip a locking carabiner (rated for at least 50 pounds) to the hook. Thread your mat’s strap through the carabiner and secure the lock mechanism—the carabiner’s gate should click audibly when locked. This setup allows you to hang and remove your mat in seconds while distributing weight evenly to prevent stretching. For a decorative touch, paint the wall hook to match your room’s accent color before installation.
Essential Installation Tools You’ll Need
Having the right tools makes hanging your yoga mat faster, safer, and more reliable. The specific tools required depend on your chosen method, but these basics cover most scenarios:
- Power drill with assorted bits (for wall mounting)
- Stud finder (critical for secure wall installations)
- Level (ensures straight, professional-looking installation)
- Measuring tape (for precise hook placement)
- Safety glasses (protects eyes during drilling)
For over-door solutions, you’ll need minimal tools—just a tape measure to confirm door thickness compatibility. Always measure your door before purchasing over-door hooks, as standard interior doors are 1.375 inches thick but older homes may have different dimensions. Keep a step stool nearby for safely reaching higher mounting points, especially when installing wall hooks at optimal heights.
Proper Installation Techniques That Last
Correct installation determines whether your yoga mat storage system functions reliably for years or fails after a few months of use. Follow these steps to ensure your hanging solution remains secure:
Locating Wall Studs for Maximum Support
Begin by finding wall studs using a stud finder—these wooden frame members provide the strongest anchor points. Most studs are spaced 16 inches apart, measured from center to center. Mark your preferred hook height on the wall, then locate the nearest stud. If your desired position doesn’t align with a stud, use heavy-duty wall anchors rated for at least twice the expected weight load.
Drill a pilot hole slightly smaller than your screw diameter to prevent wood splitting. For drywall installations without studs, insert wall anchors flush with the surface before driving screws. Test your installation by applying gradual downward pressure equivalent to 3-4 times your mat’s weight before trusting it with your equipment.
Ensuring Door Compatibility for Over-Door Systems
Not all doors can support hanging systems equally. Measure your door thickness first—most interior doors range from 1.25 to 1.75 inches thick. Check for adequate clearance above the door where the hook will sit; some architectural details like crown molding may interfere with proper hook placement.
When installing over-door hooks, lift the product and position the hooks over the top of the door, then let it settle slowly into place. The hooks should seat firmly against both sides of the door without wobbling. Test stability by gently pushing on both sides of the hook—if it shifts or rotates, adjust positioning or select a different product designed for your specific door configuration.
Prevent Mat Damage with Correct Hanging Practices

Hanging your yoga mat properly extends its lifespan while improper storage accelerates wear and tear. Follow these guidelines to protect your investment:
Always hang your mat to dry completely after practice, especially following hot yoga sessions or vigorous workouts. A damp mat stored rolled up becomes a breeding ground for bacteria and mildew. If you practice in a humid climate, position a small fan near your hanging mat to improve air circulation.
Avoid direct sunlight when choosing a hanging location—UV rays degrade yoga mat materials over time, causing cracking, fading, and reduced cushioning. North-facing walls typically receive less direct sunlight than south or west-facing walls.
Hang mats loosely rather than stretching them taut between points. Mats hung under constant tension develop permanent stretching in the material, particularly noticeable in lighter-weight mats. For optimal shape retention, hang your mat from a single point using its strap rather than stretching it across multiple hooks.
Avoid These Common Hanging Mistakes
Learning from others’ errors helps you sidestep problems that could damage your mat or create safety hazards:
- Overloading hardware beyond capacity – Even if a hook seems sturdy, exceeding its weight rating causes gradual failure. Choose hardware rated for significantly more weight than your mat actually weighs.
- Improper drywall mounting – Hanging mats from nails or screws without proper anchors causes slow but inevitable pull-out. Always use wall anchors rated for your wall type.
- Ignoring door compatibility – Purchasing over-door hooks without measuring your door leads to products that slip or won’t stay in place. Check both door thickness and clearance before buying.
Create a Complete Yoga Storage Station
Transform your single hook into a functional practice area by adding complementary storage for accessories. Mount a small floating shelf above your mat hook to hold blocks, straps, and rolled towels. This creates a dedicated zone where everything you need for practice stays organized and accessible.
For dedicated practice rooms, consider adding subtle lighting near your storage area—a small adjustable wall lamp creates an inviting atmosphere and makes it easier to grab your mat during early morning sessions. Some practitioners incorporate small plants or inspirational quotes near their storage station, creating a visual cue that signals “practice time” and helps establish consistent habits.
Portable Solutions for Travelers
If you take your mat to studios or practice while traveling, portable hanging solutions keep your mat protected and organized anywhere. Carabiner-style hooks attach to bag straps, car headrests, or hotel closet rods, providing temporary hanging points. Choose carabiners with locking mechanisms to prevent accidental detachment during transit.
For hotel rooms where permanent installations aren’t possible, consider temporary solutions like suction cup mounts or removable adhesive hooks. These work best with lighter travel mats rather than full-size practice mats. Compact mat straps that roll your mat into a tight bundle fit easily in luggage and eliminate the need for hanging during travel—simply unroll and use when you reach your destination.
Implementing the right solution to hang yoga mat transforms your practice space while protecting your equipment investment. Whether you choose permanent wall hooks, versatile doorway systems, or creative DIY alternatives, matching the method to your specific space and needs ensures long-term satisfaction. Start with the simplest option that meets your requirements, then expand your storage system as your practice evolves. A well-organized yoga mat storage setup removes friction from your routine, making it easier to roll out your mat and begin each session with focus and intention. With these proven techniques, you’ll enjoy a cleaner practice space and a longer-lasting mat that supports your wellness journey for years to come.


