

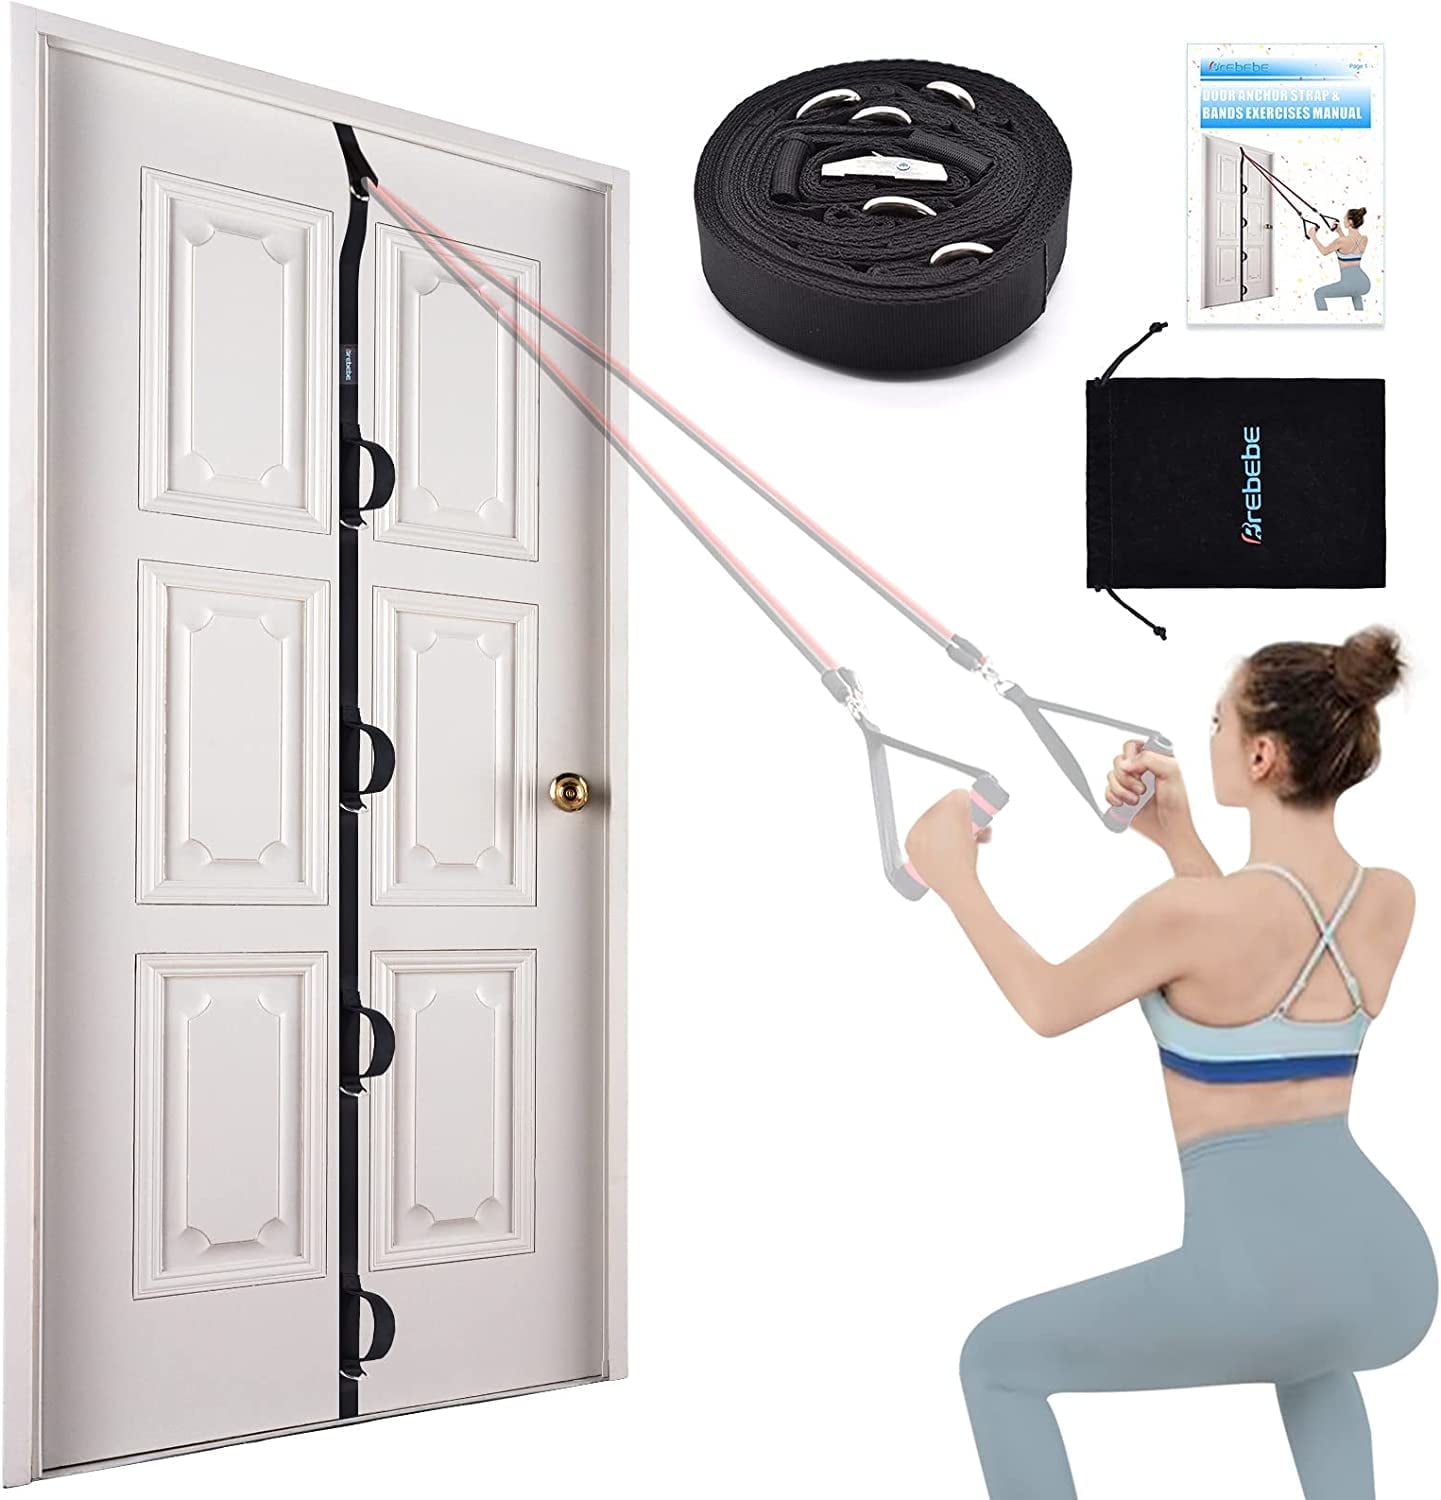
Nothing ruins a resistance band workout faster than a slipping anchor that sends your equipment flying across the room. Learning how to install door anchor for resistance bands properly transforms any standard doorway into a reliable workout station, letting you perform rows, presses, and pulls with complete confidence. The right installation technique prevents door damage, avoids equipment failure mid-exercise, and creates the stable foundation your strength training requires. Whether you’re setting up your first home gym or troubleshooting an unreliable anchor point, mastering this simple installation process takes just minutes but delivers years of safe, effective workouts.
Most exercisers don’t realize that improper door anchor installation causes over 70% of resistance band workout failures. When you pull against an unstable anchor, the force transfers unevenly through the door mechanism, potentially damaging hinges, frames, or finishes. The good news? Proper installation creates a system where the door’s natural resistance against the frame distributes force safely, allowing even lightweight interior doors to handle significant tension. This guide walks you through each critical step to ensure your door anchor installation works flawlessly every time you train.
Why Your Door Anchor Slips During Workouts
The most common problem with door anchors stems from improper positioning on the door surface. When you install door anchor for resistance bands without centering it properly across the top edge, the anchor tilts under tension, creating uneven pressure that forces it to slip. This happens because resistance bands generate directional force that pulls the anchor toward you during exercise—if the anchor isn’t perfectly aligned with the door’s center of gravity, that pulling motion creates leverage that overcomes the friction holding the door closed.
How Door Mechanics Affect Anchor Stability
Your door’s closing mechanism plays a crucial role in anchor performance. Hollow-core interior doors work best because their lightweight construction allows the door to press firmly against the frame when closed, creating maximum friction. Solid-core doors often require additional techniques because their weight can prevent full contact with the frame, leaving gaps that reduce stability. If your door has worn weatherstripping or a loose latch, the anchor loses its foundation—always test that your door closes with firm resistance before installing your anchor.
Identifying Problematic Door Types
Not all doors work equally well with resistance band anchors. Exterior doors typically have deadbolts and reinforced frames that prevent proper closing against the anchor, making them poor choices. French doors with glass panels can’t handle the lateral forces generated during workouts. Pocket doors lack the necessary frame structure entirely, while accordion or sliding doors have no top edge for proper anchor placement. Stick with standard hinged interior doors for reliable results when you install door anchor for resistance bands.
Step-by-Step Installation Process for Maximum Security
The difference between a secure anchor and a dangerous setup comes down to precise installation technique. Start by opening your door fully and positioning the anchor strap across the top edge so it hangs straight down on the opposite side from where you’ll exercise. This positioning ensures that when you pull against the band, the force pushes the door tighter against the frame rather than trying to force it open.
Perfect Anchor Positioning Technique
Center the anchor horizontally across the entire width of the door top—this distributes force evenly and prevents tilting. For strap-style anchors, ensure both sides hang down equally on the non-exercising side. Close the door slowly while watching the anchor’s position, making sure it doesn’t shift or slide during closure. The ideal position has the anchor sitting flush against the door’s top surface with no gaps between the anchor padding and the door material.
Testing Installation Stability Before Use
Never skip this critical step: with the door closed and anchor in place, apply gradual pressure to the attachment point while watching for movement. Start with light pressure and increase slowly, checking that the door remains firmly closed and the anchor doesn’t slip. Listen for any creaking sounds that indicate stress points. If the anchor holds during this static test, attach your lightest band and perform several slow stretches to test dynamic stability before progressing to heavier resistance.
Critical Safety Checks You Must Perform

Skipping proper safety checks when you install door anchor for resistance bands risks serious injury from flying equipment or door damage. Always position yourself on the opposite side of the door from the anchor—this ensures that if failure occurs, the anchor moves away from you rather than toward you. Never exceed the manufacturer’s weight rating, and remember that repeated use gradually reduces an anchor’s effective capacity as materials fatigue over time.
Warning Signs That Indicate Unsafe Installation
Stop immediately if you notice any of these danger signals during testing or workouts: the door begins to open under tension, the anchor shifts position, you hear unusual creaking or popping sounds, or the doorframe shows visible movement. These indicate that the installation cannot safely handle the forces you’re generating. Reinstall the anchor following proper technique, and if problems persist, switch to a different anchor type or installation location.
Essential Pre-Use Inspection Routine
Develop the habit of checking your anchor before every workout session. Examine the stitching for fraying, inspect metal hardware for cracks or deformation, and verify that padding remains intact and properly positioned. Pay special attention to the strap connection points where stress concentrates during use. If you spot any damage—even minor wear—replace the anchor immediately rather than risking failure during exercise.
Fixing Common Installation Problems in Minutes
Slipping anchors represent the most frequent issue exercisers face when they install door anchor for resistance bands. The solution usually involves improving friction between the anchor padding and door surface. Apply a small piece of non-slip shelf liner or grip tape to the contact area—this creates additional traction without damaging your door finish. Avoid using adhesives directly on the door, as they can leave residue or damage finishes.
Solving Anchor Tilting During Exercises
When your anchor rotates during pulls or presses, the problem typically stems from improper centering or incomplete door closure. Reopen the door and adjust the anchor so it spans the entire top edge symmetrically. Check that your door closes fully by looking for gaps around the frame—if present, place a small door wedge at the bottom on the anchor side to improve contact. Some exercisers find success by slightly tightening door hinge screws to eliminate play in the door mechanism.
Preventing Door Damage from Repeated Use
Even properly installed anchors can leave marks on door surfaces over time. Protect your door by applying felt furniture pads to the anchor’s contact points—this distributes pressure more evenly across the surface. For heavy-use situations, choose an anchor with wider, softer padding that minimizes concentrated pressure points. If you notice any finish wear developing, rotate the anchor position slightly with each use to prevent consistent pressure on the same spot.
Maximizing Workout Variety with Strategic Anchor Placement
Install door anchor for resistance bands at different heights to target specific muscle groups more effectively. Position the anchor at shoulder height for balanced upper body development, raise it above head level for enhanced back and shoulder engagement, or lower it near the base of the door for chest and triceps-focused exercises. Some advanced users install multiple anchors at various heights for seamless transitions between exercise variations.
Creating Optimal Workout Space Around Your Anchor
Consider your door’s swing direction when planning your workout area—doors that open into your training space create movement restrictions during exercises. If possible, choose an anchor location on a door that opens away from your workout zone. For limited spaces, position yourself far enough from the door to maintain proper form during full range-of-motion exercises while ensuring the band maintains a safe angle against the anchor point.
Maintaining Your Anchor System for Long-Term Reliability
After each workout, remove the anchor from your door and store it in a cool, dry location away from direct sunlight. Periodically inspect stitching and hardware for early signs of wear, especially if you use your anchor daily. Clean the padding regularly with mild soap and water to prevent buildup of skin oils that can degrade materials. Proper maintenance extends your anchor’s lifespan significantly, ensuring reliable performance for hundreds of workout sessions.
When to Choose Alternatives to Door Anchors
While learning how to install door anchor for resistance bands works perfectly for most home exercisers, certain situations call for different solutions. Solid-core doors, exterior doors, or doors with glass panels often require wall-mounted alternatives that bolt directly into structural framing. Renters with strict no-modification policies might prefer freestanding anchor systems that provide stable resistance points without requiring door or wall installations.
Properly installed door anchors transform ordinary doorways into versatile workout stations that support your strength training goals for years. By following these precise installation techniques, conducting thorough safety checks, and maintaining your equipment regularly, you create a reliable foundation for effective resistance band training. Remember that safety always comes first—never compromise on proper installation technique or ignore warning signs of instability. When you install door anchor for resistance bands correctly, you gain access to virtually unlimited exercise variations that build strength, flexibility, and confidence in the convenience of your own home. Take just five minutes to perfect your installation today, and enjoy safe, effective workouts that deliver real results tomorrow.


