
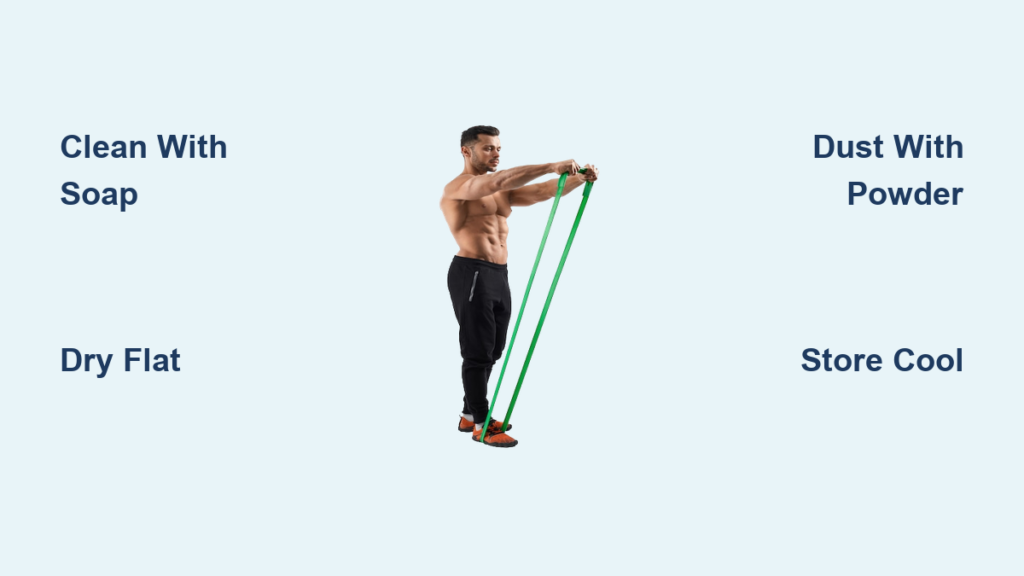
You’ve probably noticed your resistance bands becoming stiff, sticky, or less responsive over time. When searching for solutions, you might have landed on “how to lubricate resistance bands” expecting to apply some oil or substance. Here’s the crucial truth: resistance bands don’t need traditional lubrication. In fact, applying oils or lotions will destroy them. Proper maintenance involves strategic cleaning, appropriate dusting, and smart storage—not lubrication as most people imagine it. Understanding this distinction prevents costly mistakes that could ruin your fitness equipment and helps maintain optimal performance during workouts.
Many fitness enthusiasts mistakenly believe their bands need oil when they become difficult to stretch. What’s actually happening is contamination buildup from sweat, skin cells, and environmental factors causing stiffness. This guide reveals exactly what to do instead of lubricating your resistance bands, with step-by-step protocols that preserve elasticity, prevent premature wear, and keep your bands safe for consistent training. You’ll learn why conventional “lubrication” advice is dangerous, discover the proper maintenance sequence, and implement practices that double your bands’ lifespan.
Why Applying Oil Ruins Resistance Bands

The Chemical Reaction Between Oils and Rubber Materials
Latex and rubber resistance bands react catastrophically with petroleum-based oils, vegetable oils, and even some “natural” lubricants. When oil contacts band material, it begins breaking down the polymer chains that give rubber its elastic properties. Within days, the band develops weak spots where the oil penetrated, becoming thin and prone to snapping during use. Unlike metal parts that benefit from lubrication, rubber bands require a completely different maintenance approach that preserves their molecular structure rather than altering it.
Visible Damage Signs After Improper Lubrication
If you’ve already applied oil to your bands, watch for these warning signs: permanent darkening or discoloration of specific areas, areas that feel unusually soft or mushy compared to the rest of the band, and sections that stretch excessively without providing proper resistance. These aren’t improvements—they’re clear indicators of material breakdown. Bands treated with oil typically fail within 2-4 weeks, often snapping during mid-exercise when under maximum tension, which can cause injury from the recoiling band.
Proper Cleaning Protocol for Sticky Resistance Bands
Step-by-Step Band Washing Technique
Washing your bands properly replaces the dangerous practice of “lubricating” them. After each workout, wipe bands with a microfiber cloth dampened with distilled water—never tap water, which contains minerals that accelerate rubber degradation. For deeper cleaning every 2-3 weeks, mix one teaspoon of mild castile soap with two cups of lukewarm water. Dip a soft cloth into the solution (never submerge bands completely), and gently wipe the entire surface with light pressure. Pay special attention to areas that contact your hands, as sweat residue accumulates most heavily there.
Drying Methods That Prevent Mold and Degradation
How you dry bands matters as much as how you clean them. Never hang bands in direct sunlight or place them near heat sources, as UV and heat both break down rubber. Instead, lay them flat on a clean towel in a well-ventilated room away from windows. Flip bands every 30 minutes until completely dry—typically 2-4 hours depending on humidity. Never store bands while damp, as trapped moisture creates ideal conditions for mold growth inside the rubber layers, which permanently weakens the material. Proper drying eliminates the stickiness people mistakenly try to fix with lubrication.
Effective Dusting Techniques That Mimic Lubrication Benefits

Talcum Powder Application for Smooth Handling
When bands develop stickiness that cleaning doesn’t resolve, light dusting provides the smooth handling people seek from lubrication—without the damage. Use pure talcum powder (not scented or medicated versions) or cornstarch as a natural alternative. Place a teaspoon of powder in your palm, rub your hands together, then gently work the powder into the band’s surface. Focus on areas that feel tacky, using circular motions that distribute the powder evenly. The powder absorbs residual moisture and creates a dry barrier that prevents rubber from sticking to itself.
Critical Dosage Guidelines to Avoid Messy Residue
Over-application creates as many problems as oil would. Start with minimal powder—you should barely see it on the band’s surface. Test the band immediately after application; if powder transfers to your hands excessively, wipe off the surplus with a dry cloth. Bands properly dusted feel smooth but not powdery during use. Reapply only when stickiness returns, typically every 4-6 weeks with regular use. This precise dusting technique delivers the handling benefits of lubrication while actually extending your bands’ lifespan rather than destroying it.
Temperature-Controlled Storage Solutions

Ideal Storage Environment Specifications
Heat and UV exposure cause more band failures than any other factor, making proper storage essential. Maintain bands in environments between 60-75°F (15-24°C) with humidity below 60%. Never store bands in cars, garages, or near windows—even brief exposure to 90°F+ temperatures accelerates degradation by 300%. Use opaque containers to block all light, as UV penetrates clear plastics. The ideal storage location feels comfortably cool to the touch, with minimal temperature fluctuations throughout the day.
Organization Methods That Prevent Material Fusion
How you arrange bands in storage prevents them from fusing together—a common issue mistaken for needing lubrication. Store bands individually rolled or hung with space between them. Never stack bands directly on top of each other or compress them in tight containers. For multiple bands, use separate compartments in a gym bag or individual cloth pouches. If hanging, use wide hooks that don’t create sharp bends in the bands. Proper organization eliminates the sticking problems that lead users to search for “how to lubricate resistance bands” in the first place.
Pre-Workout Inspection Checklist
Critical Damage Indicators That Require Immediate Replacement
Before every use, conduct this 30-second inspection: stretch the band slightly and look for translucent areas indicating thinning, run your fingers along the entire length feeling for rough patches or inconsistencies, and check connection points for separation. Any band showing these signs must be replaced immediately—continuing to use damaged bands risks sudden failure during exercise. Never attempt to “fix” or lubricate bands with visible damage; the risk of injury outweighs the cost of replacement.
Elasticity Testing Protocol That Predicts Failure
Perform this simple test monthly: stretch the band to 50% of its maximum length and hold for 10 seconds. Healthy bands snap back to original shape within 2 seconds. If recovery takes longer or the band remains partially stretched, its elasticity has degraded beyond safe use. This test identifies internal damage before visible signs appear, preventing the frustration of bands that feel “stiff” and prompt users to search for lubrication solutions. Properly maintained bands should pass this test consistently for 6-12 months of regular use.
Maintenance Schedule That Doubles Band Lifespan
Weekly, Monthly, and Quarterly Maintenance Tasks
Create a simple maintenance calendar: wipe bands after every use, deep clean every 2-3 weeks, dust as needed (typically monthly), and inspect storage conditions weekly. Every quarter, rotate which bands you use most frequently to distribute wear evenly. After six months, replace bands used for high-tension exercises regardless of appearance—internal degradation occurs even when bands look fine. This systematic approach prevents the sudden stiffness that makes users search for “how to lubricate resistance bands” solutions.
Usage Limits That Preserve Material Integrity
Most users unknowingly shorten band lifespan through overuse. Never stretch bands beyond 2.5 times their resting length—the point where resistance becomes extremely difficult to control. Limit continuous tension to 30 seconds during exercises, and always return bands to resting state between sets. High-intensity users should rotate through 3-4 bands per workout rather than maxing out one band repeatedly. These simple usage guidelines maintain consistent resistance levels and prevent the premature stiffening that triggers dangerous lubrication attempts.
Your resistance bands work hard to build your strength—they deserve proper care that preserves their functionality. Forget everything you’ve heard about lubricating resistance bands; the real solution involves strategic cleaning, precise powder application, and climate-controlled storage. Implement these maintenance protocols consistently, and you’ll enjoy reliable performance, consistent resistance levels, and significantly extended equipment life. Remember that bands showing persistent stiffness despite proper care have likely reached their natural lifespan—replace them rather than risking injury with compromised equipment. By following these guidelines, you’ll maximize your fitness investment while keeping your workouts safe and effective.


