
You’ve probably seen athletes at your local gym powerfully hurling heavy rubber balls against walls during high-intensity workouts. Slam balls have become essential equipment for functional training, but quality commercial versions can cost $50-$150 depending on weight. If you’re looking for an affordable alternative to expensive gym equipment, learning how to make a slam ball yourself could save you money while providing a customized workout tool. Many fitness enthusiasts are turning to DIY solutions as they discover that creating their own slam ball allows for precise weight selection and immediate availability for home workouts. In this guide, you’ll learn the practical steps to construct a functional slam ball that withstands repeated impacts while keeping your home gym budget-friendly.
Understanding Slam Ball Construction Requirements
Before gathering materials, recognize what makes a slam ball different from regular exercise balls. Slam balls must withstand repeated high-impact throws against solid surfaces without bouncing or rupturing. The key is creating a dense, non-elastic structure that absorbs impact energy rather than returning it. Commercial slam balls typically contain sand, steel shot, or rubber granules inside a thick rubber shell designed specifically for impact absorption. Attempting to modify regular exercise balls usually fails because their elastic nature causes unwanted bouncing during slams.
What Materials Withstand Repeated Impact?
The core challenge in how to make a slam ball that works properly is selecting materials that won’t rupture after several uses. Many DIY attempts fail because creators use containers not designed for impact. The ideal slam ball features:
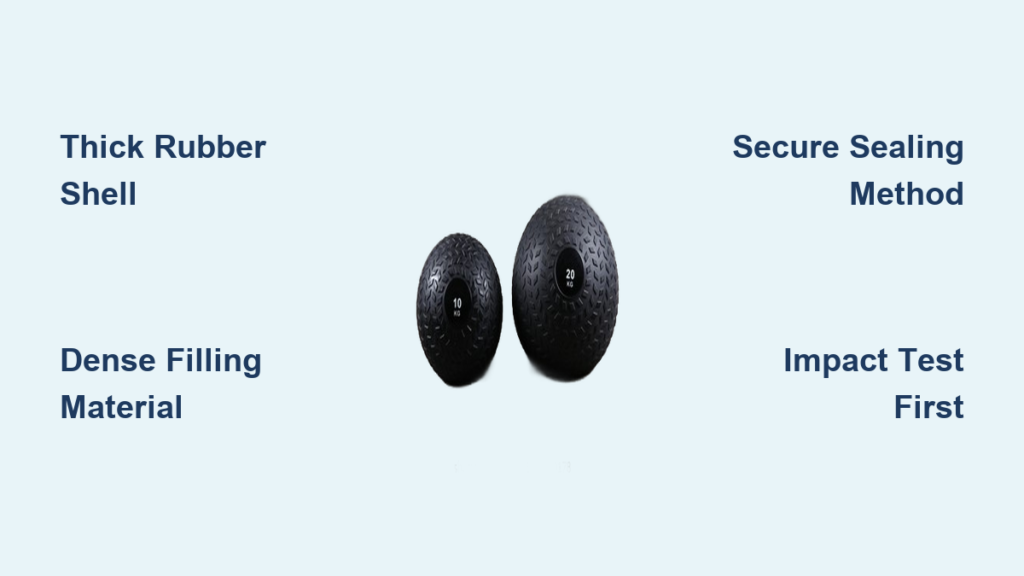
– Outer shell: Thick rubber (minimum 1/4 inch) that doesn’t bounce
– Filling material: Dense substance that won’t shift dramatically on impact
– Sealing method: Permanent closure that won’t leak under stress
Plastic bottles, thin rubber balls, or fabric sacks typically fail within a few uses. The repeated impact creates weak points that eventually rupture, making your DIY project a safety hazard rather than workout equipment.
Essential Materials for a Functional Slam Ball
Choosing the Right Outer Container
The container you select determines your slam ball’s durability. Medical-grade rubber medicine balls (the kind used for physical therapy) provide the best starting point if you can find them cheaply at thrift stores. Otherwise, consider these alternatives:
- Rubber kettlebell handles: Cut the handle portion and seal both ends
- Industrial rubber tubing: Available at hardware stores in various diameters
- Thick rubber mats: Can be rolled and sealed into ball shape
Avoid using soccer balls, basketballs, or yoga balls as they’re designed to bounce, defeating the purpose of a slam ball. The container must maintain its shape after repeated high-force impacts against hard surfaces.
Selecting Appropriate Filling Materials
Your filling choice affects both performance and safety. Consider these options:
- Sand: Inexpensive but can separate from moisture over time
- Steel shot: Provides excellent density but requires careful containment
- Rubber granules: Best performance but harder to source inexpensively
- Mixed media: Combination of sand and small rubber pieces for balance
For a 10-20 pound slam ball, you’ll need approximately 4-8 pounds of filling material depending on density. Remember that the filling should account for about 70-80% of the container’s volume to allow slight compression on impact.
Step-by-Step Slam Ball Construction Process
Preparing Your Container for Filling
Start by thoroughly cleaning your chosen container with soap and water, then let it dry completely for at least 24 hours. Any moisture inside will compromise your seal and potentially cause mold growth. If using rubber tubing, cut a 14-16 inch section and temporarily cap one end with a rubber stopper while you prepare the filling. For medicine balls with existing openings, ensure the hole is large enough to accommodate your funnel but small enough to seal effectively afterward.
Filling Your Slam Ball Correctly
Measure your filling material using a kitchen scale to achieve your target weight. For a standard workout slam ball, most fitness enthusiasts prefer 10-30 pound options. Pour the material slowly through a funnel, tapping the container periodically to settle the contents. Leave approximately 15-20% of the container empty to allow for proper sealing and slight compression during use. Overfilling creates pressure points that will cause premature failure during slams.
Sealing Techniques That Prevent Leaks
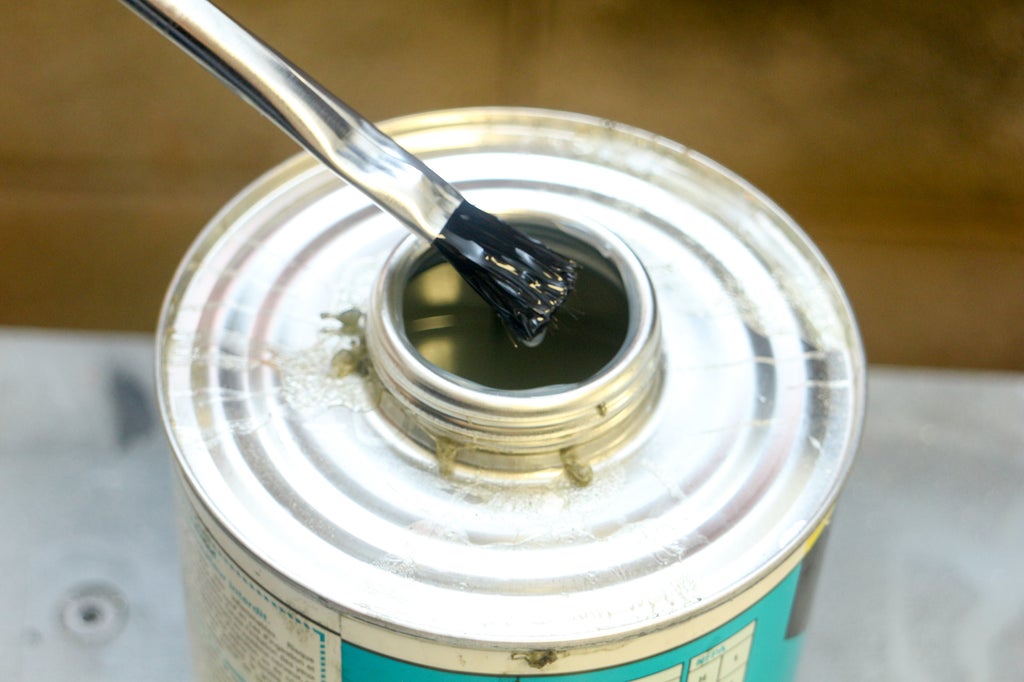
This is where most DIY slam balls fail – improper sealing. Follow these steps for a secure closure:
- Apply rubber cement around the opening’s interior and let it become tacky
- Insert a rubber plug cut from thick rubber sheeting (1/4 inch minimum)
- Apply additional rubber cement over the plug and surrounding area
- Wrap tightly with rubber repair tape while the cement sets
- Allow 72 hours for complete curing before use
For tubing containers, use hose clamps on both ends after inserting plugs. Never rely solely on glue – mechanical reinforcement is essential for impact resistance.
Testing and Safety Verification Procedures
Initial Impact Testing Protocol
Before using your DIY slam ball for full workouts, conduct controlled testing:
- Start with light tosses against your target surface from waist height
- Gradually increase force over multiple sessions
- Inspect for leaks or deformation after each use
- Listen for unusual shifting sounds that indicate internal movement
If you hear sloshing or notice any deformation after moderate use, your construction needs improvement. A properly made slam ball should maintain consistent weight distribution through multiple impacts.
Identifying Dangerous Failure Points
Watch for these warning signs that your DIY slam ball is unsafe:
- Visible bulging at stress points
- Material separation at seams
- Unusual sounds during impact
- Changes in weight distribution
- Any signs of leakage
If you notice any of these issues, stop using the slam ball immediately. A rupturing slam ball can create projectile hazards or uneven weight distribution that strains muscles unexpectedly.
Customization Options for Specific Training Needs
Creating Weight-Specific Slam Balls
The beauty of learning how to make a slam ball yourself is customization. For explosive power training, many athletes prefer heavier balls (25-40 pounds), while endurance circuits work better with lighter options (10-20 pounds). Create a progression system by making multiple slam balls at 5-pound increments. Label each clearly with its weight using permanent marker on the rubber surface.
Surface Texture Modifications
For better grip during sweaty workouts, consider these texture enhancements:
- Wrap sections with athletic tape in strategic grip areas
- Embed fine sand into the outer rubber coating before final curing
- Create finger grooves using sculpting tools while the outer layer is pliable
These modifications improve control during dynamic movements but shouldn’t compromise the ball’s structural integrity.
Maintenance and Longevity Tips
Regular Inspection Protocol
Establish a pre-workout inspection routine:
- Squeeze test for soft spots or bulges
- Visual check for cracks or separation
- Weight verification (should feel consistent)
- Surface integrity assessment
Replace your DIY slam ball immediately if you detect any abnormalities. Unlike commercial versions with quality control, homemade versions require vigilant monitoring.
Storage Best Practices
Store your slam ball properly to maximize lifespan:
- Keep in a cool, dry place away from direct sunlight
- Avoid extreme temperature fluctuations
- Store vertically rather than on its side
- Keep away from sharp objects that could cause punctures
Proper storage prevents premature material degradation that would compromise performance.
When DIY Isn’t the Best Option
Recognizing Commercial Alternatives
While knowing how to make a slam ball saves money initially, consider commercial options if:
- You need weights above 40 pounds (safety concerns increase with weight)
- You’re using the ball daily for professional training
- You lack proper materials for secure construction
- Group fitness environments where consistent performance is critical
Quality commercial slam balls often include warranty protection and consistent performance that DIY versions can’t match.
Cost-Benefit Analysis
Calculate whether DIY makes financial sense:
- $20-30 for quality rubber materials
- $10-15 for proper filling and sealing compounds
- Your time investment (3-5 hours for first attempt)
For occasional home use, DIY can save money. For regular training, a $50 commercial ball might prove more cost-effective over time when factoring in failed DIY attempts.
Creating your own slam ball requires careful material selection and precise construction techniques to ensure safety and functionality. While the DIY approach offers customization and cost savings, never compromise on structural integrity – a failing slam ball can become a dangerous projectile. Start with lighter weights as you perfect your technique, always inspect your creation before use, and progress gradually as you gain confidence in your construction skills. For most home fitness enthusiasts, a properly made 10-20 pound slam ball provides excellent versatility for full-body power training without the commercial price tag. Remember that safety should always outweigh cost considerations when creating impact-resistant fitness equipment for your home gym.


